


First of all ,we should understand the layout of this official website page.
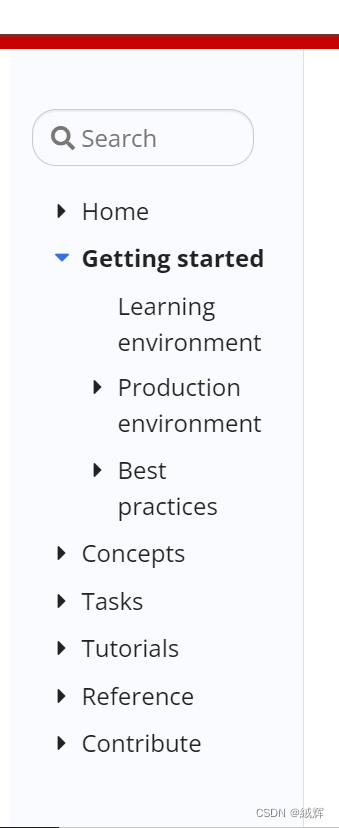
Home
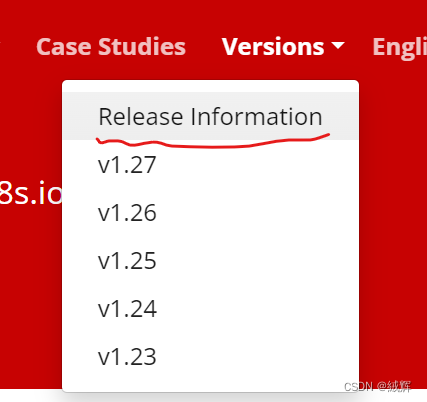
The Home chapter is that the official website has manuals for different versions of k8s ,and then generally shows the version that is now supported ,
the specific version expiration date can only be viewed by entering the version release page, as shown below.
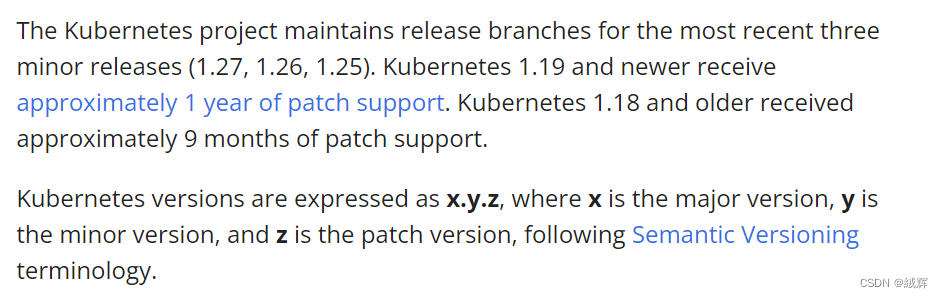
This means that users can get bug fixes and security updates on the latest minor before upgrading to the new version. In addition, maintaining the last three minor release branches ensures that the Kubernetes community can focus on a small number allowing for better management and maintenance of the Kubernetes project.
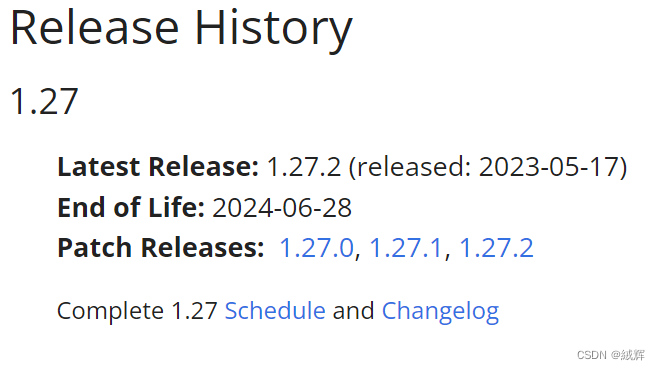
When a version of the Kubernetes project passes the end of life point, it will still be available, but it will no longer be officially supported and updated. This means that if you continue to use an outdated version of Kubernetes, you won’t get new bug fixes, security updates, or new features. In addition, the community no longer accepts bug reports or feedback on outdated versions. Therefore, it is not recommended to use an outdated Kubernetes version in a production environment but should upgrade to the latest version as soon as possible for better performance, security, and reliability.
Get Started
this part mainly tells us how to install an environment for Kubernetes。
And there is a tool called minikube, which can help us to run a Kubernetes locally, minikube runs an all-in-one or a multi-node local Kubernetes cluster on your personal computer (including Windows, macOS and Linux PCs) so that you can try out Kubernetes, or for daily development work.
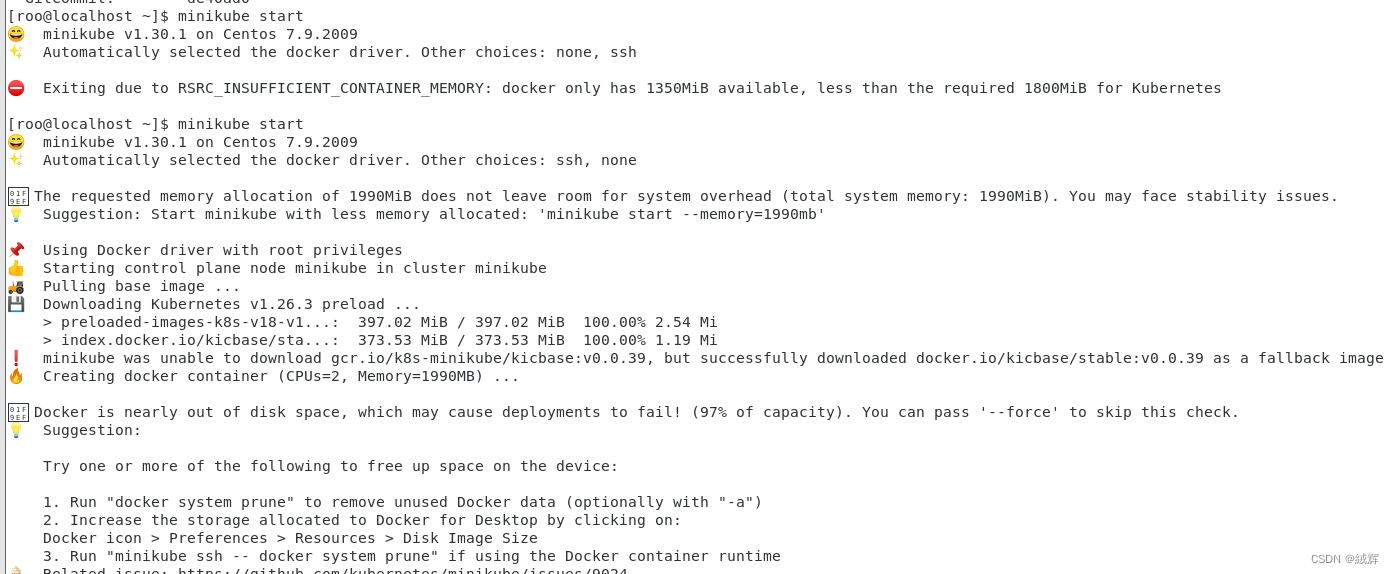
First of all , we entered the minikube official website and carried out the installation according to the tutorial. On the way , we encountered the problem of user account permission,which is finally solved successfully through the following code ,

and then completed the installation , as shown in the figure .
Since we have not installed kubectl, so we use minikube’s kubectl

And then we try to use some basic command by using kubectl to control the kubenetes .
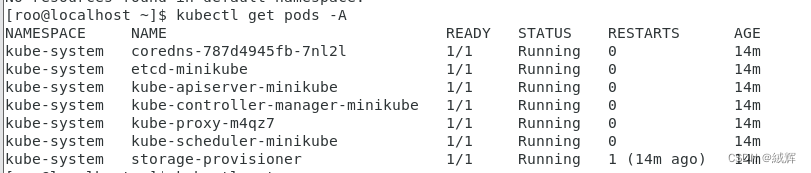
get all the pod 's information
kubectl get pods -A
get the information of kubenetes cluster

get the information of all the nodes

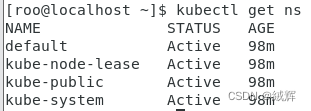
Get information about all namespaces
View the service information in the current namespace .

After many attempts, I think we should first understand how many objects there are in kubenetes and what are the relationships among them , so that our minds will be clearer when we operate these commands and work.
A Service is an abstract Kubernetes object that provides access to a set of Pods. A Service can combine multiple Pods together and provide them with a unified entry point that automatically balances the request load across multiple Pods on the back end by accessing the IP address and port of the Service, thus achieving high availability and fault tolerance.
Pod is the smallest deployable unit in Kubernetes, consisting of one or more containers that share the same network namespace and storage volume. Pods can be created, started, deleted, and recreated, and are automatically scheduled to nodes in the cluster.
Deployment is a controller that manages the number of Pod copies and updates. Deployment can automatically create and manage copies of one or more Pods and can scale and roll over updates as needed. Deployment can ensure Pod availability and reliability by managing replica sets, and Service can provide services by accessing the Pod managed by Deployment.
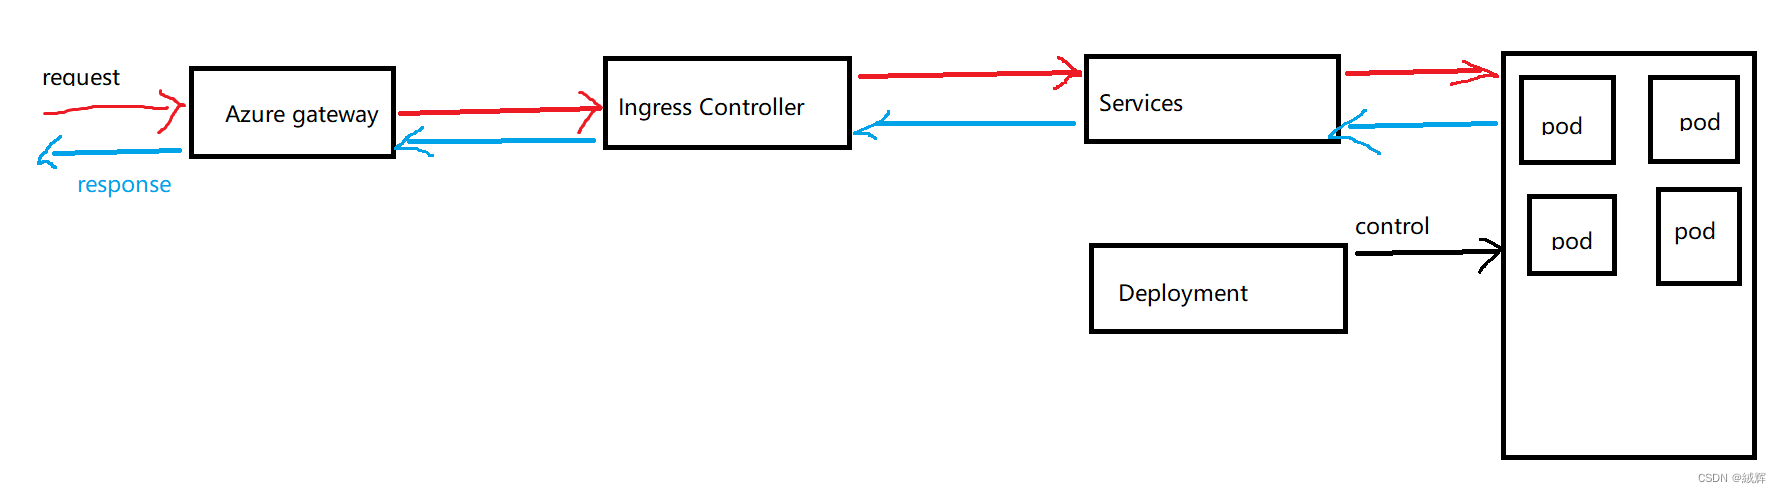
From my prospective, when deploying a project to Kubernetes, Deployment, Service, and Ingress are typically used to manage the deployment and access to the application. Deployment is used to manage the Pod for the application, Service is used to provide network access to the application, and Ingress is used to manage access to external traffic. You can also use ConfigMap and Secret to manage your application’s configuration information and sensitive data, and PersistentVolume and PersistentVolumeClaim to manage your application’s persistent storage.
The kubernetes network model
We know that Kubernetes has a variety of network models, such as Pod network, Service network, container network, network policy, Ingress network, and so on, and each network model is actually a standard, just like the interface, there are many different implementations of an interface, in our work, The Azure platform we use, the concrete implementation of the Pod network model is the Kubenet network model, and these models are a layer of interfaces, but inherit the Pod network parent interface, and the plug-in is the final implementation of these interfaces.
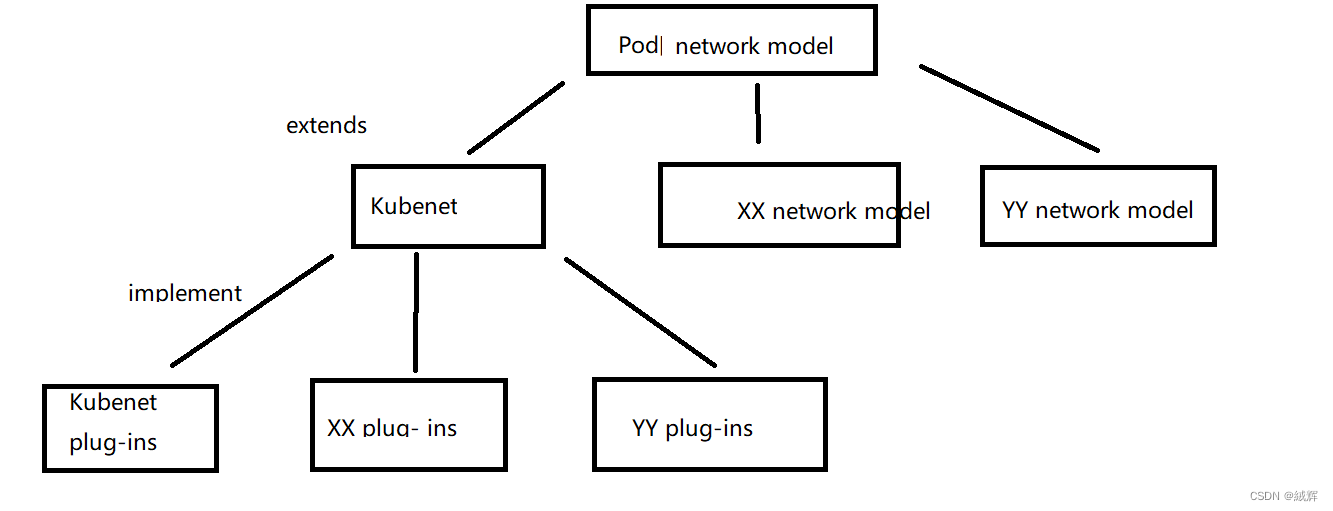
As we know , Kubenet plug-ins is the implementation of the Kubenet network model , and the Kubenet network model is the one of the Pod network model .
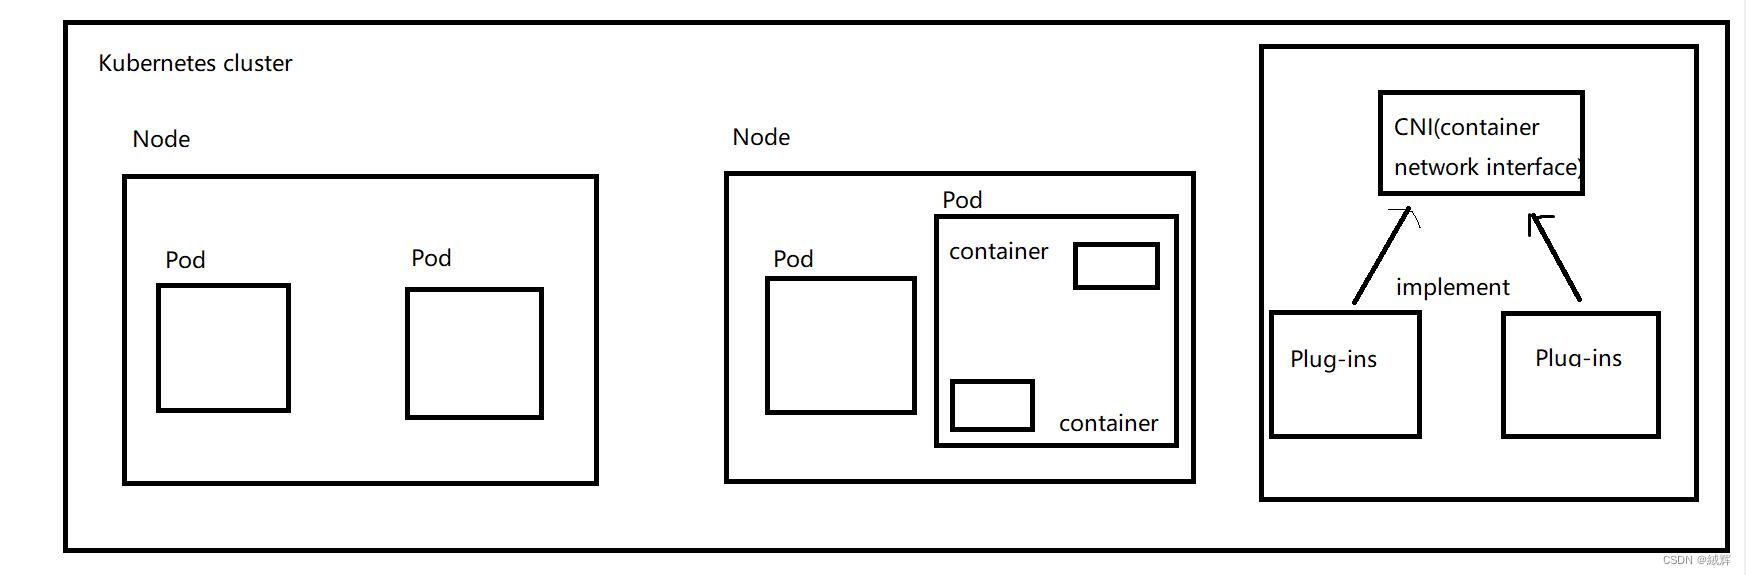
In kubernetes, each Pod has a unique IP address. These IP addresses can be dynamically assigned by CNI plug-ins in the Kubernetes cluster or statically assigned by other network plug-ins .
Pod networking is typically implemented through the Container Network Interface (CNI) specification, which is intended to provide a pluggable, extensible interface to a network plug-in.
Since we create the Kubernetes in Azure, Azure provide us with lots of plug-ins .Among these plug-ins, Kubenet is often used in our work.Based on this plug-in, let’s learn how network allocation and pod implementation integrate.
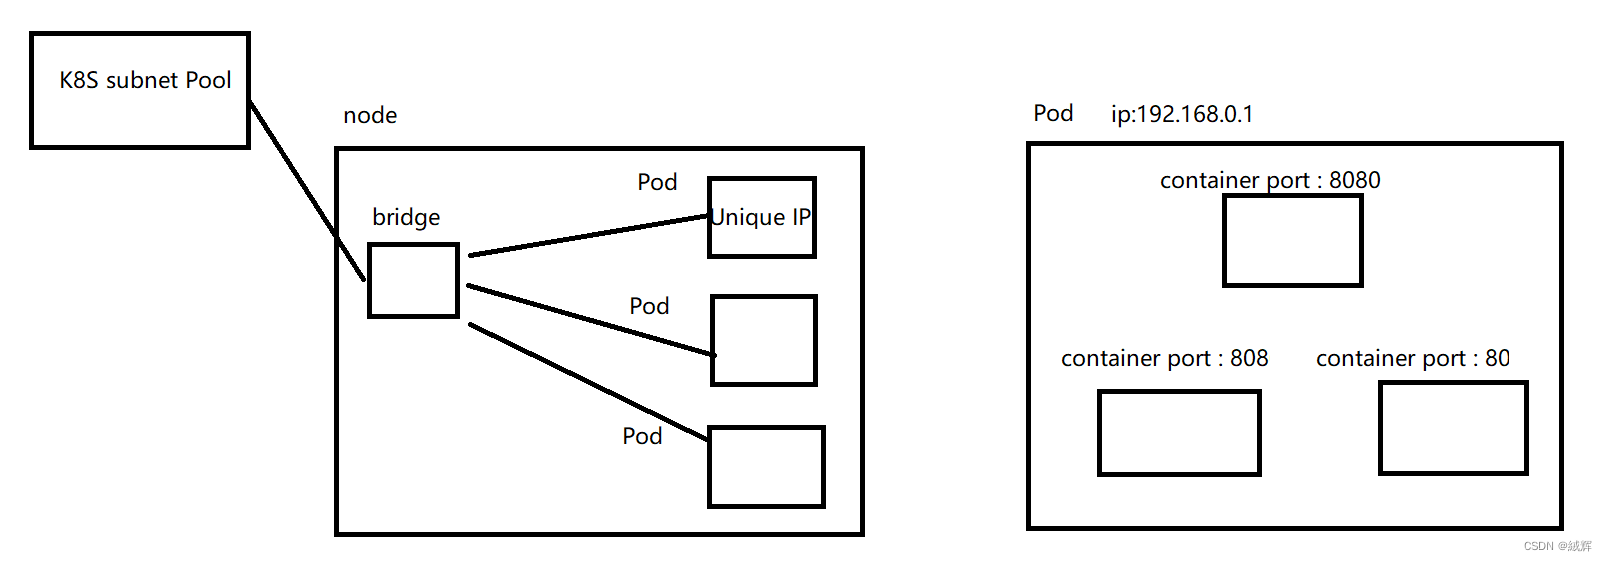
kubenet is one of the default networking models in AKS, which uses Linux Bridge and iptables tools to implement container networking. Specifically, kubenet creates a bridge device on each node, and then connects the Pod’s network interface to that bridge device. Each Pod is assigned a unique IP address, which is assigned by the subnet pool in the Kubernetes cluster. All containers in Pod share the same network namespace and network interface, so they will share the same IP address and network configuration.
Specifically, kubenet operates in AKS as follows:
1.Select kubenet as the network model when creating the Kubernetes cluster.
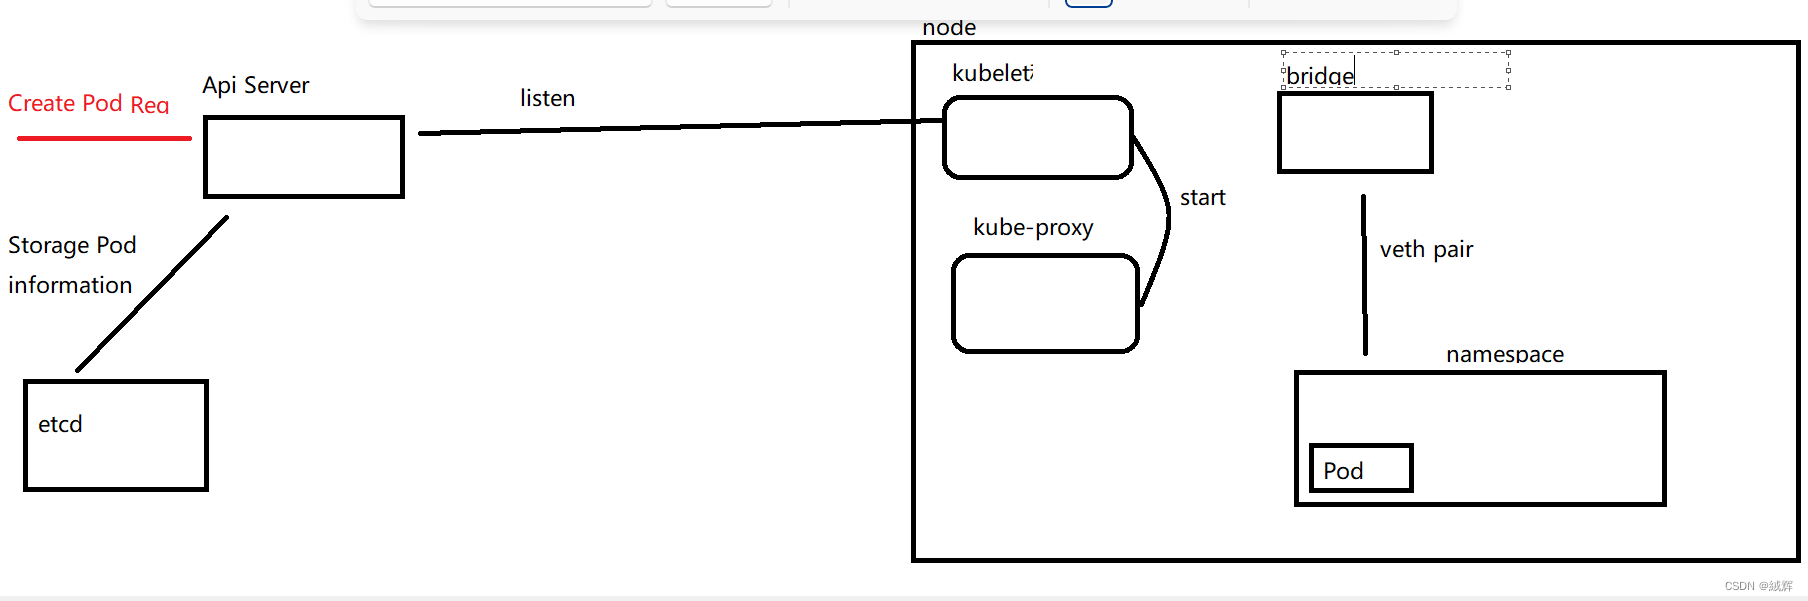
2.Start kubenet’s agent, kubelet, on each node, which starts kubenet’s network management component, kube-proxy, and listens for changes to the Kubernetes API Server.
3.When Kubernetes API Server receives a Pod creation request, it will store the Pod network information to etcd, including the Pod IP address, network namespace and other information.
4.kubenet’s agent, kubelet, listens for a Pod creation request and creates a network namespace and a veth pair on the node based on the Pod’s network information. And connect one end of the veth pair to the node’s bridge device and the other end to the Pod’s network namespace.
5.kubenet assigns each Pod a unique IP address, which is assigned by the subnet pool in the Kubernetes cluster. kubenet will configure these IP addresses to one end of the veth pair so that all containers in the Pod can communicate over this IP address.
6.kube-proxy generates iptables rules based on the Service and Endpoint information in the Kubernetes API Server to realize service discovery and load balancing.
7.When a Pod is deleted, kubenet releases the IP address and network resources occupied by the Pod and deletes network configurations such as the Pod’s network namespace and veth pair.
And the point we should know is that kubenet assigns IP addresses within the cluster, not within the Azure virtual network and subnet. IP addresses used by kubenet in AKS are assigned by the subnet pool in the Kubernetes cluster. These IP addresses are assigned specifically for the container network and do not affect the IP addresses in the Azure virtual network and subnet.
By default in AKS, kubenet assigns
IP addresses to Pods using a Container subnet,
which is created in the Azure virtual network and
 subnet where AKS nodes reside.
If you assign an existing subnet to AKS, the container subnet within AKS will use that subnet’s IP address pool to assign IP addresses to pods, allowing the container to communicate with other resources in Azure. But if you don’t assign subnets to AKS, the pool of IP addresses for the container subnets that AKS automatically creates won’t be able to communicate with other resources in Azure.
To conclude, in AKS, if you assign an Azure virtual network subnet to the AKS, the created Service assigns an Endpoint IP address to each Pod under the Service, The Endpoint IP address is assigned from the IP address pool of the container subnet. Therefore, it assigns IP addresses using the IP address pool of the Azure virtual network subnet.
The Endpoint IP address can only be used for communication between containers, but cannot be used for communication with Azure resources. Because the container subnet uses the IP address pool of a subnet in the Azure virtual network to assign IP addresses, the Endpoint IP address belongs to the IP address in the Azure virtual network. However, it can only communicate between containers, and cannot be directly used to communicate with Azure resources.
If you need Pods in a Service to communicate with Azure resources, you can use a NodePort or LoadBalancer Service to expose the Service to the Azure virtual network. The NodePort type exposes a Service on each node and assigns a random port to the Service for external access. LoadBalancer creates a load balancer on the Azure virtual network and exposes the Service to the public IP address of the load balancer for external access. This way, you can communicate with Azure resources through the Service’s public IP address.


 1531
1531


 被折叠的 条评论
为什么被折叠?
被折叠的 条评论
为什么被折叠?
 到【灌水乐园】发言


