


1.硬件设备与视频流接入
如需要一步上一篇博客
2.海康WebSDK
海康管网选择对应的sdk下载
海康开放平台海康威视合作生态致力打造一个能力开放体系、两个生态圈,Hikvision AI Cloud开放平台是能力开放体系的核心内容。它是海康威视基于多年在视频及物联网核心技术积累之上,融合AI、大数据、云计算等技术,为合作伙伴提供的一个二次开发及创新的平台。![]() https://open.hikvision.com/download/5cda567cf47ae80dd41a54b3?type=10&id=4c945d18fa5f49638ce517ec32e24e24 有下图三个版本的开发包,注意看相关说明,如下图:
https://open.hikvision.com/download/5cda567cf47ae80dd41a54b3?type=10&id=4c945d18fa5f49638ce517ec32e24e24 有下图三个版本的开发包,注意看相关说明,如下图:
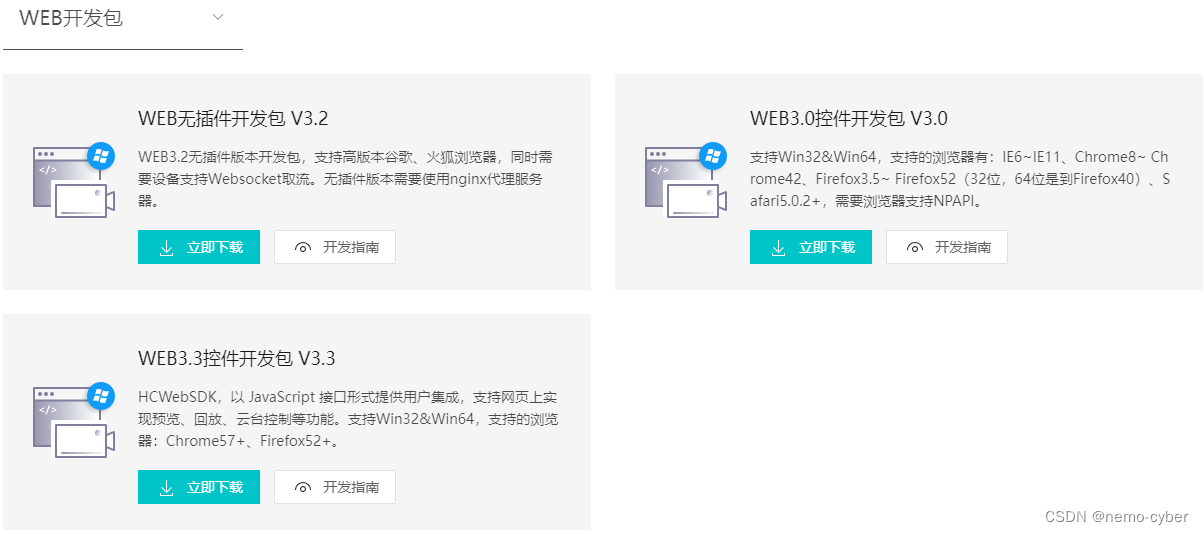
之前在网上看到有用V3.2的开发包写的博客教程,如果有需要的移步此处
海康威视web3.2开发包开发使用说明_海康isapi文档-CSDN博客文章浏览阅读2.7k次。首言:通过海康威视的最新web开发包工具进行js调用引入至vue项目中,实现监控设备的对接,监控功能的实现。3.2无插件js库同时支持插件安装的模式。目录首言:一、海康威视开发平台:?1、下载开发工具包文档2、专家支持在线咨询问题二、3.2无插件开发1、需要引用的js包2、开发api3、注意事项三、在VUE项目中多个页面引用插件进行监控视频实时显示1、把初始化过程抽象为一个组件2、在不同页面中进行调用四、其他说明1、无插件开发包必须使用nginx代理(无论是测试还是生产环境)_海康isapi文档https://blog.csdn.net/asdfadafd/article/details/123397672在vue中使用海康web3.2插件连接云台摄像机_vue3 海康 mousedownptzcontrol(iptzindex)-CSDN博客文章浏览阅读493次。在index.html文件中先引入需要的脚本。创建一个摄像机组件(复制粘贴直接可用)_vue3 海康 mousedownptzcontrol(iptzindex)
https://blog.csdn.net/qq_42556623/article/details/136883903?spm=1001.2014.3001.5501 因为我的设备不支持websocke流,这里我选用的是WEB3.3控件开发包V3.3。
如果不清楚自己的设备是否支持websocket,咨询官方客服,如果不支持websocke使用3.2版本的开发包会报错。
3.官方示例
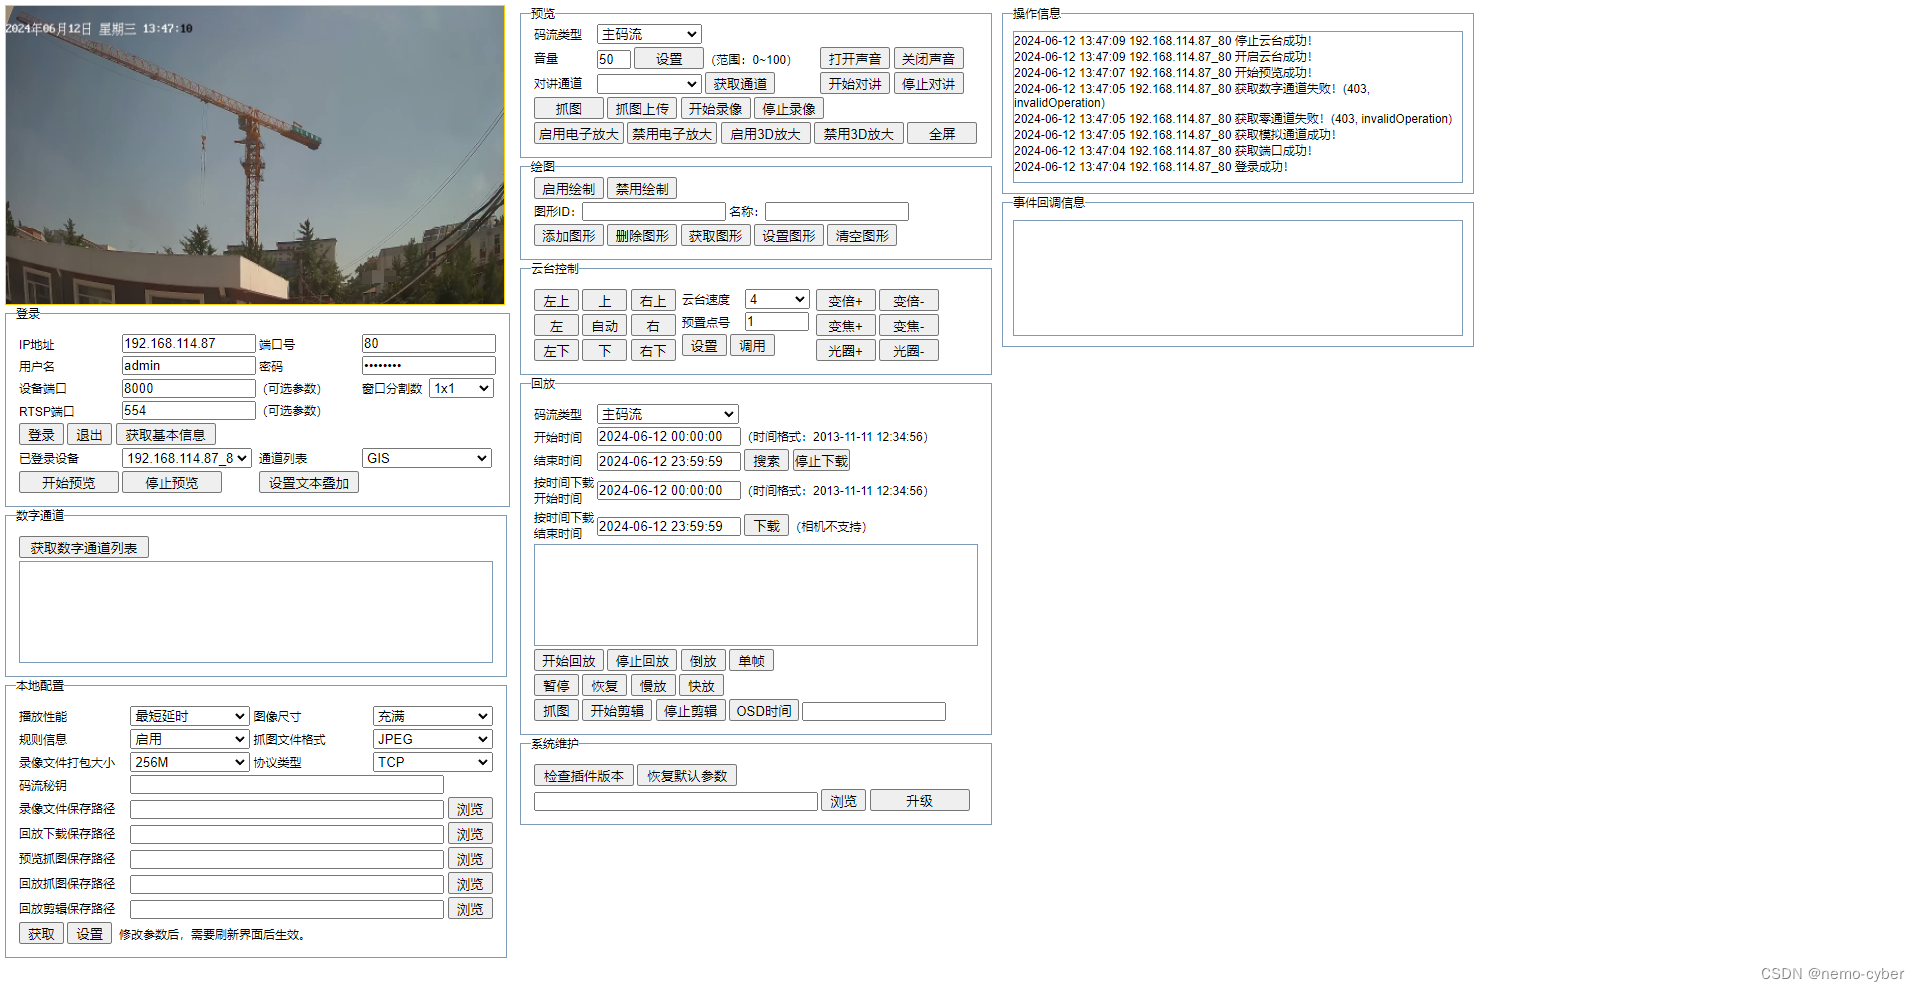
下载完成之后可以用nginx或anywhere发布后登录查看其中的demo示例,
输入设备的IP地址、端口号、用户名、密码登录并预览,页面如下图:
4.开发包的使用
(1)安装控件HCWebSDKPlugin.exe
![]()
(2)引入静态资源文件
在开发包里找到红框中的三个文件,放在前端静态资源文件夹内发布,并在index.html中进行引入。


5.针对官方示例的二次开发
5.1海康demo中的功能封装
刚开始我抱着将websdk进行改写的想法,但是后来发现demo中的代码量实在是过于大,于是将其中需要的部分拎出来进行了封装。其实demo中的代码看起来量比较大,但是把没用的东西删除掉之后,逻辑挺清晰的。
个中原因,不方便贴源码,此处截取涉及到的相关代码,如需要自行取用。
(1)初始化插件参数及插入插件
    // 初始化
    init() {
        // 初始化插件参数及插入插件
        WebVideoCtrl.I_InitPlugin({
            bWndFull: true,     //是否支持单窗口双击全屏,默认支持 true:支持 false:不支持
            iWndowType: 1,
            cbInitPluginComplete: function () {
                WebVideoCtrl.I_InsertOBJECTPlugin("divPlugin").then(() => {
                    // 检查插件是否最新
                    WebVideoCtrl.I_CheckPluginVersion().then((bFlag) => {
                        if (bFlag) {
                            alert("检测到新的插件版本,双击开发包目录里的HCWebSDKPlugin.exe升级!");
                        }
                    });
                }, () => {
                    alert("插件初始化失败,请确认是否已安装插件;如果未安装,请双击开发包目录里的HCWebSDKPlugin.exe安装!");
                });
            }
        });
        setTimeout(() => {
            this.login();

        }, 1000);
    }
(2)登录
    // 登录  将下边的四个参数替换成你自己的
    login() {
        var szIP = "IP",
            szPort = "Port",
            szUsername = "username",
            szPassword = "password";

        if ("" == szIP || "" == szPort) {
            return;
        }

        var szDeviceIdentify = szIP + "_" + szPort;

        WebVideoCtrl.I_Login(szIP, 1, szPort, szUsername, szPassword, {
            timeout: 3000,
            success: function (xmlDoc) {
                console.log(' 登录成功',)
                startRealPlay()
            },
            error: function (oError) {
                console.log(' 登录失败',)
            }
        });

        // 预览
        var startRealPlay = function () {
            WebVideoCtrl.I_StartRealPlay(szDeviceIdentify, {
                success: function () {
                    console.log("预览成功");
                },
                error: function (oError) {
                    console.log("预览失败");
                }
            });
        };
    }
(3)云台控制
    // PTZ控制 9为自动,1,2,3,4,5,6,7,8为方向PTZ

    mouseDownPTZControl(iPTZIndex) {
        if (9 == iPTZIndex && this.g_bPTZAuto) {
            this.iPTZSpeed = 0;// 自动开启后,速度置为0可以关闭自动
        } else {
            this.g_bPTZAuto = false;// 点击其他方向,自动肯定会被关闭
        }

        WebVideoCtrl.I_PTZControl(iPTZIndex, false, {
            iPTZSpeed: this.iPTZSpeed,
            success: function (xmlDoc) {
                if (9 == iPTZIndex && this.g_bPTZAuto) {
                    console.log('停止云台成功')
                } else {
                    console.log('开启云台成功')
                }
                if (9 == iPTZIndex) {
                    this.g_bPTZAuto = !this.g_bPTZAuto;
                }
            },
            error: function (oError) {
                console.log('开启云台失败')
            }
        });
    }
(4)停止云台控制
    // 方向PTZ停止
    mouseUpPTZControl() {
        WebVideoCtrl.I_PTZControl(1, true, {
            success: function (xmlDoc) {
            },
            error: function (oError) {
                console.log('停止云台失败')
            }
        });
    }
(5)将上边这几个函数封装在一个class类中
目前只写了初始化、登录、云台控制,如需要其他的接口方法,可自行进行拓展。
export default class CameraController {
    constructor() {
        this.g_bPTZAuto = false;
        this.iPTZSpeed = 4
    }
    init(){}
    ....
}
5.2类调用与云台控制实现
个中原因,不方便贴源码,此处截取涉及到的相关代码,如需要自行取用。
(1)vue代码中撰写云台控制按钮代码
<div id="divPlugin" width="500" height="300" display="none"></div>
<div class="control-grid">
<button @mousedown="mouseDownPTZControl(5)" @mouseup="mouseUpPTZControl()"
class="control-button up-left">
<!-- ↖ -->
</button>
<button @mousedown="mouseDownPTZControl(1)" @mouseup="mouseUpPTZControl()"
class="control-button up">↑</button>
<button @mousedown="mouseDownPTZControl(7)" @mouseup="mouseUpPTZControl()"
class="control-button up-right">
<!-- ↗ -->
</button>
<button @mousedown="mouseDownPTZControl(3)" @mouseup="mouseUpPTZControl()"
class="control-button left">←</button>
<button @mousedown="mouseDownPTZControl(9)" @mouseup="mouseUpPTZControl()"
class="control-button center">
↺
</button>
<button @mousedown="mouseDownPTZControl(4)" @mouseup="mouseUpPTZControl()"
class="control-button right">→</button>
<button @mousedown="mouseDownPTZControl(6)" @mouseup="mouseUpPTZControl()"
class="control-button down-left">
<!-- ↙ -->
</button>
<button @mousedown="mouseDownPTZControl(2)" @mouseup="mouseUpPTZControl()"
class="control-button down">↓</button>
<button @mousedown="mouseDownPTZControl(8)" @mouseup="mouseUpPTZControl()"
class="control-button down-right">
<!-- ↘ -->
</button>
</div>(2)按钮样式代码
    /* 云台 */
    .control-grid {
        display: grid;
        grid-template-columns: repeat(3, 1fr);
        grid-template-rows: repeat(3, 1fr);
        grid-gap: 0px;
        /* 设置按钮间隔 */
        height: 150px;
        width: 150px;
    }

    .control-button {
        font-size: 24px;
        width: 50px;
        height: 50px;
    }

    .up {
        grid-column: 2;
        grid-row: 1;
    }

    .up-left {
        grid-column: 1;
        grid-row: 1;
    }

    up-right {
        grid-column: 3;
        grid-row: 1;
    }

    left {
        grid-column: 1;
        grid-row: 2;
    }

    center {
        grid-column: 2;
        grid-row: 2;
    }

    right {
        grid-column: 3;
        grid-row: 2;
    }

    down-left {
        grid-column: 1;
        grid-row: 3;
    }

    down {
        grid-column: 2;
        grid-row: 3;
    }

    down-right {
        grid-column: 3;
        grid-row: 3;
    }
(3)js代码
//引入CameraController类
import CameraController from "../../../../../public/static/thirdParty/HCWebSDKFiles/CameraController.js";

mounted(){
    //通过定时器加载,方式初始化时报错
    setTimeout(()=>{
        this.CameraController = new CameraController();
        this.CameraController.init()
    },200)
}

methods: {
     // 定义按钮方法,并引入类中的方法
     mouseDownPTZControl(type){
        this.CameraController.mouseDownPTZControl(type)
     },
     mouseUpPTZControl(){
        this.CameraController.mouseUpPTZControl()
     },
}
6.实现效果
【注意】这里三维场景中的视频元素是通过webrtc-streamer接入的,不是通过插件接入。
点击相应的方向按钮即可实现摄像机旋转控制。


 2559
2559


 被折叠的 条评论
为什么被折叠?
被折叠的 条评论
为什么被折叠?
 到【灌水乐园】发言


