


01-Nginx安装
Nginx
是一款
轻量级
的
Web
服务器/
反向代理
服务器及
电子邮件
(IMAP/POP3)代理服务器,并在一个BSD-like 协议下发行。由俄罗斯的程序设计师Igor Sysoev所开发,供俄国大型的入口网站及搜索引擎Rambler(俄文:Рамблер)使用。其特点是占有内存少,
并发
能力强,事实上nginx的并发能力确实在同类型的网页服务器中表现较好,中国大陆使用nginx网站用户有:
京东
、
新浪
、
网易
、
腾讯
、
淘宝
等。
目录

nginx安装
# 0.首先需要有依赖yum install -y gcc pcre-devel zlib-devel# 1.下载Nginxhttp://nginx.org/en/download.html# 2.将Nginx上传到linux中,并解压缩tar -zxvf nginx-1.11.1.tar.gz# 3.在解压好的nginx目录中执行如下命令:(指定安装位置)./configure --prefix=/usr/nginx# 5.执行上述命令后,执行如下命令:make && make install# 6.编译完成后进入编译安装目录/usr/nginx目录中查看:[root@localhost nginx]# ls -l总用量 4drwxr-xr-x. 2 root root 4096 10月 14 21:17 confdrwxr-xr-x. 2 root root 40 10月 14 21:17 htmldrwxr-xr-x. 2 root root 6 10月 14 21:17 logsdrwxr-xr-x. 2 root root 19 10月 14 21:17 sbin# 7.启动nginx,进入nginx安装目录的sbin目录中执行:./nginx# 8.在windows中浏览器访问,可以看到nginx欢迎页面:http://10.15.0.8:80/ --输入自己的服务器地址:nginx端口号注意:关闭网络防火墙# 9.关闭nginx,进入nginx安装目录的sbin目录中执行:./nginx -s stop# 10.nginx配置文件在nginx安装目录的conf目录中:[root@localhost conf]# ls -l总用量 60-rw-r--r--. 1 root root 2656 10月 14 21:17 nginx.conf.......注意:nginx.conf为nginx的配置文件,可以在nginx.conf修改nginx默认配置
02-Nginx负载均衡策略
# 1.轮询说明: 默认策略,每个请求会按时间顺序逐一分配到不同的后端服务器# 2.weight 权重说明: weight参数用于指定轮询几率,weight的默认值为1,;weight的数值与访问比率成正比upstream tomcat-servers {server localhost:8080 weight=2;server localhost:8081;server localhost:8082 backup;}注意:1.权重越高分配到需要处理的请求越多。2.此策略可以与least_conn和ip_hash结合使用主要用于后端服务器性能不均# 3.ip_hash 4%3=1说明:指定负载均衡器按照基于客户端IP的分配方式,这个方法确保了相同的客户端的请求一直发送到相同的服务器,以保证session会话。这样每个访客都固定访问一个后端服务器,可以解决session不能跨服务器的问题。upstream tomcat-servers {ip_hash; #保证每个访客固定访问一个后端服务器server localhost:8080;......}# 4.least_conn说明: 把请求转发给连接数较少的后端服务器。轮询算法是把请求平均的转发给各个后端,使它们的负载大致相同;但是,有些请求占用的时间很长,会导致其所在的后端负载较高。这种情况下,least_conn这种方式就可以达到更好的负载均衡效果。upstream tomcat-servers{least_conn; #把请求转发给连接数较少的后端服务器server localhost:8080;}
03-Nginx实现Tomcat负载均衡集群
# 0.准备多个tomcattar -zxvf apache-tomcat-8.5.46.tar.gz #解压缩一个新的tomcat安装包mv apache-tomcat-8.5.46 tomcat1 #将名称改为tomcat1cp -r tomcat1/ tomcat2 #复制一份cp -r tomcat1/ tomcat3 #复制一份
# 1.此时当前目录中有三个服务器,如下:[root@localhost ~]# ls -l总用量 12248-rwxrwxrwx. 1 root root 11623939 10月 13 12:25 apache-tomcat-8.5.46.tar.gzdrwxr-xr-x. 9 root root 220 10月 14 21:28 tomcat1drwxr-xr-x. 9 root root 220 10月 14 21:38 tomcat2drwxr-xr-x. 9 root root 220 10月 14 21:38 tomcat3
# 2.修改tomcat1端口号:(伪分布式)vim tomcat1/conf/server.xml,命令修改如下内容:a.<Server port="8001" shutdown="SHUTDOWN"> ---关闭端口b.<Connector port="8888" protocol="HTTP/1.1" ---http协议端口connectionTimeout="20000"redirectPort="8443" />c.<Connector port="10010" protocol="AJP/1.3" redirectPort="8443" /> ---AJP协议端口
# 3.修改tomcat2端口号:(伪分布式)vim tomcat2/conf/server.xml,命令修改如下内容:a.<Server port="8002" shutdown="SHUTDOWN">b.<Connector port="8889" protocol="HTTP/1.1"connectionTimeout="20000"redirectPort="8443" />c.<Connector port="10011" protocol="AJP/1.3" redirectPort="8443" />
# 4.修改tomcat3端口号:(伪分布式)vim tomcat2/conf/server.xml,命令修改如下内容:a.<Server port="8003" shutdown="SHUTDOWN">b.<Connector port="8890" protocol="HTTP/1.1"connectionTimeout="20000"redirectPort="8443" />c.<Connector port="10012" protocol="AJP/1.3" redirectPort="8443" />
# 5.将多个tomcat启动:tomcat1/bin/startup.shtomcat2/bin/startup.shtomcat3/bin/startup.sh
# 6.查看tomcat是否启动成功ps -aux|grep tomcat
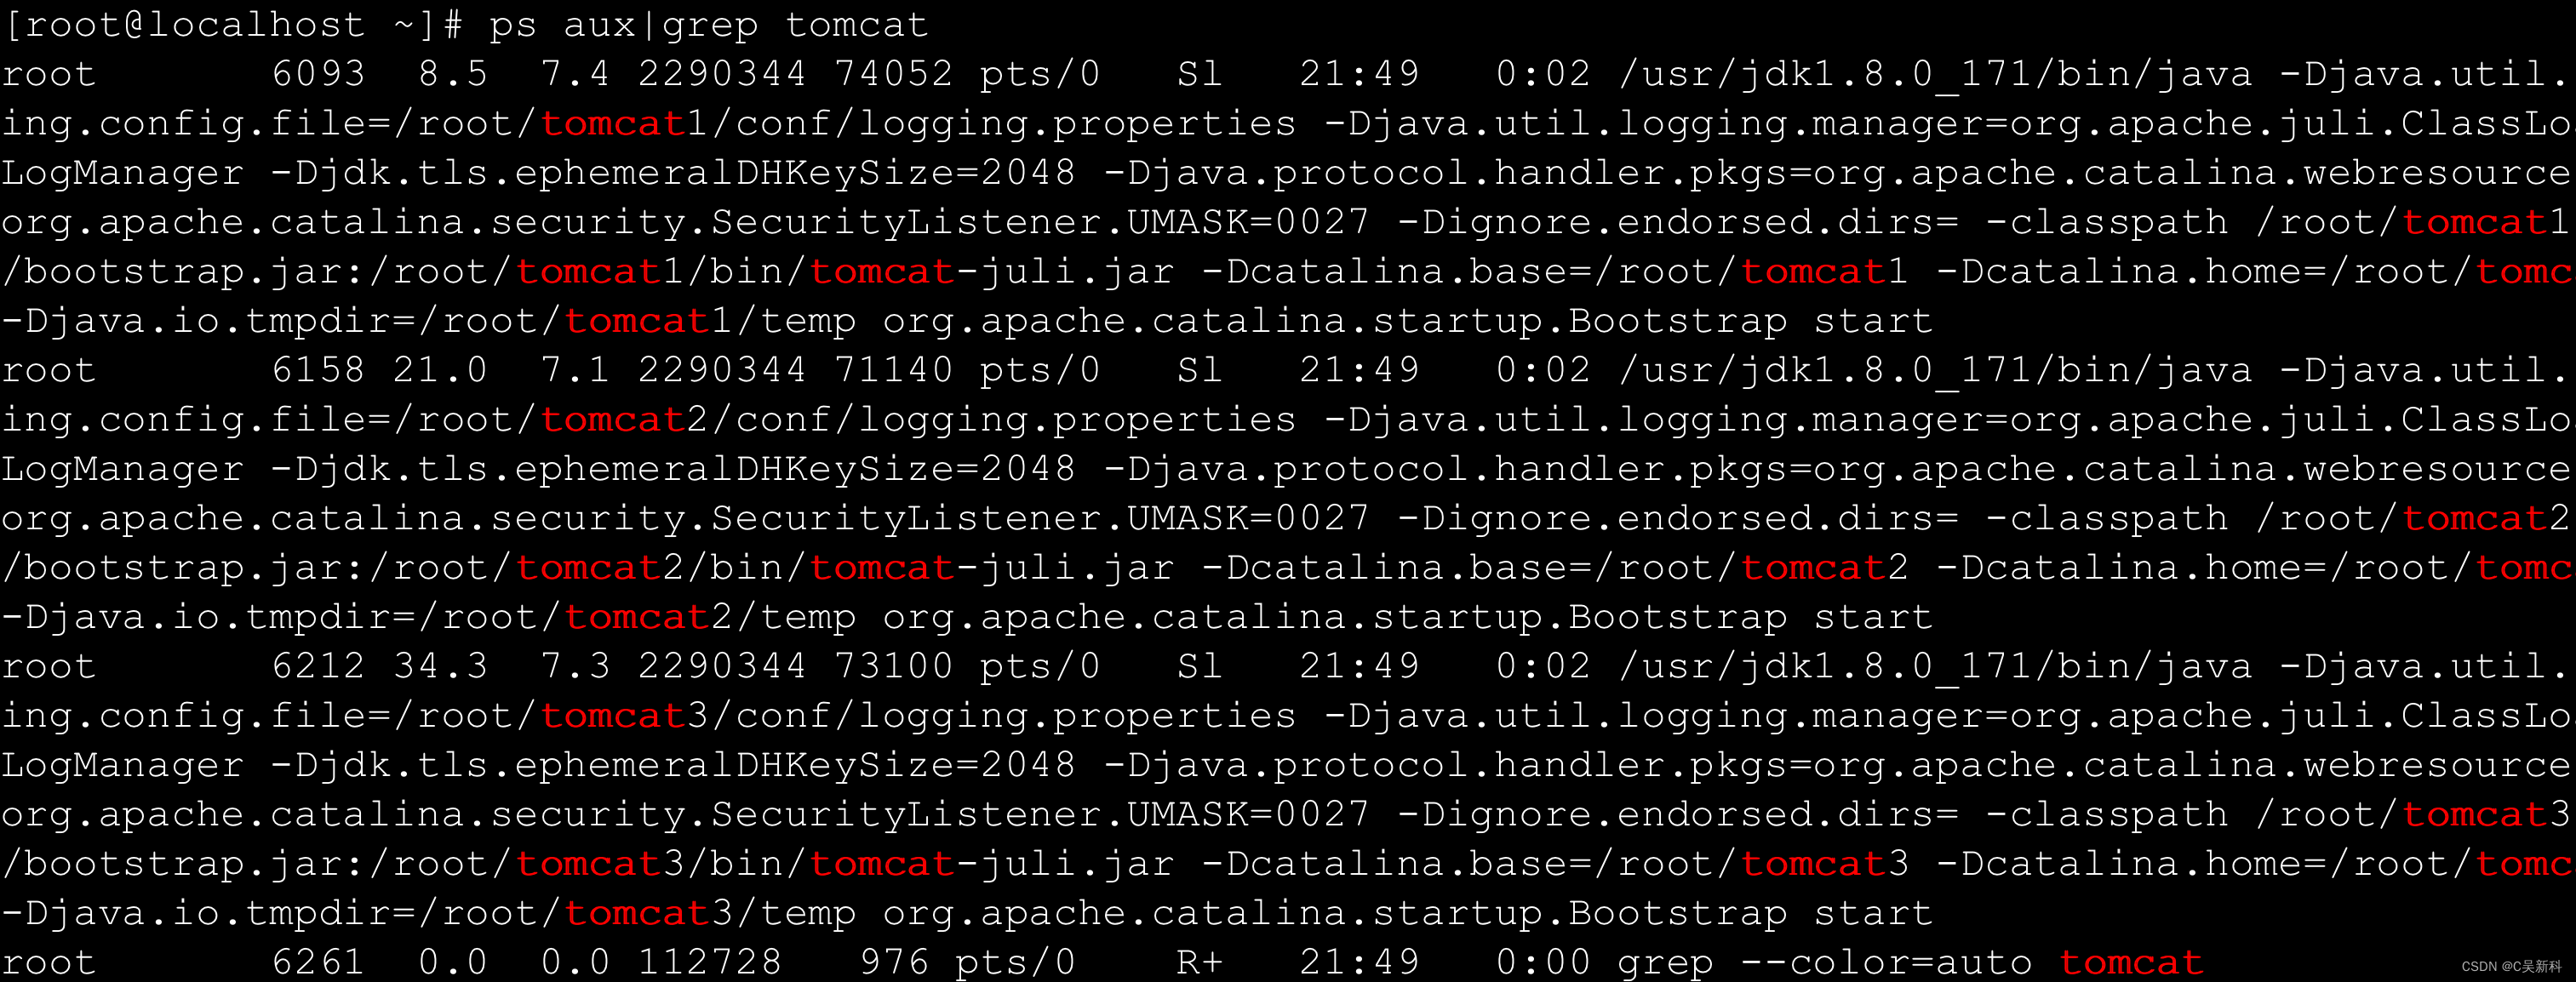
# 7.在windows中分别访问tomcat,都看到主页代表启动成功:http://10.15.0.8:8888/http://10.15.0.8:8889/http://10.15.0.8:8890/注意:这步一定要关闭网路防火墙
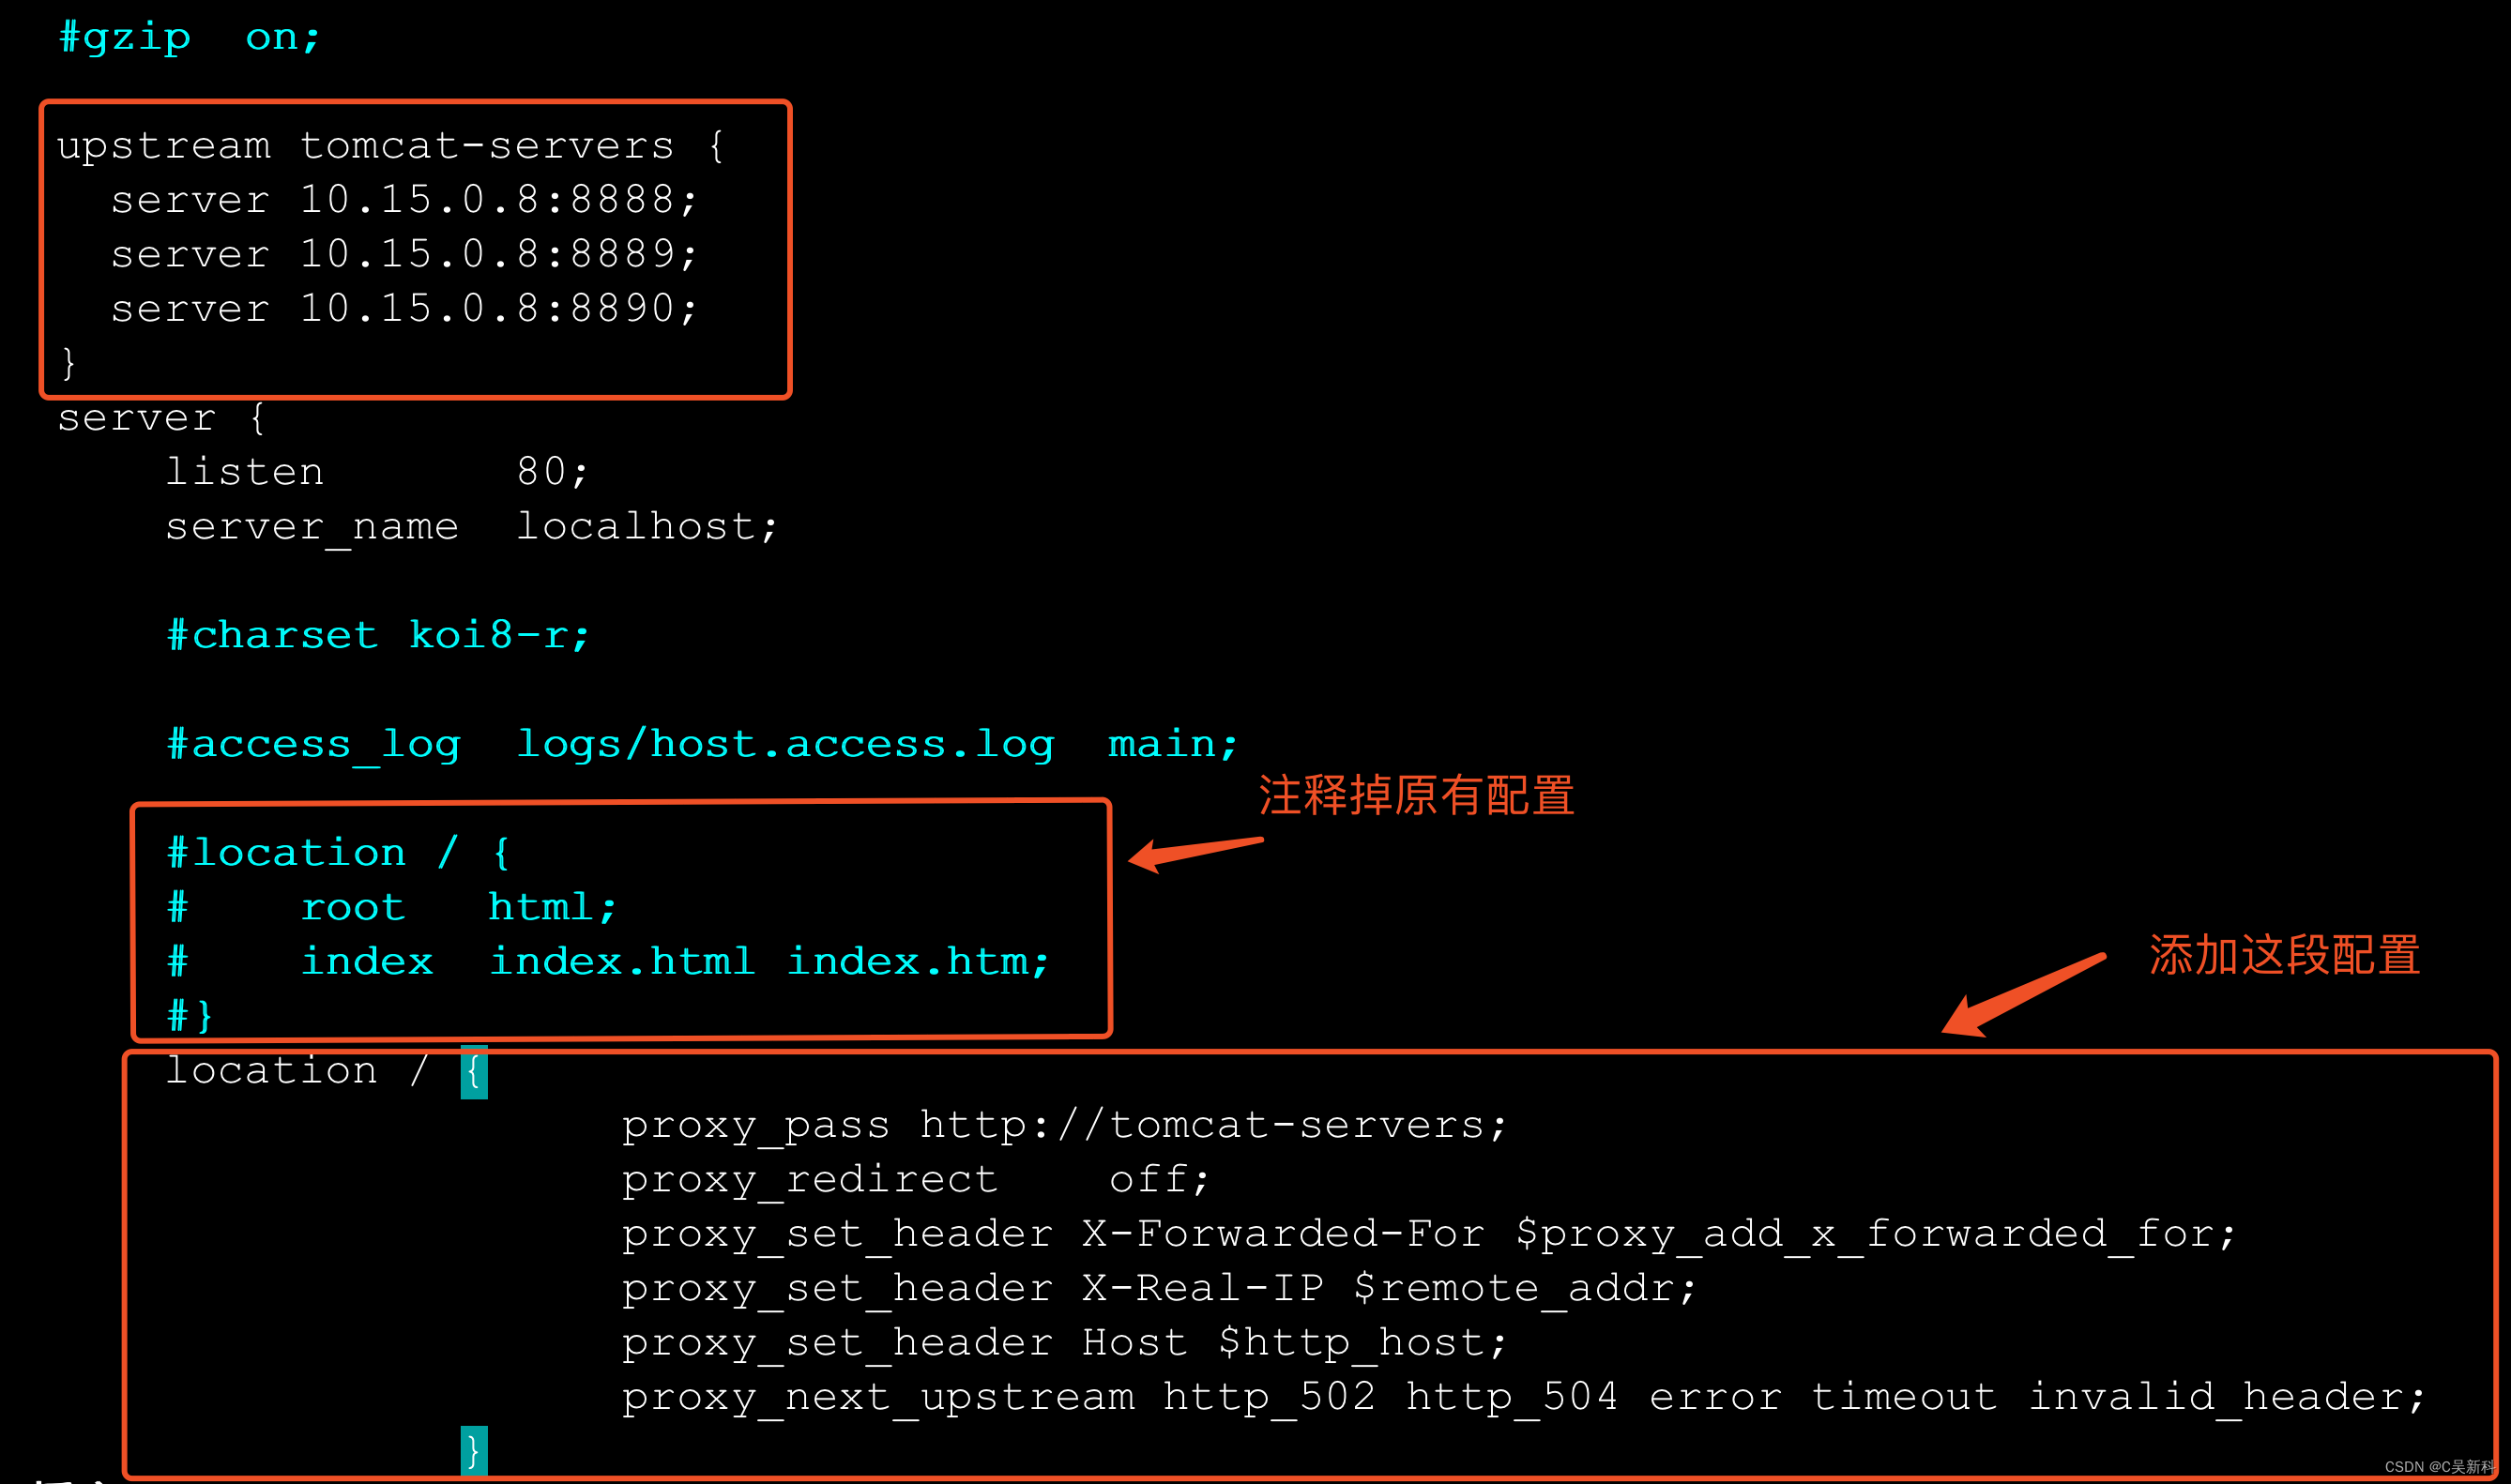
# 8.将多个tomcat配置到nginx的配置文件中:1).进入nginx的sbin目录关掉nginx服务./nginx -s stop2).进入conf目录,然后编辑nginx.conf文件vi nginx.conf3).在server标签上加入如下配置:upstream tomcat-servers {server 192.168.80.130:8090;server 192.168.80.130:8091;server 192.168.80.130:8092;}4).把配置文件里的如下配置注释掉(server配置里)location / {root html;index index.html index.htm;}5).将配置文件中 location /替换为如下配置:location / {proxy_pass http://tomcat-servers;proxy_redirect off;proxy_set_header X-Forwarded-For $proxy_add_x_forwarded_for;proxy_set_header X-Real-IP $remote_addr;proxy_set_header Host $http_host;proxy_next_upstream http_502 http_504 error timeout invalid_header;}
# 9.进入nginx安装目录sbin目录启动nginx./nginx -c /usr/nginx/conf/nginx.conf
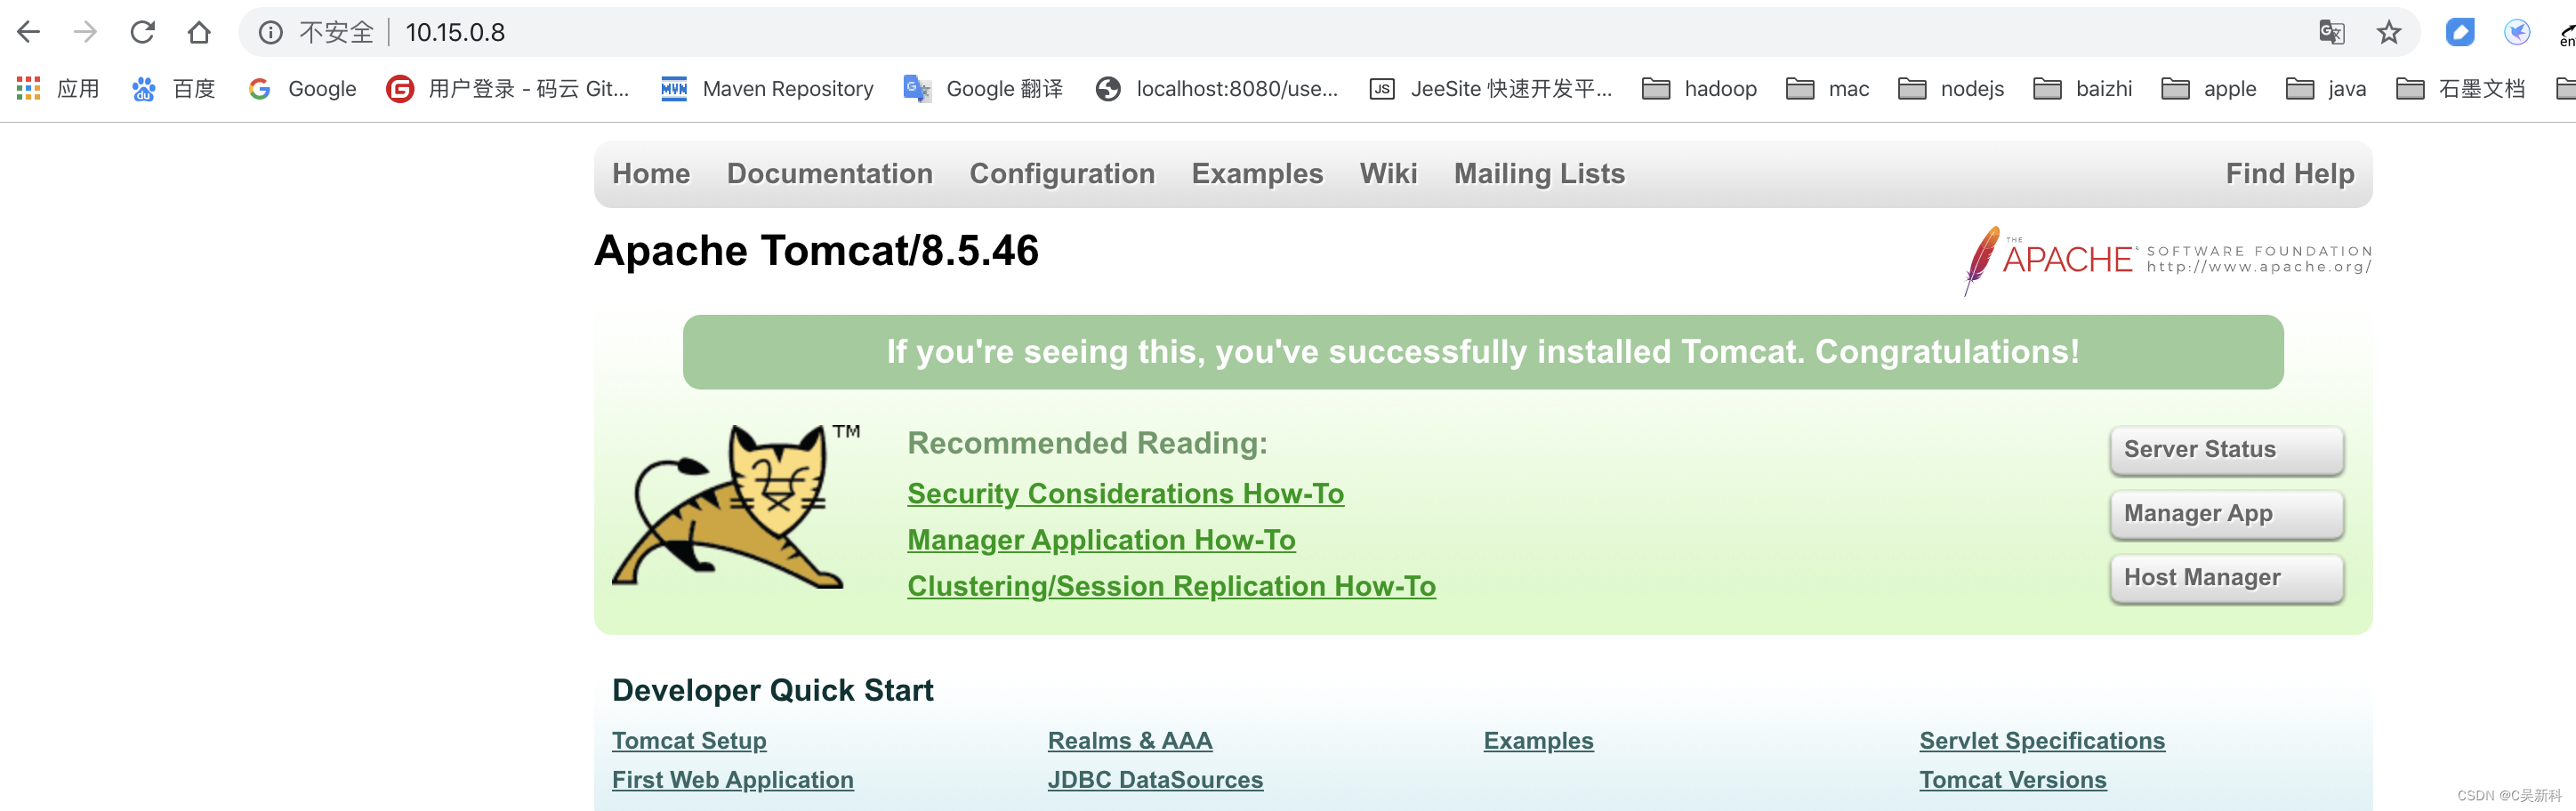
# 10.访问nginx,看到其中一个tomcat画面:http://10.15.0.8/
04-nginx.conf配置文件
4.1、nginx.conf介绍
Nginx的配置文件通常是一个文本文件,通常命名为
nginx.conf
,其内容包括以下几个方面:
-
全局配置:这部分包含了一些全局配置指令,例如 user指令指定Nginx进程的运行用户, worker_processes指令指定Nginx要启动的工作进程数等。
-
Events配置:这部分包含了一些事件处理相关的配置指令,例如 worker_connections指令指定每个工作进程可以同时处理的连接数, use指令可以指定事件模型,例如 use epoll或 use kqueue等。
-
HTTP配置:这部分包含了所有HTTP相关的配置指令,例如 server指令定义了一个HTTP服务器, location指令定义了一个请求的处理位置, proxy_pass指令可以将请求代理到其他服务器等。
下面是一个简单的Nginx配置文件示例:
user nginx;worker_processes auto;error_log /var/log/nginx/error.log;pid /var/run/nginx.pid;events {worker_connections 1024;}http {include mime.types;default_type application/octet-stream;sendfile on;keepalive_timeout 65;server {listen 80;server_name example.com;location / {root /var/www/example.com;index index.html;}location /api/ {proxy_pass http://api.example.com/;}}}
4.2、常用指令
4.2.1、alias: alias指令可以将请求的URI映射到本地文件系统中的另一个路径,从而实现路径更换的效果。
location /resource {alias /var/www/cdn/resource;index index.html;}
上面的配置将会把
http://example.com/resource
请求映射到本地文件系统的
/var/www/cdn/resource
路径下,Nginx会自动查找该目录下的
index.html
文件,并返回给客户端。如果没有找到
index.html
文件,则会返回目录列表。
需要注意的是,使用
alias
指令时,需要指定完整的本地路径,且路径中不能包含正则表达式。另外,使用
alias
指令可能会影响性能,因为Nginx需要对每个请求进行一次路径替换。如果只是简单的路径更换,建议使用
rewrite
指令或在应用程序代码中进行处理。
另外还有一种类似的指令
root
,它也可以将请求的URI映射到本地文件系统中的路径,但是它会将请求的URI和
root
指定的路径拼接在一起。例如,如果使用以下配置:
location /resource {root /var/www/cdn;index index.html;}
则
http://example.com/resource
请求会映射到本地文件系统的
/var/www/cdn/resource
路径下。
root
指令适用于简单的静态文件服务,但是不能实现路径更换的效果。
4.2.2、autoindex:展示目录
首先,需要确保目录的访问权限设置正确,使得Nginx用户(一般是
nginx
用户)有读取目录的权限。然后,在Nginx的配置文件中,找到对应的
location
块,添加
autoindex on
指令即可,例如:
server {listen 80;server_name example.com;location / {root /var/www/example.com;index index.html;}location /files/ {root /var/www/example.com;autoindex on;}}
可以通过配置
autoindex_format
指令来自定义目录列表的显示格式,例如:
location /files/ {root /var/www/example.com;autoindex on;autoindex_format html;autoindex_exact_size off;autoindex_localtime on;}
上面的配置指定了使用HTML格式显示目录列表,不显示文件大小的精确值,显示本地时间而不是GMT时间等。
需要注意的是,展示目录时,如果目录下有
index.html
文件,Nginx会优先显示该文件的内容,而不是目录列表。可以通过修改
index
指令来更改默认的索引文件,例如:
location /files/ {root /var/www/example.com;autoindex on;index index.html index.php;}
上面的配置将会在目录中查找
index.html和
index.php文件,如果找到了其中一个文件,则优先显示该文件的内容,否则才显示目录列表。
4.2.3、proxy_pass: 表示反向代理的地址,可以将客户端请求转发至该地址指定的后端服务进行处理。
在
location
块中使用
proxy_pass
配置项最常见,示例如下:
location /app/ {proxy_pass http://localhost:8000/;proxy_set_header Host $host;proxy_set_header X-Real-IP $remote_addr;proxy_set_header X-Forwarded-For $proxy_add_x_forwarded_for;}
以上配置将会将包含
/app/
路径的请求转发至
http://localhost:8000/
,并将请求头
Host
、
X-Real-IP
、
X-Forwarded-For
的参数传递给后端服务。
在
proxy_pass
配置项中,可以指定 HTTP、HTTPS、FTP 等协议,也可以通过域名指定反向代理的目标。例如:
1.使用 HTTPS:
location /app/ {proxy_pass https://localhost:8000/;...}
2.使用域名:
location /app/ {proxy_pass http://backend.example.com;...}
需要注意的是,对于
proxy_pass
中指定的地址,如果是域名或者其他需要解析的地址,需要确认 DNS 解析是否正确,同时需要考虑相关安全方案,例如 SSL/TLS 等。此外,在使用
proxy_pass
时还需要考虑反向代理的性能调优,例如通过
keepalive、proxy_cache
等配置项进行优化,避免反向代理成为系统性能瓶颈。


 1643
1643


 被折叠的 条评论
为什么被折叠?
被折叠的 条评论
为什么被折叠?
 到【灌水乐园】发言


