


前言:最近公司开发需要用到uni-app搭配高德地图,在踩坑后实现了基本的要求,过程之曲折就不说了,特地开贴记录下。
第一部分:申请高德Web API的Key和安全密钥,这个需要在后续的项目中用到
1.访问高德地图并注册账号:高德开放平台 | 高德地图API
2.注册好账号后,创建应用
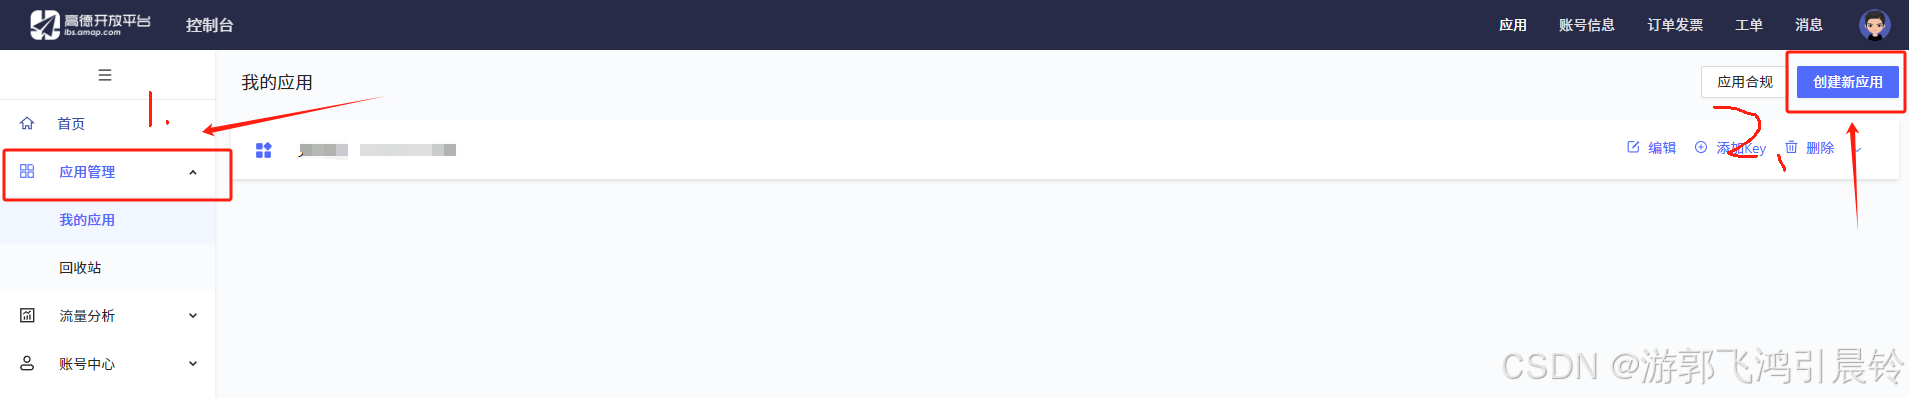
3.选择创建的应用,添加Web端的Key


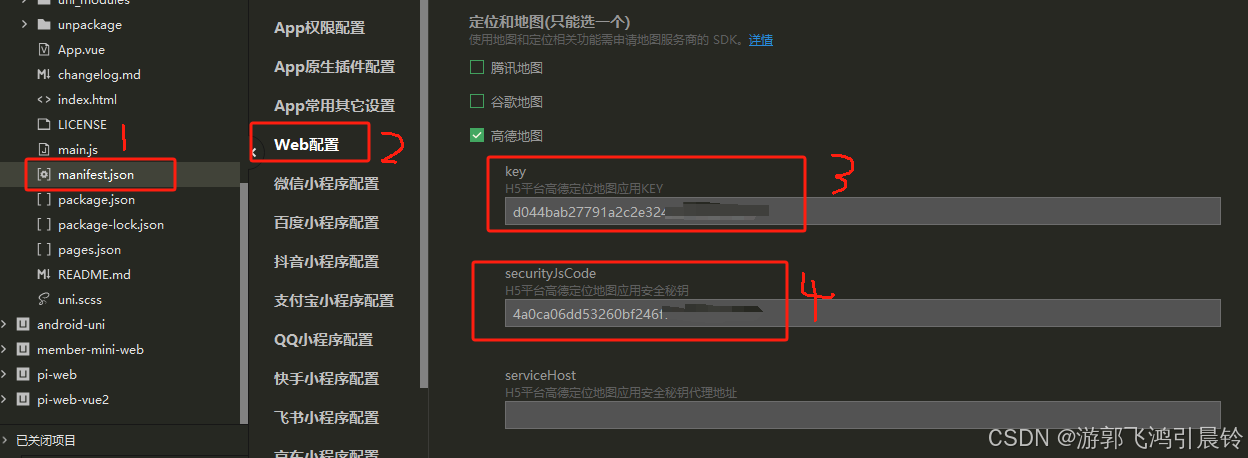
4.最后得到Web端的key值和安全密钥

第二部分:创建好高德地图相关的Key后,进入uniApp的部分
1.配置mainfest.json,对应填入上面你创建应用得到的Key和安全密钥
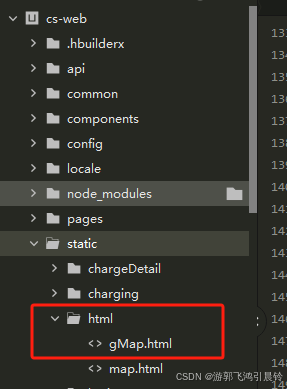
2.在根目录创建static文件夹,在static文件夹下创建html文件夹,在html文件夹创建地图html文件
注意此处的maker和标点都是用的我本地项目下static的静态图片,你们要在地图html文件对应进行更改,最好使用绝对路径,不要使用相对路径,否则打包到真机会显示不出图片。
3.html文件内容
<!DOCTYPE html>
<html lang="en">
<head>
<meta charset="UTF-8">
<meta http-equiv="X-UA-Compatible" content="IE=edge">
<meta name="viewport" content="initial-scale=1.0, user-scalable=no">
<title>Document</title>
<!-- 地圖 -->
<script type="text/javascript">
window._AMapSecurityConfig = { securityJsCode: '创建应用的安全密钥', }
</script>
<script src="https://webapi.amap.com/loader.js"></script>
<!-- vue -->
<script src="https://cdn.bootcss.com/vue/2.6.11/vue.js"></script>
</head>
<body>
<div id="app">
<div id="container"></div>
</div>
</body>
<!-- uni 的 SDK -->
<script type="text/javascript" src="https://js.cdn.aliyun.dcloud.net.cn/dev/uni-app/uni.webview.1.5.2.js"></script>
<script type="module">
new Vue({
el: '#app',
data() {
return {
map: '',
currentLat: '',
currentLng: '',
stationData: []
}
},
mounted() {
this.init();
},
methods: {
//创建地图,并遍历maker数组创建maker标点
init() {
// console.log('src传递需要的参数', window.location.search);
const params = new URLSearchParams(window.location.search);
//定位的经纬度 b
const lng = params.get('lng');
const lat = params.get('lat');
//定位的经纬度 e
//规划路线需要的终点经纬度 b
const endLng = params.get('endlng');
const endLat = params.get('endlat');
//规划路线需要的终点经纬度 e
//需要创建的maker标点数据 b
if(params.get('stationData')){
const stationData = JSON.parse(decodeURIComponent(params.get('stationData')));
localStorage.setItem('stationData',JSON.stringify(stationData));
}
//需要创建的maker标点数据 e
this.currentLng = lng;
this.currentLat = lat;
AMapLoader.load({
"key": "申请好的Web端开发者Key,首次调用 load 时必填",
"version": "2.0", // 指定要加载的 JSAPI 的版本,缺省时默认为 1.4.15
"plugins": ['AMap.Driving'], // 需要使用的的插件列表,如比例尺'AMap.Scale'等
"AMapUI": { // 是否加载 AMapUI,缺省不加载
"version": '1.1', // AMapUI 版本
"plugins": ['overlay/SimpleMarker'], // 需要加载的 AMapUI ui插件
},
"Loca": { // 是否加载 Loca, 缺省不加载
"version": '2.0' // Loca 版本
},
}).then((AMap) => {
this.map = new AMap.Map('container', {
center: [lng, lat],
resizeEnable: true,
zoom: 12 //地图显示的缩放级别
});
if (endLng && endLat) {
this.createDriving(endLng, endLat);
} else {
// 点标记显示内容,HTML要素字符串
var markerContent = '' +
`<div class="custom-content-marker-current">
<img src="../../static/coordinate.png">
</div>`;
// 根据经纬度标记地理位置
var marker = new AMap.Marker({
position: new AMap.LngLat(lng, lat),
content: markerContent,
title: '定位' //可以自定义icon图标展示
});
// 将创建的点标记添加到已有的地图实例
this.map.add(marker);
// 获取数据渲染到页面上
let obj = JSON.parse(localStorage.getItem('stationData'));
this.stationData = obj;
this.stationData.forEach((item, index) => {
// 点标记显示内容,HTML要素字符串
var markerContent = '' +
`<div class="custom-content-marker">
<img src="../../static/stationAddress.png">
</div>`;
// 根据经纬度标记地理位置
var marker = new AMap.Marker({
position: new AMap.LngLat(item.longitude, item.latitude),
content: markerContent,
// title: '充电桩定位' //可以自定义icon图标展示
});
// 点击maker创建当前坐标到maker的坐标的路线规划
let onMarkerClick = this.debounce((e) => {
this.createDriving(e.lnglat.lng, e.lnglat.lat);
}, 100);
// 将创建的点标记添加到已有的地图实例
this.map.add(marker);
marker.on("click", onMarkerClick); //绑定click事件
});
}
}).catch((e) => {
console.error(e); //加载错误提示
});
},
//创建路线规划
createDriving(endlng, endlat) {
this.map = new AMap.Map('container', {
center: [this.currentLng, this.currentLat],
resizeEnable: true,
zoom: 15 //地图显示的缩放级别
});
// 构造路线导航类
var driving = new AMap.Driving({
map: this.map,
});
console.log(this.currentLng, this.currentLat, endlng, endlat);
// 根据起终点经纬度规划驾车导航路线
driving.search(new AMap.LngLat(this.currentLng, this.currentLat), new AMap.LngLat(endlng, endlat),
function(status, result) {
if (status === 'complete') {
console.log('绘制驾车路线完成')
// console.log(status,'status')
} else {
console.log('获取驾车数据失败:' + result)
}
});
},
//防抖
debounce(func, wait) {
let timeout;
return function(...args) {
const context = this;
clearTimeout(timeout);
timeout = setTimeout(() => func.apply(context, args), wait);
};
}
}
})
</script>
<style scoped>
* {
margin: 0;
}
body,
html,
#container {
width: 100vw;
height: 100vh
}
#panel {
position: fixed;
background-color: white;
max-height: 90%;
overflow-y: auto;
top: 10px;
right: 10px;
width: 280px;
}
#panel .amap-call {
background-color: #009cf9;
border-top-left-radius: 4px;
border-top-right-radius: 4px;
}
#panel .amap-lib-driving {
border-bottom-left-radius: 4px;
border-bottom-right-radius: 4px;
overflow: hidden;
}
/* maker样式 */
.custom-content-marker-current {
position: relative;
width: 25px;
height: 34px;
overflow: hidden;
}
.custom-content-marker {
position: relative;
width: 40px;
height: 40px;
overflow: hidden;
}
.custom-content-marker-current img,
.custom-content-marker img {
width: 100%;
height: 100%;
}
/* maker样式 */
</style>
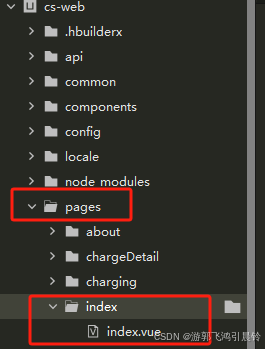
</html>4.创建好地图html文件后,到根目录page文件夹创建承载html文件的index.vue文件
5.index.vue文件内容
<template>
<!-- h5端 -->
<!-- #ifndef APP-PLUS -->
<web-view style="width: 100%;height: 100%;" :src="Mapview.webUrl.value"></web-view>
<!-- #endif -->
<!-- app端 -->
<!-- #ifdef APP-PLUS -->
<web-view :fullscreen="false" :src="Mapview.webUrl.value"></web-view>
<!-- #endif -->
</template>
<script setup>
import { onMounted, getCurrentInstance, reactive, ref } from 'vue';
import { onLoad, onShow, onHide } from "@dcloudio/uni-app";
onLoad(() => {
// #ifndef APP-PLUS
getStationData(113.335184, 23.126187); //h5无法使用uni定位所以传入固定的坐标
// #endif
// #ifdef APP-PLUS
uni.getLocation({
type: 'gcj02', // 坐标类型,默认为wgs84,可选的值为gcj02和bd09ll
success: res => {
// console.log('手机定位返回', res);
getStationData(res.longitude, res.latitude); //调用uni API获取定位
},
fail: err => {
// 获取失败,err为错误信息
console.log('getLocation err:', err);
}
});
// #endif
})
//地图地址
let Mapview = {
webUrl: ref(`/static/html/gMap.html`),
}
//传入maker的数据 需要动态获取这里演示所以写死
let getStationData = (lng, lat) => {
const stationMarkersData = [{
longitude: 113.339688,
latitude: 23.16154
},
{
longitude: 113.196217,
latitude: 23.070792
},
{
longitude: 113.327379,
latitude: 23.145002
},
{
longitude: 113.264431,
latitude: 23.056863,
},
{
longitude: 113.385708,
latitude: 23.171367
},
];
stationMarkersData.forEach((item, index) => {
let iconPath = '../../static/stationAddress.png';
let id = index;
item = { ...item, id, iconPath };
});
let testStr = encodeURIComponent(JSON.stringify(stationMarkersData));
let timeStamp = new Date().getTime();
Mapview.webUrl.value = `/static/html/gMap.html?lng=${lng}&&lat=${lat}&&stationData=${testStr}&&${timeStamp}`;
}
// ########################### 地图 e
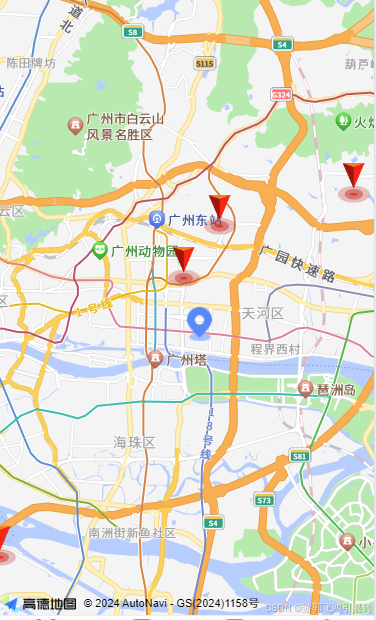
</script>6.运行到浏览器,地图创建成功,maker显示
点击maker标点,创建路线
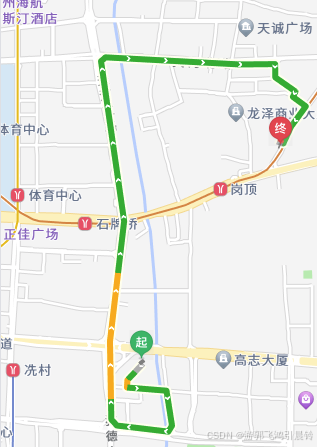
实测打包到真机也能成功运行,自此完成功能的实现~~~~~
后话:其实使用web-view作为地图的承载方式限制较多,无论是页面间的数据交互还是web-view本身层级过高导致不能随意在其上书写样式都是其的限制,我一开始本打算直接使用uniapp的map组件进行地图的构写,但一番折腾后发现功能实在匮乏,只能实现简单的创建地图和maker,如果想要做到上面的路线规划是很麻烦的,然后我又想通过直接在index.vue使用高德Web API进行相关的地图操作,在浏览器调试很顺利,但是一打包到手机却提示高德Web API不支持手机端运行,遂最后使用了web-view的方式,当然上述代码也说不上做的很完善,只是实现一些简单的地图操作而已,我翻阅过网上诸多作者的帖子并没有对此类型的代码撰写有太具体的描述,即使有也是需要收费,于是撰写了这篇帖子,希望能对有困扰的程序猿提供些许帮助,这也是我写帖子的初心了hhhh。


 8600
8600

 被折叠的 条评论
为什么被折叠?
被折叠的 条评论
为什么被折叠?
 到【灌水乐园】发言


