


目录
一、Spring Boot中的事务管理
设置事务:@Transactional(isolation = Isolation.DEFAULT)、
@Transactional(propagation = Propagation.REQUIRED);
开启事务:@EnableTransactionManagement。
启动类:
@SpringBootApplication
@EnableTransactionManagement//开启事务管理
public class Springboot01CenterTxApplication {
    public static void main(String[] args) {
        SpringApplication.run(Springboot01CenterTxApplication.class, args);
    }
}
MyService类:
@Service
@Transactional//设置事务
public class MyService implements ICustomerService{

    @Autowired
    private CustomerDao dao;

    @Override
    public void batchAdd() {
        dao.save(new Customer("台湾君越酒店","五星级","乌克兰","12345678"));
        int a = 10/0;
        dao.save(new Customer("台湾君越酒店","五星级","乌克兰","12345678"));
        dao.save(new Customer("台湾君越酒店","五星级","乌克兰","12345678"));
    }
}
执行结果分析:当程序出现异常时,数据库中的内容不会发生改变,即新增加数据。
二、Spring Boot异步任务
在项目开发中,绝大多数情况下都是通过同步方式处理业务逻辑的,但是比如批量处理数据,批量发送 邮件,批量发送短信等操作 容易造成阻塞的情况,之前大部分都是使用多线程来完成此类任务而在 Spring 3+版本之后,就已经内置了@Async注解来完美解决这个问题,从而提高效率。
使用的注解:
@EnableAsync 启动类上开启基于注解的异步任务;
@Async 标识的方法会异步执行。
启动类:
@SpringBootApplication
@EnableAsync //开启异步处理
public class Springboot02CenterAysncApplication {
    public static void main(String[] args) {
        SpringApplication.run(Springboot02CenterAysncApplication.class, args);
    }
}
IService接口和ServiceImp实现类:
public interface IService {
    void batchAdd();
}

//=========================================================

@Service
public class ServiceImp implements IService {
    @Override
    @Async
    public void batchAdd() {
        try {
            Thread.sleep(3000);//线程睡眠3秒后,继续向下执行
        } catch (InterruptedException e) {
            e.printStackTrace();
        }
        System.out.println("===批量新增===");
    }
}
MyController类:
@RestController
public class MyController {

    @Autowired
    private IService service;

    @RequestMapping("/add")
    public String batchAdd() {
        service.batchAdd();
        return "批量新增成功!";
    }
}
执行结果分析:启动配置类后,客户端浏览器发出请求后,服务器会迅速响应 “批量新增成功!” 至客户端浏览器,而控制台会在发出请求后3秒打印输出 “===批量新增===” 。
三、Spring Boot定时任务调度
在项目开发中,经常需要执行一些定时任务,比如每月1号凌晨需要汇总上个月的数据分析报表;每天凌晨分析前一天的日志信息等定时操作。Spring 为我们提供了异步执行定时任务调度的方式。
使用的注解:
@EnableScheduling启动类上开启基于注解的定时任务;
@Scheduled标识的方法会进行定时处理 需要通过cron属性来指定cron表达式:秒 分 时 日 月 星期在线生成cron表达式。
启动类:
@SpringBootApplication
@EnableScheduling //开启任务调度
public class Springboot03CenterJobApplication {
    public static void main(String[] args) {
        SpringApplication.run(Springboot03CenterJobApplication.class, args);
    }
}
MyJob类:
@Component
public class MyJob {
    // cron = "秒 分 时 日 月 星期"
    @Scheduled(cron = "* 8 19 9 8 ?")
    public void show(){
        System.out.println("是大眼同学呦!");
    }
}
执行结果:
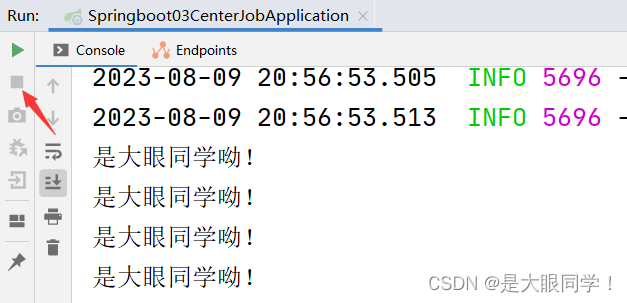
执行结果分析:执行效果是在星期三,时间为8月9日的20点56分的每秒钟控制台都会输出“是大眼同学呦!”。
四、Spring Boot整合Mail
网易邮箱 ===> QQ邮箱
第一步:添加坐标
<dependency>
    <groupId>org.springframework.boot</groupId>
    <artifactId>spring-boot-starter-mail</artifactId>
</dependency>
第二步:开启配置(application.properties)
#配置邮箱信息
spring.mail.username=
spring.mail.password=
#发送邮件服务器
spring.mail.host=smtp.163.com
第三步:编写代码
@SpringBootTest
class Springboot04CenterMailApplicationTests {

    @Autowired(required = false)
    private JavaMailSenderImpl javaMailSender;

    //发送简单邮件
    @Test
    void show1(){
        //创建邮件对象
        SimpleMailMessage simpleMailMessage = new SimpleMailMessage();
        //设置信息
        simpleMailMessage.setSubject("这是一封QQ邮箱");
        simpleMailMessage.setText("网易邮箱发消息给QQ邮箱了!");
        simpleMailMessage.setFrom("xxxxx@163.com");
        simpleMailMessage.setTo("xxxxx@qq.com");
        //发送邮件
        javaMailSender.send(simpleMailMessage);
        System.out.println("发送成功!");
    }

    //发送带有附件的邮件
    @Test
    void show2()throws Exception {
        //1.创建邮件对象
        MimeMessage mimeMessage = javaMailSender.createMimeMessage();
        //2.创建MimeMessageHelper
        MimeMessageHelper mimeMessageHelper =  new MimeMessageHelper(mimeMessage,true);
        //3.设置信息
        mimeMessageHelper.setSubject("程序员的误解");
        mimeMessageHelper.setText("程序员是个<span style='color:red'>高薪,高危</span>的职业",true);
        mimeMessageHelper.addAttachment("1.jpg",new File("C:\\imgs\\1.jpg"));
        mimeMessageHelper.setFrom("xxxxx@163.com");
        mimeMessageHelper.setTo("xxxxx@qq.com");
        //4.发送邮件
        javaMailSender.send(mimeMessage);
    }
}


 59
59


 被折叠的 条评论
为什么被折叠?
被折叠的 条评论
为什么被折叠?
 到【灌水乐园】发言


