


前端项目代码规范的搭建
Eslint + Prettier + Husky + Commitlint 使用指南
文章目录
写在前面
这里是小飞侠Pan🥳,立志成为一名优秀的前端程序媛!!!
本篇博客收录于我的github前端笔记仓库中,持续更新中,欢迎star~
👉https://github.com/mengqiuleo/myNote
1.1. 集成editorconfig配置
EditorConfig 有助于为不同 IDE 编辑器上处理同一项目的多个开发人员维护一致的编码风格。
下面的代码放到 .editorconfig 文件中
# http://editorconfig.org

root = true

[*] # 表示所有文件适用
charset = utf-8 # 设置文件字符集为 utf-8
indent_style = space # 缩进风格(tab | space)
indent_size = 2 # 缩进大小
end_of_line = lf # 控制换行类型(lf | cr | crlf)
trim_trailing_whitespace = true # 去除行首的任意空白字符
insert_final_newline = true # 始终在文件末尾插入一个新行

[*.md] # 表示仅 md 文件适用以下规则
max_line_length = off
trim_trailing_whitespace = false
VSCode需要安装一个插件:EditorConfig for VS Code
1.2. 使用prettier工具
Prettier 是一款强大的代码格式化工具,支持 JavaScript、TypeScript、CSS、SCSS、Less、JSX、Angular、Vue、GraphQL、JSON、Markdown 等语言,基本上前端能用到的文件格式它都可以搞定,是当下最流行的代码格式化工具。
1.安装prettier
npm install prettier -D
2.配置.prettierrc文件:
- useTabs:使用tab缩进还是空格缩进,选择false;
- tabWidth:tab是空格的情况下,是几个空格,选择2个;
- printWidth:当行字符的长度,推荐80,也有人喜欢100或者120;
- singleQuote:使用单引号还是双引号,选择true,使用单引号;
- trailingComma:在多行输入的尾逗号是否添加,设置为
none; - semi:语句末尾是否要加分号,默认值true,选择false表示不加;
{
  "useTabs": false,
  "tabWidth": 2,
  "printWidth": 80,
  "singleQuote": true,
  "trailingComma": "none",
  "semi": false
}
3.创建.prettierignore忽略文件
/dist/*
.local
.output.js
/node_modules/**

**/*.svg
**/*.sh

/public/*
4.VSCode需要安装prettier的插件
5.测试prettier是否生效
- 测试一:在代码中保存代码;
- 测试二:配置一次性修改的命令;
在package.json中配置一个scripts:
"prettier": "prettier --write ."
1.3. 使用ESLint检测
1.在前面创建项目的时候,我们就选择了ESLint,所以Vue会默认帮助我们配置需要的ESLint环境。
2.VSCode需要安装ESLint插件:
3.解决eslint和prettier冲突的问题:
在理想的状态下,eslint与prettier应该各司其职。eslint负责我们的代码质量,prettier负责我们的代码格式。但是在使用的过程中会发现,由于我们开启了自动化的eslint修复与自动化的根据prettier来格式化代码。所以我们已保存代码,会出现屏幕闪一起后又恢复到了报错的状态。
这其中的根本原因就是eslint有部分规则与prettier冲突了,所以保存的时候显示运行了eslint的修复命令,然后再运行prettier格式化,所以就会出现屏幕闪一下然后又恢复到报错的现象。这时候你可以检查一下是否存在冲突的规则。
查阅资料会发现,社区已经为我们提供了一个非常成熟的方案,即eslint-config-prettier + eslint-plugin-prettier。
安装插件:(vue在创建项目时,如果选择prettier,那么这两个插件会自动安装)
npm i eslint-plugin-prettier eslint-config-prettier -D
在 .eslintrc.json中extends的最后添加一个配置
{
    extends: [
    'eslint:recommended',
    'plugin:vue/vue3-essential',
    'plugin:@typescript-eslint/recommended',
+    // 新增,必须放在最后面
+    'plugin:prettier/recommended'
  ],
}
.eslintrc.js文件完整配置如下:
  extends: [
    "plugin:vue/vue3-essential",
    "eslint:recommended",
    "@vue/typescript/recommended",
    "@vue/prettier",
    "@vue/prettier/@typescript-eslint",
    "plugin:prettier/recommended"
  ],
1.4. git Husky和eslint
对于不使用
vscode的,或者没有安装eslint、preitter与stylelint插件的同学来说,就不能实现在保存的时候自动的去修复与和格式化代码。这样提交到
git仓库的代码还是不符合要求的。因此需要引入强制的手段来保证提交到git仓库的代码时符合我们的要求的。
husky是一个用来管理git hook的工具,git hook即在我们使用git提交代码的过程中会触发的钩子。
虽然我们已经要求项目使用eslint了,但是不能保证组员提交代码之前都将eslint中的问题解决掉了:
-
也就是我们希望保证代码仓库中的代码都是符合eslint规范的;
-
那么我们需要在组员执行
git commit命令的时候对其进行校验,如果不符合eslint规范,那么自动通过规范进行修复;
那么如何做到这一点呢?可以通过Husky工具:
- husky是一个git hook工具,可以帮助我们触发git提交的各个阶段:pre-commit、commit-msg、pre-push
如何使用husky呢?
**这里我们可以使用自动配置命令:**直接下载就行
npx husky-init && npm install
这里会做三件事:
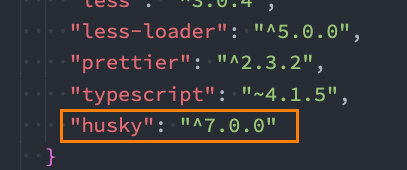
1.安装husky相关的依赖:
2.在项目目录下创建 .husky 文件夹:
npx huksy install

3.在package.json中添加一个脚本:
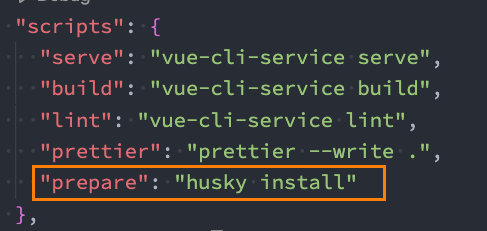
接下来,我们需要去完成一个操作:在进行commit时,执行lint脚本:
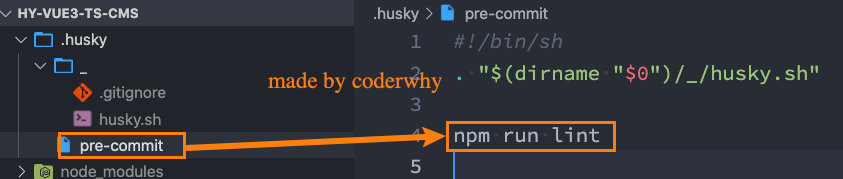
这个时候我们执行git commit的时候会自动对代码进行lint校验。
注意:
执行命令时出错的情况:
E:\note\前端\代码\vue3_demo\vite_demo\vite_test>npx husky-init && npm install
npx: 2 安装成功,用时 2.084 秒
husky-init updating package.json
  setting prepare script to command "husky install"
can't create hook, .husky directory doesn't exist (try running husky install)
安装husky报错(遇到的问题)
husky - can't create hook, .husky directory doesn't exist (try running husky install)
不能创建钩子,.husky目录不存在(尝试运行Husky install)
不能创建钩子,.husky目录不存在(尝试运行Husky install)
解决:
重新执行下面的命令
git init
npx husky-init
注意:
- 上述命令需要在git bash中执行!!!
- 否则会报错
1.5. git commit规范
1.5.1. 代码提交风格
通常我们的git commit会按照统一的风格来提交,这样可以快速定位每次提交的内容,方便之后对版本进行控制。
但是如果每次手动来编写这些是比较麻烦的事情,我们可以使用一个工具:Commitizen
- Commitizen 是一个帮助我们编写规范 commit message 的工具;
1.安装Commitizen
npm install commitizen -D
2.安装cz-conventional-changelog,并且初始化cz-conventional-changelog:
npx commitizen init cz-conventional-changelog --save-dev --save-exact
这个命令会帮助我们安装cz-conventional-changelog:

并且在package.json中进行配置:

这个时候我们提交代码需要使用 npx cz:而不是使用 git commit -m “xxx”
- 第一步是选择type,本次更新的类型
| Type | 作用 |
|---|---|
| feat | 新增特性 (feature) |
| fix | 修复 Bug(bug fix) |
| docs | 修改文档 (documentation) |
| style | 代码格式修改(white-space, formatting, missing semi colons, etc) |
| refactor | 代码重构(refactor) |
| perf | 改善性能(A code change that improves performance) |
| test | 测试(when adding missing tests) |
| build | 变更项目构建或外部依赖(例如 scopes: webpack、gulp、npm 等) |
| ci | 更改持续集成软件的配置文件和 package 中的 scripts 命令,例如 scopes: Travis, Circle 等 |
| chore | 变更构建流程或辅助工具(比如更改测试环境) |
| revert | 代码回退 |
- 第二步选择本次修改的范围(作用域)

- 第三步选择提交的信息

- 第四步提交详细的描述信息:这里直接回车跳过

- 第五步是否是一次重大的更改

- 第六步是否影响某个open issue

我们也可以在scripts中构建一个命令来执行 cz:
1.5.2. 代码提交验证
如果我们按照cz来规范了提交风格,但是依然有同事通过 git commit 按照不规范的格式提交应该怎么办呢?
- 我们可以通过commitlint来限制提交;
1.安装 @commitlint/config-conventional 和 @commitlint/cli
npm i @commitlint/config-conventional @commitlint/cli -D
2.在根目录创建commitlint.config.js文件,配置commitlint
module.exports = {
  extends: ['@commitlint/config-conventional']
}
3.使用husky生成commit-msg文件,验证提交信息:(对提交信息进行拦截)
npx husky add .husky/commit-msg "npx --no-install commitlint --edit $1"
这里使用命令不成功
我们手动创建文件 commit-msg:该文件与pre-commit文件同级
#!/usr/bin/env sh
. "$(dirname -- "$0")/_/husky.sh"

npx --no-install commitlint --edit
此时我们测试用git commit 提交,失败

所以我们必须用npx cz提交,但是该命令不太熟悉,要改名
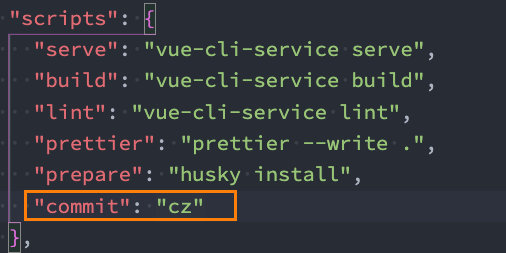
我们在package.json中新增脚本:"commit": "cz"
整体配置如下:
 "scripts": {
    "serve": "vue-cli-service serve",
    "build": "vue-cli-service build",
    "lint": "vue-cli-service lint",
    "prettier": "prettier --write .",
    "prepare": "husky install",
    "commit": "cz"
  },
以后我们使用 npm run commit 来进行提交
具体提交流程如下:
- 首先要在git bash的命令行窗口下执行命令!!!
- 然后执行 git add .
- 执行
npm run commit - 接下来的操作就是上面的注释的操作
1.5.3 扩展——自定义提交规范
npm i -D commitlint-config-cz cz-customizable
变更 commitlint.config.js 这里采用自己定义的规范,将会覆盖上面那个,所以上面那个可以不用安装

增加 .cz-config.js
  'use strict'
  module.exports = {
    types: [
      { value: '✨新增', name: '新增:    新的内容' },
      { value: '🐛修复', name: '修复:    修复一个Bug' },
      { value: '📝文档', name: '文档:    变更的只有文档' },
      { value: '💄格式', name: '格式:    空格, 分号等格式修复' },
      { value: '♻️重构', name: '重构:    代码重构,注意和特性、修复区分开' },
      { value: '⚡️性能', name: '性能:    提升性能' },
      { value: '✅测试', name: '测试:    添加一个测试' },
      { value: '🔧工具', name: '工具:    开发工具变动(构建、脚手架工具等)' },
      { value: '⏪回滚', name: '回滚:    代码回退' }
    ],
    scopes: [
      { name: 'leetcode' },
      { name: 'javascript' },
      { name: 'typescript' },
      { name: 'Vue' },
      { name: 'node' }
    ],
    // it needs to match the value for field type. Eg.: 'fix'
    /*  scopeOverrides: {
      fix: [
        {name: 'merge'},
        {name: 'style'},
        {name: 'e2eTest'},
        {name: 'unitTest'}
      ]
    },  */
    // override the messages, defaults are as follows
    messages: {
      type: '选择一种你的提交类型:',
      scope: '选择一个scope (可选):',
      // used if allowCustomScopes is true
      customScope: 'Denote the SCOPE of this change:',
      subject: '短说明:\n',
      body: '长说明,使用"|"换行(可选):\n',
      breaking: '非兼容性说明 (可选):\n',
      footer: '关联关闭的issue,例如:#31, #34(可选):\n',
      confirmCommit: '确定提交说明?(yes/no)'
    },
    allowCustomScopes: true,
    allowBreakingChanges: ['特性', '修复'],
    // limit subject length
    subjectLimit: 100
  }
package.json 中,将原来commit配置,变更为自定义配置

然后提交会变成这样

bug解决
Failed to load config “@vue/prettier“ to extend from
这种是版本问题。
解决方案:
@vue/prettier改为prettier
原因还不知道, @vue/prettier在@vue/下没找到
参考解决方案:https://www.cnblogs.com/boji/p/15929707.html
相关文章:
vue3+ts+vite项目中使用eslint+prettier+stylelint+husky指南
Eslint + Prettier + Husky + Commitlint+ Lint-staged 规范前端工程代码规范


 2217
2217


 被折叠的 条评论
为什么被折叠?
被折叠的 条评论
为什么被折叠?
 到【灌水乐园】发言


