


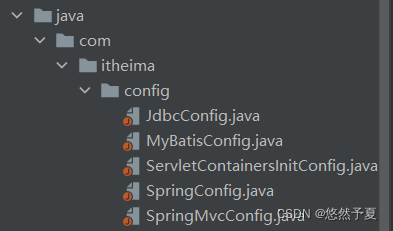
1、新增配置文件Java类
2、取代web.xml,ServletContainersInitConfig配置
package com.itheima.config;

import org.springframework.web.context.WebApplicationContext;
import org.springframework.web.context.support.AnnotationConfigWebApplicationContext;
import org.springframework.web.filter.CharacterEncodingFilter;
import org.springframework.web.servlet.support.AbstractDispatcherServletInitializer;

import javax.servlet.DispatcherType;
import javax.servlet.FilterRegistration;
import javax.servlet.ServletContext;
import javax.servlet.ServletException;
import java.util.EnumSet;

public class ServletContainersInitConfig extends AbstractDispatcherServletInitializer {

    //创建Servlet容器时,使用注解的方式加载SPRINGMVC配置类中的信息,并加载成WEB专用的ApplicationContext对象
    //该对象放入了ServletContext范围,后期在整个WEB容器中可以随时获取调用
    @Override
    protected WebApplicationContext createServletApplicationContext() {
        AnnotationConfigWebApplicationContext ctx = new AnnotationConfigWebApplicationContext();
        ctx.register(SpringMvcConfig.class);
        return ctx;
    }

    //注解配置映射地址方式,服务于SpringMVC的核心控制器DispatcherServlet
    @Override
    protected String[] getServletMappings() {
        return new String[]{"/"};
    }

    @Override
    //基本等同于<listener-class>org.springframework.web.context.ContextLoaderListener</listener-class>
    protected WebApplicationContext createRootApplicationContext() {
        AnnotationConfigWebApplicationContext ctx = new AnnotationConfigWebApplicationContext();
        ctx.register(SpringConfig.class);
        return ctx;
    }

    //乱码处理作为过滤器,在servlet容器启动时进行配置,相关内容参看Servlet零配置相关课程
    @Override
    public void onStartup(ServletContext servletContext) throws ServletException {
        //触发父类的onStartup
        super.onStartup(servletContext);
        //1.创建字符集过滤器对象
        CharacterEncodingFilter cef = new CharacterEncodingFilter();
        //2.设置使用的字符集
        cef.setEncoding("UTF-8");
        //3.添加到容器(它不是ioc容器,而是ServletContainer)
        FilterRegistration.Dynamic registration = servletContext.addFilter("characterEncodingFilter", cef);
        //4.添加映射
        registration.addMappingForUrlPatterns(EnumSet.of(DispatcherType.REQUEST, DispatcherType.FORWARD, DispatcherType.INCLUDE), false, "/*");
    }
}
3、JdbcConfig
package com.itheima.config;

import com.alibaba.druid.pool.DruidDataSource;
import org.springframework.beans.factory.annotation.Value;
import org.springframework.context.annotation.Bean;

import javax.sql.DataSource;

public class JdbcConfig {
    //使用注入的形式,读取properties文件中的属性值,等同于<property name="*******" value="${jdbc.driver}"/>
    @Value("${jdbc.driver}")
    private String driver;
    @Value("${jdbc.url}")
    private String url;
    @Value("${jdbc.username}")
    private String userName;
    @Value("${jdbc.password}")
    private String password;

    //定义dataSource的bean,等同于<bean id="dataSource" class="com.alibaba.druid.pool.DruidDataSource">
    @Bean("dataSource")
    public DataSource getDataSource(){
        //创建对象
        DruidDataSource ds = new DruidDataSource();
        //手工调用set方法,等同于set属性注入<property name="driverClassName" value="******"/>
        ds.setDriverClassName(driver);
        ds.setUrl(url);
        ds.setUsername(userName);
        ds.setPassword(password);
        return ds;
    }
}
4、MyBatisConfig
package com.itheima.config;

import com.github.pagehelper.PageInterceptor;
import org.apache.ibatis.plugin.Interceptor;
import org.mybatis.spring.SqlSessionFactoryBean;
import org.mybatis.spring.mapper.MapperScannerConfigurer;
import org.springframework.beans.factory.annotation.Autowired;
import org.springframework.context.annotation.Bean;

import javax.sql.DataSource;
import java.util.Properties;

public class MyBatisConfig {
    //定义MyBatis的核心连接工厂bean,等同于<bean class="org.mybatis.spring.SqlSessionFactoryBean">
    @Bean
    //参数使用自动装配的形式加载dataSource,为set注入提供数据,dataSource来源于JdbcConfig中的配置
    public SqlSessionFactoryBean getSqlSessionFactoryBean(@Autowired DataSource dataSource,@Autowired Interceptor interceptor){
        SqlSessionFactoryBean ssfb = new SqlSessionFactoryBean();
        //等同于<property name="typeAliasesPackage" value="com.itheima.domain"/>
        ssfb.setTypeAliasesPackage("com.itheima.domain");
        //等同于<property name="dataSource" ref="dataSource"/>
        ssfb.setDataSource(dataSource);
//        //等同于<bean class="com.github.pagehelper.PageInterceptor">
//        Interceptor interceptor = new PageInterceptor();
//        Properties properties = new Properties();
//        properties.setProperty("helperDialect","mysql");
//        properties.setProperty("reasonable","true");
//        //等同于<property name="properties">
//        interceptor.setProperties(properties);
        ssfb.setPlugins(interceptor);
        return ssfb;
    }

    //定义MyBatis的映射扫描,等同于<bean class="org.mybatis.spring.mapper.MapperScannerConfigurer">
    @Bean
    public MapperScannerConfigurer getMapperScannerConfigurer(){
        MapperScannerConfigurer msc = new MapperScannerConfigurer();
        //等同于<property name="basePackage" value="com.itheima.dao"/>
        msc.setBasePackage("com.itheima.dao");
        return msc;
    }

    @Bean("pageInterceptor")
    public Interceptor getPageInterceptor(){
        Interceptor interceptor = new PageInterceptor();
        Properties properties = new Properties();
        properties.setProperty("helperDialect","mysql");
        properties.setProperty("reasonable","true");
        //等同于<property name="properties">
        interceptor.setProperties(properties);
        return interceptor;
    }

}
5、SpringConfig
package com.itheima.config;

import org.springframework.beans.factory.annotation.Autowired;
import org.springframework.context.annotation.*;
import org.springframework.jdbc.datasource.DataSourceTransactionManager;
import org.springframework.stereotype.Controller;
import org.springframework.transaction.annotation.EnableTransactionManagement;

import javax.sql.DataSource;

@Configuration
//等同于<context:component-scan base-package="com.itheima">
@ComponentScan(value = "com.itheima",excludeFilters =
    //等同于<context:exclude-filter type="annotation" expression="org.springframework.stereotype.Controller"/>
    @ComponentScan.Filter(type= FilterType.ANNOTATION,classes = {Controller.class}))
//等同于<context:property-placeholder location="classpath*:jdbc.properties"/>
@PropertySource("classpath:jdbc.properties")
//等同于<tx:annotation-driven />,bean的名称默认取transactionManager
@EnableTransactionManagement
@Import({MyBatisConfig.class,JdbcConfig.class})
public class SpringConfig {
    //等同于<bean id="txManager"/>
    @Bean("transactionManager")
    //等同于<bean class="org.springframework.jdbc.datasource.DataSourceTransactionManager">
    public DataSourceTransactionManager getTxManager(@Autowired DataSource dataSource){
        DataSourceTransactionManager tm = new DataSourceTransactionManager();
        //等同于<property name="dataSource" ref="dataSource"/>
        tm.setDataSource(dataSource);
        return tm;
    }
}
6、SpringMvcConfig
package com.itheima.config;

import org.springframework.context.annotation.ComponentScan;
import org.springframework.context.annotation.Configuration;
import org.springframework.web.servlet.config.annotation.EnableWebMvc;

@Configuration
//等同于<context:component-scan base-package="com.itheima.controller"/>
@ComponentScan("com.itheima.controller")
//等同于<mvc:annotation-driven/>,还不完全相同
@EnableWebMvc
public class SpringMvcConfig {
}
7、小结
到此我们就可以将xml配置文件以注解的形式给代替了。


 1054
1054


 被折叠的 条评论
为什么被折叠?
被折叠的 条评论
为什么被折叠?
 到【灌水乐园】发言


