❝我从不幻想成功。我只会为了成功努力实践
大家好,我是柒八九。一个专注于前端开发技术/Rust及AI应用知识分享的Coder
❝此篇文章所涉及到的技术有
WebAssemblyMupdf分页展示/文本抽离/文本标注/获取超链接/Pdf转图片/翻转/截取)
因为,行文字数所限,有些概念可能会一带而过亦或者提供对应的学习资料。请大家酌情观看。
前言
从上次发文SSE打扮你的AI应用,让它美美哒已经差不多过了快2个月了。
这期间呢,发生了很多事情。
足足有8周的时间。
❝一周就是一年的
2%啊
那就是这一年的16%的时间,确实抽不出时间来写文章。这里向广大的读者说一句抱歉。
不过呢,这段时间内,也没闲着。虽然,没时间写文章,但是做了很多有趣的功能。
-
操作 PDF(就是这篇文章的主要内容) -
EPub分页展示 -
视频抽帧( Rust+WebAssembly) -
图片OCR识别( AI模型+Rust+WebAssembly) -
图片基于关键词进行标注( Rust+WebAssembly) -
音频文件识别(AI模型+ Python) -
SRT文件标注 -
文本翻译(AI模型+ Python) -
leafletjs [1](GIS相关)
大家不要着急,这些内容都准备写成文章。
老粉都知道,之前我们在Rust 赋能前端 -- 写一个 File 转 Img 的功能/AI 赋能前端 -- 文本内容概要生成介绍过"文档操作"的功能。
❝而就在之后,我们其中一个需求中,又新增了一个对PDF分页展示和关键词标注的功能点。
也就是说,我们无法直接使用iframe亦或者pdfjs-dist[2]等PDF常规解决方案来实现上述操作。
❝这已经超出了正常前端的技能范畴了,那么我们就需要把视角移到其他语言环境(
C/C++/Rust)是否有成熟的解决方案。然后配套WebAssembly来实现我们的目的。
而今天,我们就来讲讲。在前端如何使用WebAssembly来拓展前端应用的功能,实现之前不能或者不好实现的功能。
之前呢,我们在Rust 赋能前端 -- 写一个 File 转 Img 的功能就介绍过mupdf。
上次呢,我们使用mupdf-js[3]对Pdf进行了一些操作。例如,将PDF转成text/png/svg/html。但是呢,在使用mupdf-js有一个弊端就是,有些高级功能,例如(翻转/文本标注/获取pdf中的图片等)无法实现。
所以,今天我们绕过mupdf-js而是直接使用mupdf[4]的编译好的wasm文档来执行相关操作。
效果展示
首先,我们会使用mupdf为大家讲解下面的各种操作。
例如:
-
'获取元数据' -
'页数' -
'结构化文本' -
'抽取图片' -
'获取标注信息' -
'文本查询' -
'获取文档中超链接' -
'获取文档大小' -
'pdf转图片' -
'添加文本' -
'翻转' -
'截取' -
'文档分割'

其次,我们会基于上面的各种能力,来实现一个Pdf分页和关键词标注的操作。

好了,天不早了,干点正事哇。

我们能所学到的知识点
❝
项目初始化 使用Mupdf 蹂躏 PDF PDF 分页展示和文本标注
1. 项目初始化
从上面的演示效果,是不是有种似曾相识的感觉,对呢。我们还是基于f_cli_f[5]来构建的前端Vite+React+TS项目。
❝
f_cli_f,我们后期打算升级一版,敬请期待。
当我们通过yarn/npm安装好对应的包时。我们就可以在pages新建一个Pdf2Img的目录。
然后构建如下的目录结构
├── KeyWordsHight.tsx
├── PdfShow.tsx
├── index.tsx
└── pdf.ts
这里呢,我们没有使用Web Worker或者Comlink[6]。是因为,在之前Rust 赋能前端 -- 写一个 File 转 Img 的功能/AI 赋能前端 -- 文本内容概要生成就有过相关的解释。所有,这里为了行文方便,就选择了最简单的方式 - Promise来处理针对PDF的相关操作。
引入mupdf的wasm
我们在前端项目中,新建一个wasm来存放在前端项目中要用到的各种wasm。
然后,我们创建一个mupdf的文件夹,这里面是存放mupdf编译后的文件内容。
├── mupdf-wasm.js
├── mupdf-wasm.wasm
├── mupdf.d.ts
└── mupdf.js
具体针对mupdf的wasm文件从哪里来,我们可以通过mupdf_github亦或者npm包来获取。当然,之前也介绍过,如果你还想使用更高级的功能,我们也可以自己通过命令来编译。
下面,我们就以功能点来各自介绍它们的作用。
2. 使用 Mupdf 蹂躏 PDF
这个标题确实吓人,但是看了下面的操作后,发现这个词真是很贴切。
下面,我们就来讲讲在前言出现过的mupdf的各种能力。

在这节中,我们就直接使用代码来演示mupdf赋予我们的能力。如果想了解更多关于Mupdf在前端环境的使用方式,可以翻看mupdf_core API[7]。
初始化mudpf实例
我们将初始化mupdf放置在pdf.ts文件中。然后,我们在pdf.ts存储一个全局变量(doc)来表示mupdf的实例。
let doc: mupdf.Document;

export function getInstance(buffer: ArrayBuffer) {
  doc = mupdf.Document.openDocument(buffer, 'application/pdf');
}
这样,在页面中,我们可以通过input的onChange或者通过fetch来获取pdf的ArrayBuffer资源。
而我们这里是通过input来处理pdf。在index.tsx中,我们有一个input的onChange的回调。
  const handleFileChange = (e: React.ChangeEvent<HTMLInputElement>) => {
    const files = e.target.files;
    if (files && files.length > 0) {
      const file = files[0];
      const reader = new FileReader();

      reader.onload = (event) => {
        const arrayBuffer = event.target?.result as ArrayBuffer;
        getInstance(arrayBuffer);
      };

      reader.readAsArrayBuffer(file);
    }
  };
这样,我们在每次接收到arrayBuffer后,就会实例化对于的mupdf。
获取元数据
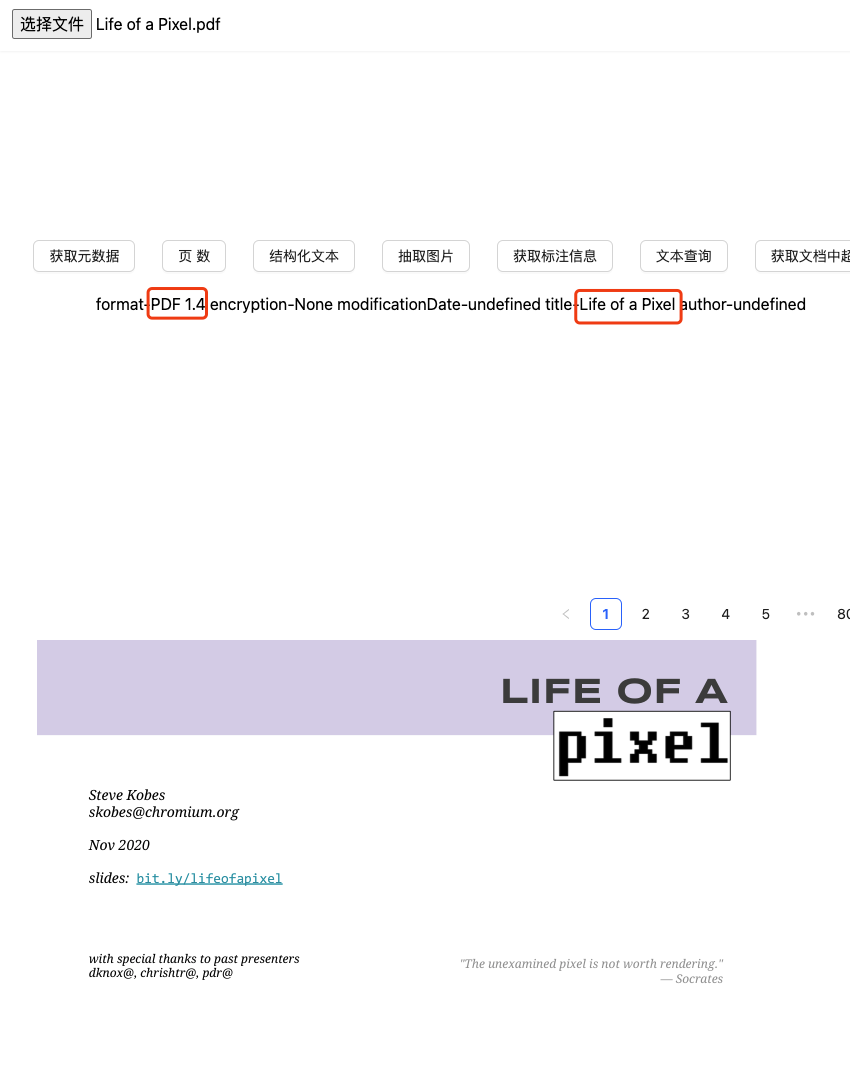
我们可以通过如下代码来获取一个PDF的元数据信息。
export function getMetadata(): Promise<string> {
  return new Promise((res) => {
    const format = doc.getMetaData('format');
    const modificationDate = doc.getMetaData('info:ModDate');
    const encryption = doc.getMetaData('encryption');
    const author = doc.getMetaData('info:Author');
    const title = doc.getMetaData('info:Title');
    res(`format-${format}
        encryption-${encryption}
        modificationDate-${modificationDate}
        title-${title}
        author-${author}
        `);
  });
}
当然,我们还可以获取其他的元数据信息。
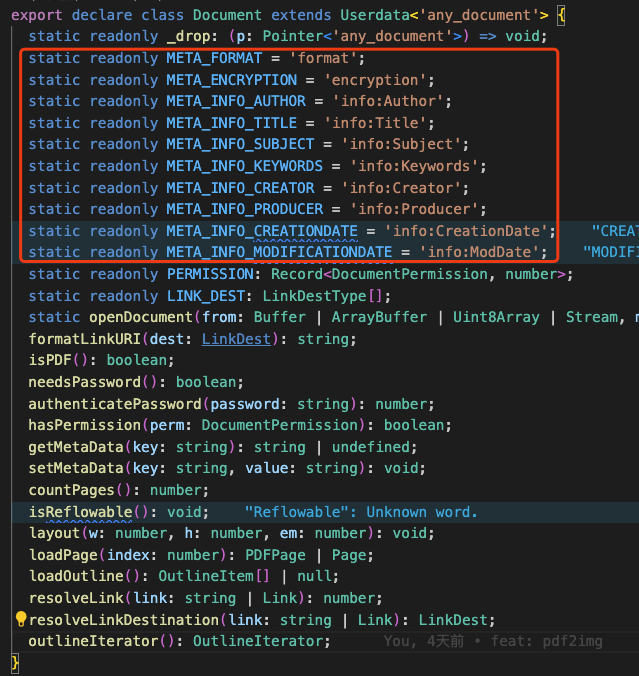
我们还可以通过setMetaData(key: string, value: string)来对某个元数据设定值。
效果展示
页数
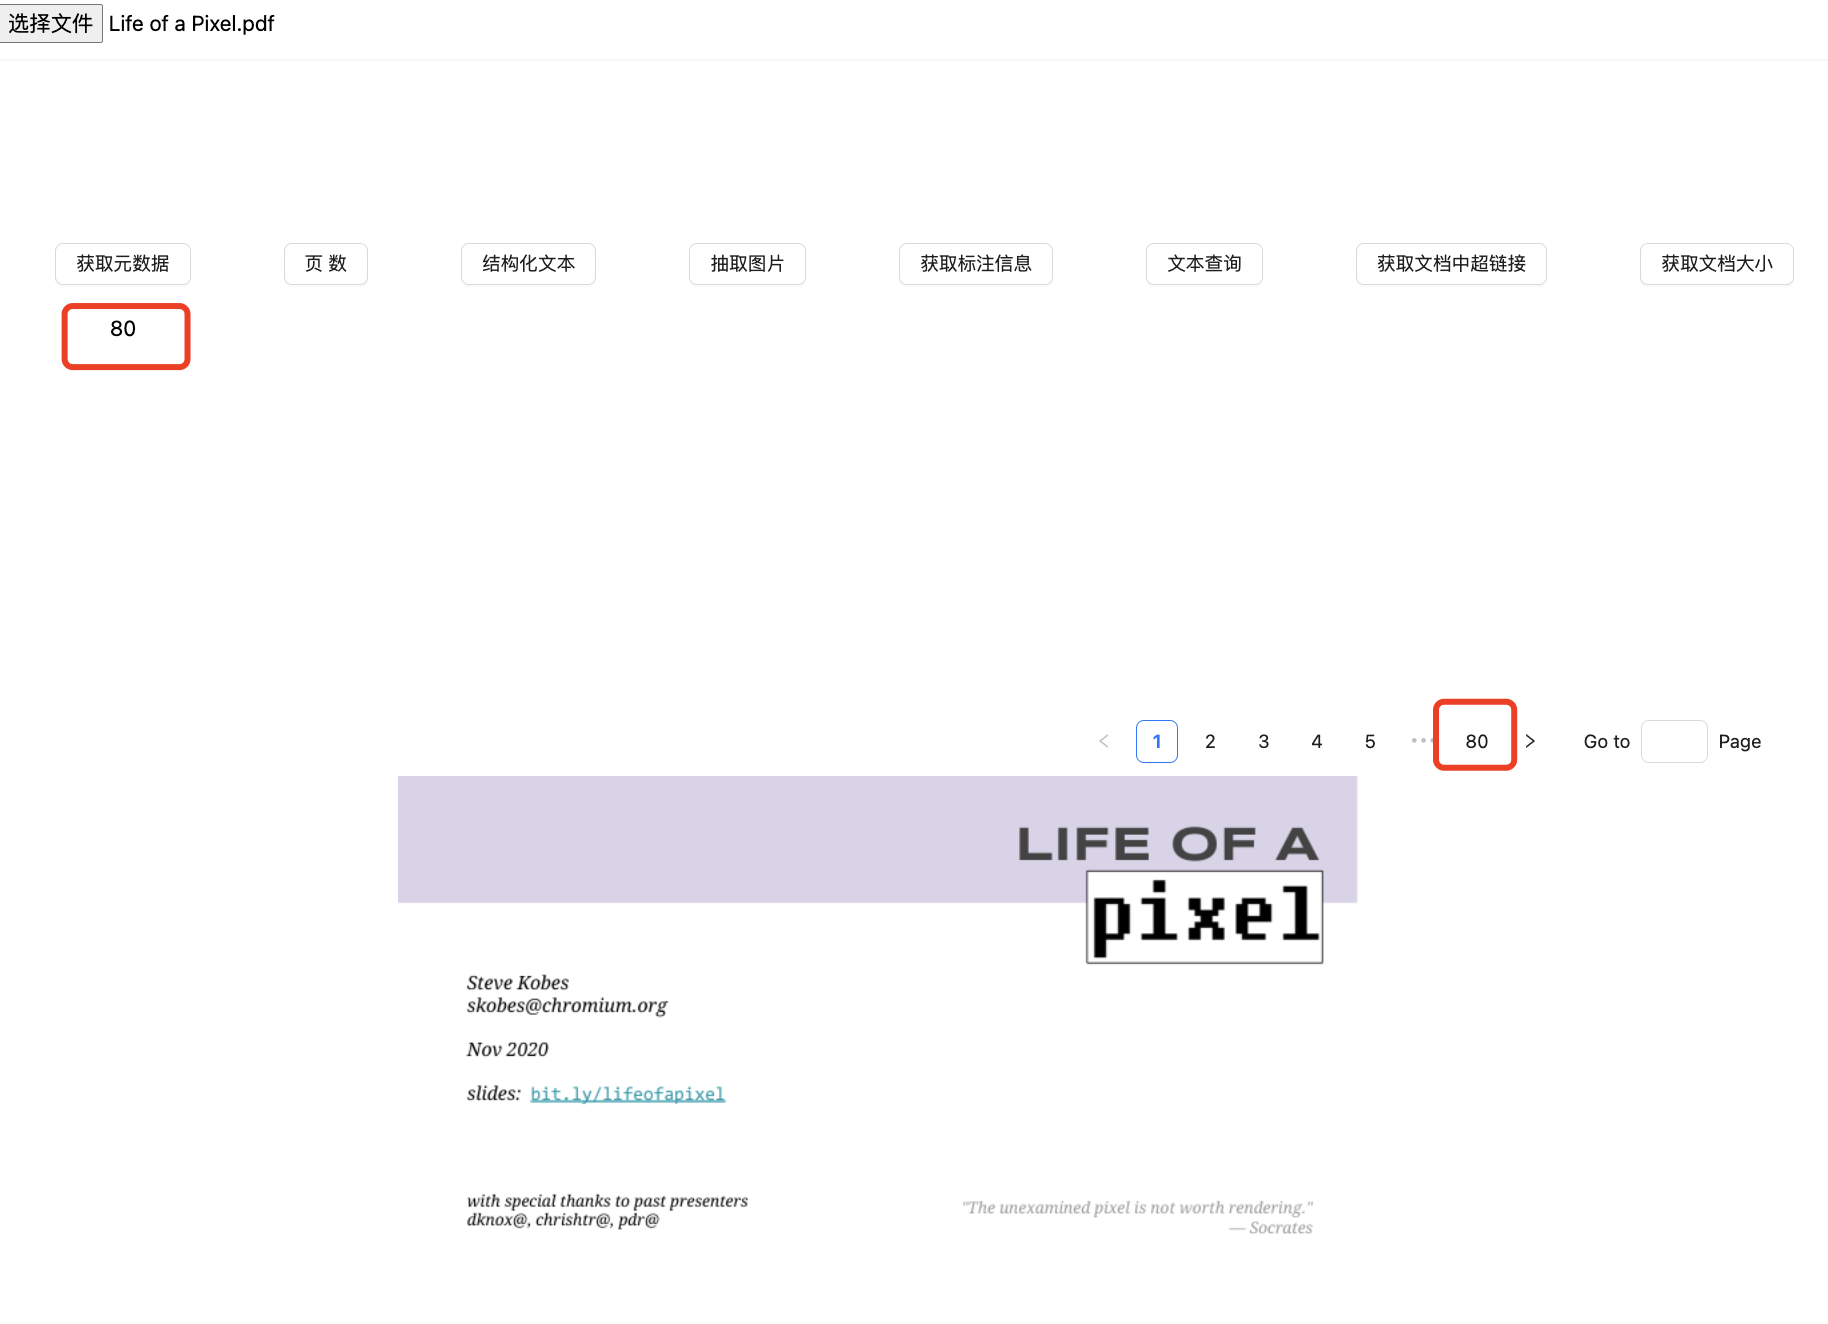
我们可以通过doc.countPages()来获取pdf的总页数。
那既然,PDF的总页面信息有了,是不是我们可以将其做分页处理。这个我们在下一节中会讲到。
❝有些功能,我们为了行文的方便,在介绍一些功能时,只对其某个
page页面进行处理。其实,如果你想通过下面的功能获取全部doc.countPages()来对全文档进行操作处理。
效果展示
结构化文本
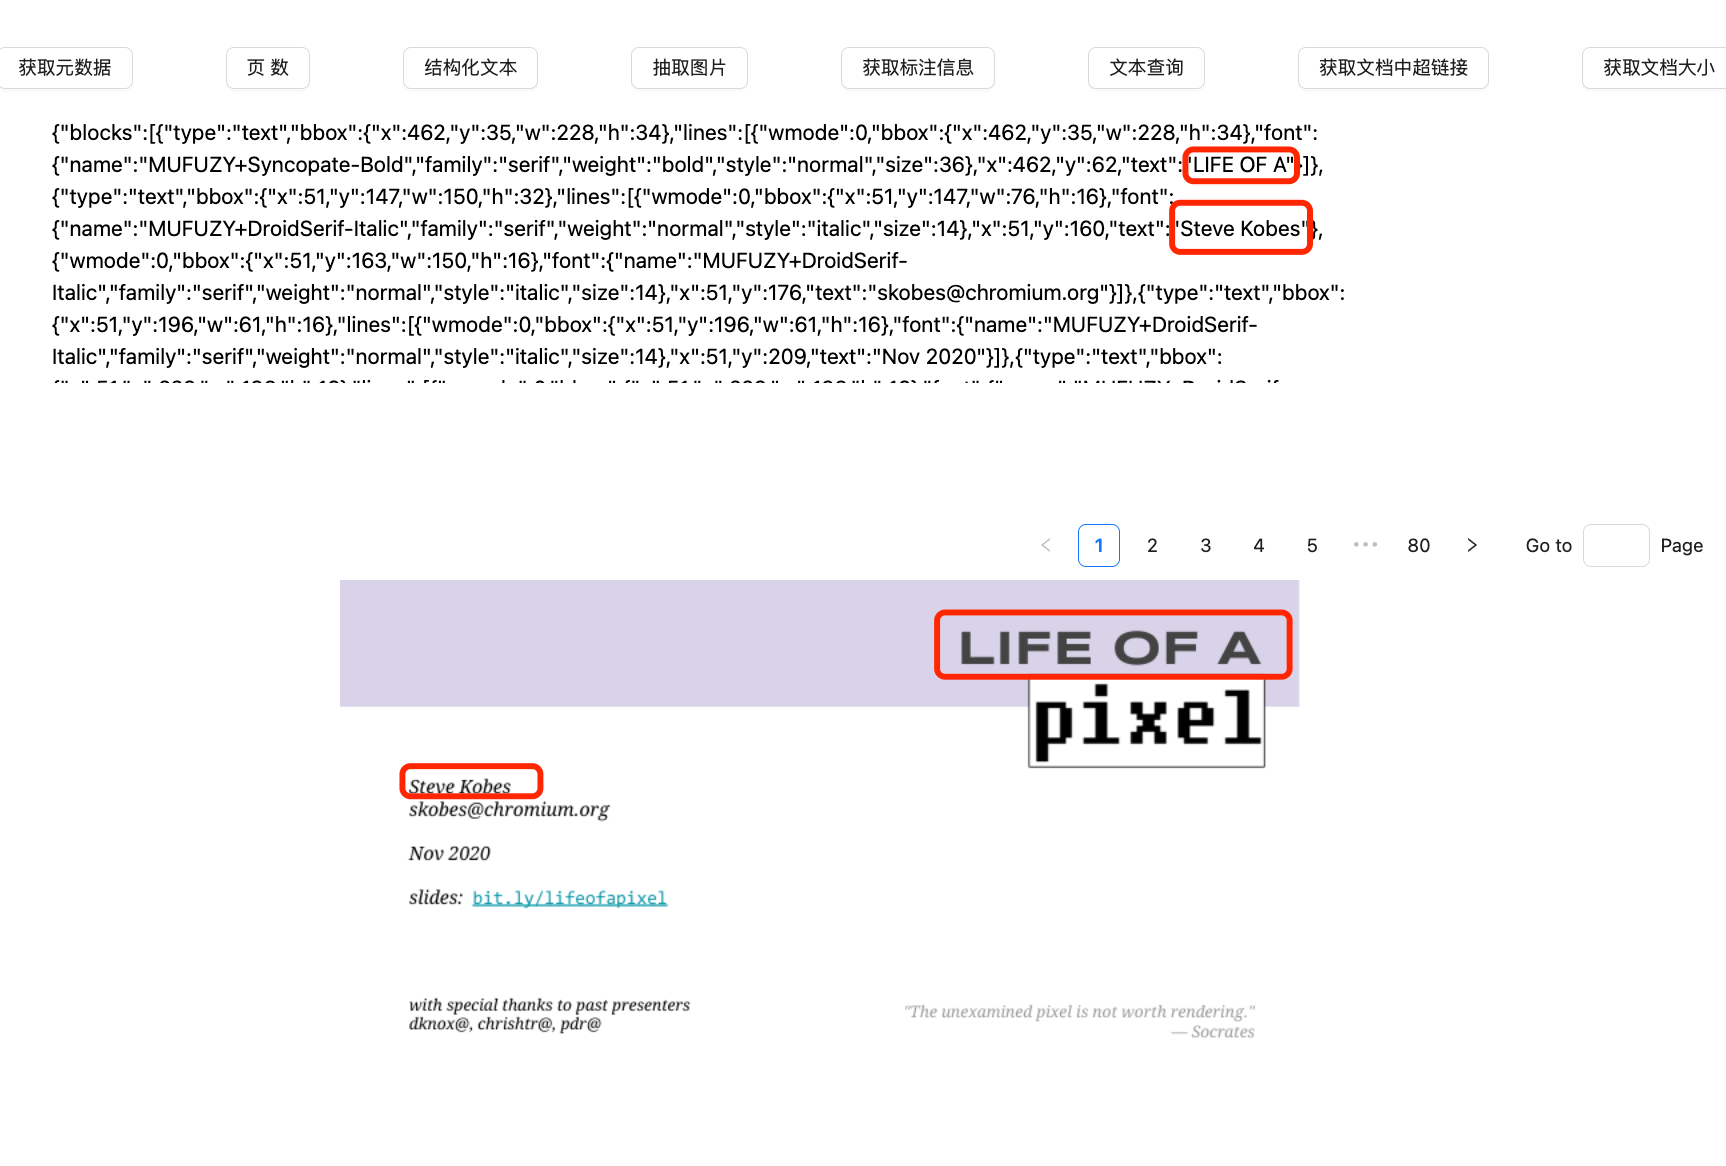
我们可以通过toStructuredText来抽离指定页面的文本内容。
export function getStructuredText(page: number): Promise<string> {
  return new Promise((res) => {
    const pageContent = doc.loadPage(page);
    const json = pageContent.toStructuredText('preserve-whitespace').asJSON();
    res(json);
  });
}
通过toStructuredText返回了一个StructuredText类型的数据。
export declare class StructuredText extends Userdata<'fz_stext_page'> {
  static readonly _drop: (p: Pointer<'fz_stext_page'>) => void;
  static readonly SELECT_CHARS = 0;
  static readonly SELECT_WORDS = 1;
  static readonly SELECT_LINES = 2;
  walk(walker: StructuredTextWalker): void;
  asJSON(scale?: number): string;
  copy(p: Point, q: Point): string;
  highlight(p: Point, q: Point, max_hits?: number): Quad[];
  search(needle: string, max_hits?: number): Quad[][];
}
从上面定义我们可以看到,我们可以基于StructuredText做更精细化的操作。(walk/search等)
效果展示
抽取图片
在pdf.ts中定义如下代码
type imagesType = {
  bbox: [number, number, number, number];
  matrix: [number, number, number, number, number, number];
  image: mupdf.Image;
};

export function getImages(page: number): Promise<imagesType[]> {
  return new Promise((res) => {
    const result: imagesType[] = [];
    const pageContent = doc.loadPage(page);
    pageContent.toStructuredText('preserve-images').walk({
      onImageBlock(bbox, matrix, image) {
        result.push({ bbox, matrix, image });
      },
    });
    res(result);
  });
}
然后在页面中的指定函数中,处理getImages返回的数据信息
 if (ability === '抽取图片') {
        res = await getImages(page);
        const arr = [];
        res.map(async (item) => {
          const image = item.image;
          const pngUint8Array = image.toPixmap().asPNG();
          const blob = new Blob([pngUint8Array], { type: 'image/svg' });
          const url = await BlobToObjectURL(blob);
          arr.push(url);
        });

        setImgUrlArr(arr);
      }
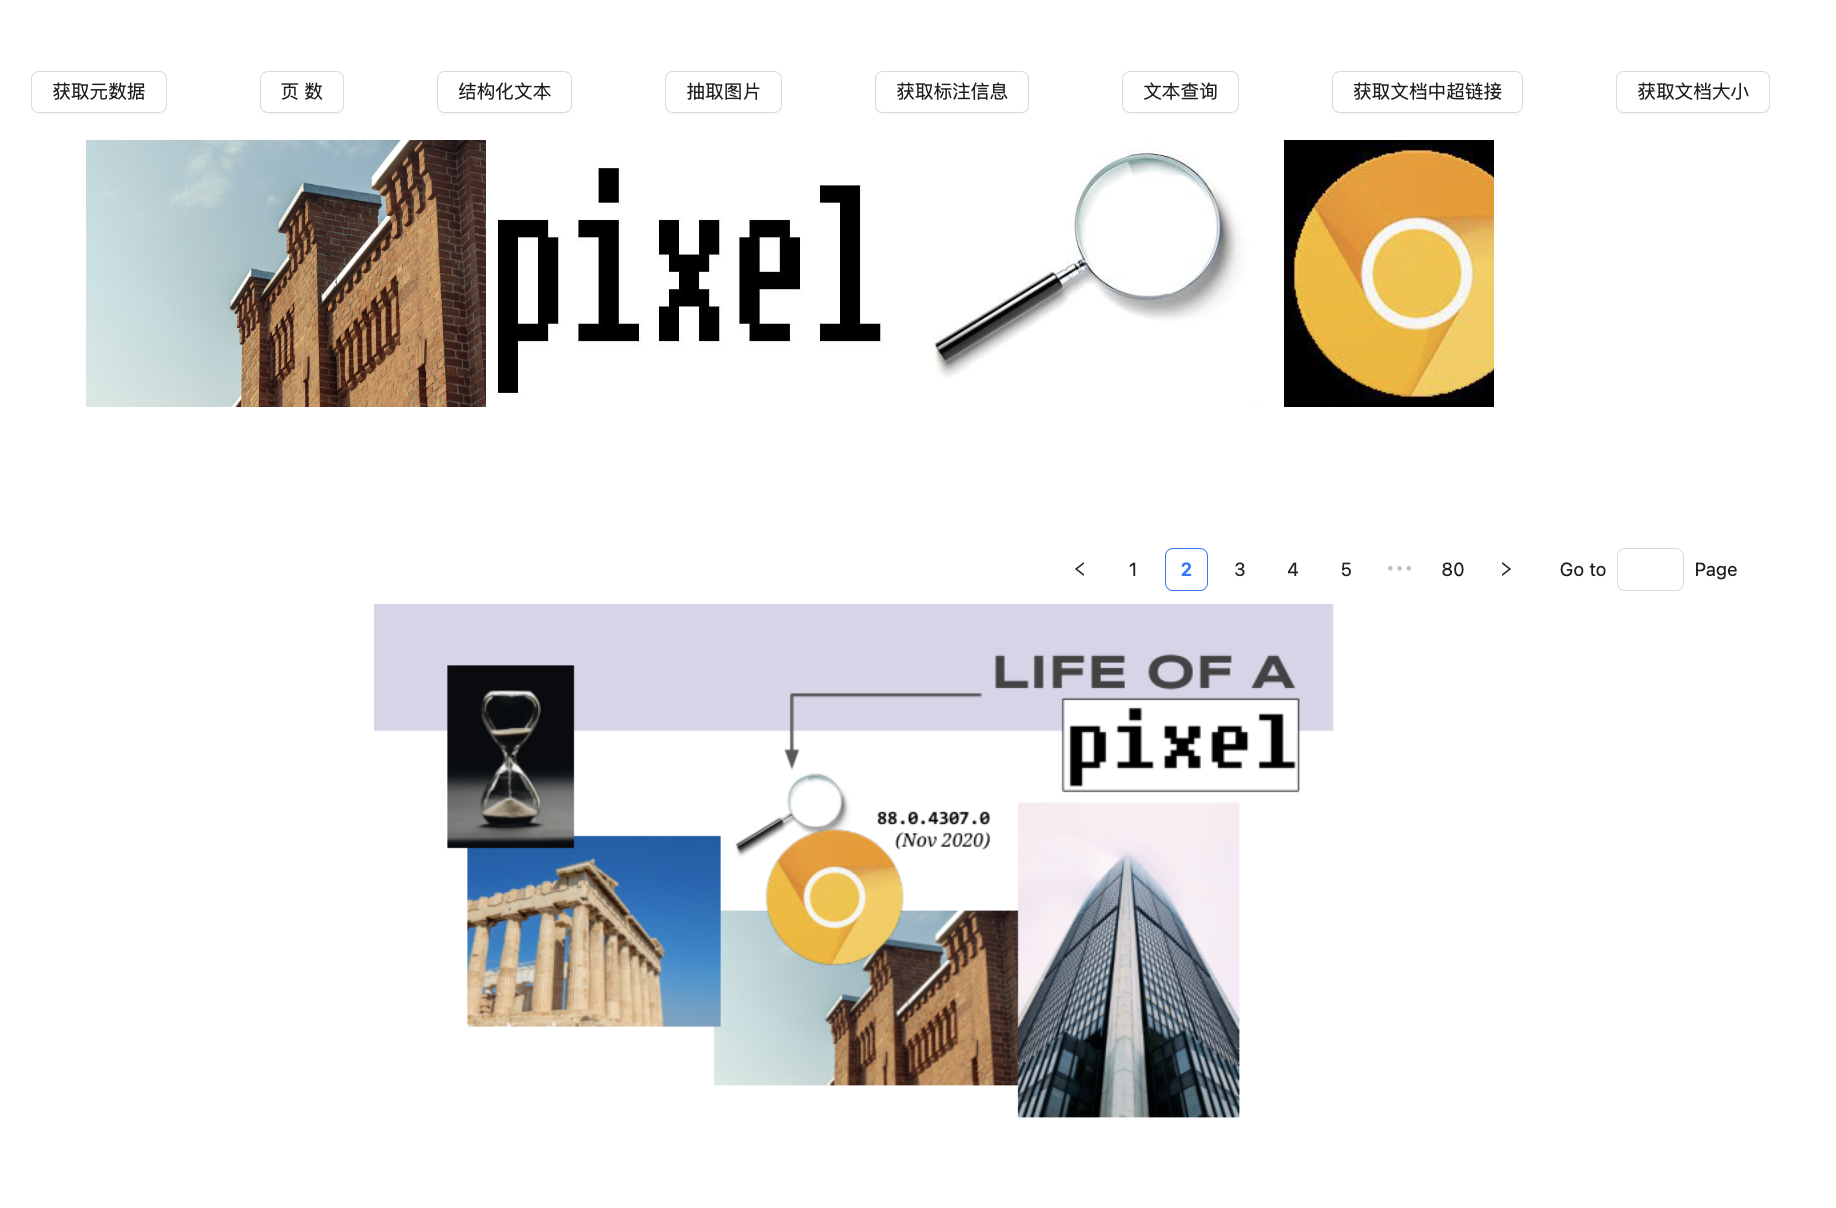
上面的代码就是用于抽取某页pdf中图片信息。
效果展示
文本查询
在pdf.ts中定义如下代码
type Quad = [number, number, number, number, number, number, number, number];
export function search(page: number, keywords: string): Promise<Quad[][]> {
  return new Promise((res) => {
    const pageContent = doc.loadPage(page);
    const result = pageContent.search(keywords);
    res(result);
  });
}
效果展示
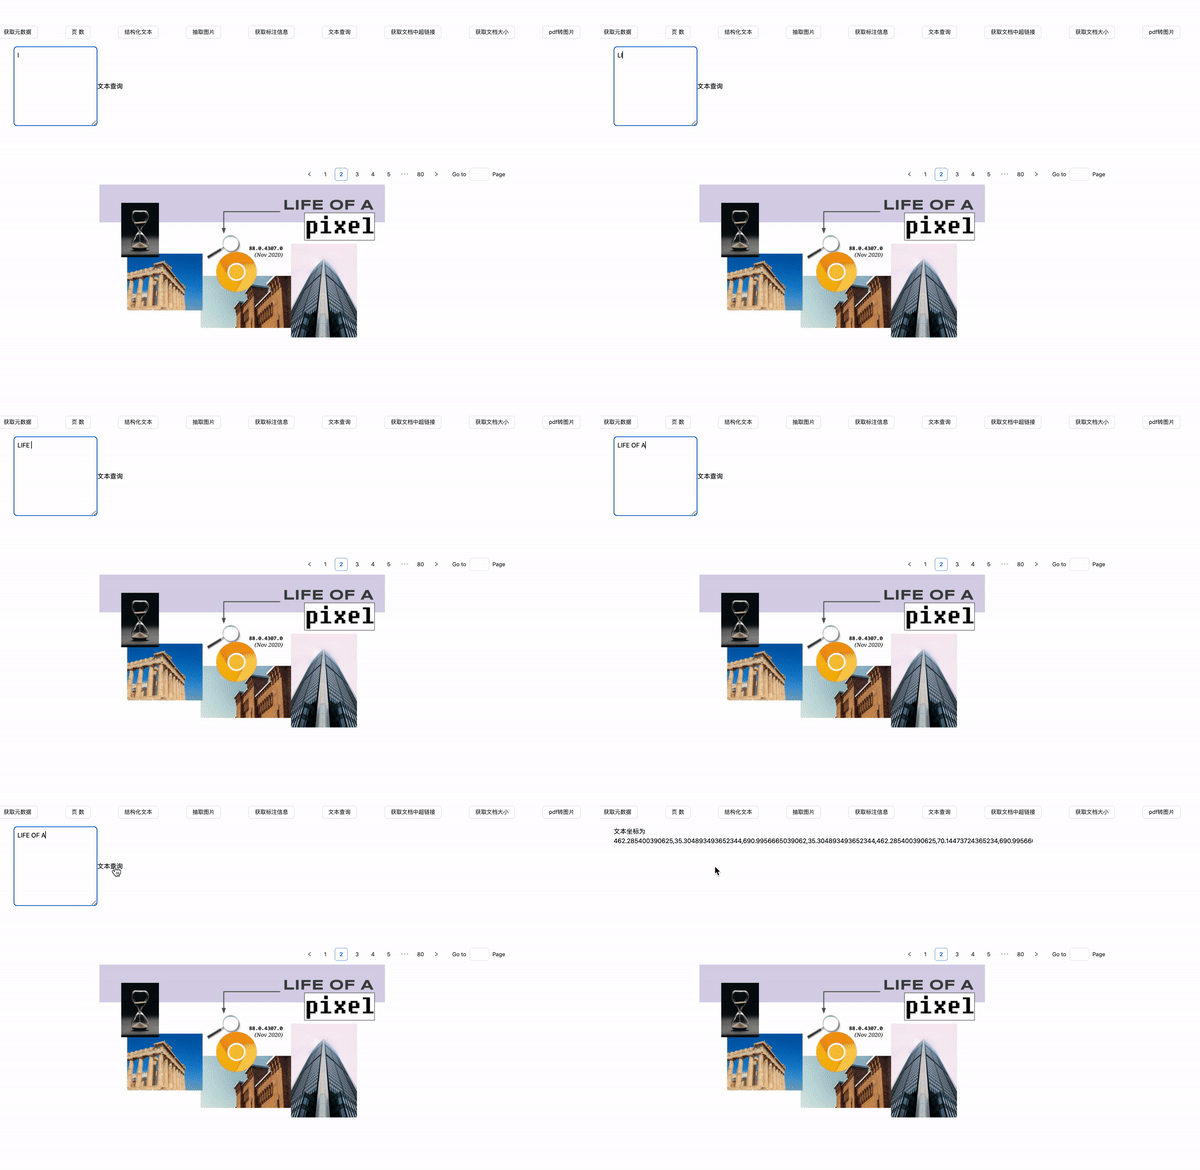
我们通过search可以获得对应keywords在原文档中的位置。那么,就给我提供了一个机会,用于该文本的标注处理。这个我们在下一节中介绍。
获取文档中超链接
在pdf.ts中定义如下代码
export function getLinks(page: number): Promise<mupdf.Link[]> {
  return new Promise((res) => {
    const pageContent = doc.loadPage(page);
    const links = pageContent.getLinks();
    res(links);
  });
}
效果展示
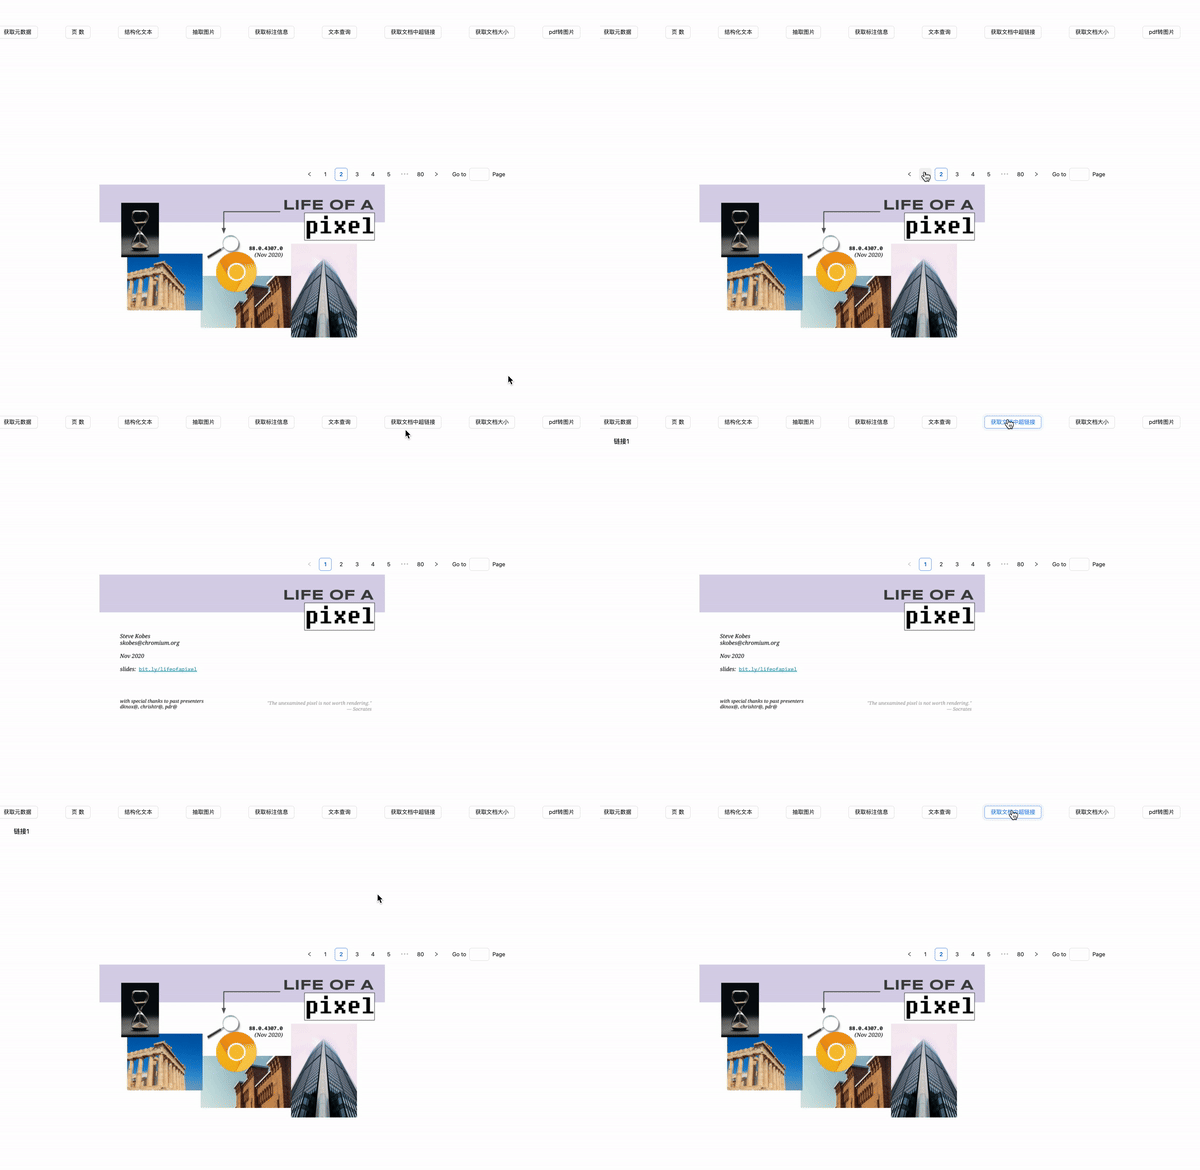
我们可以看到,它能准确识别出pdf文档中的超链接。
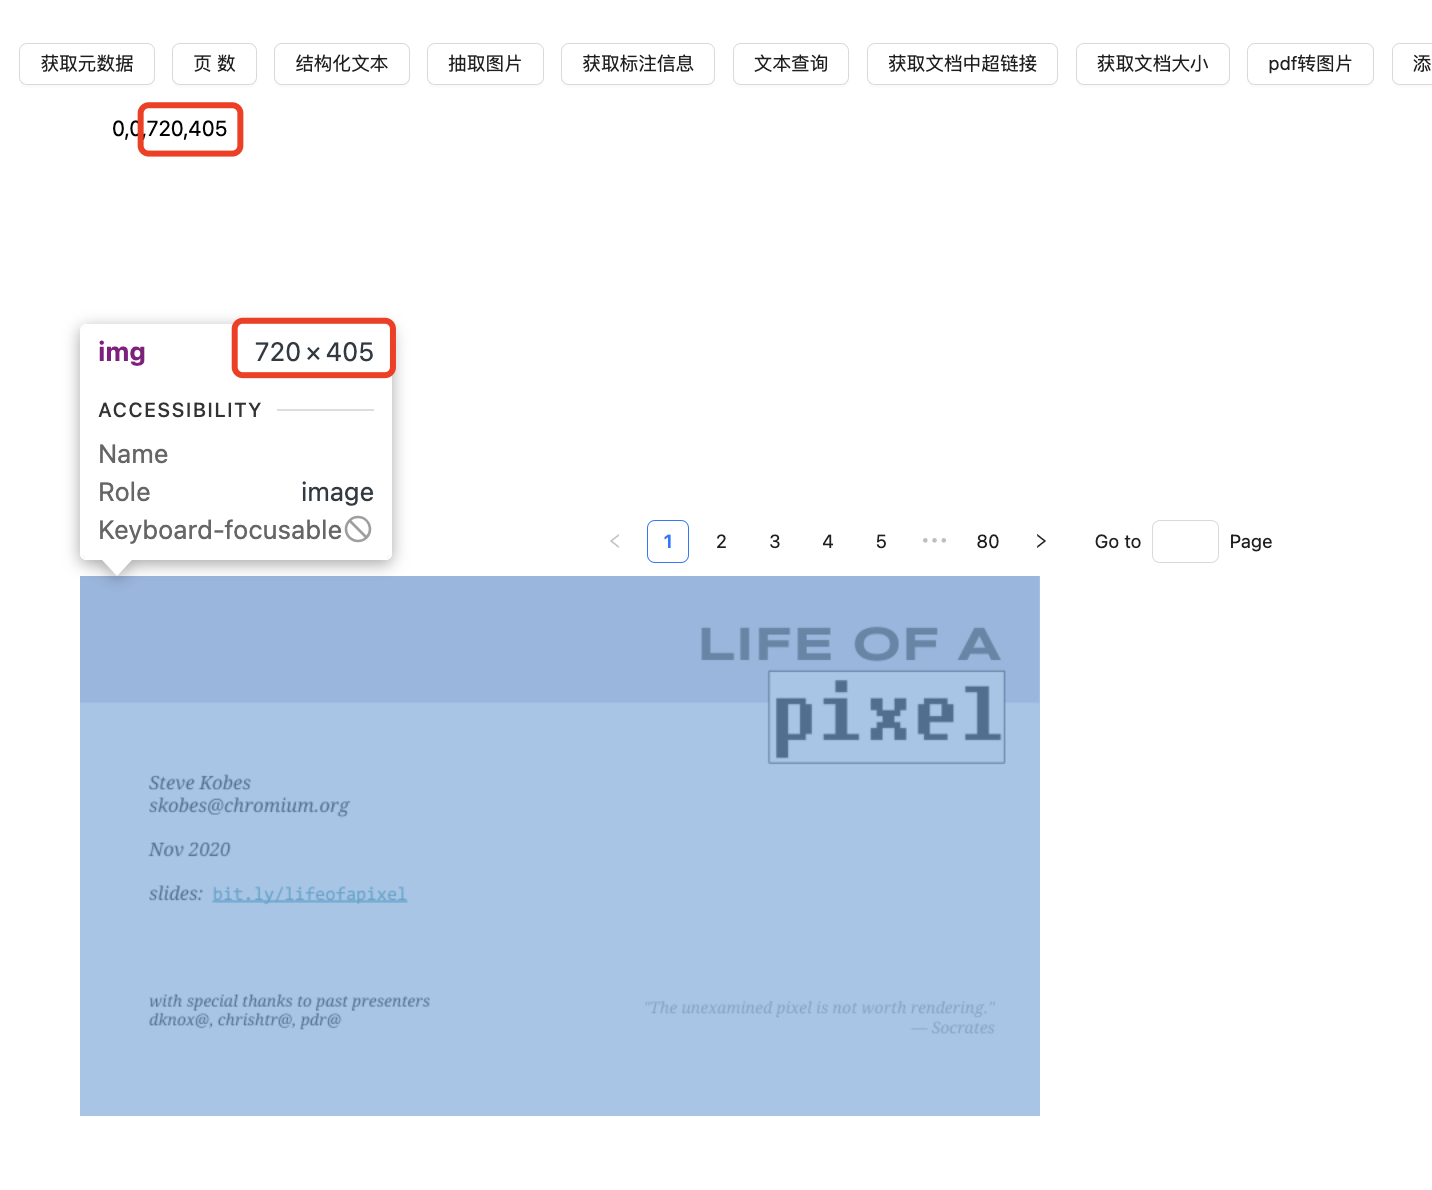
获取文档大小
type Rect = [number, number, number, number];
export function getBounds(page: number): Promise<Rect> {
  return new Promise((res) => {
    const pageContent = doc.loadPage(page);
    const bounds = pageContent.getBounds();
    res(bounds);
  });
}
效果展示
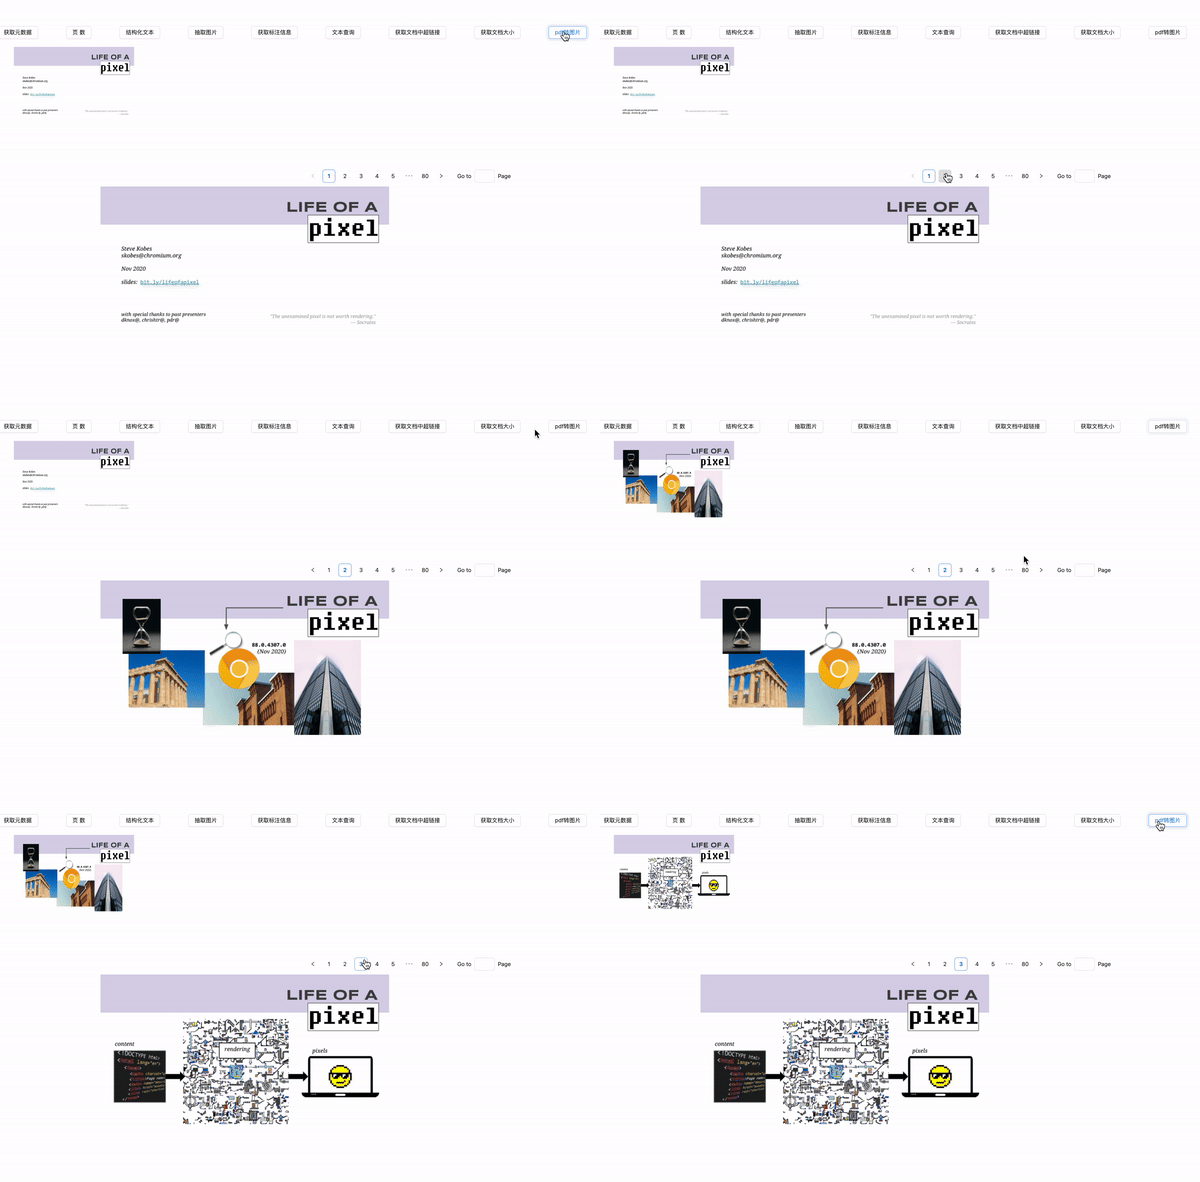
pdf转图片
export function getContentByPage(page: number): Promise<string> {
  return new Promise((res) => {
    const pageContent = doc.loadPage(page);
    const pixmap = pageContent.toPixmap(
      mupdf.Matrix.identity,
      mupdf.ColorSpace.DeviceRGB,
      false,
      true
    );
    const pngUint8Array = pixmap.asPNG();
    const blob = new Blob([pngUint8Array], { type: 'image/svg' });
    blobToBase64Uri(blob).then((base64) => {
      res(base64);
    });
  });
}
效果展示
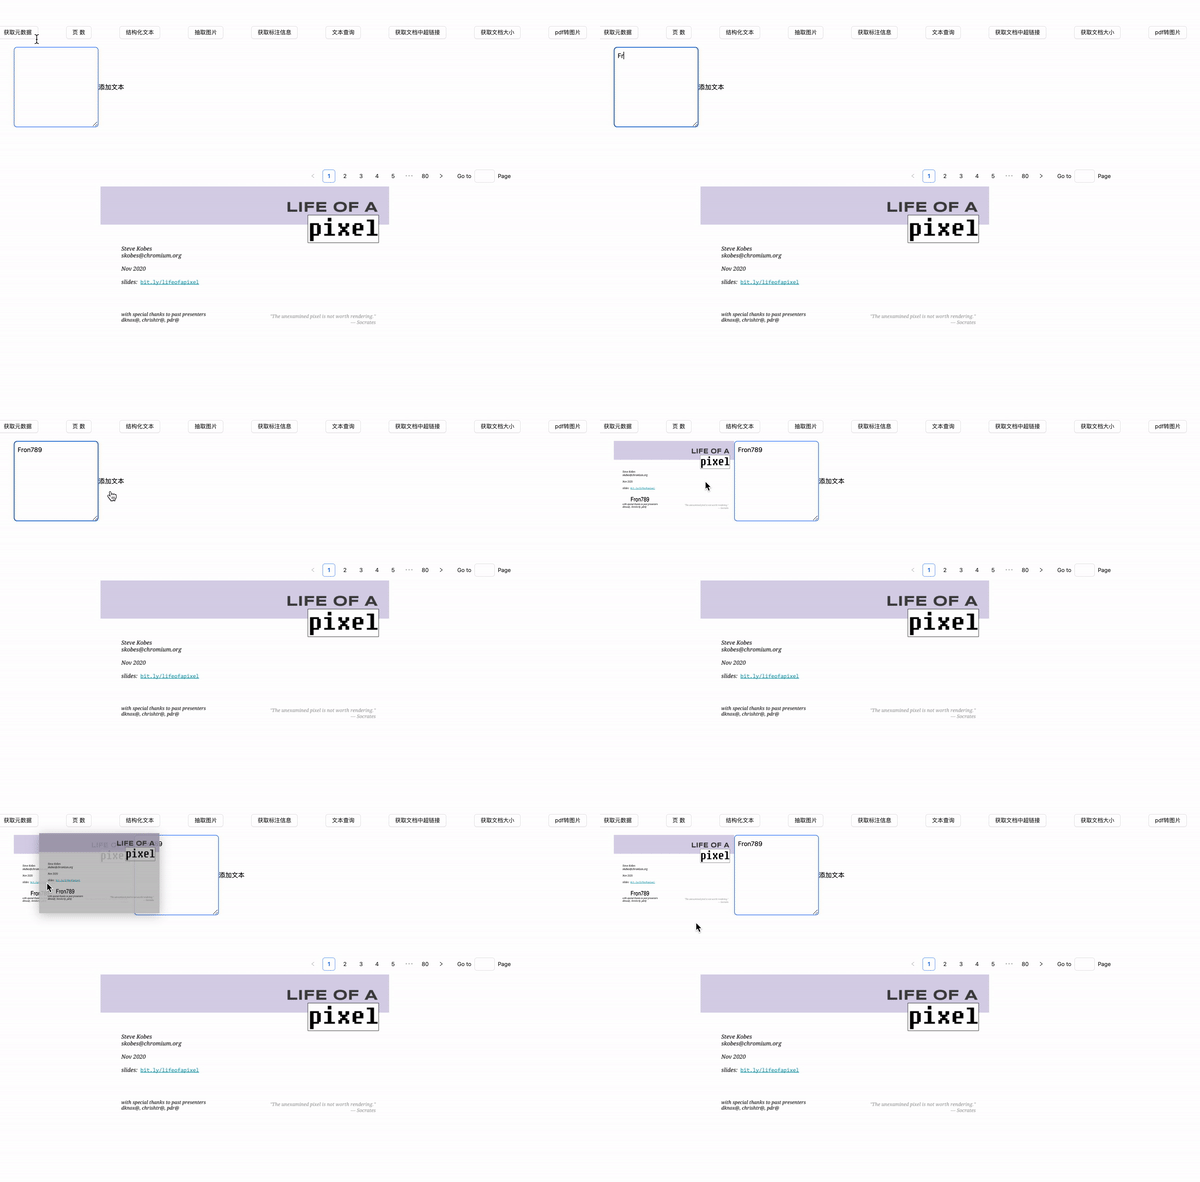
添加文本
export type textType = {
  text: string;
  x: number;
  y: number;
  fontFamily: string;
  fontSize: number;
};

export function addText(pageNumber: number, textInfo: textType): Promise<Uint8Array> {
  return new Promise((res) => {
    const { text, x, y, fontFamily, fontSize } = textInfo;
    const page = doc.loadPage(pageNumber) as mupdf.PDFPage;
    const pageObj = page.getObject();

    const pdfDocument = doc as mupdf.PDFDocument;

    const font = pdfDocument.addSimpleFont(new mupdf.Font(fontFamily));

    let resources = pageObj.get('Resources');
    if (!resources.isDictionary())
      pageObj.put('Resources', (resources = pdfDocument.newDictionary()));

    let resFonts = resources.get('Font');
    if (!resFonts.isDictionary()) resources.put('Font', (resFonts = pdfDocument.newDictionary()));

    resFonts.put('F1', font);

    // create drawing operations
    const extra_contents = pdfDocument.addStream(
      'BT /F1 ' + fontSize + ' Tf 1 0 0 1 ' + x + ' ' + y + ' Tm (' + text + ') Tj ET',
      {}
    );

    // add drawing operations to page contents
    const page_contents = pageObj.get('Contents');
    if (page_contents.isArray()) {
      // Contents is already an array, so append our new buffer object.
      page_contents.push(extra_contents);
    } else {
      // Contents is not an array, so change it into an array
      // and then append our new buffer object.
      const new_page_contents = pdfDocument.newArray();
      new_page_contents.push(page_contents);
      new_page_contents.push(extra_contents);
      pageObj.put('Contents', new_page_contents);
    }

    const outputBuffer = pdfDocument.saveToBuffer('incremental');
    res(outputBuffer.asUint8Array());
  });
}
效果展示
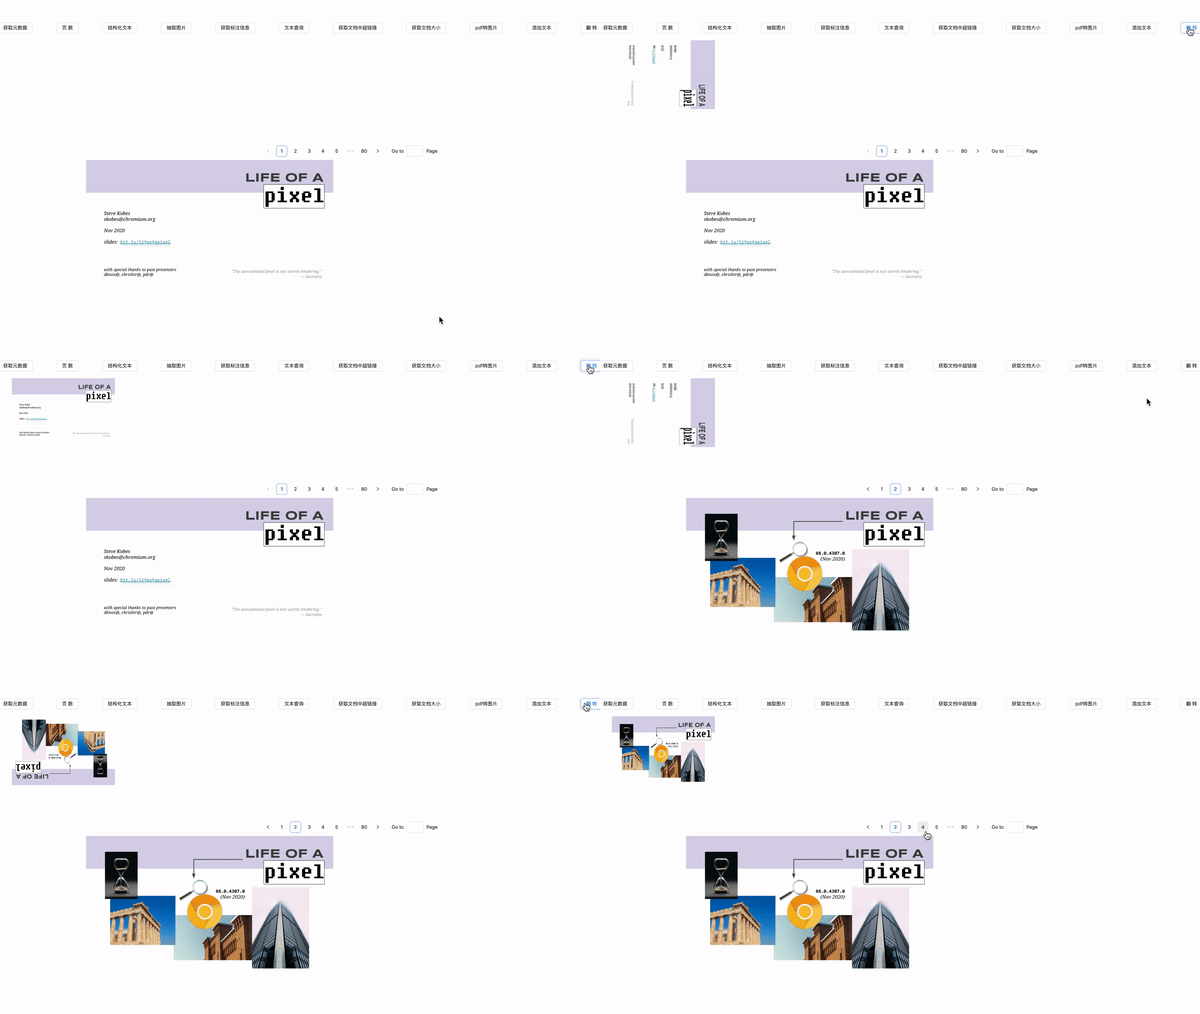
翻转
export function rotate(pageNumber: number, degrees: number): Promise<Uint8Array> {
  return new Promise((res) => {
    const page = doc.loadPage(pageNumber) as mupdf.PDFPage;
    const pageObj = page.getObject();

    const rotate = pageObj.getInheritable('Rotate');
    pageObj.put('Rotate', (rotate as unknown as number) + degrees);

    const outputBuffer = (doc as mupdf.PDFDocument).saveToBuffer('incremental');
    res(outputBuffer.asUint8Array());
  });
}
效果展示
截取
type CropInfo = {
  x: number;
  y: number;
  width: number;
  height: number;
};

export function crop(pageNumber: number, cropInfo: CropInfo): Promise<Uint8Array> {
  return new Promise((res) => {
    const { x, y, width, height } = cropInfo;
    const page = doc.loadPage(pageNumber) as mupdf.PDFPage;
    page.setPageBox('CropBox', [x, y, x + width, y + height]);

    const outputBuffer = (doc as mupdf.PDFDocument).saveToBuffer('incremental');
    res(outputBuffer.asUint8Array());
  });
}
效果展示
文档分割
export function split(): Promise<Uint8Array[]> {
  return new Promise((res) => {
    const splitDocuments: Uint8Array[] = [];
    const pdfDocument = doc as mupdf.PDFDocument;

    for (let i = 0; i < pdfDocument.countPages(); i++) {
      const newDoc = new mupdf.PDFDocument();
      newDoc.graftPage(0, pdfDocument, i);
      const buffer = newDoc.saveToBuffer('compress');
      splitDocuments.push(buffer.asUint8Array());
      res(splitDocuments);
    }
  });
}
效果展示
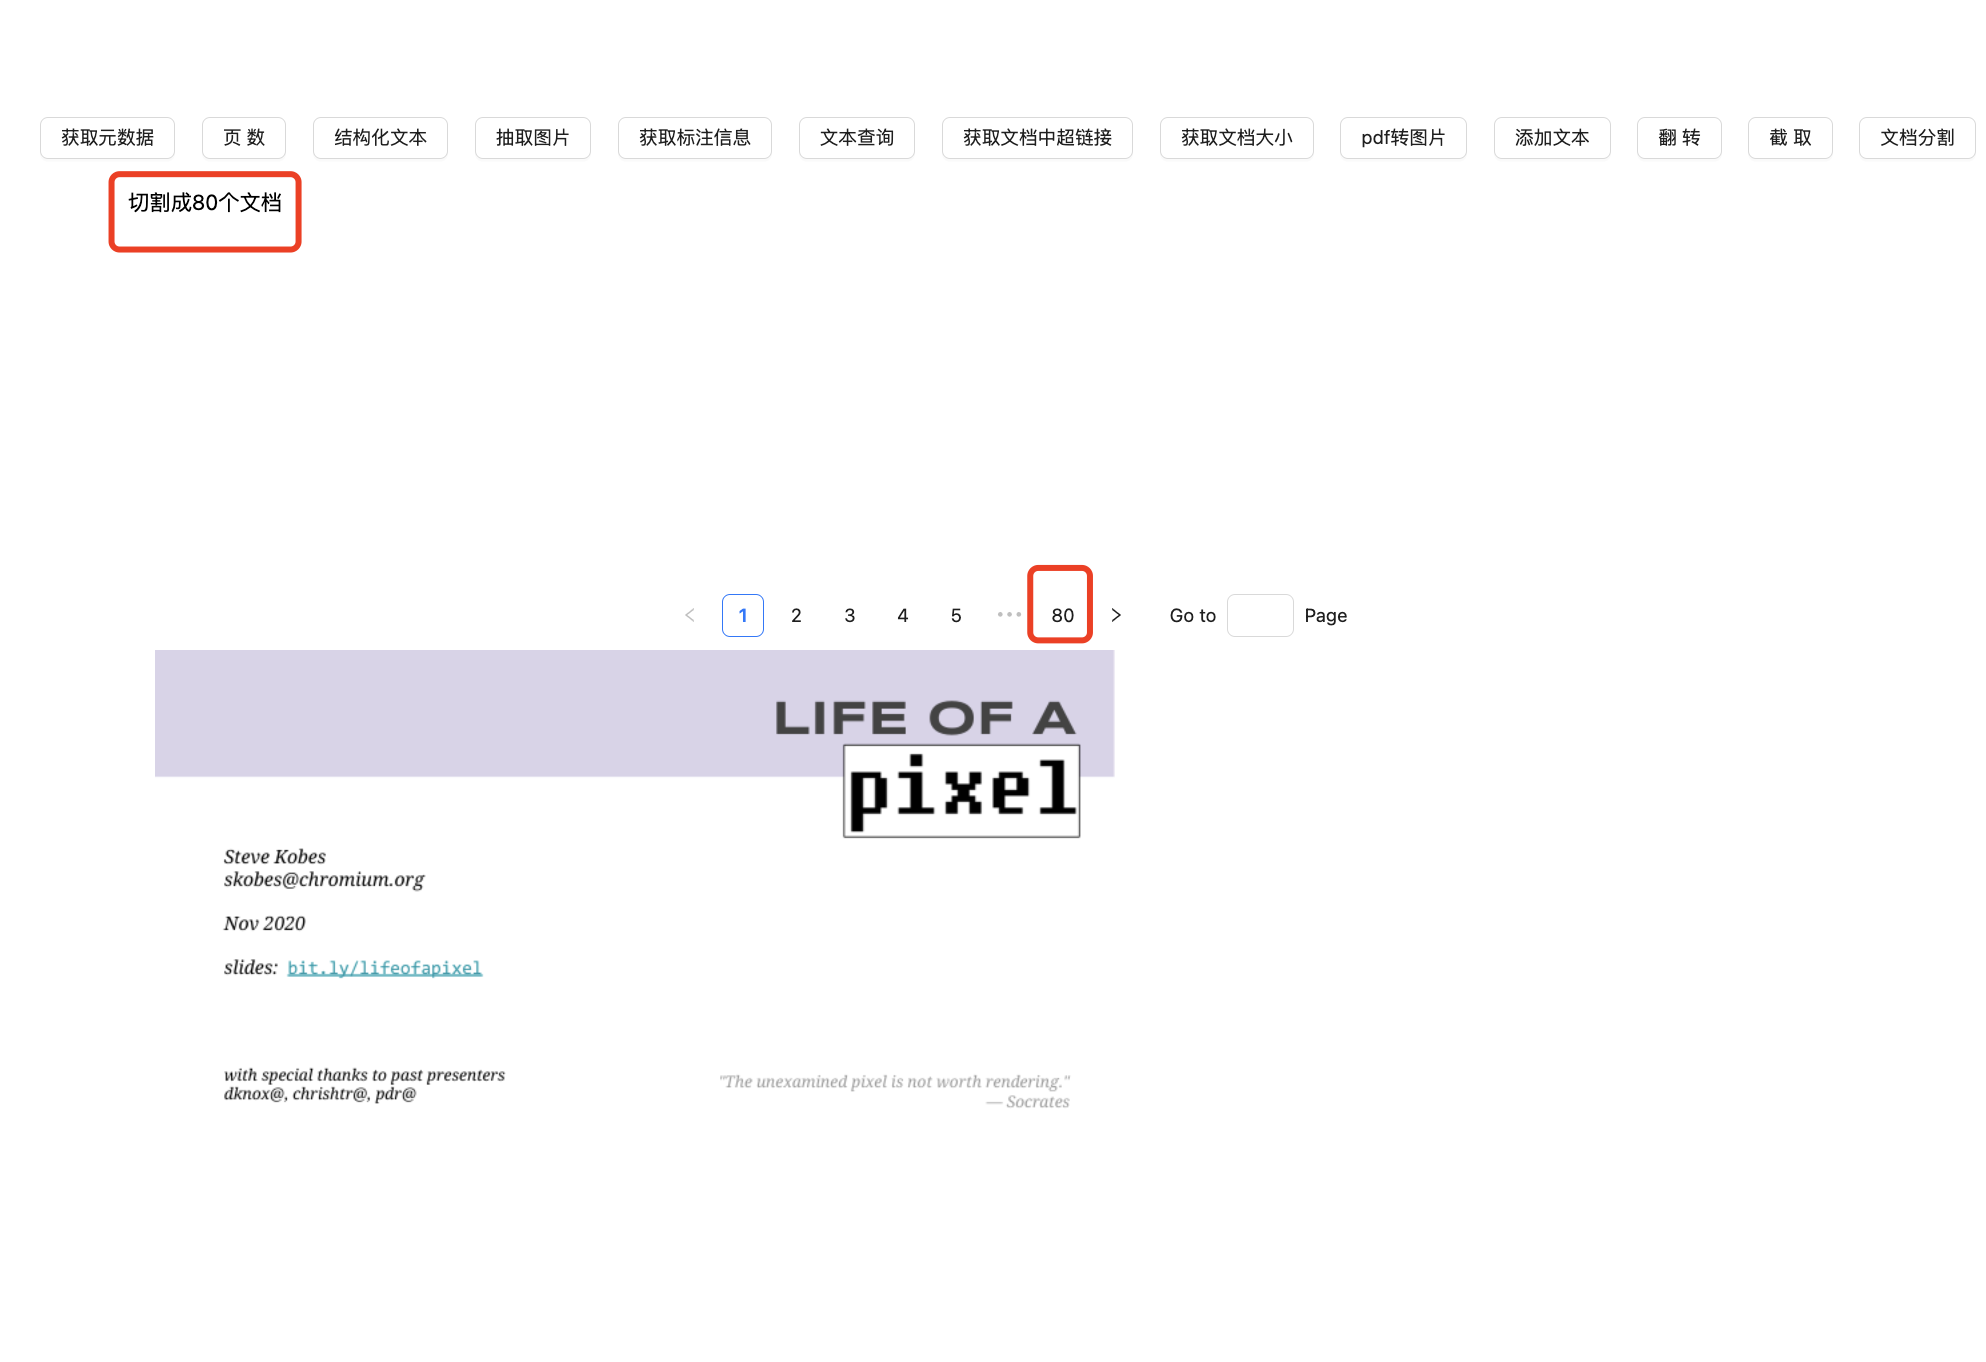
3. PDF 分页展示和文本标注
我们在第二节,展示了如何使用mupdf处理pdf。而现在呢,我们就糅合上面的几种能力来实现一个,PDF分页和文本标注。
我们把用到的一些能力放到下面
-
获取PDF总页数 -
PDF转图片 -
文本查询
我们的主要逻辑都集中在PdfShow.tsx和KeyWordsHight.tsx。
PdfShow.tsx
主要代码如下:
import { Pagination, Spin } from 'antd';
import { useEffect, useState } from 'react';
import { getPageCount, getContentByPage, searchKeyWords, SearchResult } from './pdf';
import KeyWordsHight from './KeyWordsHight';
export interface MuFileProps {
  buffer: ArrayBuffer;
  searchQuery: string;
}
const PdfShow: React.FC<MuFileProps> = (props) => {
  const { buffer, searchQuery } = props;
  const [count, setCount] = useState(0);
  const [loading, setLoading] = useState(false);
  const [page, setPage] = useState(0);
  const [fileContent, setFileContent] = useState('');
  const [keywordsResults, setKeywordsResults] = useState({} as SearchResult);

  useEffect(() => {
    const getFileInfo = async () => {
      setLoading(true);
      const pageCount = await getPageCount(buffer);
      setCount(pageCount);
      setPage(1);
      const pageContent = await getContentByPage(0);
      setFileContent(pageContent);
      setLoading(false);
    };
    buffer && getFileInfo();
  }, [buffer]);

  useEffect(() => {
    const searchKey = async () => {
      const results = await searchKeyWords(searchQuery, 1);
      setKeywordsResults(results);
    };
    if (searchQuery) {
      searchKey();
    }
  }, [searchQuery]);


  const onPaginationChange = async (page: number) => {
    setKeywordsResults({} as SearchResult);
    setLoading(true);
    setPage(page);
    const pageContent = await getContentByPage(page - 1);
    setFileContent(pageContent);
    setLoading(false);
  };

  return (
    <Spin spinning={loading}>
      <section style={{ height: '100%', width: '100%' }}>
        <div
          style={{
            position: 'sticky',
            top: 0,
            zIndex: 1,
            backgroundColor: 'white',
            padding: '10px 0px',
          }}
        >
          {count > 0 && (
            <Pagination
              hideOnSinglePage
              defaultCurrent={1}
              defaultPageSize={1}
              total={count}
              showQuickJumper
              showSizeChanger={false}
              onChange={onPaginationChange}
            />
          )}
        </div>
        <KeyWordsHight
          fileContent={fileContent}
          pageNumber={page}
          searchResults={keywordsResults}
        />
      </section>
    </Spin>
  );
};

export default PdfShow;
从代码中,我们可以看出。
PdfShow主要是接收buffer数据,然后通过pdf.ts中的各种方法来初始化页面总数(count),进而构建和分页(Pagination)相关的逻辑,在处理page的过程中,通过fileContent来保存mupdf处理后的信息。
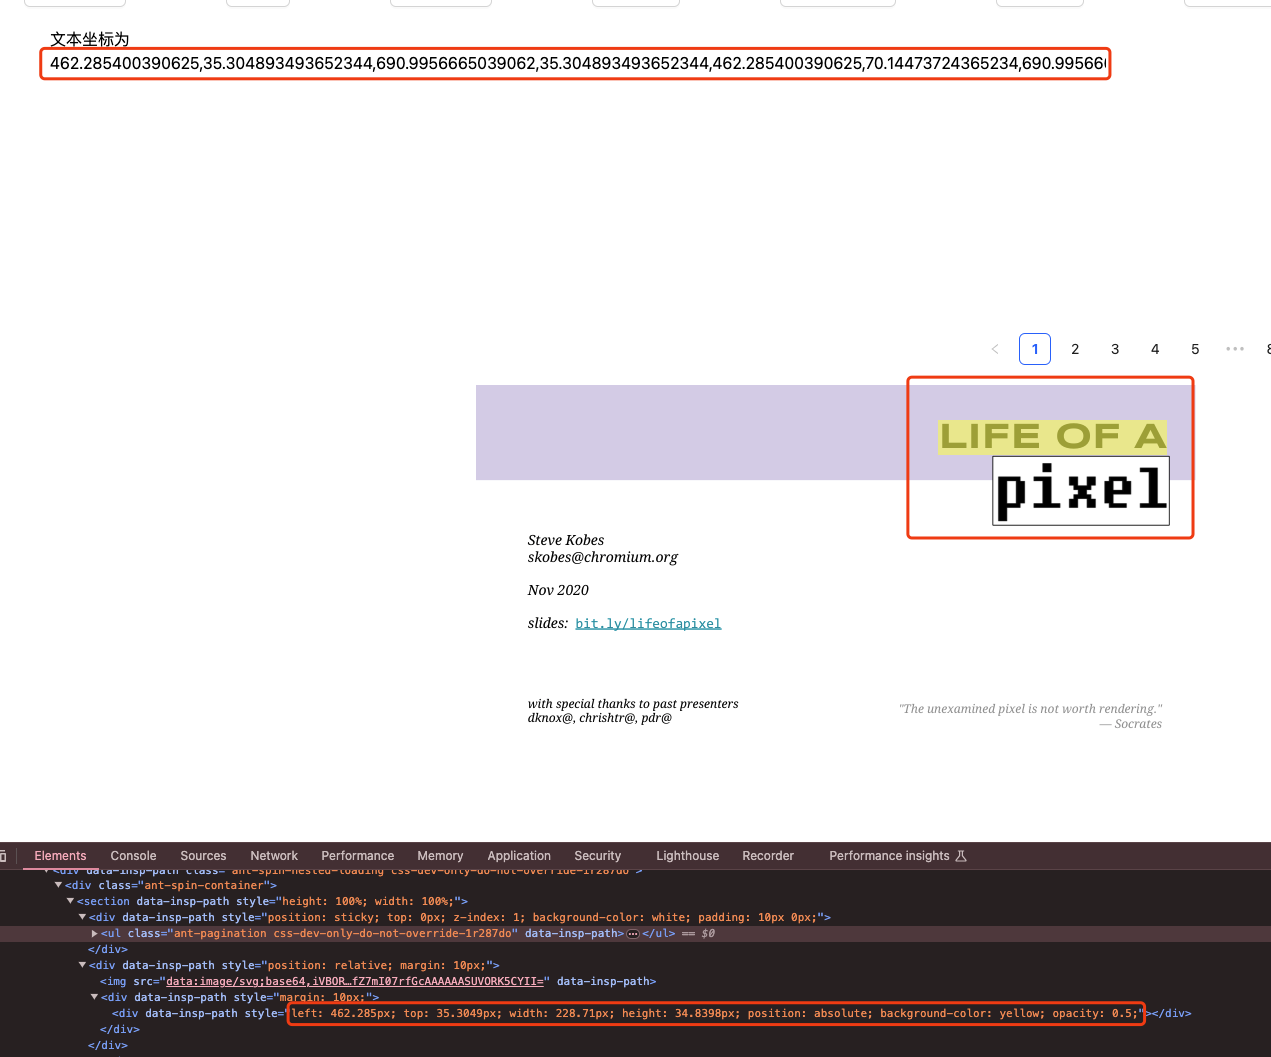
针对searchQuery,我们是通过pdf.ts中的searchKeyWords来找到对应的关键词的位置信息,并存储到keywordsResults中。
searchKeyWords的相关逻辑
export type Box = {
  x: number;
  y: number;
  w: number;
  h: number;
};

export type SearchResult = {
  page?: number;
  results: Box[];
  pageWidth?: number;
  pageHeight?: number;
};

export function searchKeyWords(keywords: string, page: number): Promise<SearchResult> {
  return new Promise((res) => {
    const pageContent = doc.loadPage(page);
    const hits = pageContent.search(keywords);
    const result = [];
    for (const hit of hits) {
      for (const quad of hit) {
        const [ulx, uly, urx, ury, llx, lly, lrx, lry] = quad;
        result.push({
          x: ulx,
          y: uly,
          w: urx - ulx,
          h: lly - uly,
        });
      }
    }
    res({ results: result });
  });
}
随后,我们将fileContent和keywordsResults都传人到KeyWordsHight组件中。
KeyWordsHight
import { useEffect, useRef, useState } from 'react';
import { Box, SearchResult } from './pdf';
type PngPageProps = {
  fileContent: string;
  pageNumber: number;
  searchResults?: SearchResult;
};

const KeyWordsHight = ({ fileContent, pageNumber, searchResults }: PngPageProps) => {
  const imgRef = useRef<HTMLImageElement>(null);
  const [boxes, setBoxes] = useState([] as Box[]);

  useEffect(() => {
    if (imgRef.current && searchResults?.results?.length) {
      const { results } = searchResults;
      if (results.length) {
        setBoxes(
          results?.map(
            (res) =>
              ({
                x: res.x,
                y: res.y,
                w: res.w,
                h: res.h,
              }) as Box
          )
        );
      }
    }
  }, [searchResults]);
  if (boxes.length) {
    return (
      <div style={{ position: 'relative', margin: '10px' }}>
        <img ref={imgRef} src={fileContent} />
        <div style={{ margin: '10px' }}>
          {boxes.map(({ x, y, w, h }, key) => (
            <div
              key={key}
              style={{
                left: `${x}px`,
                top: `${y}px`,
                width: `${w}px`,
                height: `${h}px`,
                position: 'absolute',
                backgroundColor: 'yellow',
                opacity: 0.5,
              }}
            />
          ))}
        </div>
      </div>
    );
  }

  return (
    <div key={pageNumber} style={{ position: 'relative' }}>
      <img ref={imgRef} src={fileContent} />
    </div>
  );
};

export default KeyWordsHight;
由于我们将pdf转换成了图片资源(fileContent),然后它可以直接给<img/>。
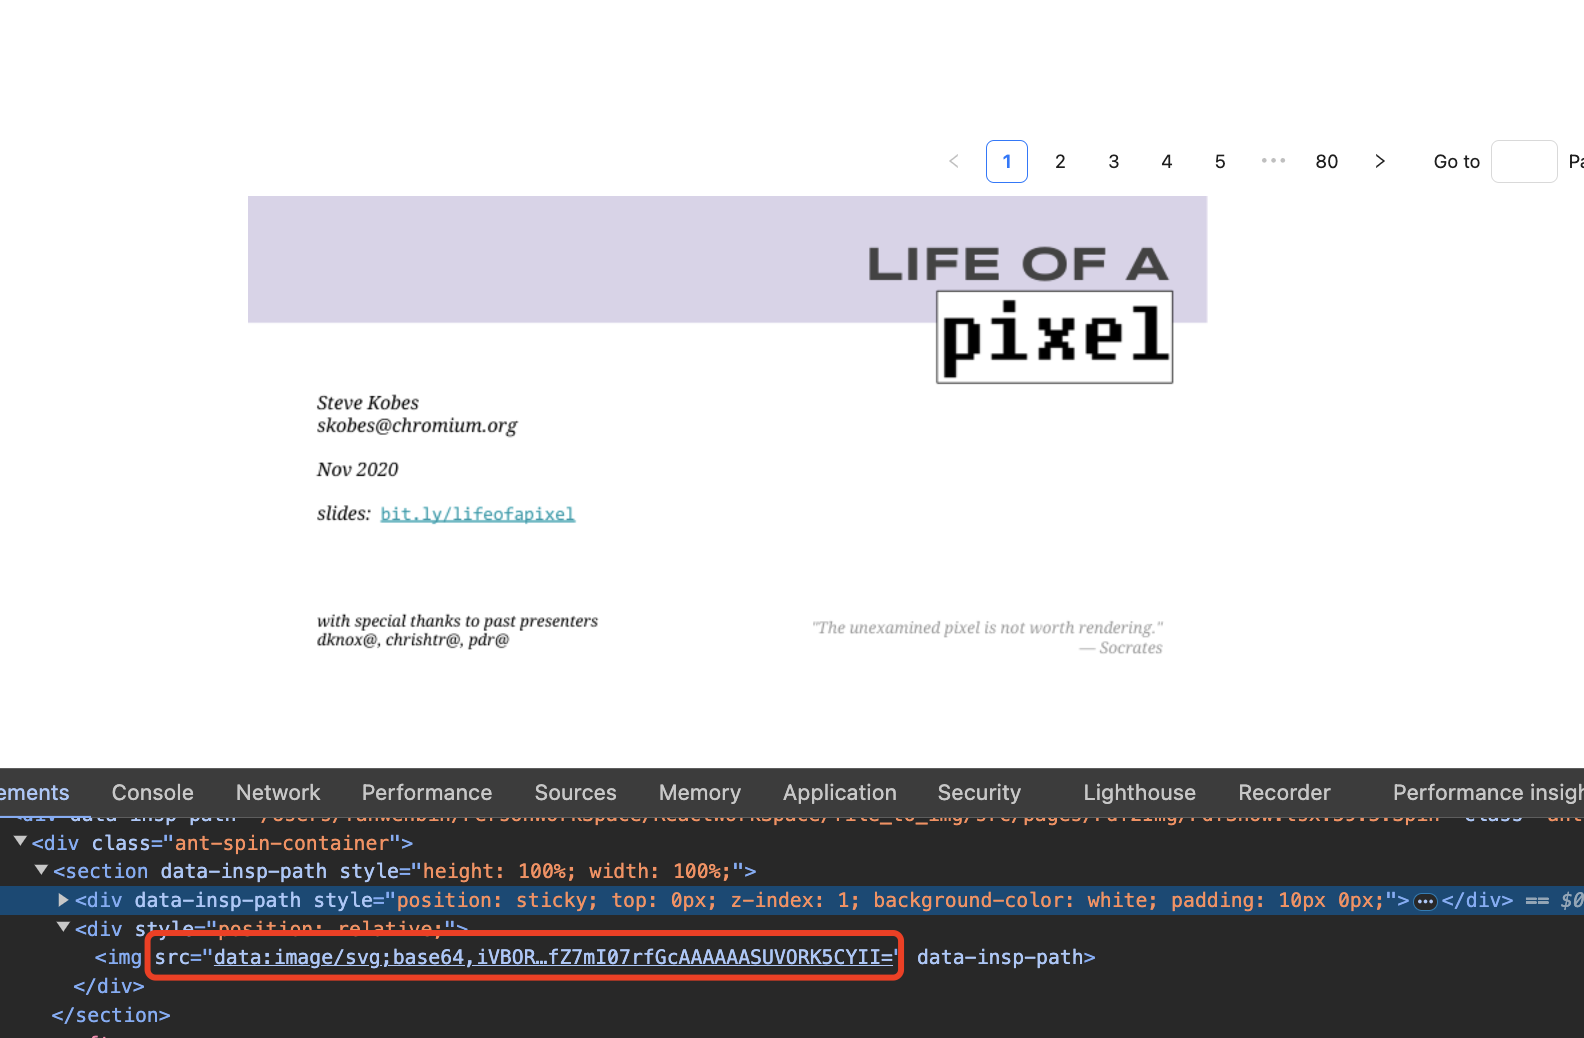
然后,我们基于searchResults是否含有boxes信息,来判定是否有标注信息。
后记
分享是一种态度。
全文完,既然看到这里了,如果觉得不错,随手点个赞和“在看”吧。

leafletjs: https://leafletjs.com/
[2]pdfjs-dist: https://www.jsdelivr.com/package/npm/pdfjs-dist
[3]mupdf-js: https://www.npmjs.com/package/mupdf-js
[4]mupdf: https://mupdf.com/
[5]f_cli_f: https://www.npmjs.com/package/f_cli_f
[6]Comlink: https://www.npmjs.com/package/comlink
[7]mupdf_core API: https://mupdfjs.readthedocs.io/en/latest/how-to-guide/node/document/index.html#core-api
本文由 mdnice 多平台发布


 3万+
3万+

 被折叠的 条评论
为什么被折叠?


