


本文基于org.springframework.boot 2.3.5.RELEASE版,如果有错,欢迎指出并一起讨论。
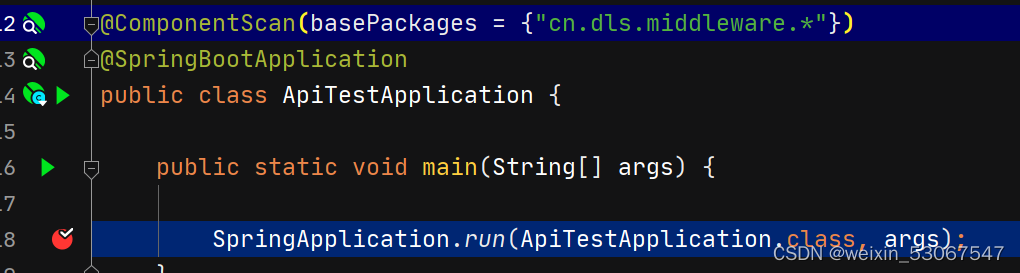
首先debug从主函数走起
进去run方法

继续进去run重载方法—这里new了一个SpringApplication对象,并进行了一系列赋值,这里读者自己debug进去看看,就不带大家看了,只要记得最重要的是从META-INF下的spring.factories文件加载了一系列监听器和初始化器并将启动类赋值给primarySources

继续进去重载run方法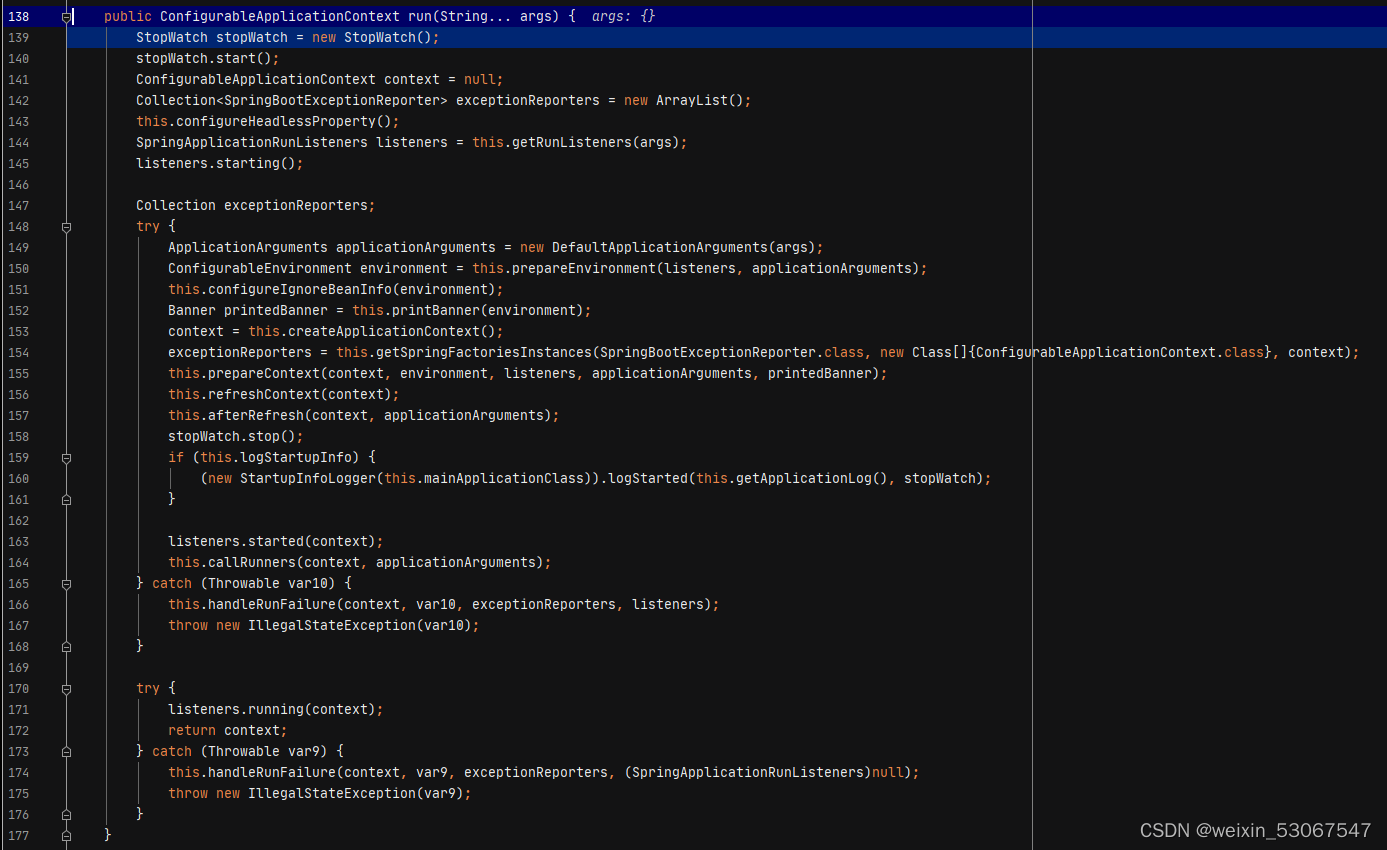
上面方法前面都是一些准备工作,我们重点讲跟自动装配有关的代码 。
context = this.createApplicationContext();
这行代码创建了一个应用上下文,也就是springboot的容器,并为容器内添加了一些内置处理器
其中org.springframework.context.annotation.internalConfigurationAnnotationProcessor对应的是ConfigurationClassPostProcessor这个类,这个类就是处理自动装配的核心。
我们再来看下启动类上的@SpringBootApplication注解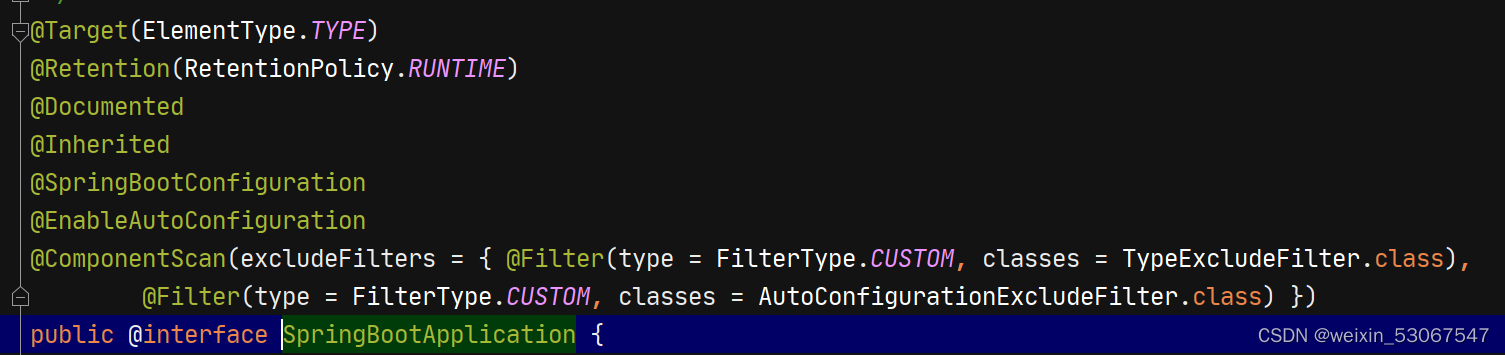
点@SpringBootConfiguration进去,发现就是@Configuration,而@Configuration点进去又是@Component

我们再来看@EnableAutoConfiguration,我们可以看到SpringBoot对他的注释是Enable auto-configuration of the Spring Application Context, attempting to guess and configure beans that you are likely to need. 所以这个注解就是自动装配的核心。
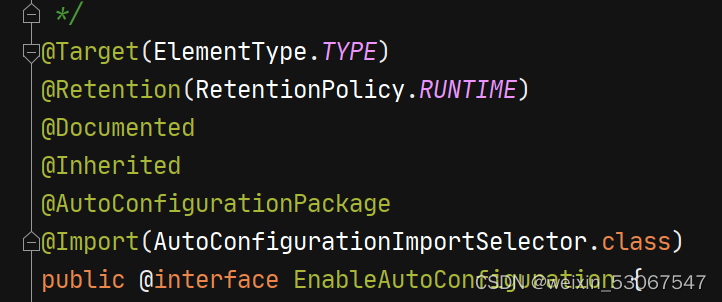
从图上可以看到@EnableAutoConfiguration上面有
@AutoConfigurationPackage
@Import(AutoConfigurationImportSelector.class)
AutoConfigurationImportSelector.class实现了ImportSelector接口
点进去@AutoConfigurationPackage注解
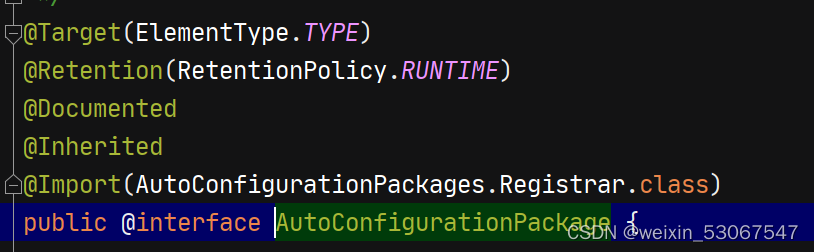

又看到 @Import(AutoConfigurationPackages.Registrar.class) 注解AutoConfigurationPackages.Registrar实现了ImportBeanDefinitionRegistrar接口
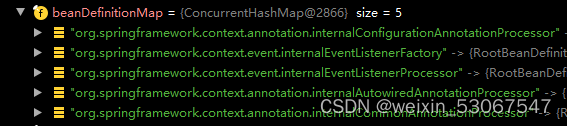
我们在回到上文的run方法中,在执行 this.prepareContext(context, environment, listeners, applicationArguments, printedBanner);这行代码的过程中,它会将我们的启动类加入到spring容器中,可以看到此时beanDefinitionMap中已经多了启动类,注意启动类beanDefinition的类型是AnnotatedGenericBeanDefinition,后面会将解析类包装成ConfigurationClass
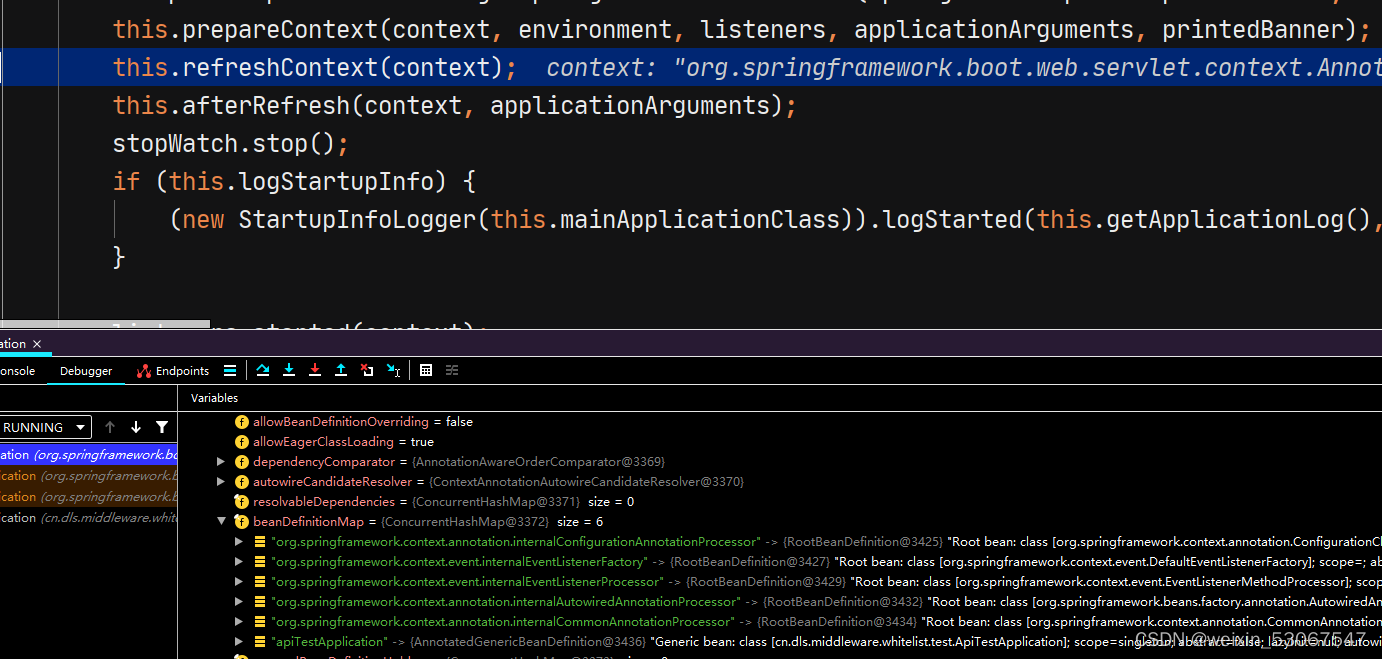
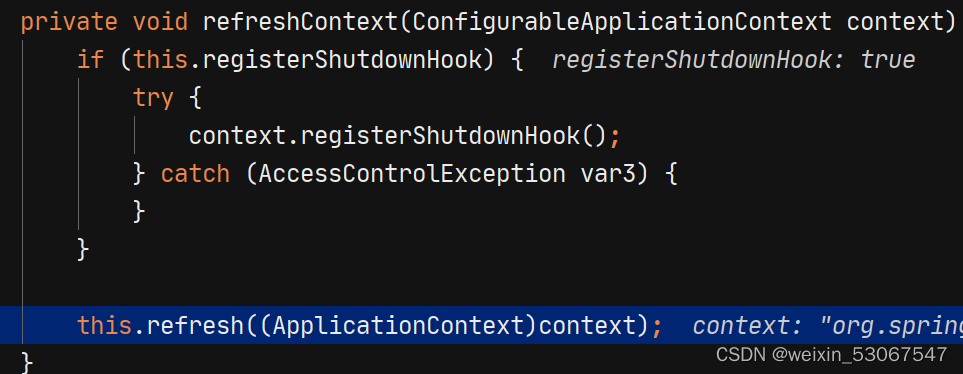
然后执行this.refreshContext(context);刷新spring容器,执行bean的生命周期,在这过程中,就会解析处理自动装配的注解。


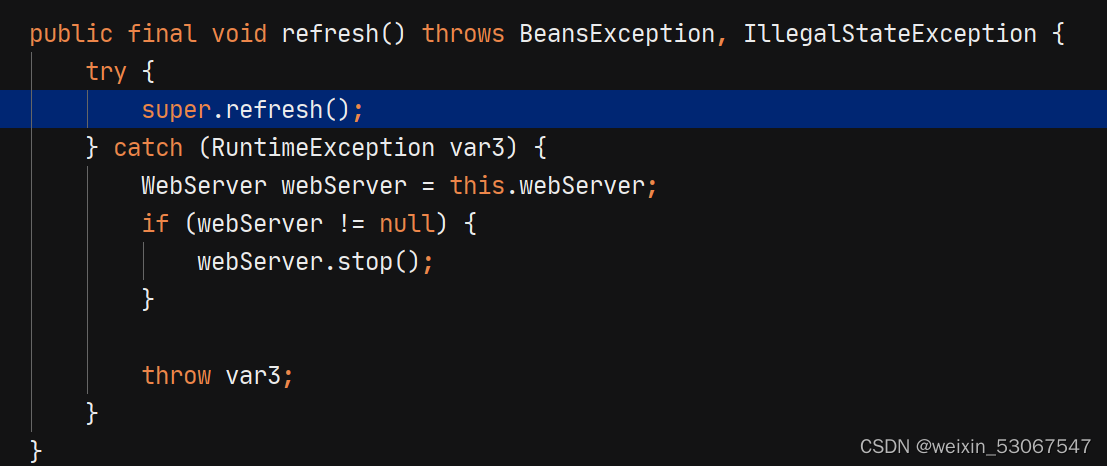

我们直接跳到 this.invokeBeanFactoryPostProcessors(beanFactory);这个方法负责调用BeanFactory后置处理器,而上文提到的ConfigurationClassPostProcessor就是一个BeanFactory后置处理器

点进去来到invokeBeanDefinitionRegistryPostProcessors(currentRegistryProcessors, registry);这个方法,它会遍历调用每个后置处理器的方法,其中包ConfigurationClassPostProcessor,由于代码太多,我们直接来到ConfigurationClassPostProcessor的postProcessBeanDefinitionRegistry
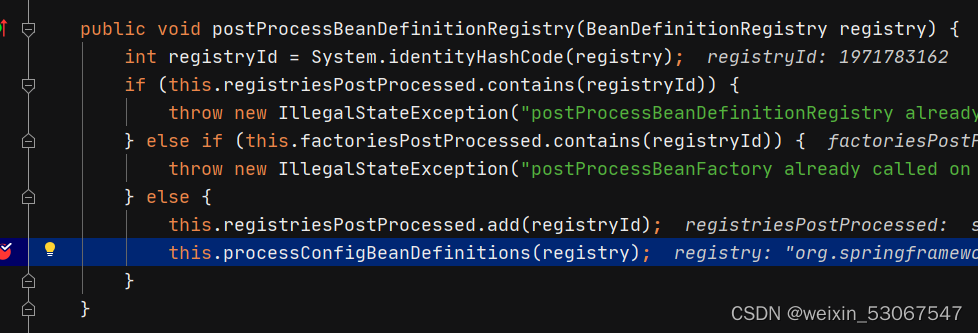
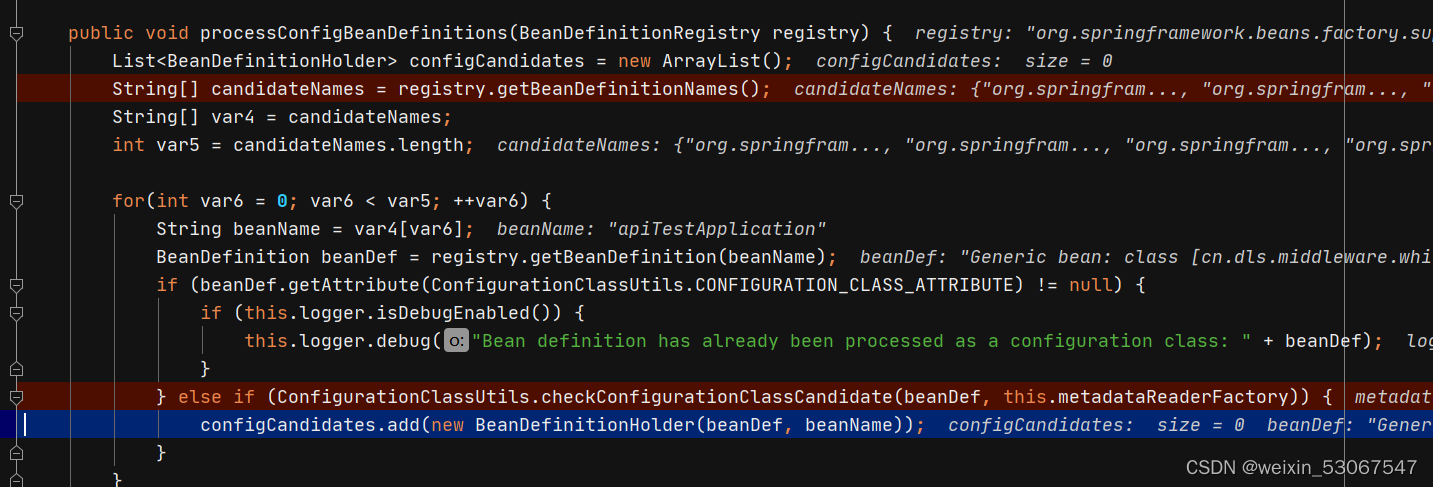
这里筛选启动类到configCandidates
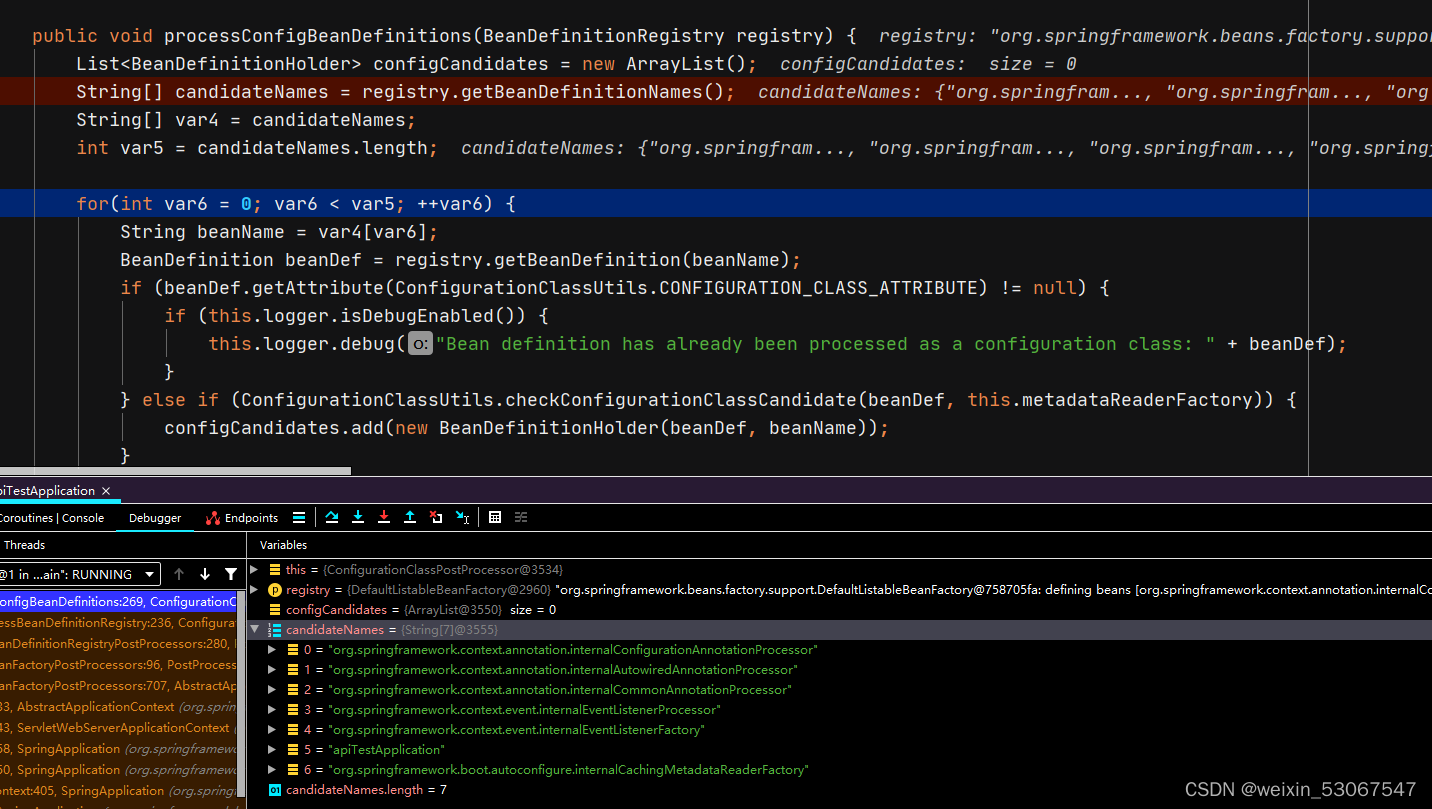
跳到parser.parse(candidates);


来到doProcessConfigurationClass方法,do方法是核心干活的方法,也就是开始解析启动类上的注解
ConfigurationClassPostProcessor会处理所有BeanDefinition中的符合注解条件的BeanDefinition,(@Configuration注解的、@Component、@ComponentScan、@Import、@ImportResource或者@Bean注解的)
经过上面我们对@SpringBootApplication注解的分析,我们直接跳到解析@Import注解的地方
在参数this.getImports(sourceClass)方法中,找到了所有启动类上所有@Import注解

AutoConfigurationPackages.Registrar实现了ImportBeanDefinitionRegistrar接口,实例化后添加到importBeanDefinitionRegistrars中

AutoConfigurationImportSelector实现了DeferredImportSelector

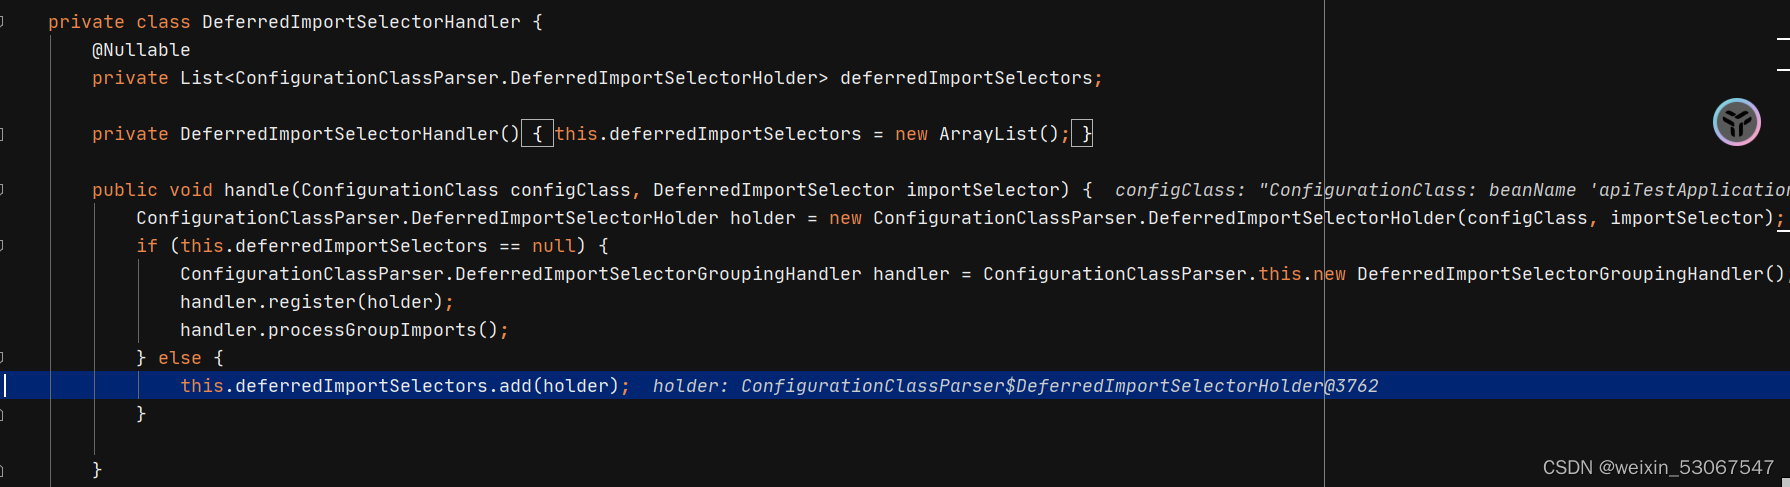
此时并未执行自动装配过程,只是将两个类放到两个集合中
回到parse方法


我们点进去getSpringFactoriesLoaderFactoryClass() 方法,发现返回EnableAutoConfiguration

根据断言,我们猜测是在META-INF/spring.factories下找到EnableAutoConfiguration并加载

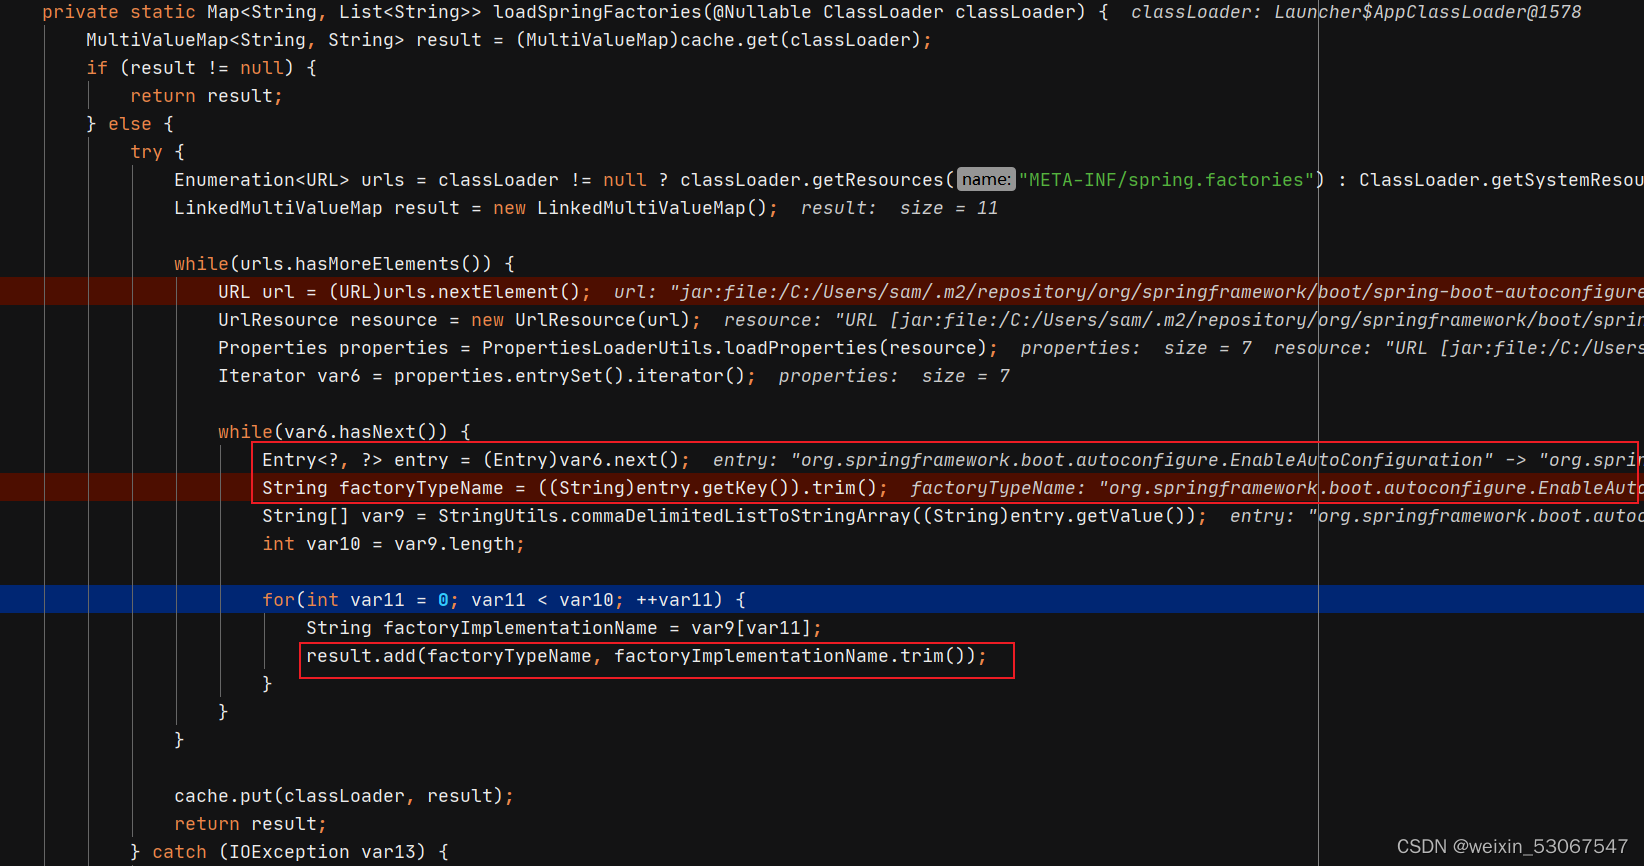
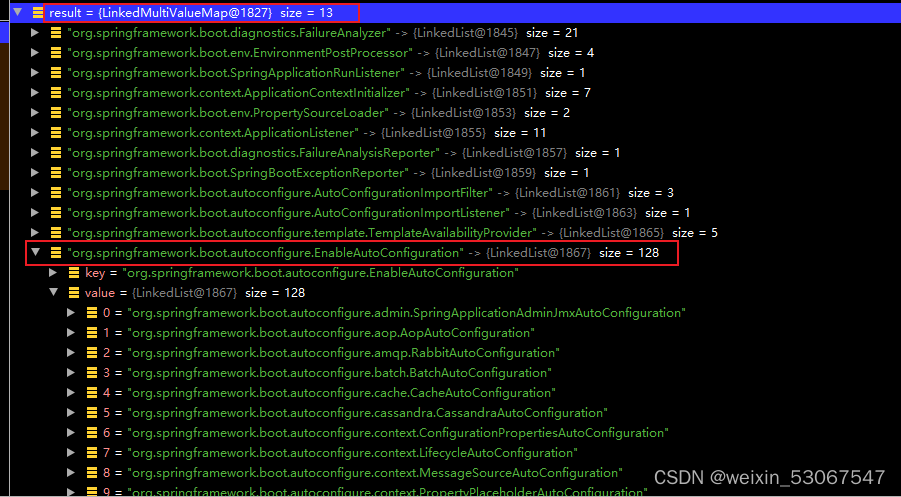
我们可以看到AppClassLoader会找到当前应用下所有META-INF/spring.factories文件下的EnableAutoConfiguration键值对并封装到一个map中,key是EnableAutoConfiguration

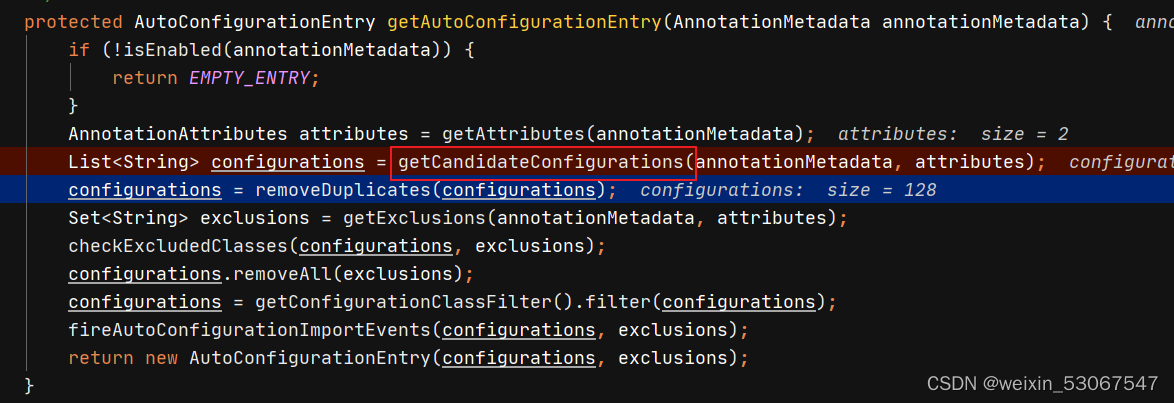
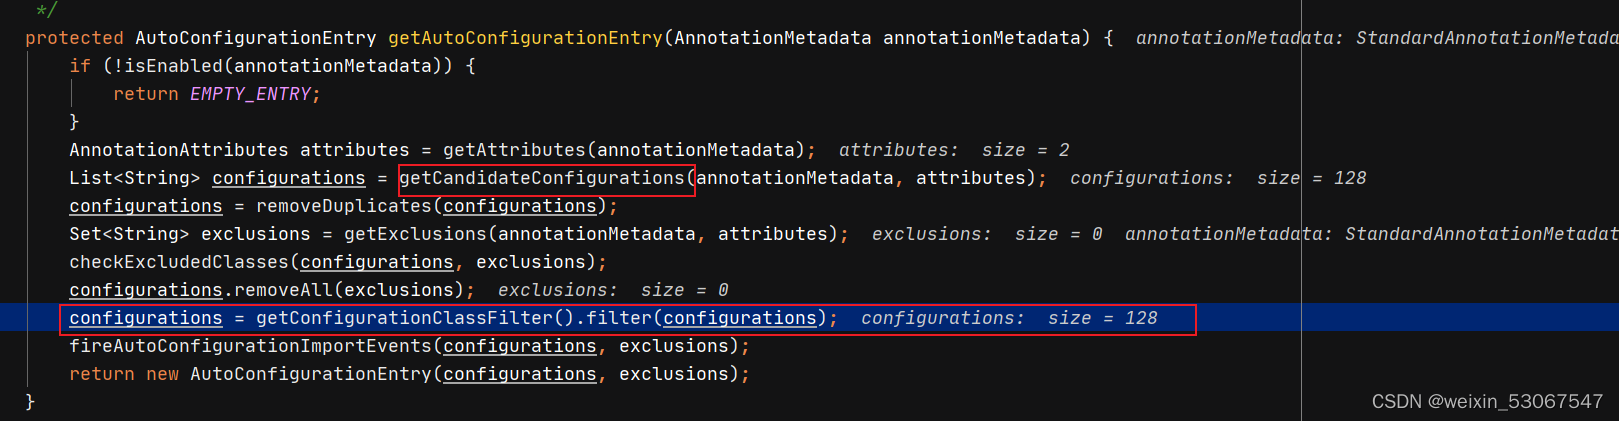
返回128个自动配置类后,经过筛选,还剩24个自动配置类
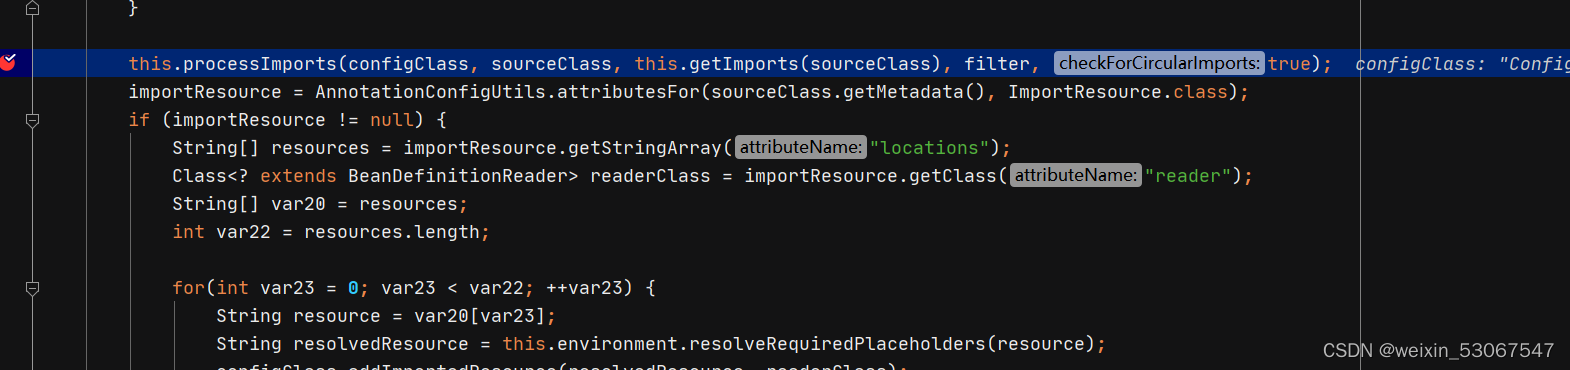
一直return,返回到如下方法进入循环,processImports方法会将上面过滤后的自动配置类封装成为ConfigurationClass ,然后向上面解析启动类一样解析各种注解

我们跳出parse.parse方法,此时自动配置类都被解析封装成了ConfigurationClass,我们要将自动配置类加载进容器内自动配置类


而@Import注解中实现了ImportBeanDefinitionRegistrar接口的就在这里执行

在上文中我们看到AutoConfigurationPackages.Registrar添加到ConfigurationClass启动类中的importBeanDefinitionRegistrars中,我们直接把断点打到AutoConfigurationPackages.Registra的registerBeanDefinitions方法上


从上面代码我们可以看到是往容器内注入了AutoConfigurationPackages这个类,springboot对这个类的注释是Class for storing auto-configuration packages for reference later (e.g. by JPA entity
scanner).,大概意思是说用来保存自动配置的包路径,JPA实体扫描会用到。网上很多文章说@AutoConfigurationPackage的作用是扫描启动类所在包与子包,其实是错误的,启动类上的@ComponentScan才是负责扫描作用的。
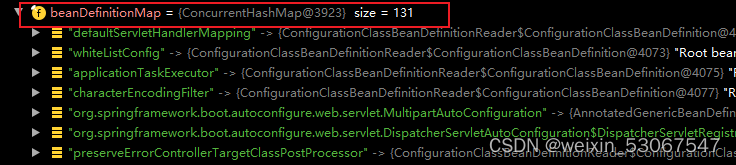
我们跳出 this.reader.loadBeanDefinitions(configClasses);方法,可以看到容器内已经有了自动装配相关的beanDefinition
到此为止,自动装配已经完成,剩下的就是spring的生命周期。
我们简单总结一下springboot的自动装配就是springboot在启动的过程中,会将我们的启动类注入到容器内,类型是AnnotatedGenericBeanDefinition,在spring的refresh方法中,会调用ConfigurationClassPostProcessor的增强方法,它会将启动类封装成ConfigurationClass并解析启动类上的Import注解,而Import注解内的类实现了ImportSelector接口,会调用
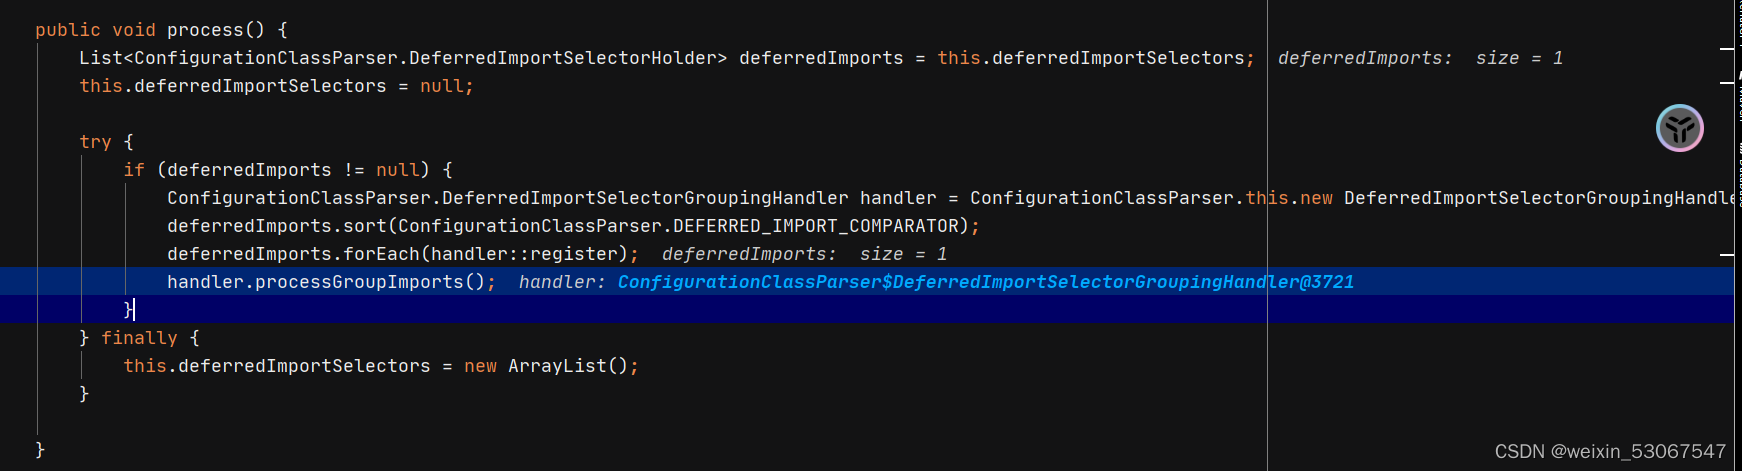
->process()
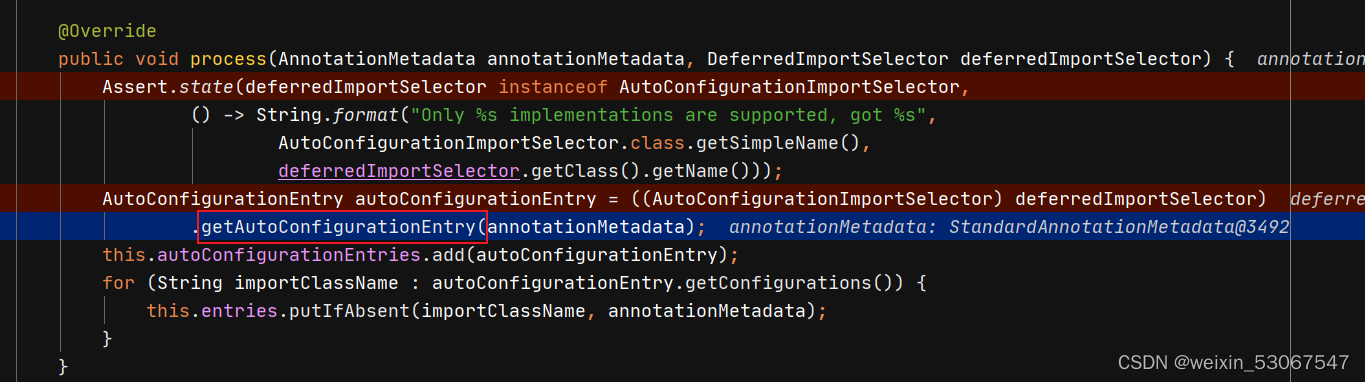
->getAutoConfigurationEntry()
->getCandidateConfigurations()
->SpringFactoriesLoader.loadFactoryNames()->
->使用AppClassLoader找到当前应用下所有META-INF/spring.factories文件下的EnableAutoConfiguration键值对,经过过滤后,这些键值对被逐一封装成ConfigurationClass,像解析启动类上注解般解析。


 1万+
1万+


 被折叠的 条评论
为什么被折叠?
被折叠的 条评论
为什么被折叠?
 到【灌水乐园】发言


