本文参考:JQUERY实现鼠标悬停在图片上模拟放大镜效果_jquery 悬浮放大图片-CSDN博客
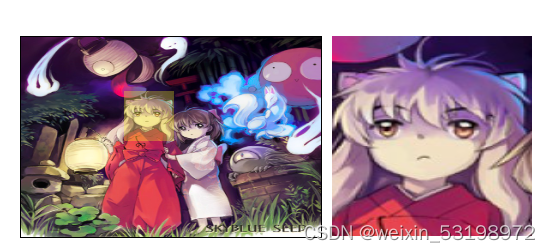
在很多网页上特别是电商网站上我们经常看到当我们的鼠标悬停在某张图片上时会有类似放大镜的效果 ,以下这张图是实现该功能后的效果图
以下以jQuery为例:
css代码
* {
            margin: 0;
            padding: 0;
        }
        #box{
            display: flex;
            flex-direction: row;
            margin: 50px;
        }
        #normal {
            width: 300px;
            height: 200px;
            border: 1px solid #000;
        }
        #normal img {
            width: 100%;
            height: 100%;
        }
        #show {
            width: 50px;
            height: 50px;
            background: yellow;
            opacity: 0.3;
            position: fixed;
            top: 0;
            left: 0;
            cursor: move;
            display: none;
        }
        #big {
            width: 200px;
            height: 200px;
            overflow: hidden;
            position: relative;
            margin-left: 10px;
        }
        #big>img {
            position:absolute;
            top: 0;
            left: 0;
            width: 1200px;
            height: 800px;
            display: none;
        }
html以及js代码
<div id="box">
        <div id="normal">
            <img src="img/1 (1).jpg" />
            <div id="show"></div>
        </div>
        <div id="big"><img src="img/1 (1).jpg" /></div>
    </div>
    <script>
        $(function () {
            $('#normal').mouseover(function () {
                //鼠标移入"显示"方块
                $('#show').show();
                $('#big').find('img').show();
                $(this).mousemove(function (e) {
                    //鼠标移动方块随着移动
                    $('#show').css({
                        'left': e.pageX - $('#show').width() / 2,
                        'top': e.pageY - $('#show').width() / 2
                    })
                    //防止方块移出图片内容
                    let top = $('#normal').offset().top + $('#normal').height() - $('#show').height()
                    let left = $('#normal').offset().left + $('#normal').width() - $('#show').width()
                    if ($('#show').offset().top <= $('#normal').offset().top) {
                        $('#show').css('top', $('#normal').offset().top);
                    } else if ($('#show').offset().top >= top) {
                        $('#show').css('top', top);
                    }
                    if ($('#show').offset().left <= $('#normal').offset().left) {
                        $('#show').css('left', $('#normal').offset().left);
                    } else if ($('#show').offset().left >= left) {
                        $('#show').css('left', left);
                    }
                    //在大容器显示放大图片
                    $('#big').find('img').css({
                        'left': -1200 * ($('#show').offset().left-51) / 300,
                        'top': -800 * ($('#show').offset().top-51) / 200

                    });
                });
            });
            //鼠标移出图片让方块"消失"
            $('#normal').mouseout(function () {
                $('#show').hide();
                $('#big').find('img').hide()
            });
        });
    </script>
记一个出现的问题:这里的show是固定定位fixed,如果是以它的父级normal为参考来定位的话,则show的位置会出现错误,在靠近图片边缘时,会跳到图片外去,如果不靠近图片边缘则正常(已经将show的left和top修改正确,并且console的结果看来也是正确的)。如下:
更改部分的代码如下:
//鼠标移动方块随着移动
 $('#show').css({
    'left': e.pageX -50- $('#show').width() / 2,
    'top': e.pageY -50- $('#show').width() / 2
}) 


 142
142

 被折叠的 条评论
为什么被折叠?


