


openstack是什么
OpenStack是一个云操作系统,它控制整个数据中心的计算、存储和网络资源的大型池,所有这些都通过具有通用身份验证机制的api进行管理和配置。
它还提供了一个仪表板,允许管理员控制,同时允许用户通过web界面提供资源。
除了标准的基础设施即服务功能外,其他组件还提供编排、故障管理和服务管理等服务,以确保用户应用程序的高可用性。
目的是搭建一个类似于阿里云那样的云计算平台,但只是一个具备基础功能的平台,更多功能的扩展需要添加不同的组件才可以实现。
1 软件环境
物理机配置控制节点网络
第一块网卡常规配置即可,第二块网卡首先更改网卡命名格式(保持和第一块网卡命名格式相同,防止发生未知错误),然后激活网卡,不需要为其分配ip
[root@foundation ~]# cd /boot/grub2/
[root@foundation grub2]# ls
grubenv
[root@foundation grub2]# vim grubenv
net.ifnames=0  ##添加内核参数,使网卡命名格式为eth格式
节点主机server1操作
[root@server1 ~]# cd /etc/sysconfig/network-scripts/
[root@server1 network-scripts]# cp ifcfg-eth0 ifcfg-eth1
[root@server1 network-scripts]# vim ifcfg-eth1
BOOTPROTO=none
DEVICE=eth1
ONBOOT=yes
[root@server1 network-scripts]# ifup eth1 ##激活网卡
[root@server1 network-scripts]# ip addr

#配置域名解析:设置节点主机名为 controller,计算节点为compute1,存储节点为block1
[root@server1 network-scripts]# vim /etc/hosts
172.25.114.1 controller
172.25.114.2 compute1
172.25.114.3 block1
[root@server1 network-scripts]# hostnamectl set-hostname controller


2 网络时间协议(NTP)
使用chrony保证不同节点之间的时间同步
真机设置
[root@gy ~]# vim /etc/chrony.conf
server ntp1.aliyun.com iburst
server ntp2.aliyun.com iburst
server ntp3.aliyun.com iburst

allow 0.0.0.0/0


[root@gy ~]# systemctl enable --now chronyd
[root@gy ~]# chronyc sources -V


[root@controller ~]# yum install -y chrony
[root@controller ~]# vim /etc/chrony.conf
server 172.25.114.250 iburst
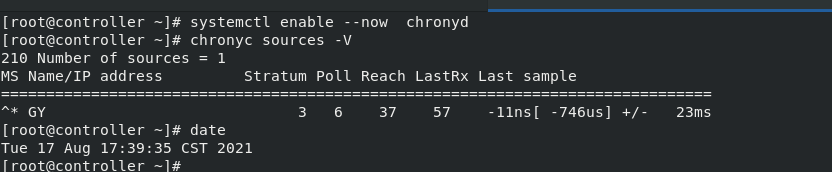
[root@controller ~]# systemctl enable --now chronyd
[root@controller ~]# chronyc sources -V

3 openstack
禁用selinux和防火墙
[root@controller ~]# cd /etc/yum.repos.d
[root@controller yum.repos.d]# vim openstack.repo
[root@controller yum.repos.d]# cat openstack.repo
[openstack]
name=mitaka
baseurl=http://172.25.114.250/pub/openstack/mitaka
gpgcheck=0
[root@controller yum.repos.d]# yum upgrade  #主机上升级包
[root@controller yum.repos.d]# yum install python-openstackclient -y  #装OpenStack客户端


4 SQL数据库
大多数 OpenStack 服务使用 SQL 数据库来存储信息。 典型地,数据库运行在控制节点上。指南中的步骤依据不同的发行版使用MariaDB或 MySQL。
[root@controller ~]# yum install mariadb mariadb-server python2-PyMySQL -y
[root@controller ~]# cd /etc/my.cnf.d/
[root@controller my.cnf.d]# ls
auth_gssapi.cnf  client.cnf  enable_encryption.preset  mariadb-server.cnf  mysql-clients.cnf  tokudb.cnf
[root@controller my.cnf.d]# vim openstack.cnf
[root@controller my.cnf.d]# cat openstack.cnf
[mysqld]
bind-address = 172.25.114.1
default-storage-engine = innodb
innodb_file_per_table
max_connections = 4096
collation-server = utf8_general_ci
character-set-server = utf8

#启动数据库服务,并将其配置为开机自启,运行mysql_secure_installation脚本安全安装数据库
[root@controller my.cnf.d]# systemctl enable --now mariadb.service
Created symlink from /etc/systemd/system/multi-user.target.wants/mariadb.service to /usr/lib/systemd/system/mariadb.service.

[root@controller my.cnf.d]# mysql_secure_installation
Enter current password for root (enter for none):
OK, successfully used password, moving on...

Setting the root password ensures that nobody can log into the MariaDB
root user without the proper authorisation.

Set root password? [Y/n] Y
New password:                            #密码设置为westos
Re-enter new password:
Password updated successfully!
Reloading privilege tables..
 ... Success!


By default, a MariaDB installation has an anonymous user, allowing anyone
to log into MariaDB without having to have a user account created for
them.  This is intended only for testing, and to make the installation
go a bit smoother.  You should remove them before moving into a
production environment.

Remove anonymous users? [Y/n] Y
 ... Success!

Normally, root should only be allowed to connect from 'localhost'.  This
ensures that someone cannot guess at the root password from the network.

Disallow root login remotely? [Y/n] Y
 ... Success!

By default, MariaDB comes with a database named 'test' that anyone can
access.  This is also intended only for testing, and should be removed
before moving into a production environment.

Remove test database and access to it? [Y/n] Y
 - Dropping test database...
 ... Success!
 - Removing privileges on test database...
 ... Success!

Reloading the privilege tables will ensure that all changes made so far
will take effect immediately.

Reload privilege tables now? [Y/n] Y
 ... Success!

Cleaning up...

All done!  If you've completed all of the above steps, your MariaDB
installation should now be secure.


5 消息队列
OpenStack 使用 message queue 协调操作和各服务的状态信息。消息队列服务一般运行在控制节点上。OpenStack支持好几种消息队列服务包括 RabbitMQ, Qpid, 和 ZeroMQ。不过,大多数发行版本的OpenStack包支持特定的消息队列服务。
[root@controller my.cnf.d]# yum install rabbitmq-server -y
[root@controller my.cnf.d]# systemctl enable --now rabbitmq-server.service   ##启动消息队列服务并将其配置为随系统启动
[root@controller my.cnf.d]# rabbitmqctl add_user openstack openstack ##添加openstack用户,密码最好和用户名保持一致
Creating user "openstack" ...
[root@controller my.cnf.d]# rabbitmqctl set_permissions openstack ".*" ".*" ".*"    ##给openstack用户配置写和读权限
Setting permissions for user "openstack" in vhost "/" ...

[root@controller ~]# rabbitmq-plugins list
[root@controller ~]# rabbitmq-plugins enable rabbitmq_management
[root@controller ~]# netstat -antlp   ##查看端口,通过15672端口可以访问web图形化界面

[root@controller ~]# rabbitmqctl list_users
Listing users ...
openstack	[]
guest	[administrator]
[root@controller ~]# rabbitmqctl list_user_permissions openstack
Listing permissions for user "openstack" ...
/	.*	.*	.*
[root@controller ~]# rabbitmqctl authenticate_user openstack openstack
Authenticating user "openstack" ...
Success


 网页访问172.25.114.1:15672
用户密码均为guest

6 memcached
认证服务认证缓存使用Memcached缓存令牌。缓存服务memecached运行在控制节点。在生产部署中,我们推荐联合启用防火墙、认证和加密保证它的安全。
[root@controller ~]# yum install memcached python-memcached -y
[root@controller ~]# vim /etc/sysconfig/memcached
[root@controller ~]# cat /etc/sysconfig/memcached
PORT="11211"
USER="memcached"
MAXCONN="1024"
CACHESIZE="64"
#OPTIONS="-l 127.0.0.1,::1" ##注释这一行,表示允许所有网段(公网)访问
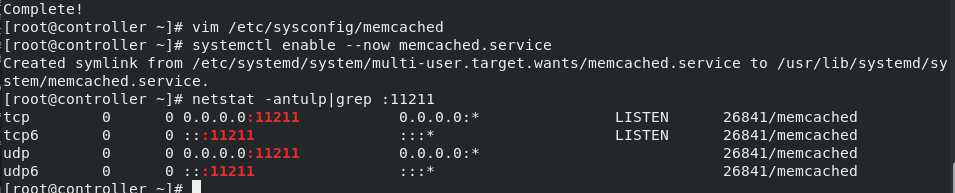
[root@controller ~]# systemctl enable --now memcached.service
Created symlink from /etc/systemd/system/multi-user.target.wants/memcached.service to /usr/lib/systemd/system/memcached.service.
[root@controller ~]# netstat -antulp|grep :11211 ##memcache11211端口开启
tcp 0 0 0.0.0.0:11211 0.0.0.0:* LISTEN 6524/memcached
tcp6 0 0 :::11211 :::* LISTEN 6524/memcached
udp 0 0 0.0.0.0:11211 0.0.0.0:* 6524/memcached
udp6 0 0 :::11211 :::* 6524/memcached


 7575
7575


 被折叠的 条评论
为什么被折叠?
被折叠的 条评论
为什么被折叠?
 到【灌水乐园】发言


