


 本文详细介绍了队列的概念,如其先进先出的特性,以及如何通过链表实现队列,包括初始化、入队、出队、获取队头和队尾元素等操作。此外,还展示了如何使用队列实现栈,以及设计循环队列和用栈实现队列的技巧,提供了具体的代码实现。这些内容对于理解数据结构和算法有着重要的作用。
队列的介绍与实现
1.队列的概念及结构
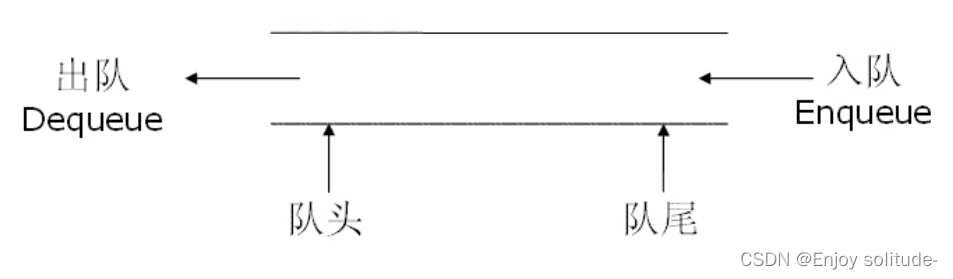
队列:只允许在一端进行插入数据操作,在另一端进行删除数据操作的特殊线性表,队列具有先进先出
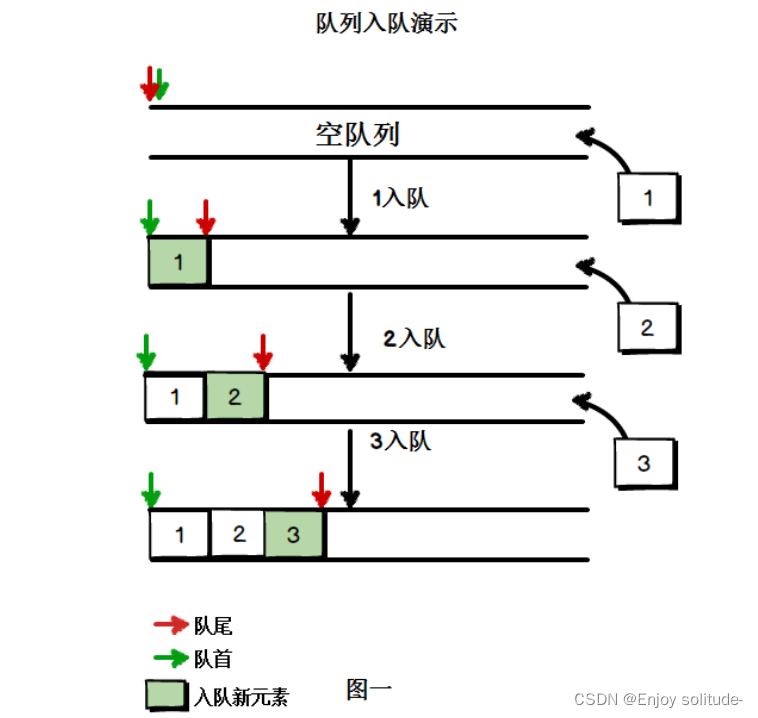
入队列:进行插入操作的一端称为队尾
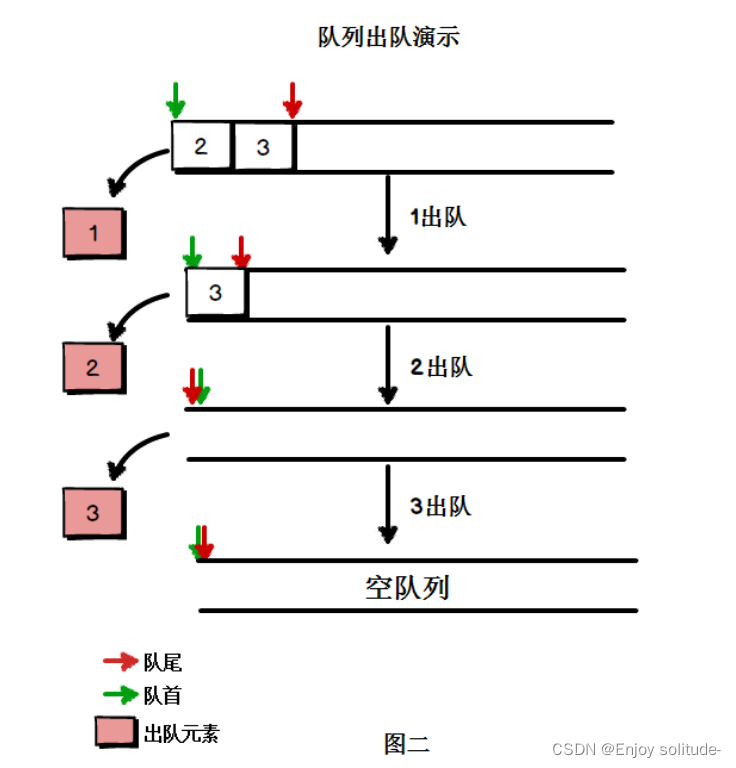
出队列:进行删除操作的一端称为队头
2.队列的实现
2.1整体描述
typedef int QDataType;//队列中存储的元素类型(这里用整型举例)
typedef struct QueueNode//创建一个结点类型,类型包含了该结点的数据和指向下一结点的指针。
{
	struct QueueNode* next;
	QDataType data;
}QueueNode;

typedef struct Queue//创建一个结构体用于存放队列的队头和队尾。
{
	QueueNode* phead;
	QueueNode* ptail;
}Queue;
void QueueInit(Queue* pq);//初始化队列
void QueueDestory(Queue* pq);销毁队列元素
void QueuePush(Queue* pq, QDataType x);  //队尾入队列
void QueuePop(Queue* pq);                // 队头出队列
int QueueSize(Queue* pq);//记录队列有效数据个数
QDataType QueueFront(Queue* pq);//获取队头元素
QDataType QueueBack(Queue* pq);//获取队尾元素
bool QueueEmpty(Queue* pq);//判空(检测队列是否为空)
2.2具体实现
初始化队列
首先我们需要创建一个结点类型,类型包含了该结点的数据和指向下一结点的指针。
typedef int QDataType;
typedef struct QueueNode
{
	struct QueueNode* next;
	QDataType data;
}QueueNode;
队列与普通链表有所不同,普通链表只需要知道链表的头指针,而队列的信息包括了队头和队尾,所以我们需要再创建一个结构体用于存放队列的队头和队尾。
typedef struct Queue
{
	QueueNode* phead;//队头
	QueueNode* ptail;//队尾
}Queue;
然后,我们需要一个初始化函数,对刚创建的队列进行初始化。
//初始化队列
void QueueInit(Queue* pq)
{
	assert(pq);
	//起始时队列为空
pq->phead = pq->ptail = NULL;
}
销毁队列
队列中的每一个结点所占用的内存空间都是动态开辟的,当我们使用完队列后需要及时释放队列中的每一个结点。
void QueueDestory(Queue* pq)//释放
{
	assert(pq);

	QueueNode* cur = pq->phead;
	//遍历链表,逐个释放结点
	while (cur)
	{
		QueueNode* next = cur->next;
		free(cur);
		cur = next;
	}
	pq->phead = pq->ptail = NULL;
}
队尾入队列
入队列,即申请一个新结点并将其链接到队尾,然后改变队尾的指针指向即可。
void QueuePush(Queue* pq, QDataType x)
{
	assert(pq);

	QueueNode* newnode = (QueueNode*)malloc(sizeof(QueueNode));//申请新结点
	if (newnode == NULL)
	{
		printf("malloc fail\n");
		exit(-1);
	}
	newnode->data = x;//新结点赋值
	newnode->next = NULL;//新结点指针域置空
	if (pq->phead == NULL)//队列中原本无结点
	{
		pq->phead = pq->ptail = newnode;//队头、队尾直接指向新结点
	}
	else//队列中原本有结点
	{
		pq->ptail->next = newnode;//最后一个结点指向新结点
		pq->ptail = newnode;//改变队尾指针指向
	}
}
队头出队列
出队列,即释放队头指针指向的结点并改变队头指针的指向
//队头出队列
void QueuePop(Queue* pq)
{
	assert(pq);
	assert(!QueueEmpty(pq));//检测队列是否为空

	if (pq->phead->next == NULL)//队列中只有一个结点
	{
		free(pq->phead);
		pq->phead = NULL;
		pq->ptail = NULL;
	}
	else//队列中有多个结点
	{
		QListNode* next = pq->phead->next;
		free(pq->phead);
		pq->phead = next;//改变队头指针指向
	}
}
获取队头元素
获取队列头部元素,即返回队头指针指向的数据即可。
//获取队列头部元素
QDataType QueueFront(Queue* pq)
{
	assert(pq);
	assert(!QueueEmpty(pq));//检测队列是否为空

	return pq->phead->data;//返回队头指针指向的数据
}
获取队尾元素
获取队列尾部元素,即返回队尾指针指向的数据即可。
//获取队列尾部元素
QDataType QueueBack(Queue* pq)
{
	assert(pq);
	assert(!QueueEmpty(pq));//检测队列是否为空

	return pq->ptail->data;//返回队尾指针指向的数据
}
检测队列是否为空
检测队列是否为空,即判断队头指针指向的内容是否为空。
//检测队列是否为空
bool QueueEmpty(Queue* pq)
{
	assert(pq);

	return pq->phead == NULL;
}
记录队列有效数据个数
队列中有效元素个数,即队列中的结点个数。我们只需遍历队列,统计队列中的结点数并返回即可。
int QueueSize(Queue* pq)
{
	assert(pq);

	QueueNode* cur = pq->phead;//接收队头
	int count = 0;//记录结点个数
	while (cur)//遍历队列
	{
		count++;
		cur = cur->next;
	}
	return count;//返回队列中的结点数
}
3.简单测试
插入1 2 3 4 5五个元素,并遍历输出
int main()
{
	Queue q;
	QueueInit(&q);//初始化
	QueuePush(&q, 1);//队尾入数据
	QueuePush(&q, 2);
	QueuePush(&q, 3);
	QueuePush(&q, 4);
	QueuePush(&q, 5);

	while (!QueueEmpty(&q))//
	{
		printf("%d ", QueueFront(&q));
		QueuePop(&q);
	}
	printf("\n");

	return 0;
}
运行结果:

4.队列经典例题
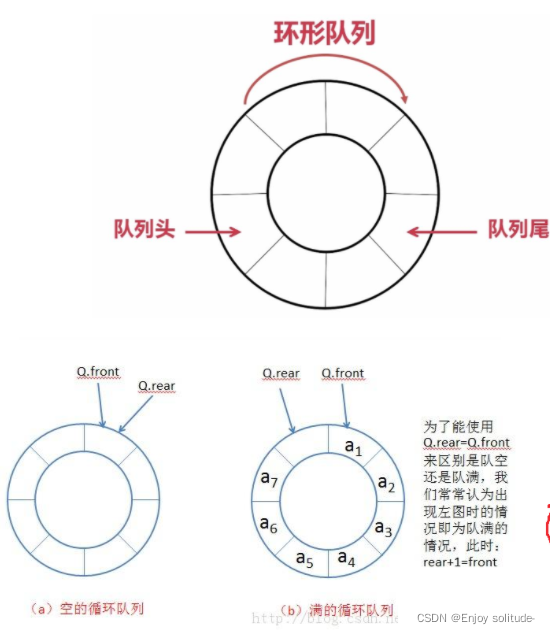
4.1设计循环队列
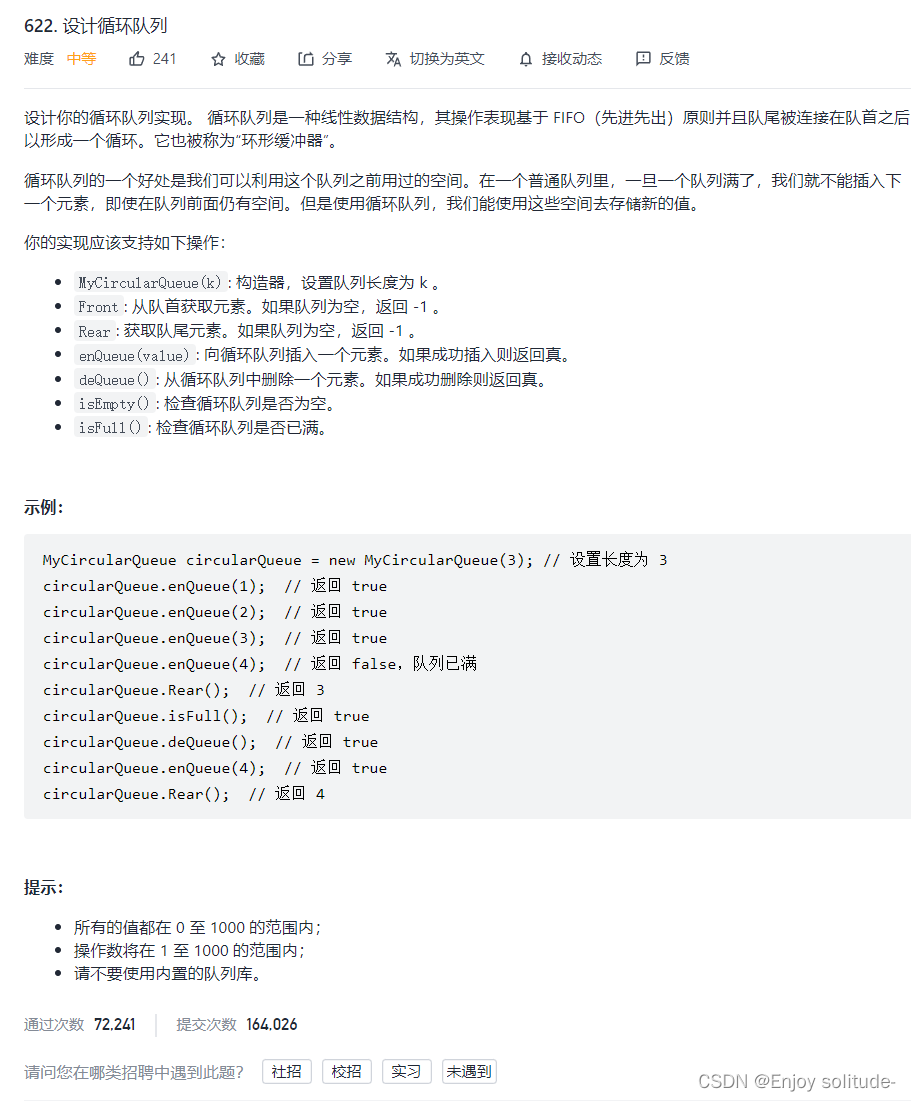
代码:
typedef struct {
int *a;
int front;
int rear;
int k;
} MyCircularQueue;

//初始化
MyCircularQueue* myCircularQueueCreate(int k) {
MyCircularQueue* q=(MyCircularQueue*)malloc(sizeof(MyCircularQueue));
q->a=(int *)malloc(sizeof(int*)*(k+1));
q->front=0;
q->rear=0;
q->k=k;
return q;
}
//判空
bool myCircularQueueIsEmpty(MyCircularQueue* obj) {
assert(obj);
return obj->front==obj->rear;
}
//判满
bool myCircularQueueIsFull(MyCircularQueue* obj) {
assert(obj);
//取余操作防止溢出
return (obj->rear+1)%(obj->k+1)==obj->front;
}

//入队列
bool myCircularQueueEnQueue(MyCircularQueue* obj, int value) {
assert(obj);
if(myCircularQueueIsFull(obj))                      //若队列满则无法进行入队操作
        return false;
    obj->a[obj->rear] = value;
   obj->rear++;
   //防止溢出
 if(obj->rear==obj->k+1)
 obj->rear=0;
    return true;

}
//从循环队列中删除一个元素
bool myCircularQueueDeQueue(MyCircularQueue* obj) {
assert(obj);
if(myCircularQueueIsEmpty(obj))
return false;
++obj->front;
//防溢出
obj->front%=(obj->k+1);
return true;
}
//从队首获取元素
int myCircularQueueFront(MyCircularQueue* obj) {
assert(obj);
if(myCircularQueueIsEmpty(obj))
return -1;

return obj->a[obj->front];
}
//从队尾获取元素
int myCircularQueueRear(MyCircularQueue* obj) {
assert(obj);
if(myCircularQueueIsEmpty(obj))
return -1;

int prevrear=obj->rear-1;
if(obj->rear==0)
prevrear=obj->k;
return obj->a[prevrear];
}


void myCircularQueueFree(MyCircularQueue* obj) {
assert(obj);
free(obj->a);
free(obj);
}
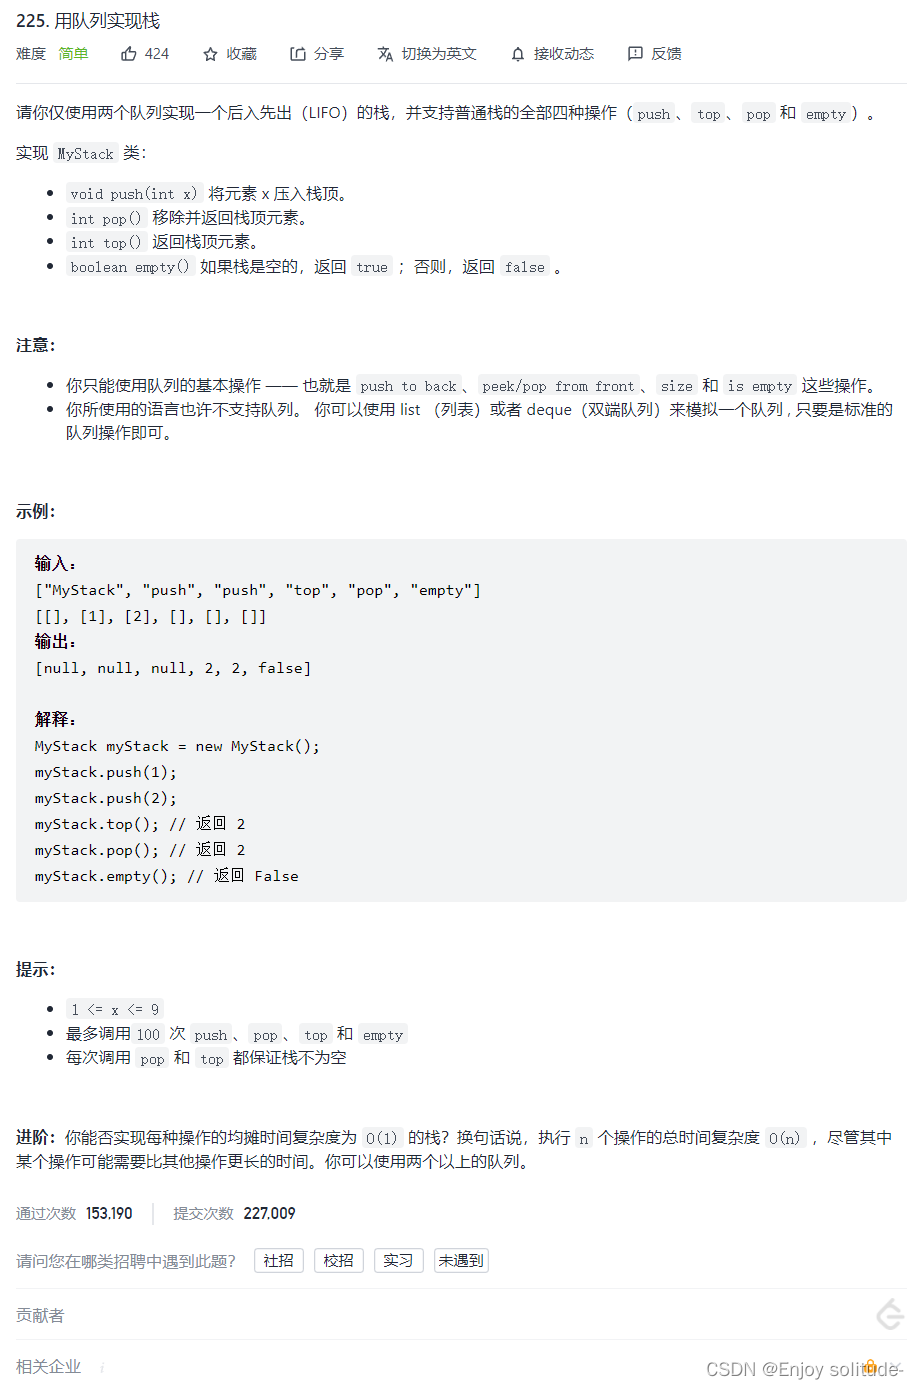
4.2用队列实现栈

代码:
typedef int QDataType;
typedef struct QueueNode
{
	struct QueueNode* next;
	QDataType data;
}QueueNode;

typedef struct Queue
{
	QueueNode* phead;
	QueueNode* ptail;
}Queue;

void QueueInit(Queue* pq)//初始化
{
	assert(pq);
	pq->phead = pq->ptail = NULL;
}
void QueueDestory(Queue* pq)//释放
{
	assert(pq);

	QueueNode* cur = pq->phead;
	while (cur)
	{
		QueueNode* next = cur->next;
		free(cur);
		cur = next;
	}
	pq->phead = pq->ptail = NULL;
}

bool QueueEmpty(Queue* pq)//判空
	{
		assert(pq);
		return pq->phead == NULL && pq->ptail == NULL;
	}

void QueuePush(Queue* pq, QDataType x)//队尾插
{
	assert(pq);
	QueueNode* newnode = (QueueNode*)malloc(sizeof(QueueNode));
	if (newnode == NULL)
	{
		printf("malloc fail\n");
		exit(-1);
	}
	newnode->data = x;
	newnode->next = NULL;

	if (pq->ptail == NULL)
	{
		pq->phead = pq->ptail = newnode;
	}
	else
	{
		pq->ptail->next = newnode;
		pq->ptail = newnode;
	}
}

	void QueuePop(Queue * pq)//队头删
	{
		assert(pq);
		assert(!QueueEmpty(pq));

		if (pq->phead->next == NULL)
		{
			free(pq->phead);
			pq->phead = pq->ptail = NULL;
		}
		else
		{
			QueueNode* next = pq->phead->next;
			free(pq->phead);
			pq->phead = next;
		}
	}
	int QueueSize(Queue* pq)
	{
		assert(pq);
		int n = 0;
		QueueNode* cur = pq->phead;
		while (cur)
		{
			n++;
			cur = cur->next;
		}
		return n;
	}

	QDataType QueueFront(Queue* pq)//取队头元素
	{
		assert(pq);
		assert(!QueueEmpty(pq));

		return pq->phead->data;
	}
	QDataType QueueBack(Queue* pq)//取队尾元素
	{
		assert(pq);
		assert(!QueueEmpty(pq));

		return pq->ptail->data;
	}
///
typedef struct {
Queue q1;
Queue q2;
} MyStack;


MyStack* myStackCreate() {
MyStack* pst=(MyStack*)malloc(sizeof(MyStack));
QueueInit(&pst->q1);
QueueInit(&pst->q2);
return pst;
}

void myStackPush(MyStack* obj, int x) {
assert(obj);

if(!QueueEmpty(&obj->q1))
{
    QueuePush(&obj->q1,x);

}
else
{
    QueuePush(&obj->q2,x);
}
}

int myStackPop(MyStack* obj) {
assert(obj);
Queue* emptyQ=&obj->q1;
Queue* noneemptyQ=&obj->q2;

if(!QueueEmpty(&obj->q1))
{
    emptyQ=&obj->q2;
    noneemptyQ=&obj->q1;
//将非空队列的size-1个数据导入空队列
}
while(QueueSize(noneemptyQ)>1)
{
QueuePush(emptyQ,QueueFront(noneemptyQ));
QueuePop(noneemptyQ);

}
//删掉空队列中剩下的最后一个数据,这个数据相当与我们的栈顶数据。
int top =QueueFront(noneemptyQ);
QueuePop(noneemptyQ);

return top;
}

int myStackTop(MyStack* obj)
{
assert(obj);
if(!QueueEmpty(&obj->q1))
{
    return QueueBack(&obj->q1);
}
else
{
return QueueBack(&obj->q2);
}

}

bool myStackEmpty(MyStack* obj) {
assert(obj);
return QueueEmpty(&obj->q1)&&QueueEmpty(&obj->q2);
}

void myStackFree(MyStack* obj) {
//释放
assert(obj);

QueueDestory(&obj->q1);
QueueDestory(&obj->q2);
free(obj);
}
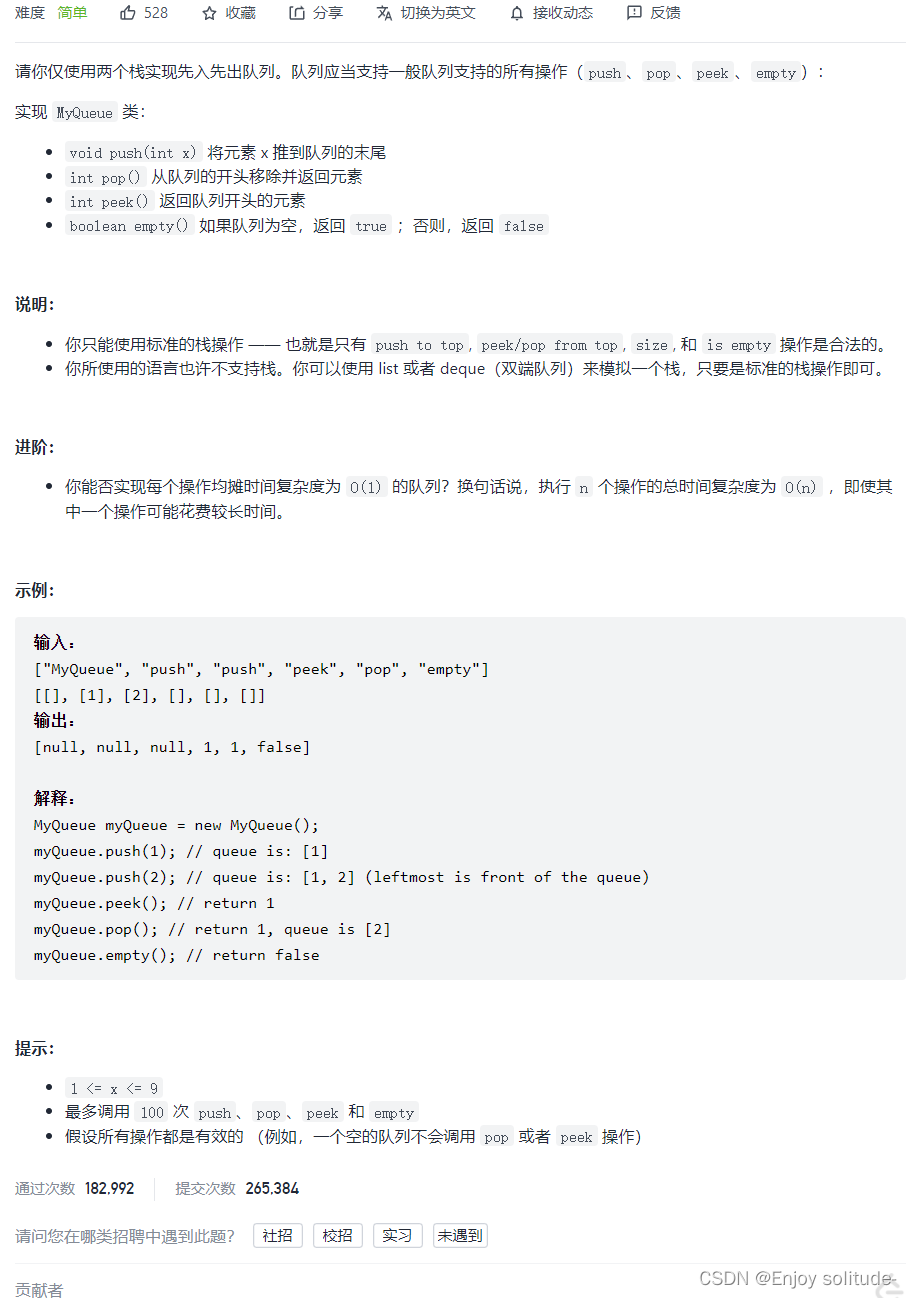
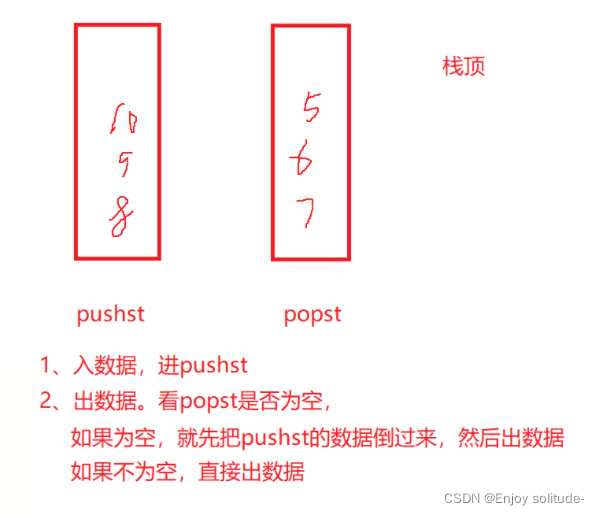
4.3用栈实现队列
用栈实现队列《–(戳这里)
代码:
typedef int STDatatype;//栈中存储的元素类型(这里用整型举例)
typedef struct Stack
{
	STDatatype* a;//栈
	int top;//栈顶
	int capacity;//容量,方便增容
}ST;
// 初始化栈
void StackInit(ST* ps);

// 销毁栈
void StackDestory(ST* ps);

// 入栈
void StackPush(ST* ps,STDatatype x);

// 出栈
void StackPop(ST* ps);

// 检测栈是否为空,如果为空返回非零结果,如果不为空返回0
bool StackEmpty(ST* ps);

// 获取栈中有效元素个数
int  StackSize(ST* ps);

// 获取栈顶元素
STDatatype StackTop(ST* ps);

//初始化栈
void StackInit(ST* ps)
{
	assert(ps);
	ps->a = NULL;
	ps->top = 0;
	ps->capacity = 0;
}

//销毁栈
void StackDestory(ST* ps)
{
	assert(ps);
	if (ps->a)
	{
		free(ps->a);//释放栈
	}
	ps->a = NULL;
	ps->top = 0;//-1也可以 //栈顶置0
	ps->capacity = 0;//容量置0
}

//入栈
void StackPush(ST* ps, STDatatype x)
{
	assert(ps);
	//检查空间够不够,不够就增容
	if (ps->top == ps->capacity)
	{
		int newcapacity = ps->capacity == 0 ? 4 : ps->capacity * 2;
		STDatatype* tmp = realloc(ps->a, sizeof(STDatatype) * newcapacity);
		if (tmp == NULL)
		{
			printf("realloc fail!\n");
			exit(-1);
		}
		ps->a = tmp;
		ps->capacity = newcapacity;
	}
	ps->a[ps->top] = x;//栈顶位置存放元素x
	ps->top++;//栈顶上移
}

//出栈
void StackPop(ST* ps)//删
{
	assert(ps);
	assert(!StackEmpty(ps));//检测栈是否为空
	--ps->top;//栈顶下移
}

//检测栈是否为空
bool StackEmpty(ST* ps)
{
	assert(ps);
	return ps->top == 0;
}

//获取栈中有效元素个数
int  StackSize(ST* ps)
{
	assert(ps);
	return ps->top;
}

//获取栈顶元素
STDatatype StackTop(ST* ps)
{
	assert(ps);
	assert(!StackEmpty(ps));//检测栈是否为空

	return ps->a[ps->top - 1];//返回栈顶元素
}

typedef struct {
ST pushST;
ST popST;
} MyQueue;


MyQueue* myQueueCreate() {
MyQueue* q=(MyQueue*)malloc(sizeof(MyQueue));
StackInit(&q->pushST);//初始化栈
StackInit(&q->popST);

return q;
}

void myQueuePush(MyQueue* obj, int x) {
assert(obj);
StackPush(&obj->pushST,x);//往pushST插元素

}


int myQueuePeek(MyQueue* obj) {
assert(obj);
if(StackEmpty(&obj->popST))
{
    while(!StackEmpty(&obj->pushST))
    {
        StackPush(&obj->popST,StackTop(&obj->pushST));//pushST栈顶元素插入到popST
        StackPop(&obj->pushST);//干掉pushST中原有插入popST中的元素
    }
}
return StackTop(&obj->popST);

}

int myQueuePop(MyQueue* obj) {
assert(obj);

int front=myQueuePeek(obj);//找到popST栈顶元素(即队列队头元素)
StackPop(&obj->popST);//取出栈顶元素

return front;
}

bool myQueueEmpty(MyQueue* obj) {
//判空
return StackEmpty(&obj->popST)&&StackEmpty(&obj->pushST);
}

void myQueueFree(MyQueue* obj) {
//释放
StackDestory(&obj->popST);
StackDestory(&obj->pushST);
free(obj);
}
– the End –
以上就是我分享的【队列的介绍与实现】相关内容,感谢阅读!
关注作者,持续阅读作者的文章,学习更多知识!
https://blog.csdn.net/weixin_53306029?spm=1001.2014.3001.5343
2022/1/4
————————————————


 2779
2779

 被折叠的 条评论
为什么被折叠?
被折叠的 条评论
为什么被折叠?
 到【灌水乐园】发言


