


时隔一年,我又回来了!!!!
最近负责app的项目,使用uniapp+openlayers技术栈实现一些地图的操作。本次技术分享主要是前端方面的,由于之前没有用过openlayers加上uniapp接触的也不深,所以前期写的时候踩了不少坑,希望能本篇博客能帮助刚入坑的小伙伴,话不多说进入正题!
1、引入openlayers
首先控制台执行命令,安装OpenLayers库,这块就不多说了
npm install ol
然后将所需的模块引入,这块当时遇到了一个坑,下面详细说明
	import 'ol/ol.css';
	import ol from 'ol';
	// 1、
	import {Source,Feature,Map,Overlay} from 'ol'
	import {XYZ,Vector} from 'ol/source';
	import {Group} from 'ol/layer'
	import {geom,Point,LineString} from 'ol/geom'
	import {Style,Circle,Fill,Stroke,Text} from 'ol/style'     // a
	// 2、
	import View from 'ol/View';
	import TileLayer from 'ol/layer/Tile';
	import Lvector from 'ol/layer/Vector'
	import OSM from 'ol/source/OSM';
	import Gcircle from 'ol/geom/Circle'     // b
上方引入方式有两种:
第一种后面引入的是模块,所需要的具体哪个方法用“{}”括起来,这里的方法名必须要和模块下的方法名保持一致。
第二种是具体的某一个模块下的方法,方法名可自定义;
为什么要用这两种方式引入,因为不同模块下有相同的方法名,如果用第一种方式,在调用的时候会因为无法区分而报错,所以要用第二种方式起别名。(例如,上方标记的a和b两个模块下都用到了circle)
2、创建地图
<view id="map" class="map"></view>

<script>
	let map = new Map({
			target: 'map',
			layers: [
				new TileLayer({
					// 网上很多这种方式,但是我用了之后加载不出来地图,所以通过加载高德瓦片地图
					// source: new OSM()
					source: new XYZ({
					url: ' http://wprd0{1-4}.is.autonavi.com/appmaptile?x={x}&y={y}&z={z}&lang=zh_cn&size=1&scl=2&style=6',
					projection: 'EPSG:3857',
					crossOrigin: '*',
					})
				}),
			],
			view: new View({
				center: [81.277857, 43.907986],
				zoom: 12,
				projection: 'EPSG:4326'
			})
		});
</script>
注意:
1、上面使用的方法需要先引入之后去创建,例如,new Map({})这种方式没有问题, 但是如果是 new ol.Map({})会不起作用,不知道是不是uniapp中不支持这种方式
2、openlayers支持多种数据源的加载,上面示例只是加载高德的瓦片地图
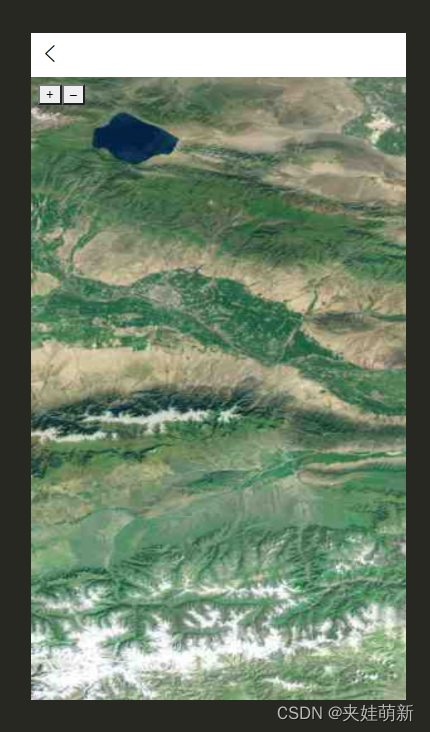
效果图
3、附源码
<template>
	<view class="container">
		<view id="map" class="map"></view>
	</view>
</template>
<script>
	import 'ol/ol.css';
	import ol from 'ol';
	import {Source,Feature,Map,Overlay} from 'ol'
	import {XYZ,Vector} from 'ol/source';
	import {Group} from 'ol/layer'
	import {geom,Point,LineString} from 'ol/geom'
	import {Style,Circle,Fill,Stroke,Text} from 'ol/style'
	import View from 'ol/View';
	import TileLayer from 'ol/layer/Tile';
	import Lvector from 'ol/layer/Vector'
	import OSM from 'ol/source/OSM';
	import Gcircle from 'ol/geom/Circle'
	export default {
			data() {
				return {
					map: null,
				}
			},
			mounted() {
			this.initMap();
		},
		methods: {
			initMap() {
				this.map = new Map({
					target: 'map',
					layers: [
						new TileLayer({
							// source: new OSM()
							source: new XYZ({
								url: ' http://wprd0{1-4}.is.autonavi.com/appmaptile?x={x}&y={y}&z={z}&lang=zh_cn&size=1&scl=2&style=6',
								projection: 'EPSG:3857',
								// wrapX: false
								crossOrigin: '*',
							})
						}),
					view: new View({
						center: [81.277857, 43.907986],
						// center: [114.30, 30.50],
						zoom: 12,
						projection: 'EPSG:4326'
					})
				});
			},
		}
	}
</script>
<style lang="scss" scoped>
	#map {
		position: relative;
		width: 100%;
		height: 1300rpx;
	}
</style>
uniapp是基于vue一个前端技术栈,很多在写法上跟vue类似,但是也会有一些坑。
本次就先到这吧,后续更新一些简单的操作,敬请期待!!


 537
537

 被折叠的 条评论
为什么被折叠?
被折叠的 条评论
为什么被折叠?
 到【灌水乐园】发言


