


#LibreNMS 是一个功能强大的开源网络监控系统,它能够为你的网络性能和设备提供全面的监控。本文将引导你通过一系列步骤,在 Ubuntu 22.04 服务器上安装和配置 LibreNMS,使用 Nginx 作为 Web 服务器。
简介
LibreNMS 提供了对网络设备和性能的深入洞察,帮助你监控和管理网络。本文将详细介绍如何在 Ubuntu 22.04 系统上部署 LibreNMS,并通过 Nginx 和 SSL 证书来增强其安全性。我们将覆盖从系统更新到 SSL 配置的全过程,确保你的网络监控系统既安全又高效。
接下来,我将一步一步教大家如何进行安装和部署!!
开始部署
1. 更新系统包
首先,确保你的系统是最新的,运行以下命令:
sudo apt update
sudo apt upgrade -y
2. 安装必要的依赖
LibreNMS 需要多个依赖,包括 PHP、MariaDB、Nginx 等。使用以下命令安装这些依赖:
apt install -y acl curl fping git graphviz imagemagick mariadb-client mariadb-server mtr-tiny nginx-full nmap php-cli php-curl php-fpm php-gd php-gmp php-json php-mbstring php-mysql php-snmp php-xml php-zip rrdtool snmp snmpd unzip python3-pymysql python3-dotenv python3-redis python3-setuptools python3-systemd python3-pip whois traceroute
3. 安装 LibreNMS
首先,创建一个名为 librenms 的用户:
useradd librenms -d /opt/librenms -M -r -s "$(which bash)"
接下来,从 GitHub 下载 LibreNMS:
cd /opt
git clone https://github.com/librenms/librenms.git
设置正确的目录权限:
chown -R librenms:librenms /opt/librenms
chmod 771 /opt/librenms
setfacl -d -m g::rwx /opt/librenms/rrd /opt/librenms/logs /opt/librenms/bootstrap/cache/ /opt/librenms/storage/
setfacl -R -m g::rwx /opt/librenms/rrd /opt/librenms/logs /opt/librenms/bootstrap/cache/ /opt/librenms/storage/
4. 配置 PHP
安装所需的 PHP 依赖:
su - librenms
./scripts/composer_wrapper.php install --no-dev
exit
如果因为代理问题导致上述脚本失败,可以手动安装 composer 包:
wget <https://getcomposer.org/composer-stable.phar>
mv composer-stable.phar /usr/bin/composer
chmod +x /usr/bin/composer
修改 PHP 配置以设置时区:
nano /etc/php/8.1/fpm/php.ini
nano /etc/php/8.1/cli/php.ini
找到 date.timezone 并设置为 Etc/UTC:
date.timezone = Etc/UTC
同时设置系统时区:
timedatectl set-timezone Etc/UTC
接下来,配置 PHP-FPM。创建一个新的 PHP 池,以便设置 sock 文件,并设置用户和组:
cp /etc/php/8.1/fpm/pool.d/www.conf /etc/php/8.1/fpm/pool.d/librenms.conf
nano /etc/php/8.1/fpm/pool.d/librenms.conf
将 [www] 改为 [librenms]:
[librenms]
更改用户和组为 “librenms”:
user = librenms
group = librenms
更改监听路径以匹配你的 Web 服务器配置:
listen = /run/php-fpm-librenms.sock
如果没有其他 PHP Web 应用程序在此服务器上,可以删除 www.conf 以节省资源。根据需要调整 librenms.conf 中的性能设置。
重启 PHP-FPM 以应用更改:
systemctl restart php8.1-fpm
5. 配置数据库
启动并保护 MariaDB 服务器:
sudo systemctl start mariadb
sudo mysql_secure_installation
在安全安装过程中,设置 root 密码并保护你的 MariaDB 安装。
创建 LibreNMS 的数据库和用户:
CREATE DATABASE librenms CHARACTER SET utf8 COLLATE utf8_unicode_ci;
CREATE USER 'librenms'@'localhost' IDENTIFIED BY 'strong_password';
GRANT ALL PRIVILEGES ON librenms.* TO 'librenms'@'localhost';
FLUSH PRIVILEGES;
EXIT;
6. 配置 Nginx
为 LibreNMS 创建一个 Nginx 配置文件:
sudo nano /etc/nginx/sites-available/librenms.conf
添加以下配置:
server {
 listen      80;
 server_name your_domain;
 root        /opt/librenms/html;
 index       index.php; charset utf-8;
 gzip on;
 gzip_types text/css application/javascript text/javascript application/x-javascript image/svg+xml text/plain text/xsd text/xsl text/xml image/x-icon;
 location / {
  try_files $uri $uri/ /index.php?$query_string;
 }
 location ~ [^/]\\.php(/|$) {
  fastcgi_pass unix:/run/php-fpm-librenms.sock;
  fastcgi_split_path_info ^(.+\\.php)(/.+)$;
  include fastcgi.conf;
 }
 location ~ /\\.(?!well-known).* {
  deny all;
 }
}
启用站点并重启 Nginx:
sudo ln -s /etc/nginx/sites-available/librenms.conf /etc/nginx/sites-enabled/
sudo systemctl restart nginx
7. 使用 SSL 保护安装
首先,在防火墙中添加 HTTP 和 HTTPS 端口(如果适用):
ufw allow 80/tcp
ufw allow 443/tcp
ufw reload
接下来,使用 Let’s Encrypt 获得免费的 SSL 证书。
安装 Certbot:
sudo apt install certbot python3-certbot-nginx -y
获取并安装证书:
sudo certbot --nginx -d your_domain
按照提示完成 SSL 安装。
8. 启用 lnms 命令补全
此功能允许你在 lnms 命令中使用 Tab 键进行补全,就像普通 Linux 命令一样。
ln -s /opt/librenms/lnms /usr/bin/lnms
cp /opt/librenms/misc/lnms-completion.bash /etc/bash_completion.d/
9. 配置 SNMP
修改 SNMP 配置文件:
sudo cp /opt/librenms/snmpd.conf.example /etc/snmp/snmpd.conf
sudo nano /etc/snmp/snmpd.conf
将 RANDOMSTRINGGOESHERE 替换为你选择的社区字符串。根据需要调整 syslocation 和 syscontact。
重启 SNMP 守护进程:
curl -o /usr/bin/distro <https://raw.githubusercontent.com/librenms/librenms-agent/master/snmp/distro>
chmod +x /usr/bin/distro
systemctl enable snmpd
systemctl restart snmpd
10. 设置 Cron 作业和日志轮转
LibreNMS 需要多个 Cron 作业来执行各种任务。创建一个新的 Cron 文件:
cp /opt/librenms/dist/librenms.cron /etc/cron.d/librenms
现在,启用调度器:
cp /opt/librenms/dist/librenms-scheduler.service /opt/librenms/dist/librenms-scheduler.timer /etc/systemd/system/
systemctl enable librenms-scheduler.timer
systemctl start librenms-scheduler.timer
配置 LibreNMS 日志轮转:复制 logrotate 配置
LibreNMS 将日志保存在 /opt/librenms/logs。随着时间的推移,这些日志可能会变得很大,需要轮转出去。使用提供的 logrotate 配置文件:
cp /opt/librenms/misc/librenms.logrotate /etc/logrotate.d/librenms
11. 完成 LibreNMS 安装
通过在 Web 浏览器中访问 http://your_domain/install.php 来导航到 LibreNMS Web 安装程序。
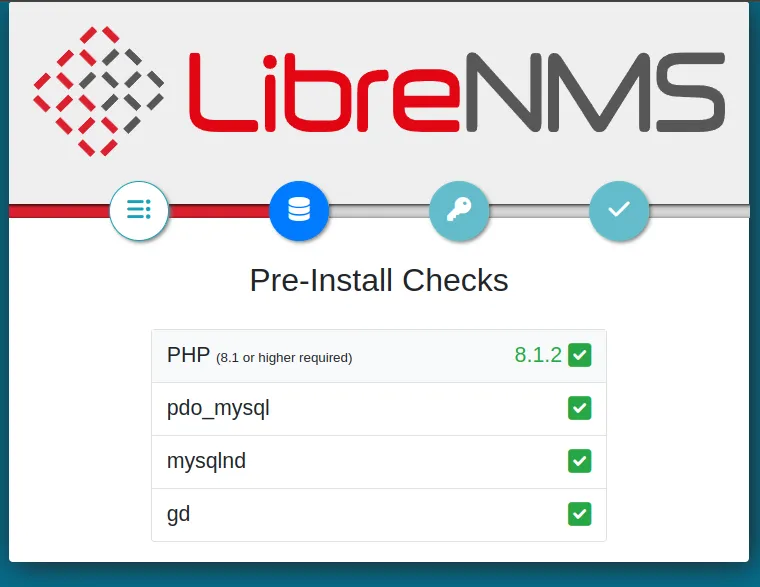
按照基于 Web 的设置说明进行操作:
- 数据库连接:输入你之前创建的数据库详细信息。
- 创建管理员用户:为 LibreNMS 设置管理员用户。
- 完成安装:按照剩余的提示完成安装。
相关链接
我的博客:https://blog.ivwv.site


 1万+
1万+

 被折叠的 条评论
为什么被折叠?
被折叠的 条评论
为什么被折叠?
 到【灌水乐园】发言


