


本文使用spring cloud,nacos,dubbo,gateway搭建微服务
启动nacos
nacos是阿里开源的一个组件,用于服务发现、注册中心与配置中心。
首先下载nacos server:GitHub - alibaba/nacos: an easy-to-use dynamic service discovery, configuration and service management platform for building cloud native applications.
解压压缩包,打开bin目录。因为直接启动的话,会以集群模式启动,单机下会报错。所以有三种方法解决:
-
使用命令行启动,指定为单机模式:
-
startup.cmd -m standalone
-
修改startup.cmd文件,将其修改为单机模式:
将
| set MODE="cluster" |
修改为:
-
rem set MODE="cluster"
set MODE="standalone"
注:
rem为注释语句 -
可以去修改数据库配置,感觉太麻烦了
建议第一种。
然后便能直接启动。
web页面地址为:http://localhost:8848/nacos/index.html
默认账号密码都是nacos
项目搭建
开始搭建项目
新建一个父项目,名为cloud-demo

删掉多余的src目录。
然后再分别新建Module类型的项目,分别命名为provider、consumer、gateway,依赖选择Spring Web。
在父pom.xml文件中,引入子模块:
| <packaging>pom</packaging> <modules> <module>consumer</module> <module>gateway</module> <module>provider</module> </modules> |
再新建一个公共子模块,命名为common。分别在provider、consumer子模块的pom.xml文件中引入common模块的依赖:
| <dependency> <groupId>com.wtsm</groupId> <artifactId>common</artifactId> <version>0.0.1-SNAPSHOT</version> </dependency> |
因为每个子模块都需要引入配置中心和注册中心,所以在common和gateway模块中引入相应的依赖:
| <!-- 配置管理 --> <dependency> <groupId>com.alibaba.cloud</groupId> <artifactId>spring-cloud-starter-alibaba-nacos-config</artifactId> <version>2021.1</version> </dependency> <!-- 服务发现 --> <dependency> <groupId>com.alibaba.cloud</groupId> <artifactId>spring-cloud-starter-alibaba-nacos-discovery</artifactId> <version>2021.1</version> </dependency> |
在application.yml同目录下,新建一个名为bootstrap.yml的资源文件,并保持application.yml为空。对gateway的bootstrap.yml配置文件进行配置:
| # bootstrap.yml spring: application: name: consumer cloud: nacos: config: server-addr: http://localhost:8848 group: test file-extension: yaml |
注:spring.application.name为nacos配置中心中dataId的一部分。 group为分组名。 file-extension为配置中心配置文件的扩展名。
然后在nacos的web管理页面的配置管理,新建一个配置。 Data Id填写上面spring.applicatio.name的值, Group即为上面的 group,配置格式选择YAML,配置内容填写需要放在配置中心的配置,这里填写运行端口与注册中心的地址:
| server: port: 8082 spring: application: name: consumer cloud: nacos: discovery: server-addr: http://localhost:8848 |
bootstrap.yml会比application.yml先加载,但是要使用bootstrap.yml配置文件的话,需要添加依赖,这里我们在common和gateway中添加:
| <dependency> <groupId>org.springframework.cloud</groupId> <artifactId>spring-cloud-starter-bootstrap</artifactId> <version>3.0.4</version> </dependency> |
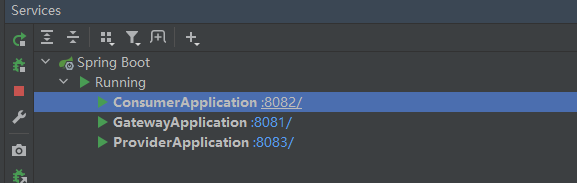
先启动consumer模块,能看到程序以配置中心配置的8082端口运行,并且在服务列表能看到consumer服务
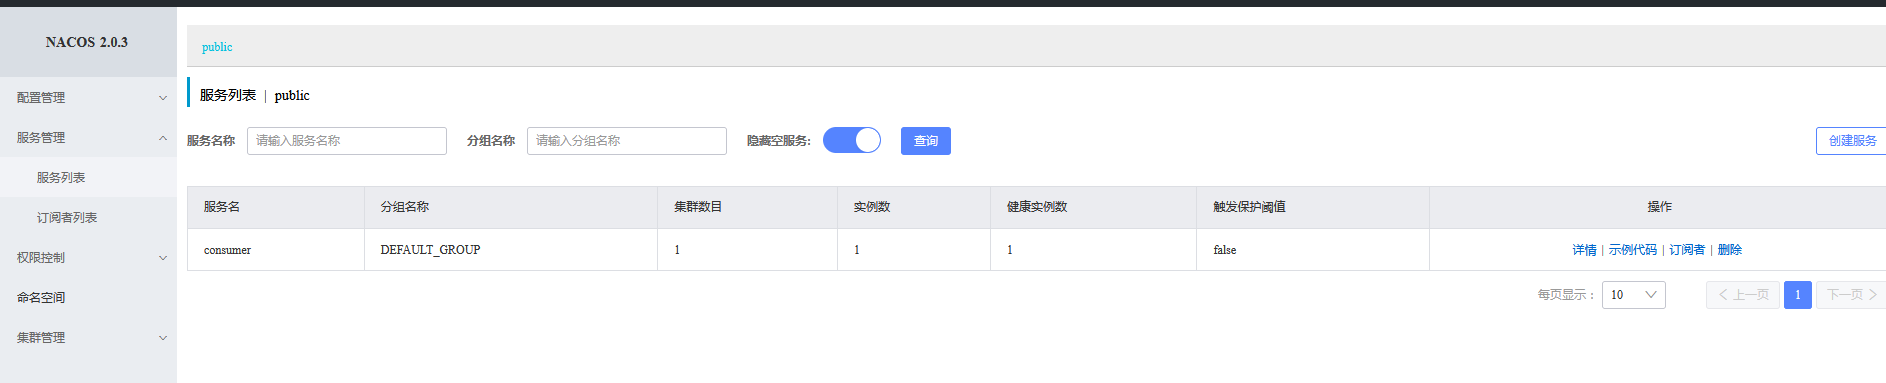
说明配置中心与注册中心都连接成功。
同理,对provider配置bootstrap.yml和配置中心配置:
| # bootstrap.yml spring: application: name: provider cloud: nacos: config: server-addr: http://localhost:8848 group: test file-extension: yaml |
| server: port: 8083 spring: application: name: provider cloud: nacos: discovery: server-addr: http://localhost:8848 |
同理,对gateway配置bootstrap.yml和配置中心配置
| spring: application: name: gateway cloud: nacos: config: server-addr: http://localhost:8848 group: test file-extension: yaml |
| server: port: 8081 spring: application: name: gateway cloud: nacos: discovery: server-addr: http://localhost:8848 |
启动服务
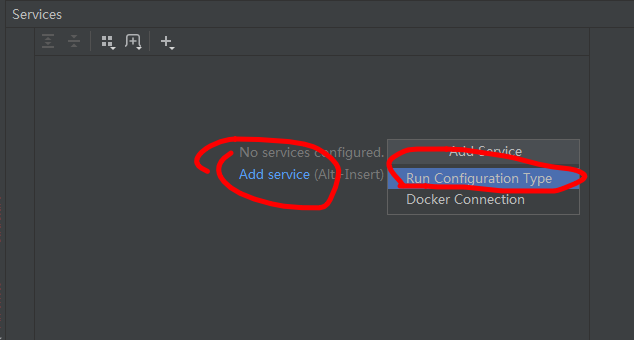
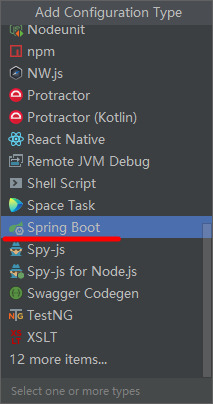
使用idea快捷键alt+8,打开Services界面,添加服务
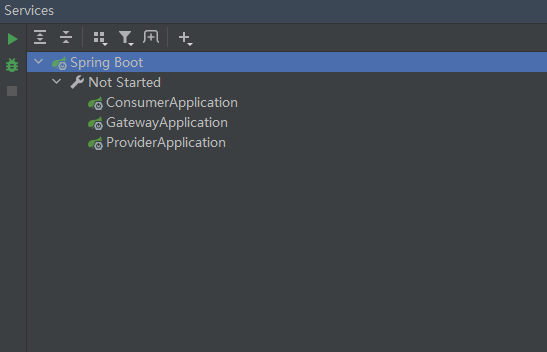
把多余的隐藏,剩这三个:
启动时发现报错了。
| *************************** APPLICATION FAILED TO START *************************** Description: Your project setup is incompatible with our requirements due to following reasons: - Spring Boot [2.5.5] is not compatible with this Spring Cloud release train Action: Consider applying the following actions: - Change Spring Boot version to one of the following versions [2.3.x, 2.4.x] . You can find the latest Spring Boot versions here [https://spring.io/projects/spring-boot#learn]. If you want to learn more about the Spring Cloud Release train compatibility, you can visit this page [https://spring.io/projects/spring-cloud#overview] and check the [Release Trains] section. If you want to disable this check, just set the property [spring.cloud.compatibility-verifier.enabled=false] |
这是因为所引入的Spring Cloud Alibaba和spring boot版本不符合,因为我用Spring Cloud Alibaba版本为2021.1,根据Spring Cloud Alibaba官方版本说明,需要将spring boot的版本改为2.4.2。
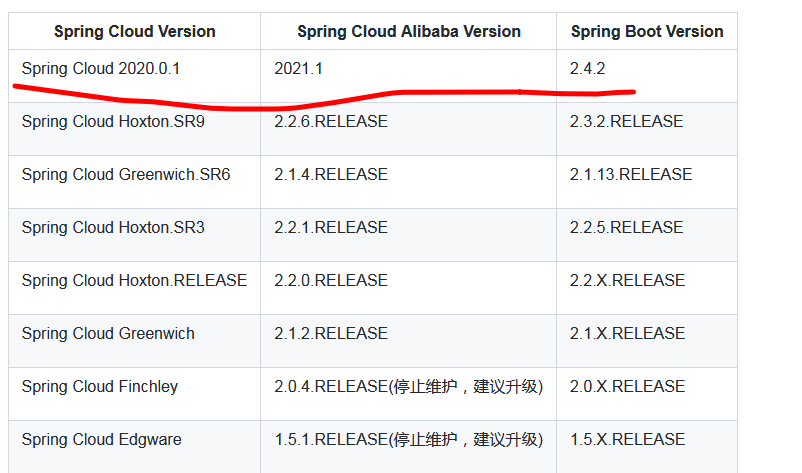
| <parent> <groupId>org.springframework.boot</groupId> <artifactId>spring-boot-starter-parent</artifactId> <version>2.4.2</version> <relativePath/> <!-- lookup parent from repository --> </parent> |
能看到启动成功
到nacos页面,能看到注册成功的服务

测试nacos的配置自动刷新:
新增一个类:
| @RestController @RequestMapping("/config") @RefreshScope public class ConfigController { @Value("${local:false}") private boolean local; @RequestMapping("/get") public boolean get() { return local; } } |
访问http://localhost:8082/config/get,得到结果为false
然后在配置中心,添加 local: true,结果为:
| server: port: 8082 spring: cloud: nacos: discovery: server-addr: http://localhost:8848 local: true |
在不重启应用的情况下,再次访问链接,得到的结果为true。说明配置确实动态刷新了。
集成dubbo
dubbo也是由阿里巴巴开源的一个微服务开发框架,可用于微服务之间的RPC通信。
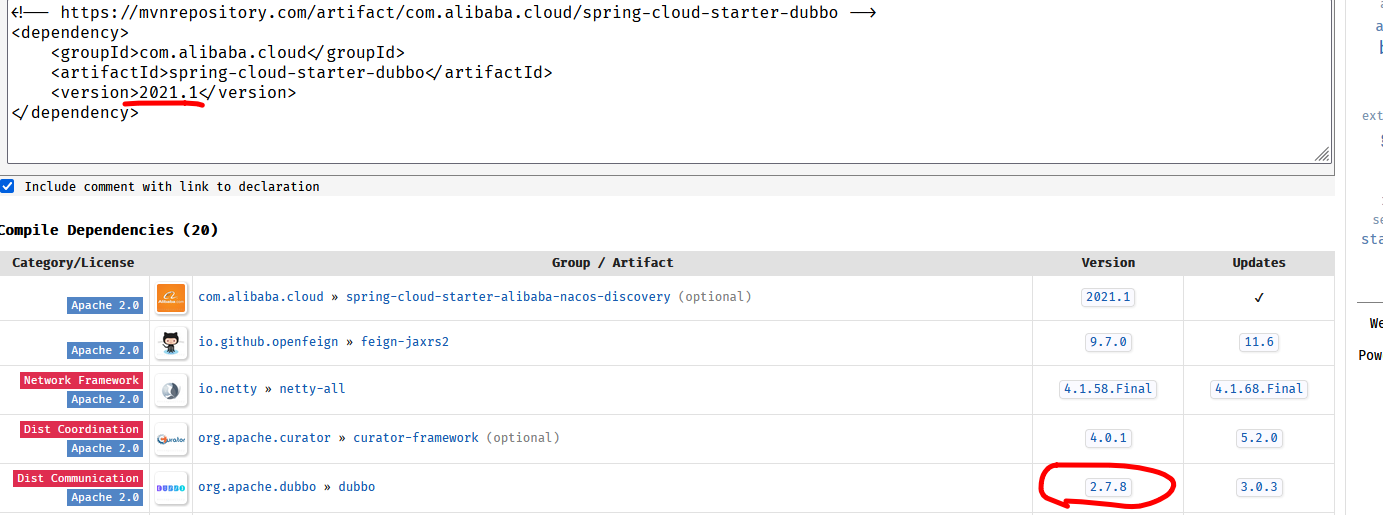
需要使用dubbo的话,需要在common中引入依赖:
| <dependency> <groupId>com.alibaba.cloud</groupId> <artifactId>spring-cloud-starter-dubbo</artifactId> <version>2021.1</version> </dependency> <dependency> <groupId>org.apache.commons</groupId> <artifactId>commons-lang3</artifactId> <version>3.12.0</version> </dependency> |
注:
- 如果不引入commons-lang3的话会报错:
java.lang.ClassNotFoundException: org.apache.commons.lang3.StringUtils。但是在2018年的时候就提示已经移除了commons-lang3,详见[dubbo-1920] remove commons-lang3 dependency by beiwei30 · Pull Request #1921 · apache/dubbo · GitHub,而且spring-cloud-starter-dubbo的2021.1中使用的dubbo时2.7.8的,版本时间是2020年。理应没这个问题才对,很奇怪。
- 如果引入下面的dubbo的话,
| <!-- dubbo --> <dependency> <groupId>org.apache.dubbo</groupId> <artifactId>dubbo</artifactId> <version>3.0.3</version> </dependency> |
虽然不会报commons-lang3的错,但是在使用consumer调用远程接口时,会提示远程方法为null: java.lang.NullPointerException: null,且查看provider服务的元数据时,只有 preserved.register.source=SPRING_CLOUD,正常来说,应该如下图所示:
在配置中心为consumer添加dubbo的配置:
| server: port: 8082 spring: application: name: consumer cloud: nacos: discovery: server-addr: http://localhost:8848 dubbo: application: name: consumer qos-enable: false protocol: name: dubbo port: -1 # rpc需要一个额外的端口,-1表示端口随机 registry: address: spring-cloud://localhost cloud: subscribed-services: provider consumer: check: false |
在配置中心为provider添加dubbo的配置:
| server: port: 8083 spring: application: name: provider cloud: nacos: discovery: server-addr: http://localhost:8848 dubbo: application: name: provider qos-enable: false #不启用qos,启用的话会报端口被占用 scan: base-packages: com.wtsm.provider.service #Dubbo服务实现类的扫描基准包路径 protocol: name: dubbo port: -1 registry: address: nacos://localhost:8848 |
新增一个子模块,命名为provider-api。在改模块中新建一个接口IProviderService:
| public interface IProviderService { String getProvider(); } |
分别在consumer和provider增加provider-api的依赖:
| <dependency> <groupId>com.wtsm</groupId> <artifactId>provider-api</artifactId> <version>0.0.1-SNAPSHOT</version> </dependency> |
在provider中实现IProviderService接口:
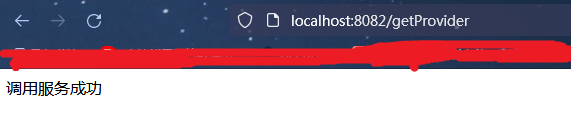
| import com.wtsm.providerapi.IProviderService; import org.apache.dubbo.config.annotation.DubboService; @DubboService public class ProviderServiceImpl implements IProviderService { @Override public String getProvider() { return "调用服务成功"; } } |
在consumer中调用接口:
| import com.wtsm.providerapi.IProviderService; import org.apache.dubbo.config.annotation.DubboReference; import org.springframework.cloud.context.config.annotation.RefreshScope; import org.springframework.web.bind.annotation.GetMapping; import org.springframework.web.bind.annotation.RestController; @RestController @RefreshScope public class ConsumerController { @DubboReference private IProviderService providerService; @GetMapping("getProvider") public String getProvider(){ return providerService.getProvider(); } } |
运行consumer和provider服务,访问http://localhost:8082/getProvider,能看到调用成功
集成网关
注释掉gateway模块的 spring-boot-starter-web依赖,然后在gateway模块中引入 spring-cloud-starter-gateway依赖,因为spring-cloud-starter-gateway内部实现的webflux与spring mvc的配置所冲突。
如果使用 lb,但不添加spring-cloud-starter-loadbalancer依赖的话,会报503的错。详见
nacos+spring cloud gateway 出现503 Service Unavailable_wangzibai的博客-CSDN博客
| <dependency> <groupId>org.springframework.cloud</groupId> <artifactId>spring-cloud-starter-gateway</artifactId> <version>3.0.4</version> </dependency> <dependency> <groupId>org.springframework.cloud</groupId> <artifactId>spring-cloud-starter-loadbalancer</artifactId> <version>3.0.4</version> <!-- 版本号是必须要加的 --> </dependency> |
然后在gateway的配置文件中,新增配置:
| spring: cloud: gateway: routes: - id: consumer_route # uri后面指定消费者的服务id,lb代表从注册中心获取服务,lb是Load Balance的缩写 uri: lb://consumer predicates: # 匹配转发路径 - Path=/** |
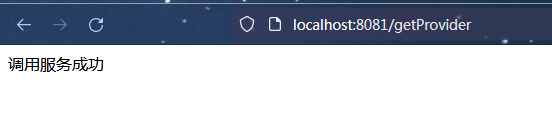
将所有服务启动后,访问 http://localhost:8081/getProvider,会转发到consumer微服务中


 2万+
2万+


 被折叠的 条评论
为什么被折叠?
被折叠的 条评论
为什么被折叠?
 到【灌水乐园】发言


