


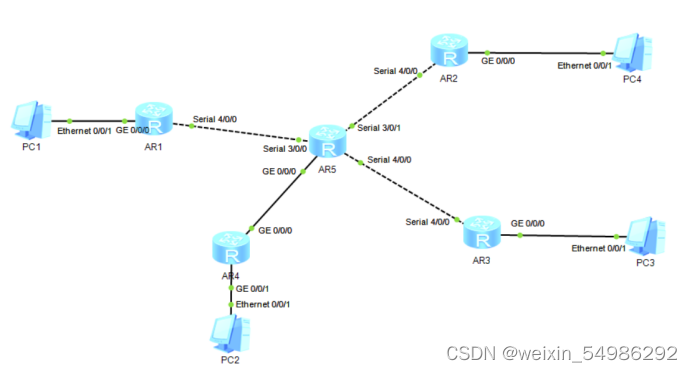
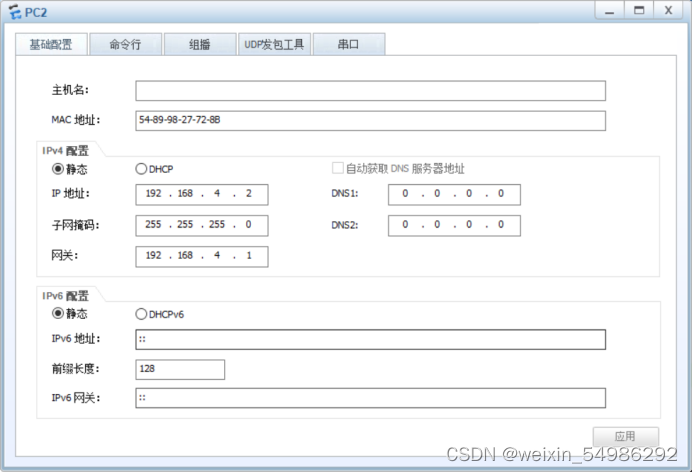
首先配置IP地址
R1:

R2:

R3:

R4:

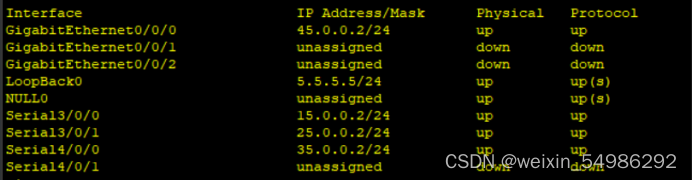
ISP:
接着配置路由:
[r1]ip route-static 0.0.0.0 0 15.0.0.2
[r2]ip route-static 0.0.0.0 0 25.0.0.2
[r3]ip route-static 0.0.0.0 0 35.0.0.2
[r4]ip route-static 0.0.0.0 0 45.0.0.2
配置完之后内网可以互相ping通
根据题目要求,R1和R5之间使用PPP的PAP,R2和R5使用PPP的chap,R3和R5使用HDLC ISP上部署aaa认证并启用ppp:
[isp]aaa
[isp-aaa]local-user dzy password cipher 123456
[isp-aaa]local-user dzy service-type ppp
[isp]int s3/0/0
[isp-Serial3/0/0]ppp authentication-mode pap
R1上启用ppp:
[r1]int s4/0/0
[r1-Serial4/0/0]ppp pap local-user dzy password cipher 123456
在ISP上再部署chap以连R2:
[isp-Serial3/0/1]ppp authentication-mode chap
在R2上开启ppp:
[r2-Serial4/0/0]ppp chap user dzy
[r2-Serial4/0/0]ppp chap password cipher 123456
在R3上使用HDLC协议:
[r3]int s4/0/0
[r3-Serial4/0/0]link-protocol hdlc
在ISP上也更改协议以互通:
[isp]int s4/0/0
[isp-Serial4/0/0]link-protocol hdlc
接着搭建MGRE环境;
在R1上:
[r1]int t0/0/0
[r1-Tunnel0/0/0]ip address 192.168.5.1 24
[r1-Tunnel0/0/0]tunnel-protocol gre p2mp
[r1-Tunnel0/0/0]source 15.0.0.1
[r1-Tunnel0/0/0]nhrp entry multicast dynamic —开启伪广播,为RIP做准备
R2:
[r2]int t0/0/0
[r2-Tunnel0/0/0]ip address 192.168.5.2 24
[r2-Tunnel0/0/0]tunnel-protocol gre p2mp
[r2-Tunnel0/0/0]source s4/0/0
[r2-Tunnel0/0/0]nhrp entry 192.168.5.1 15.0.0.1 register
R3:
[r3]int t0/0/0
[r3-Tunnel0/0/0]ip address 192.168.5.3 24
[r3-Tunnel0/0/0]tunnel-protocol gre p2mp
[r3-Tunnel0/0/0]source s4/0/0
[r3-Tunnel0/0/0]nhrp entry 192.168.5.1 15.0.0.0 register
R1,R4之间配置点到点GRE:
R1:
[r1]int t0/0/1
[r1-Tunnel0/0/1]ip address 192.168.6.1 24
[r1-Tunnel0/0/1]tunnel-protocol gre
[r1-Tunnel0/0/1]source 15.0.0.1
[r1-Tunnel0/0/1]destination 45.0.0.1
R4:
[r4]int t0/0/0
[r4-Tunnel0/0/0]ip address 192.168.6.2 24
[r4-Tunnel0/0/0]tunnel-protocol gre
[r4-Tunnel0/0/0]source 45.0.0.1
[r4-Tunnel0/0/0]destination 15.0.0.1
根据题意基于RIP全网可达,去各个路由器上配置RIP:
R1:
[r1]rip
[r1-rip-1]v 2
[r1-rip-1]network 192.168.1.0
[r1-rip-1]network 192.168.5.0
[r1-rip-1]network 192.168.6.0
R2:
[r2]rip
[r2-rip-1]v 2
[r2-rip-1]network 192.168.2.0
[r2-rip-1]network 192.168.5.0
R3:
[r3]rip
[r3-rip-1] v 2
[r3-rip-1]network 192.168.3.0
[r3-rip-1]network 192.168.5.0
R4:
[r4]rip
[r4-rip-1]v 2
[r4-rip-1]network 192.168.4.0
[r4-rip-1]network 192.168.6.0
配完后发现R2和R3的路由条目不全 原因是以为RIP的水平分割,关闭水平分割就是非shortcut,这里使用汇总来使用shortcut
R1:
[r1]int t0/0/0
[r1-Tunnel0/0/0]rip summary-address 192.168.0.0 255.255.248.0
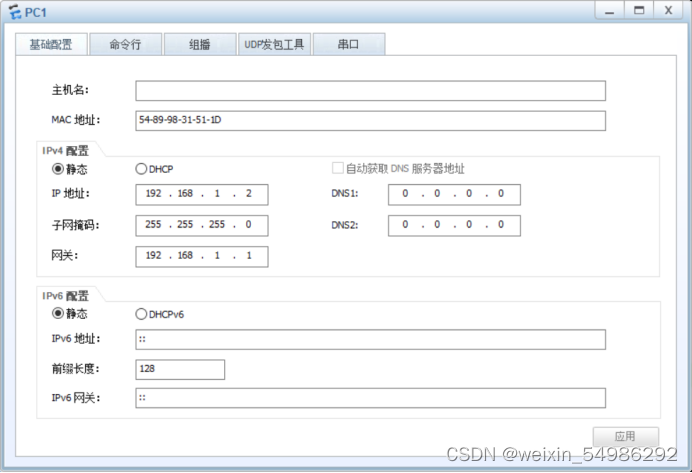
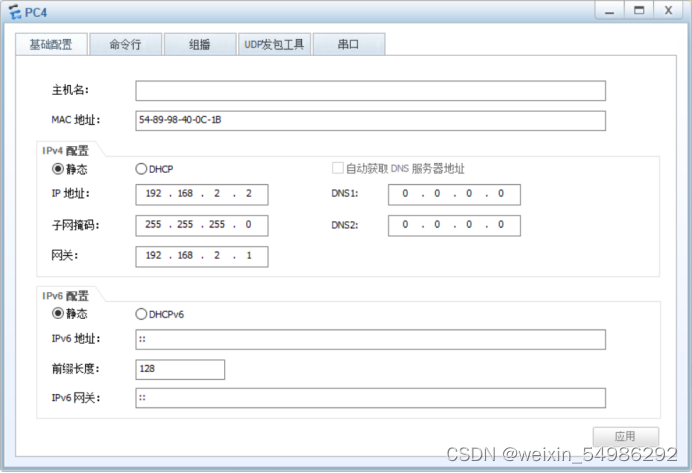
最后将所有PC设置私有IP为源IP,可以访问R5环回

然后配置nat使私有IP访问官网:
R1:
[r1]acl 2000
[r1-acl-basic-2000]rule permit source 192.168.1.0 0.0.0.255
[r1-acl-basic-2000]q
[r1]int s4/0/0
[r1-Serial4/0/0]nat outbound 2000
R2:
[r2]acl 2000
[r2-acl-basic-2000]rule permit source 192.168.2.0 0.0.0.255
[r2-acl-basic-2000]q
[r2]int s4/0/0
[r2-Serial4/0/0]nat outbound 2000
R3:
[r3]acl 2000
[r3-acl-basic-2000]rule permit source 192.168.3.0 0.0.0.255
[r3-acl-basic-2000]q
[r3]int s4/0/0
[r3-Serial4/0/0]nat outbound 2000
R4:
[r4]acl 2000
[r4-acl-basic-2000]rule permit source 192.168.4.0 0.0.0.255
[r4-acl-basic-2000]q
[r4-GigabitEthernet0/0/0]nat outbound 2000


 221
221


 被折叠的 条评论
为什么被折叠?
被折叠的 条评论
为什么被折叠?
 到【灌水乐园】发言


