


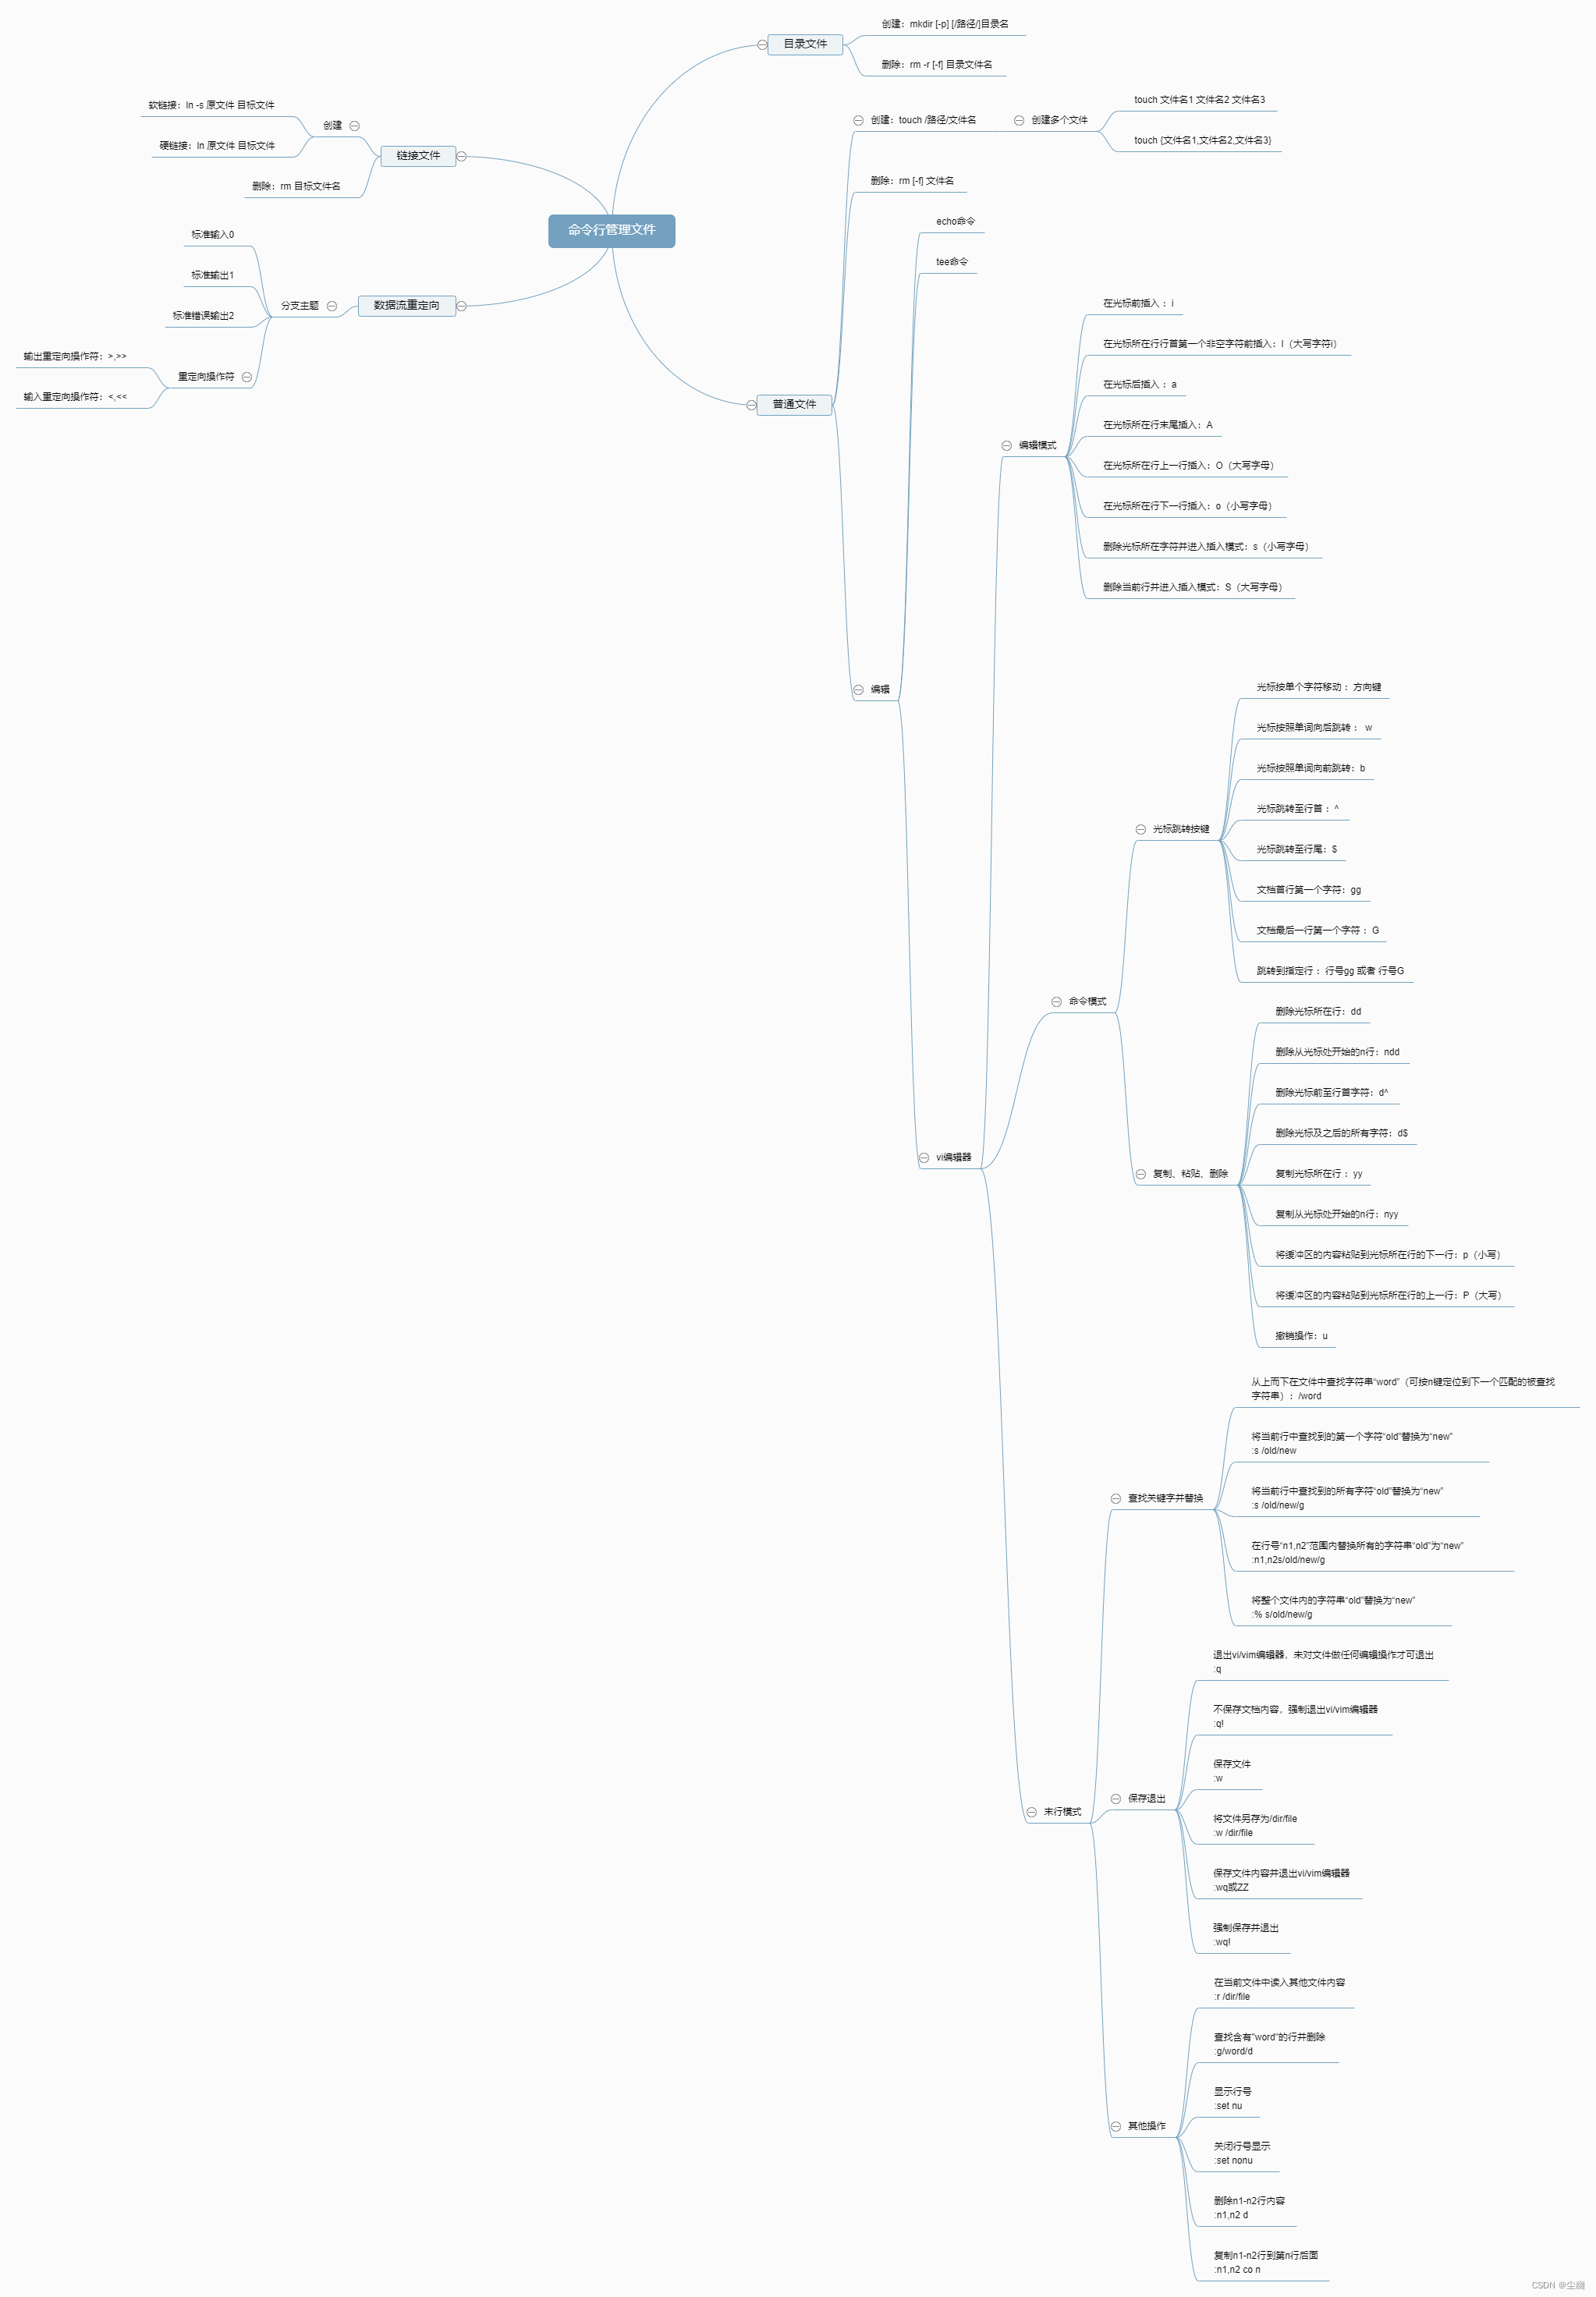
总结
1、创建文件命令练习:
(1) 在/目录下创建一个临时目录test;
[root@localhost ~]# mkdir  /test
[root@localhost ~]# ls /
bin  boot  dev  etc  home  lib  lib64  media  mnt  opt  proc  root  run  sbin  srv  sys  test  tmp  usr  var
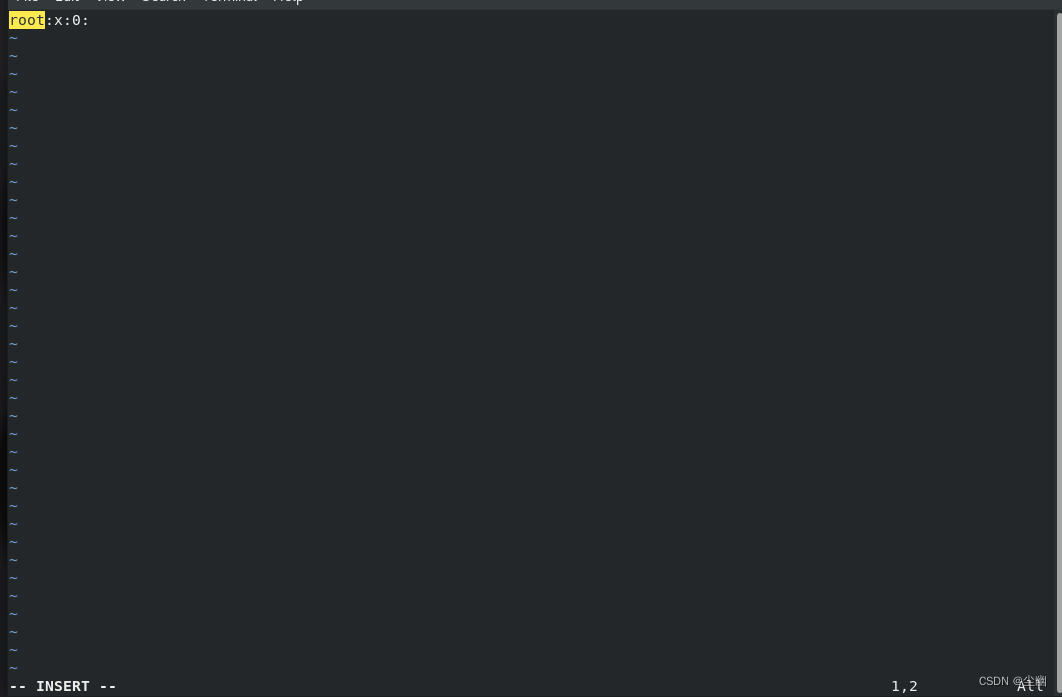
(2)在临时目录test下创建五个文件,文件名分别为passwd,group,bashrc,profile,sshd_config;
[root@localhost ~]# cd /test
[root@localhost test]# touch passwd group bashrc profile sshd_config
[root@localhost test]# ls /test
bashrc  group  passwd  profile  sshd_config
(3)在/test创建/etc/motd的软链接,文件名为motd.soft;创建/etc/motd的硬链接为motd.hard
[root@localhost ~]# ln -s /etc/motd /test/motd.soft
[root@localhost ~]# ln  /etc/motd /test/motd.hard
[root@localhost ~]# ls /test
bashrc  group  motd.hard  motd.soft  passwd  profile  sshd_config
[root@localhost ~]# ll /test
total 0
-rw-r--r--. 1 root root 0 Oct 21 13:01 bashrc
-rw-r--r--. 1 root root 0 Oct 21 13:01 group
-rw-r--r--. 2 root root 0 Sep 10  2018 motd.hard
lrwxrwxrwx. 1 root root 9 Oct 21 13:04 motd.soft -> /etc/motd
-rw-r--r--. 1 root root 0 Oct 21 13:01 passwd
-rw-r--r--. 1 root root 0 Oct 21 13:01 profile
-rw-r--r--. 1 root root 0 Oct 21 13:01 sshd_config
[root@localhost ~]# ll -i  /etc/motd /test/motd.hard
33652948 -rw-r--r--. 2 root root 0 Sep 10  2018 /etc/motd
33652948 -rw-r--r--. 2 root root 0 Sep 10  2018 /test/motd.hard
2、重定向练习:
(1)将系统内核版本信息,发行版本信息,写入到/test/motd.soft文件中
[root@localhost ~]# cat /etc/redhat-release      //查看发行版本
Red Hat Enterprise Linux release 8.4 (Ootpa)
[root@localhost ~]# cat /etc/redhat-release > /test/motd.soft
[root@localhost ~]# cat /test/motd.soft
Red Hat Enterprise Linux release 8.4 (Ootpa)
[root@localhost ~]# uname -r                    //查看内核版本
4.18.0-305.el8.x86_64
[root@localhost ~]# uname -r >> /test/motd.soft  //追加到/motd.soft文件
[root@localhost ~]# cat /test/motd.soft
Red Hat Enterprise Linux release 8.4 (Ootpa)
4.18.0-305.el8.x86_64
(2)将当前主机主机名,当前用户使用的shell信息追加到/test/motd.hard文件中
[root@localhost ~]# hostname      //查看主机名
localhost.localdomain
[root@localhost ~]# hostname > /test/motd.hard     //将主机名写入到文件
[root@localhost ~]# cat /test/motd.hard
localhost.localdomain
[root@localhost ~]# echo $SHELL           //查看当前默认的shell
/bin/bash
[root@localhost ~]# echo $SHELL >> /test/motd.hard  //将shell信息追加到文件
[root@localhost ~]# cat /test/motd.hard
localhost.localdomain
/bin/bash
(3)将根目录下的文件的文件名写入/test/file文件中
[root@localhost ~]# ls /
bin  boot  dev  etc  home  lib  lib64  media  mnt  opt  proc  root  run  sbin  srv  sys  test  tmp  usr  var
[root@localhost ~]# ls / > /test/file
[root@localhost ~]# cat /test/file
bin
boot
dev
etc
home
lib
lib64
media
mnt
opt
proc
root
run
sbin
srv
sys
test
tmp
usr
var
(4)查看当前工作目录是否为/test目录,将当前工作目录的详细信息追加到/test/file文件中
[root@localhost ~]# pwd          //查看当前工作目录
/root
[root@localhost ~]# pwd >> /test/file
[root@localhost ~]# cat /test/file
bin
boot
dev
etc
home
lib
lib64
media
mnt
opt
proc
root
run
sbin
srv
sys
test
tmp
usr
var
/root
3、tee命令练习:
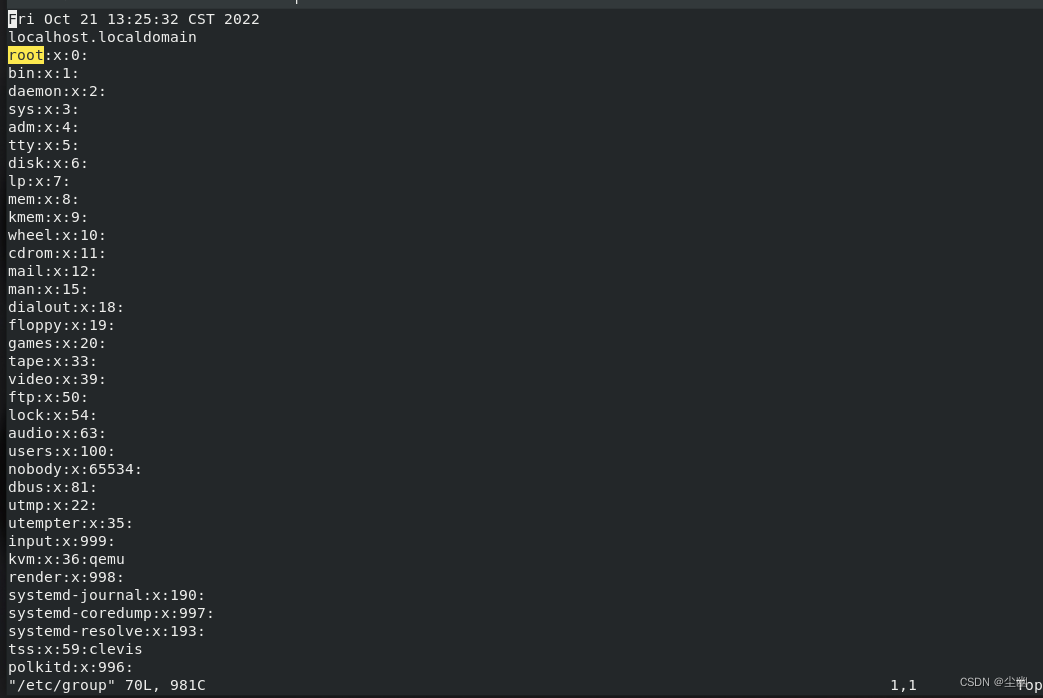
(1)将当前时间添加至/test目录下的passwd,group,bashrc,profile,sshd_config文件中
[root@localhost ~]# date | tee /test/passwd /test/group /test/bashrc /test/profile /test/sshd_config
Fri Oct 21 13:25:32 CST 2022
[root@localhost ~]# cat /test/passwd
Fri Oct 21 13:25:32 CST 2022
[root@localhost ~]# cat /test/group
Fri Oct 21 13:25:32 CST 2022
[root@localhost ~]# cat /test/bashrc
Fri Oct 21 13:25:32 CST 2022
[root@localhost ~]# cat /test/profile
Fri Oct 21 13:25:32 CST 2022
[root@localhost ~]# cat /test/sshd_config
Fri Oct 21 13:25:32 CST 2022
(2)将当前用户的用户名追加至/test目录下的passwd,group,bashrc,profile,sshd_config文件
中
[root@localhost ~]# hostname | tee -a /test/passwd /test/group /test/bashrc /test/profile /test/sshd_config
localhost.localdomain
[root@localhost ~]# cat /test/passwd
Fri Oct 21 13:25:32 CST 2022
localhost.localdomain
[root@localhost ~]# cat /test/sshd_config
Fri Oct 21 13:25:32 CST 2022
localhost.localdomain
4、vim命令练习:
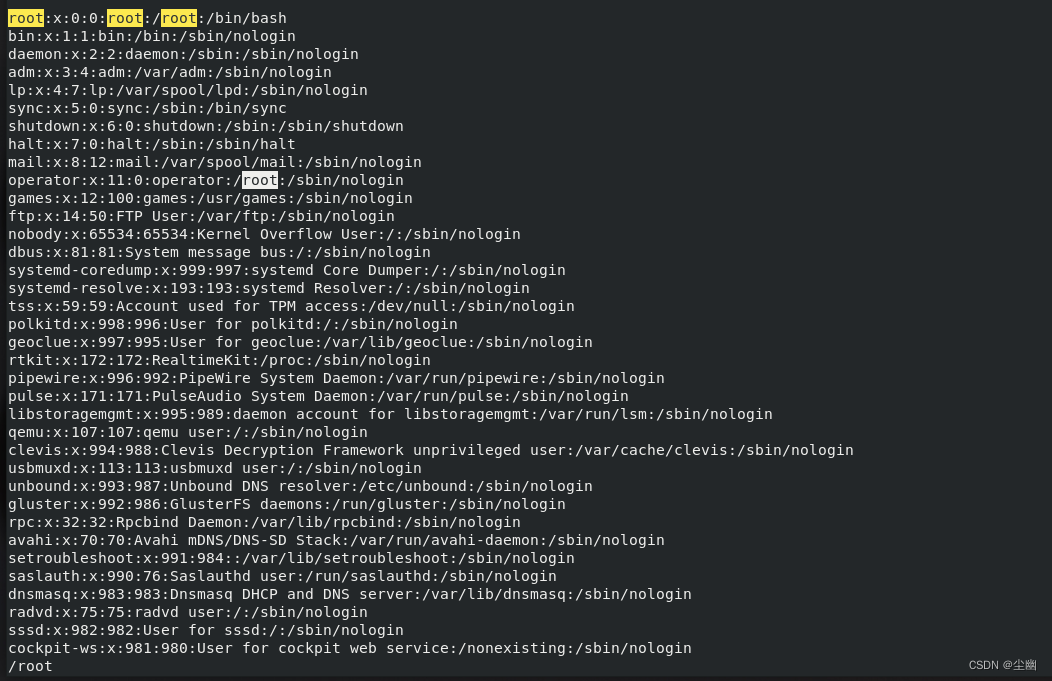
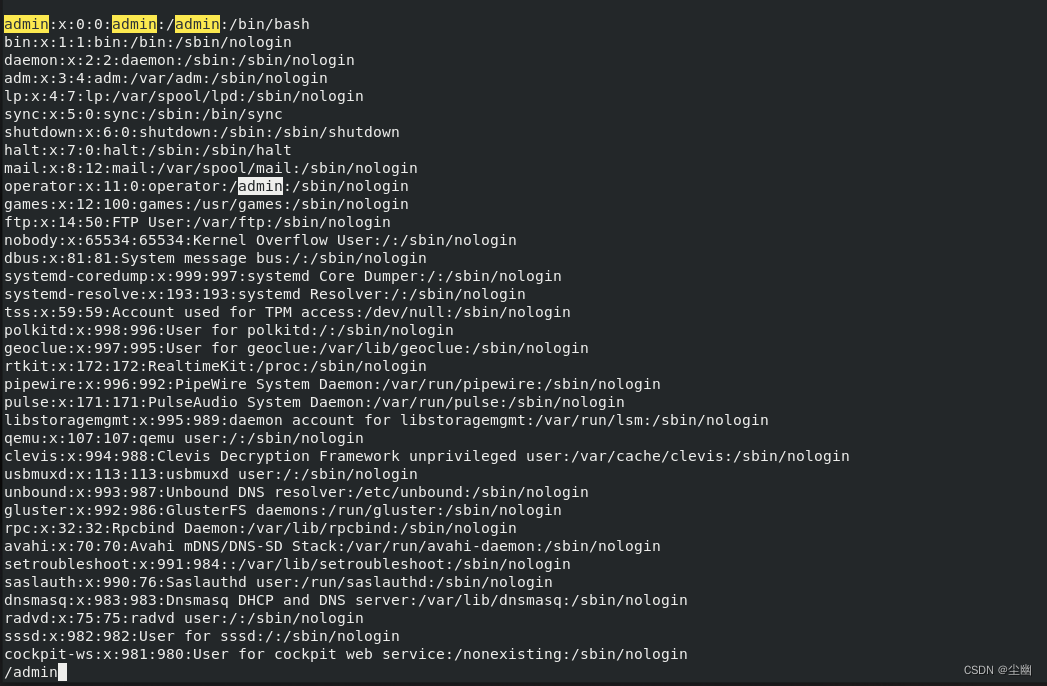
(1)将/etc/passwd文件内容读入/test/passwd,并修改文件里的root字符为admin
[root@localhost ~]# vim /test/passwd
进入到/test/passwd文件里,输入 :r /etc/passwd
这个命令是在/test/passwd文件读入/etc/passwd 文件的内容
[root@localhost ~]# vim /test/passwd
进入文件,输入 /需要查找的字符 可查找到所有的root字符
这里我查找root字符,所以需要输入 /root
查找到后,输入 :% s/原字符/替换的字符/g
这是将所有字符进行替换
我需要将root替换成admin,所以我需要输入 :% s/root/admin/g
(2)将/etc/group文件内容读入/test/group,只保留root开头的行内容
查看/etc/group文件
进入到/test/group文件,读入/etc/group的内容
[root@localhost ~]# vim /test/group //进入文件
输入 :r /etc/group
删除除root字段的其他字段
:v/root/d
(3)将/root/.bashrc文件内容读入/test/bashrc,删除#号开头的行内容
进入到/test/bashrc里面,继续使用 :r /root/.bashrc 读入/root/.bashrc的内容
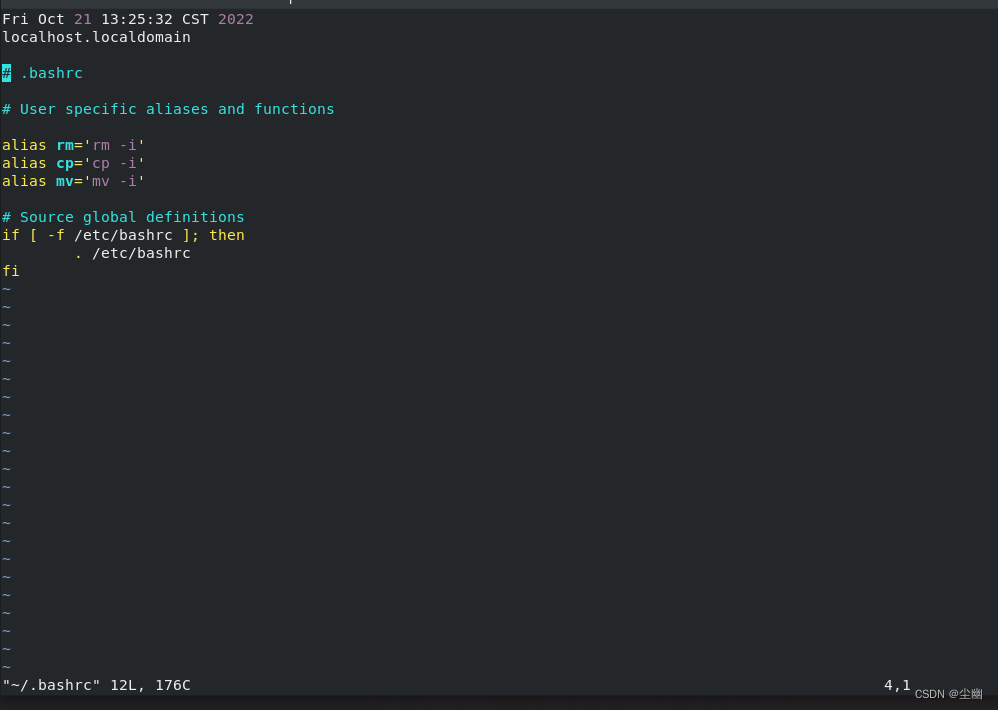
然后输入 :g/#/d
或者是 :%s/#.*\n 删除以#开头的字段

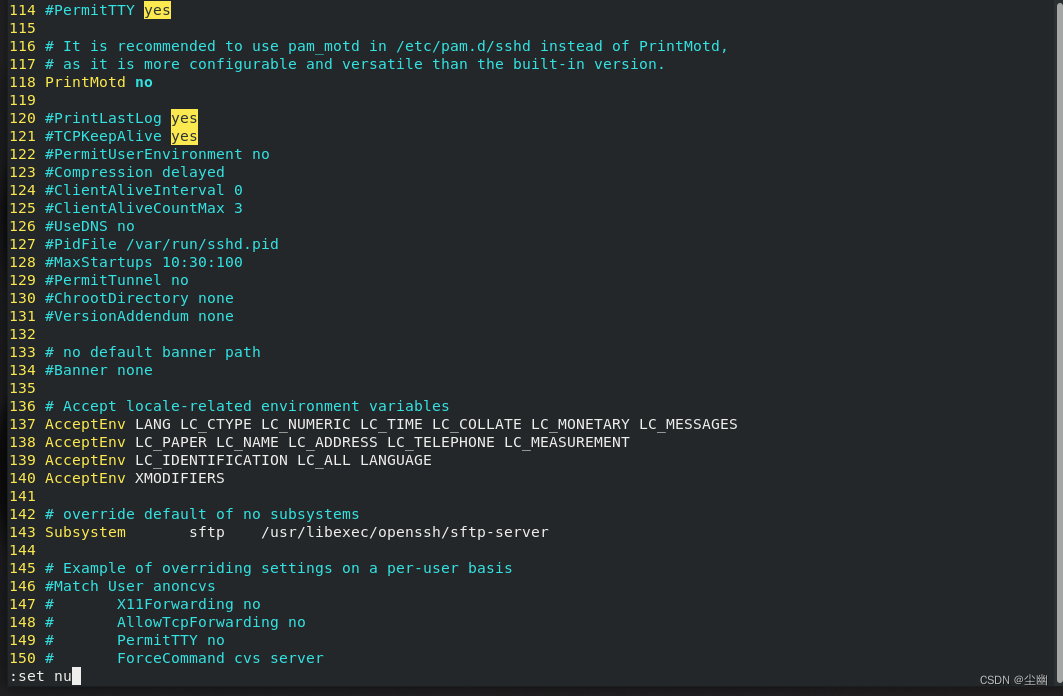
(4)将/etc/ssh/sshd_config文件内容读入/test/sshd_config,在该文件的第17行后添加一行内容Port 22
读入内容
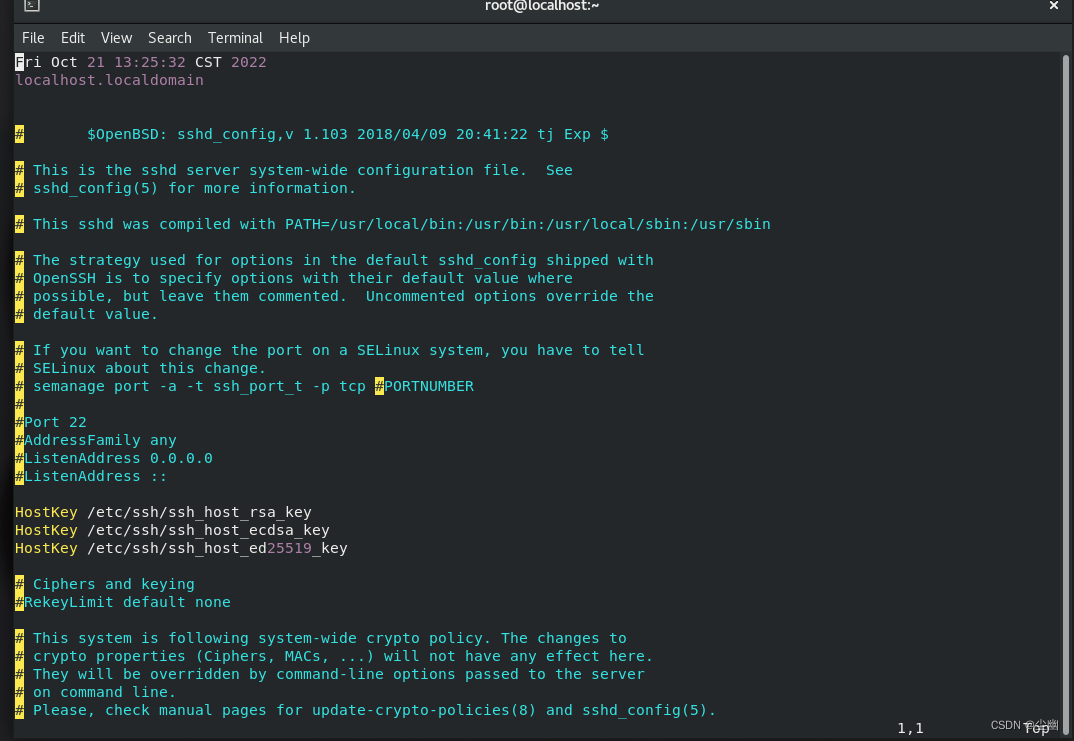
输入 :set nu 显示行数
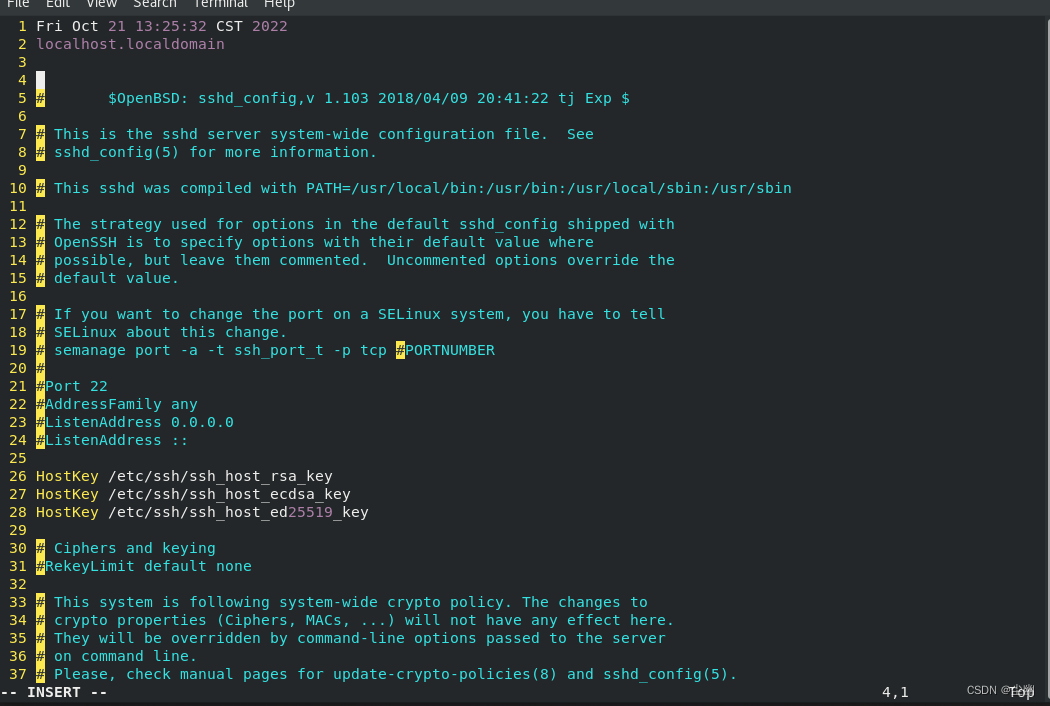
找到17行,输入一行内容Port22

(5)将/test/sshd_config文件中的第40-50行的yes改为no
原本内容
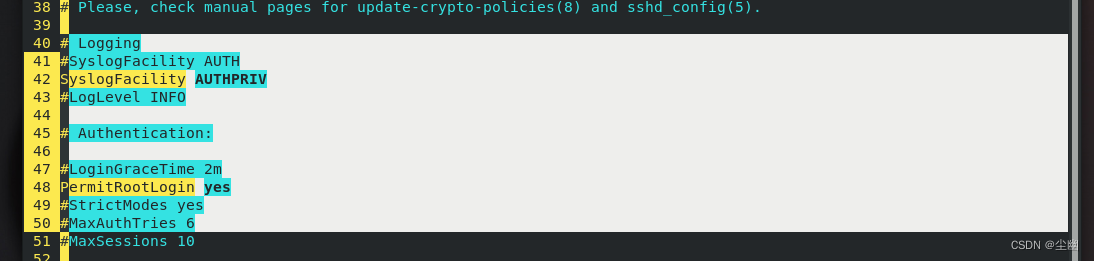
对其进行替换,输入 :40,50 s/yes/no/g

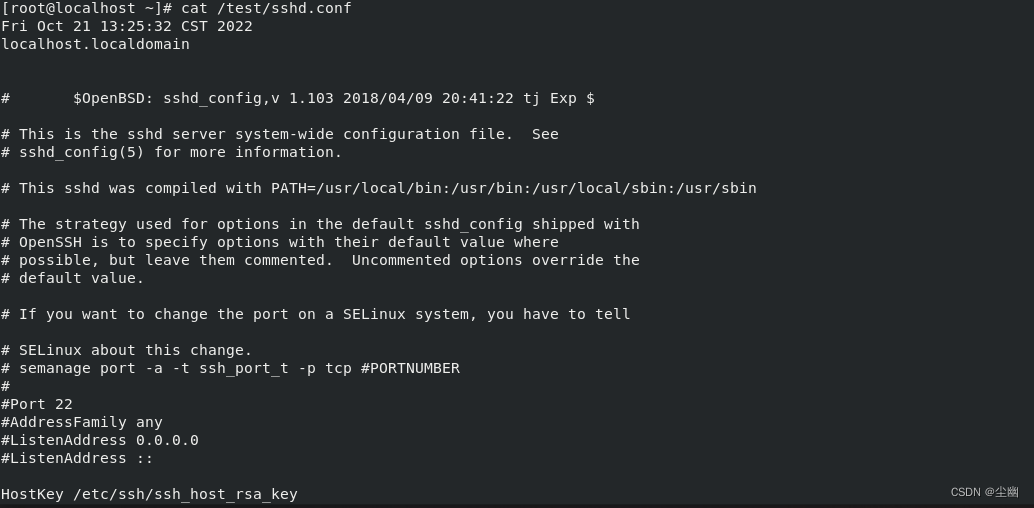
(6)将/test/sshd_config文件另存为/test/sshd.conf
在/test/sshd_config文件中输入 :w /test/sshd.conf 即可另存文件
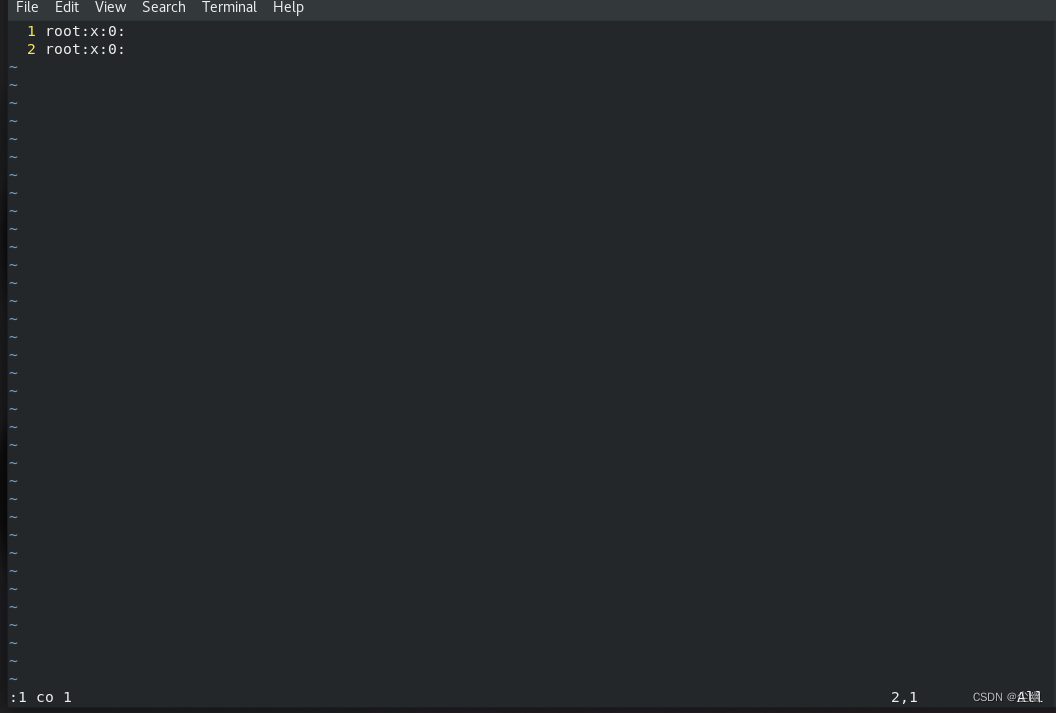
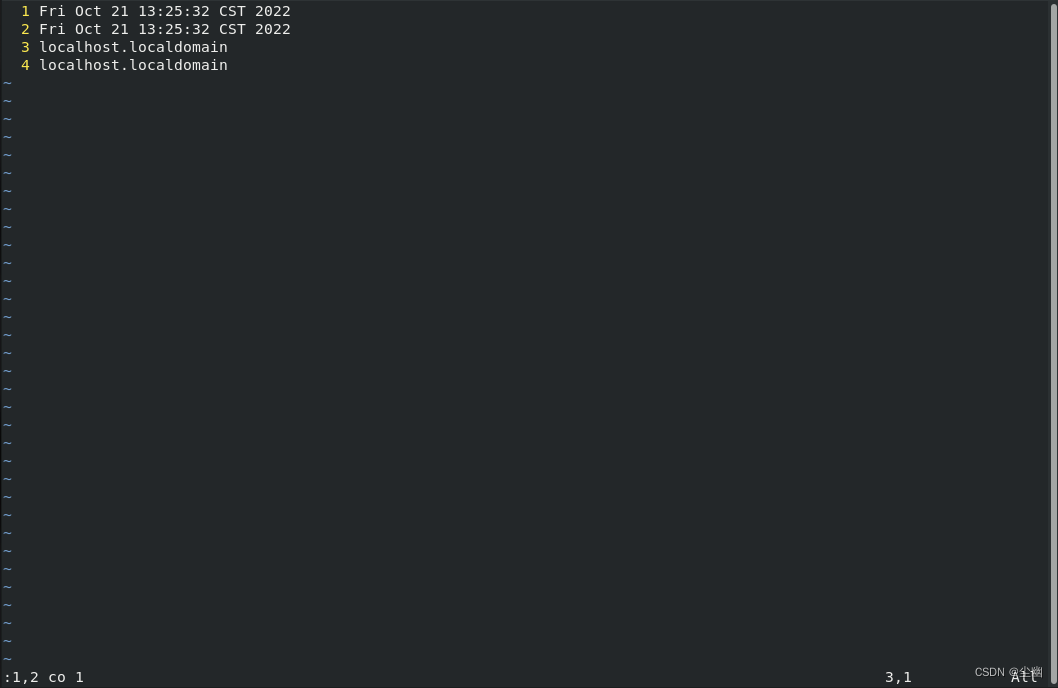
(7)将/test目录下的passwd,group,bashrc文件中的第一行内容复制至文档最后一行
在文件里输入 :1 co 最后一行行号
group文件
(8)将/test目录下的profile,sshd_config文件中前两行内容复制至文档倒数第二行
profile文件
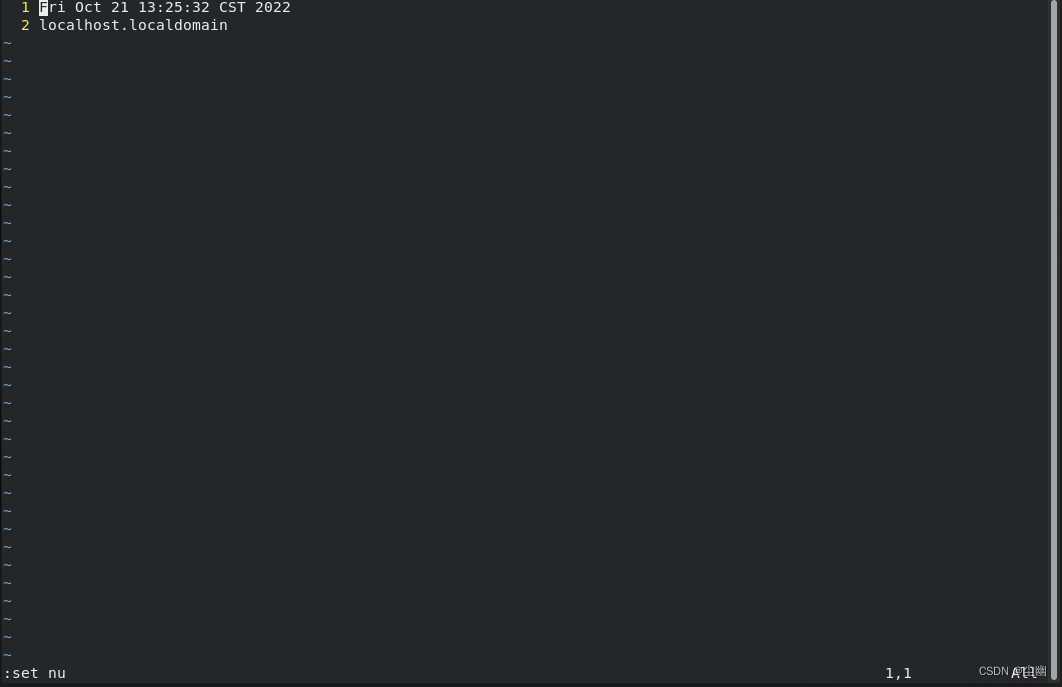
输入 :1,2 co 1
sshd_config文件
输入 :1,2 co 149


 814
814


 被折叠的 条评论
为什么被折叠?
被折叠的 条评论
为什么被折叠?
 到【灌水乐园】发言


