


【超详细】vue项目:Tinymce富文本使用教程以及踩坑总结+业务需要功能扩展
-
- 引言:
- 一、 开始
- 二、快速开始
- 三、配置说明
- 四、封装成Vue组件
- 五、使用Tinymce组件
- 六、menubar(菜单)配置
- 七、toolbar(工具栏)配置
- 八、contextmenu(上下文菜单)配置
- 九、tinymce插件
- 十、获取TinyMCE编辑器中的内容
- 十一、TinyMCE上传图片
- 十二、业务逻辑实现
引言:
在Vue项目的开发过程中,经常需要使用富文本编辑器来处理用户的输入内容。Tinymce 是一个功能强大且易于使用的富文本编辑器,它支持大多数常见的文本编辑功能,并且可以通过插件进行扩展。本文将详细介绍如何在Vue项目中使用Tinymce富文本编辑器。
一、 开始
官网文档:https://www.tiny.cloud/docs/
中文文档:http://tinymce.ax-z.cn/
社区版及开发版官方最新打包地址:https://www.tiny.cloud/get-tiny/self-hosted/
汉化包:http://tinymce.ax-z.cn/static/tiny/langs/zh_CN.js
二、快速开始
1、安装Tinymce
首先,在Vue项目的根目录下打开终端,运行以下命令来安装Tinymce:
npm install tinymce
上述命令会下载并安装Tinymce的依赖到你的项目中。
三、配置说明
{

width: '100%', //  设置富文本编辑器宽度
height: '100%', //  设置富文本编辑器高度
menubar: false, // 设置富文本编辑器菜单, 默认true
branding: false, // 关闭底部官网提示 默认true
statusbar: true, // 显示底部状态栏 默认true
readonly: false, // 设置只读属性 默认 false
resize: false, // 调节编辑器大小 默认 true
autosave_ask_before_unload: true, // 阻止有内容时浏览器阻塞行为, 默认 true  需引入插件autosave
autosave_interval: '3s', // 设置自动保存为草稿时间 单位只能为s 需引入插件autosave
autosave_prefix: `editor_${
     _this.$route.path}`, // 设置自动保存为草稿时前缀 本地localStorage中存储  需引入插件autosave
autosave_retention: '300m', // 自动草稿的有效期 单位只能为m  需引入插件autosave
contextmenu: 'copy paste cut link', // 上下文菜单 默认 false
draggable_modal: true, // 模态框拖动 默认false
placeholder: '开始编写吧', // 占位符
theme: 'silver', // 主题 必须引入
skin_url: '/tinymce/skins/ui/oxide', // 主题路径
icons: 'custom',  // 自定义图标名称
icons_url: '/tinymce/icons/icons.js', // 自定义图标路径
language_url: '/tinymce/langs/zh_CN.js', // 中文化 默认为英文
language: 'zh_CN', // 设置富文本编辑器语言
content_css: `/tinymce/skins/content/default`, // 富文本编辑器内容区域样式
content_style: 'body, p{font-size: 12px}', // 为内容区编辑自定义css样式
fontsize_formats: '12px 14px 16px 18px 20px 22px 24px 26px 36px 48px 56px', // 工具栏自定义字体大小选项
font_formats: "微软雅黑='微软雅黑'; 宋体='宋体'; 黑体='黑体'; 仿宋='仿宋'; 楷体='楷体'; 隶书='隶书'; 幼圆='幼圆'; 方正舒体='方正舒体'; 方正姚体='方正姚体'; 等线='等线'; 华文彩云='华文彩云'; 华文仿宋='华文仿宋'; 华文行楷='华文行楷'; 华文楷体='华文楷体'; 华文隶书='华文隶书'; Andale Mono=andale mono,times; Arial=arial; Arial Black=arial black;avant garde; Book Antiqua=book antiqua;palatino; Comic Sans MS=comic sans ms; Courier New=courier new;courier; Georgia=georgia; Helvetica=helvetica; Impact=impact;chicago; Symbol=symbol; Tahoma=tahoma;arial; sans-serif; Terminal=terminal,monaco; Times New Roman=times new roman,times; Trebuchet MS=trebuchet ms; Verdana=verdana;geneva; Webdings=webdings; Wingdings=wingdings", // 工具栏自定义字体选项
toolbar_sticky: true, // 粘性工具栏 默认false (在向下滚动网页直到不再可见编辑器时,将工具栏和菜单停靠在屏幕顶部)
toolbar_mode: 'sliding', // sliding生效条件toolbar必须为字符串,且有'|'区分,不能为数组
plugins: ['autosave help textpattern lineheight'], // 插件配置
toolbar: 'fontselect styleselect fontsizeselect restoredraft undo redo | bold italic underline strikethrough subscript superscript removeformat forecolor backcolor lineheight align outdent indent help', // 工具栏配置
images_upload_handler: (blobInfo, success, failure) => {

  // 发送请求, 获取图片路径后, 将路径传给success
  success('http://pic.sc.chinaz.com/files/pic/pic9/202005/apic25209.jpg')
}, // 图片上传函数 需引入插件image
image_advtab: true, // 为上传图片窗口添加高级属性 需引入插件image
paste_data_images: true, // 粘贴data格式的图像 需引入插件paste 谷歌浏览器无法粘贴
paste_as_text: true, // 默认粘贴为文本 需引入插件paste 谷歌浏览器无法粘贴
templates: [{
    title: '标题', description: '描述', content: '内容' }], // 内容模板 需引入插件templates
visual: false, // 颜色辅助
quickbars_selection_toolbar: 'bold italic underline strikethrough | link h2 h3 h4 blockquote', // 设置 快速选择 触发提供的工具栏 需引入插件  默认 'alignleft aligncenter alignright' 设置为false禁用
quickbars_insert_toolbar: 'quickimage quicktable', // 设置 快速插入 触发提供的工具栏 需引入插件quickbars 默认 quickimage quicktable 设置为false禁用
textpattern_patterns: [
  {
    start: '*', end: '*', format: 'italic' },
  {
    start: '**', end: '**', format: 'bold' },
  {
    start: '#', format: 'h1' },
  {
    start: '##', format: 'h2' },
  {
    start: '###', format: 'h3' },
  {
    start: '####', format: 'h4' },
  {
    start: '#####', format: 'h5' },
  {
    start: '######', format: 'h6' },
  {
    start: '1. ', cmd: 'InsertOrderedList' },
  {
    start: '* ', cmd: 'InsertUnorderedList' },
  {
    start: '- ', cmd: 'InsertUnorderedList' }
], // 快速排版  类似于markdown 需引入插件textpattern
init_instance_callback: editor => {
    // 初始化结束后执行, 里面实现双向数据绑定功能
  if (_this.value) {

    editor.setContent(_this.value)
  }
  _this.hasInit = true
  editor.on('Input undo redo Change execCommand SetContent', (e) => {

    _this.hasChange = true
    // editor.getContent({ format: ''text }) // 获取纯文本
    _this.$emit('change', editor.getContent())
  })
},
setup: (editor) => {
    // 初始化前执行
  // 监听鼠标按下事件
  editor.on('keydown', (e) => {

    if (e.keyCode === 9) {

      if (e.shiftKey) {

        editor.execCommand('Outdent')
      } else {

        editor.execCommand('Indent')
      }
      e.preventDefault()
      e.stopPropagation()
    }
  })
  // 注册自定义上传按钮
  editor.ui.registry.addButton('upload', {

    text: `<i class="el-icon-upload" style="font-size: 24px"></i>`,
    tooltip: '自定义上传',
    onAction: () => {

      _this.config.show = true
    }
  })
  // 注册获取内容按钮
  editor.ui.registry.addButton('submit', {

    text: `<i class="el-icon-position" style="font-size: 18px"></i>`,
    tooltip: '获取内容',
    onAction: () => {

      console.log(editor.getContent())
    }
  })
  // 注册清空内容按钮
  editor.ui.registry.addButton('empty', {

    text: `<i class="el-icon-close" style="font-size: 18px"></i>`,
    tooltip: '清空内容',
    onAction: () => {

      _this.content = ''
      editor.setContent('')
    }
  })}
}
四、封装成Vue组件
1、文件结构
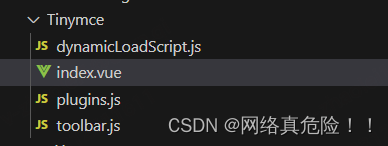
2、index.vue
<template>
  <div :class="{ fullscreen: fullscreen }" class="tinymce-container" :style="{ width: containerWidth }">
    <textarea :id="tinymceId" class="tinymce-textarea" />
  </div>
</template>

<script>
/**
 * docs:
 * https://panjiachen.github.io/vue-element-admin-site/feature/component/rich-editor.html#tinymce
 */
import plugins from './plugins'
import toolbar from './toolbar'
import load from './dynamicLoadScript'

// why use this cdn, detail see https://github.com/PanJiaChen/tinymce-all-in-one
// http://cdn.jsdelivr.net无法访问了,将cdn.jsdelivr.net域名替换为fastly.jsdelivr.net或者gcore.jsdelivr.net
// const tinymceCDN = 'https://cdn.jsdelivr.net/npm/tinymce-all-in-one@4.9.3/tinymce.min.js'
const tinymceCDN = 'https://fastly.jsdelivr.net/npm/tinymce-all-in-one@4.9.3/tinymce.min.js'

export default {

  name: 'Tinymce',
  props: {

    id: {

      type: Stri
最低0.47元/天 解锁文章


 868
868

 被折叠的 条评论
为什么被折叠?
被折叠的 条评论
为什么被折叠?
 到【灌水乐园】发言


