


一、项目预览

二、开发前准备
1.配置node环境:npm cnpm
去官网链接下载安装,记得进行环境变量的配置
官网网站:(http://nodejs.cn/)
2.安装Vue脚手架:vue-cli
代码如下(示例):
npm install -g @vue/cli-service-global
3.创建项目 miaomiao
在指定想开发项目的目录下cmd,执行以下操作
vue create miaomiao
然后进入项目 运行
cd miaomiao
npm run start
在浏览器输入localhost:8080
如果打开运行了以下页面,证明你的项目创建成功

三、实战开发
1.改造项目文件创建框架
在src下的App.vue中只保留以下代码
<template>
    <keep-alive>
      <router-view/>
    </keep-alive>
</template>
在删除views中自带的.vue文件 新建三个文件夹 分别为Movie Cinema Mine 在三个文件夹下都创建一个index.vue的文件
分别给相应index.vue文件写入一些基本代码
<template>

</template>

<script>

export default {
    name : 'movie'
}
</script>

<style scoped>

</style>
创建好文件夹后就开始创建相对应的路由文件 在router文件夹下新建三个文件夹分别为movie cinema mine 然后在三个文件夹下都创建index.js文件用来配置路由
2.配置基本路由
分别配置movie cinema mine 下面的index.js文件
export default {
    path : '/cinema',
    component : () => import('@/views/Cinema')
}
然后在配置主路由 router下面的index.js
import Vue from 'vue'
import VueRouter from 'vue-router'
import movieRouter from './movie'
import mineRouter from './mine'
import cinemaRouter from './cinema'

Vue.use(VueRouter)

const routes = [
  movieRouter,
  mineRouter,
  cinemaRouter,
  {
    path : '/*',
    redirect : '/movie'
  }
]

const router = new VueRouter({
  base: process.env.BASE_URL,
  routes
})

export default router
3.引入需要的静态资源
在public中引入需要的静态资源文件
然后在下面的index.html文件中引入文件
<!DOCTYPE html>
<html lang="">
  <head>
    <meta charset="utf-8">
    <meta http-equiv="X-UA-Compatible" content="IE=edge">
    <meta name="viewport" content="width=device-width,initial-scale=1.0,user-scalable=no">
    <link rel="icon" href="<%= BASE_URL %>favicon.ico">
    <link rel="stylesheet" href="<%= BASE_URL %>css/common.css">
    <link rel="stylesheet" href="<%= BASE_URL %>css/iconfont/iconfont.css">
    <link rel="stylesheet" href="<%= BASE_URL %>libs/swiper.min.css">
    <script src="<%= BASE_URL %>libs/swiper.min.js"></script>
    <title>miaomiao</title>
  </head>
  <body>
    <noscript>
      <strong>We're sorry but <%= htmlWebpackPlugin.options.title %> doesn't work properly without JavaScript enabled. Please enable it to continue.</strong>
    </noscript>
    <style>
      #app{display: flex;height: 100%;}
      #app div{margin: auto;}
    </style>
    <div id="app">
      <div>喵喵网努力加载中...</div>
    </div>
    <!-- built files will be auto injected -->
  </body>
</html>
四、页面组件开发和路由配置
1.开发基本的组件Header和TabBar
在components下新建两个组件Header和TabBar
Header:
<template>
    <header id="header">
        <slot /><h1>{{ title }}</h1>
    </header>
</template>

<script>
export default {
    name : 'Header',
    props : {
        title : {
            type : String,
            default : '喵喵电影'
        }
    }
}
</script>

<style scoped>
    #header{width: 100%;height: 50px;color: #fff;background: #e54847;border-bottom: 1px solid #e54847;position: relative;}
    #header h1{font-size: 18px;text-align: center;line-height: 50px;font-weight: normal;}
    #header i{position: absolute;left: 5px;top: 50%;margin-top: -13px;font-size: 26px;}
</style>
TabBar:
<template>
    <footer id="footer">
        <ul>
            <router-link tag="li" to="/movie">
                <i class="iconfont icon-fengche"></i>
                <p>电影</p>
            </router-link>
            <router-link tag="li" to="/cinema">
                <i class="iconfont icon-gouwu"></i>
                <p>影院</p>
            </router-link>
            <router-link tag="li" to="/mine">
                <i class="iconfont icon-zhifeiji"></i>
                <p>我的</p>
            </router-link>
        </ul>
    </footer>
</template>

<script>
export default {
    name : 'Footer'
}
</script>

<style scoped>
    #footer{width: 100%;height: 50px;background: white;border-top: 2px solid #ebe8e3;position: fixed;left: 0;bottom: 0;}
    #footer ul{display: flex;text-align: center;height: 50px;align-items: center;}
    #footer ul li{flex: 1;height: 40px;}
    #footer ul li.active{color: #f03d37;}
    #footer ul li.router-link-active{color: #f03d37;}
    #footer ul i{font-size: 20px;}
    #footer ul p{font-size: 12px;line-height: 18px;}
</style>
创建好组件之后在Movie Mine Cinema当中的index.vue 中引入 在页面中渲染得到
<script>

import Header from '@/components/Header';
import TabBar from '@/components/TabBar';

export default {
    name : 'movie',
    components : {
        Header,
        TabBar
    }
}
</script>
渲染之后得到以下页面

2.Movie下的二级路由
在组件components目录下新建四个目录NowPlaying ComingSoon City Search
然后在movie下的index.js文件配置路由
路由配置如下:
export default {
    path : '/movie',
    component : () => import('@/views/Movie'),
    children : [
        {
            path : 'city',
            component : () => import('@/components/City')
        },
        {
            path : 'comingsoon',
            component : () => import('@/components/ComingSoon')
        },
        {
            path : 'search',
            component : () => import('@/components/Search')
        },
        {
            path : 'nowplaying',
            component : () => import('@/components/NowPlaying')
        },
        {
            path : '/movie',
            redirect : '/movie/NowPlaying'
        }
    ]
}
3.更新Movie界面
为了更好的切换Movie的二级路由 在views下的Movie中index.vue文件中书写相关样式
<template>
    <div id="main">
        <Header title="喵喵电影"/>
        <div id="content">
            <div class="movie_menu">
                <router-link tag="div" to="/movie/City" class="city_name">
                    <span>北京</span><i class="iconfont icon-address"></i>
                </router-link>
                <div class="hot_swtich active">
                    <router-link tag="div" to="/movie/NowPlaying" class="hot_item">正在热映</router-link>
                    <router-link tag="div" to="/movie/ComingSoon" class="hot_item">即将上映</router-link>
                </div>
                <router-link tag="div" to="/movie/Search" class="search_entry">
                    <i class="iconfont icon-search"></i>
                </router-link>
            </div>
            <keep-alive>
                <router-view />
            </keep-alive>
        </div>
        <TabBar />
    </div>
</template>

<script>

import Header from '@/components/Header';
import TabBar from '@/components/TabBar';

export default {
    name : 'movie',
    components : {
        Header,
        TabBar
    }
}
</script>

<style scoped>
    #content .movie_menu{width: 100%;height: 45px;border-bottom: 1px solid #e6e6e6;display: flex;justify-content: center;}/* */
    .movie_menu .city_name{margin-left: 20px;line-height: 45px;}
    .movie_menu .city_name.active{color: #ef4238;border-bottom: 2px solid #ef4238;}
    .movie_menu .city_name.router-link-active{color: #ef4238;border-bottom: 2px red solid;}
    .movie_menu .hot_swtich{display: flex;height: 100%;line-height: 45px;}
    .movie_menu .hot_item{font-size: 15px;color: #666;width: 80px;text-align: center;margin: 0 12px;font-weight: 700;}
    .movie_menu .hot_item.active{color: #ef4238;border-bottom: 2px #ef4238 solid;}
    .movie_menu .hot_item.router-link-active{color: #ef4238;border-bottom: 2px #ef4238 solid;}
    .movie_menu .search_entry{margin-right: 20px;line-height: 45px;}
    .movie_menu .search_entry.active{color: #ef4238;border: 1px solid #ef4238;}
    .movie_menu .search_entry.router-link-active{ color: #ef4238;border-bottom: 2px #ef4238 solid;}
    .movie_menu .search_entry i{font-size: 24px;color: red;}
</style>
渲染之后的页面展示

4.更新Movie下的二级路由界面
提示:现在的数据都是假数据 等布局弄好之后在渲染真实数据
### Ⅰ. NowPlaying
<template>
    <div id="NowPlaying" class="movie_body slide-enter-active" ref="movie_body" >
            <ul>
                <li>
                    <div class="pic_show"><img src="/images/04.jpg" alt=""></div>
                    <div class="info_list">
                        <h2>无名之辈</h2>
                        <p>观众评 <span class="grade">9.2</span></p>
                        <p>主演: 陈建斌,任素汐,潘斌龙</p>
                        <p>今天55家影院放映355场</p>
                    </div>
                    <div class="btn_mall">
                        购票
                    </div>
                </li>
           </ul>
    </div>
</template>

<script>
export default {
    name : 'NowPlaying'
}
</script>

<style scoped>
    #content .movie_body{flex: 1;overflow: auto;}
    .movie_body ul{margin: 0 12px;overflow: hidden;}
    .movie_body ul li{margin-top: 12px;display: flex;align-items: center;border-bottom: 1px rgb(173, 168, 168) solid;padding-bottom: 2px;}
    .movie_body .pic_show{width: 64px;height: 90px;}
    .movie_body .pic_show img{width: 100%;}
    .movie_body .info_list{margin-left: 10px;flex: 1;position: relative;}
    .movie_body .info_list h2{font-size: 17px;line-height: 24px;width: 150px;overflow: hidden;white-space: nowrap;text-overflow: ellipsis;}
    .movie_body .info_list p{font-size: 13px;color: #666;line-height: 22px;width: 200px;overflow: hidden;white-space: nowrap;text-overflow: ellipsis;}
    .movie_body .info_list .grade{font-weight: 700;color: #faaf00;font-size: 15px;}
    .movie_body .info_list img{width: 50px;position: absolute;right: 10px;top: 5px;}
    .movie_body .btn_mall , .movie_body .btn_pre{width: 47px;height: 27px;line-height: 28px;text-align: center;background: #f03d37;color: #fff;border-radius: 4px;font-size: 12px;cursor: pointer;}
    .movie_body .btn_pre{background-color: #3c9fe6;}
    .movie_body .pullDown{margin:0;padding: 0;border: none;font-size: 10px;}
</style>

Ⅱ.ComingSoon
<template>
    <div id="ComingSoon" class="movie_body slide-enter-active">
            <ul>
                <li>
                    <div class="pic_show"><img src="/images/04.jpg" alt=""></div>
                    <div class="info_list">
                        <h2> 无名之辈 </h2>
                        <p><span class="person">200</span>人想看</p>
                        <p>主演:*** ***</p>
                        <p>2021年6月6日 上映</p>
                    </div>
                    <div class="btn_per">
                        预售
                    </div>
                </li>
            </ul>
    </div>
</template>

<script>
export default {
    name : 'ComingSoon'
}
</script>

<style scoped>
    #content .movie_body{flex: 1;overflow: auto;}
    .movie_body ul{margin: 0 12px;overflow: hidden;}
    .movie_body ul li{margin-bottom: 12px;display: flex;align-items: center;border-bottom: 1px rgb(173, 168, 168) solid;padding: 12px 0;}
    .movie_body .pic_show{width: 64px;height: 90px;}
    .movie_body .pic_show img{width: 100%;}
    .movie_body .info_list{margin-left: 10px;flex: 1;position: relative;}
    .movie_body .info_list h2{font-size: 17px;line-height: 24px;width: 150px;overflow: hidden;white-space: nowrap;text-overflow: ellipsis;}
    .movie_body .info_list p{font-size: 13px;color: #666;line-height: 22px;width: 200px;overflow: hidden;white-space: nowrap;text-overflow: ellipsis;}
    .movie_body .info_list .grade{font-weight: 700;color: #faaf00;font-size: 15px;}
    .movie_body .info_list img{width: 50px;position: absolute;right: 10px;top: 5px;}
    .movie_body .btn_mall , .movie_body .btn_per{width: 47px;height: 27px;line-height: 28px;text-align: center;background: #f03d37;color: #fff;border-radius: 4px;font-size: 12px;cursor: pointer;}
    .movie_body .btn_per{background-color: #3c9fe6;}
</style>

Ⅲ.City
<template>
    <div class="city_body">
        <div class="city_list">
                <div>
                    <div class="city_hot">
                        <h2>热门城市</h2>
                        <div>
                            <ul class="clearfix">
                                <li>上海</li>
                                <li>北京</li>
                                <li>广州</li>
                                <li>深圳</li>
                                <li>重庆</li>
                                <li>厦门</li>
                                <li>长沙</li>
                            </ul>
                        </div>
                    </div>
                    <div class="city_sort">
                        <div>
                            <h2>A</h2>
                            <ul>
                                <li>阿拉善盟</li>
                                <li>鞍山</li>
                                <li>安庆</li>
                                <li>安阳</li>
                            </ul>
                        </div>
                    </div>
                </div>
        </div>
        <div class="city_index">
            <ul>
                <li>A</li>
                <li>B</li>
                <li>C</li>
                <li>D</li>
                <li>E</li>
                <li>F</li>
                <li>G</li>
            </ul>
        </div>
    </div>
</template>

<script>
    export default {
        name : 'City',
       }
</script>

<style scoped>
    .city_body{margin-top: 45px;display: flex;width: 100%;position: absolute;top: 0px;bottom: 0px;}
    .city_body .city_list{flex: 1;overflow: auto;background: #fff5f0;}
    .city_body .city_list::-webkit-scrollbar{background-color: transparent;width: 0;}
    .city_body .city_hot{margin-top: 20px;}
    .city_body .city_hot h2{padding-left: 15px;line-height:30px;font-size: 14px;background: #F0F0f0;font-weight: normal;}
    .city_body .city_hot ul li{float: left;background: #fff;width: 29%;height: 33px;margin-top: 15px;margin-left: 3%;padding:0 4px;border: 1px solid #e6e6e6;border-radius: 3px;line-height: 33px;text-align: center;box-sizing: border-box;}
    .city_body .city_sort div{margin-top: 20px;}
    .city_body .city_sort h2{padding-left: 15px;line-height: 30px;font-weight: normal;font-size: 14px;background: #F0F0F0;}
    .city_body .city_sort ul{padding-left: 10px;margin-top: 10px;}
    .city_body .city_sort ul li{line-height: 30px;}
    .city_body .city_index{width: 20px;display: flex;flex-direction: column;justify-content: center;text-align: center;border-left: 1px solid #e6e6e6;}
</style>

Search:
<template>
    <div class="search_body">
        <div class="search_input">
            <div class="search_input_wrapper">
                <i class="iconfont icon-search"></i>
                <input type="text" v-model="message">
            </div>
        </div>
        <div class="search_result">
            <h3>电影/电视剧/综艺</h3>
            <ul>
                <li>
                    <div class="img"><img src="/images/04.jpg" alt=""></div>
                    <div class="info">
                        <p><span>无名之辈</span><span>8.5</span></p>
                        <p>剧情,喜剧,犯罪</p>
                        <p>2018-11-30上映</p>
                    </div>
                </li>
            </ul>
        </div>
    </div>
</template>

<script>
export default {
    name : 'Search',
    data(){
        return {
            message : ''
        }
    }
}
</script>

<style scoped>
    #content .search_body{flex: 1;overflow: auto;}
    .search_body .search_input{padding:8px 10px;background-color: #f5f5f5;border-bottom: 1px solid #e5e5e5;}
    .search_body .search_input_wrapper{padding: 0 10px;border: 1px solid #e6e6e6;border-radius: 5px;background-color: #fff;display: flex;line-height: 25px;}
    .search_body .search_input_wrapper i{font-size: 15px;padding: 4px 0;}
    .search_body .search_input_wrapper input{border: none;font-size: 13px;color: #333;padding: 4px 0;outline: none;margin-left: 5px;width: 100%;}
    .search_body .search_result h3{font-size: 15px;color: #999;padding: 9px 15px;border-bottom: 1px #e5e6e6 solid;}
    .search_body .search_result li{border-bottom: 1px #c9c9c9 dashed;padding: 10px 15px;box-sizing: border-box;display: flex;}
    .search_body .search_result .img{width: 60px;float: left;}
    .search_body .search_result .img img{width: 100%;}
    .search_body .search_result .info{float: left;margin-left: 15px;flex: 1;}
    .search_body .search_result .info p{height: 22px;display: flex;line-height: 22px;font-size: 12px;}
    .search_body .search_result .info p:nth-child(1) span:nth-of-type(1){font-size: 18px;flex: 1;}
    .search_body .search_result .info p:nth-child(1) span:nth-of-type(2){font-size: 16px;color: #fc7103;}
</style>

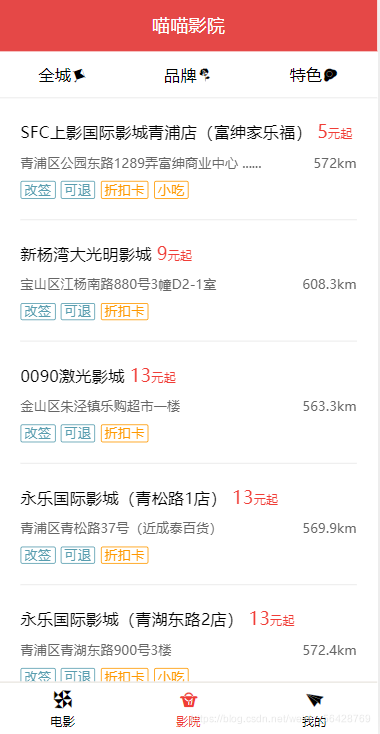
5.更新Cinema界面
和Movie页面一样 在Cinema里面用二级路由设置,但这页面只是预览,并没有其他详细功能,所以做的比较简单
先在components创建一个Cilist组件用来渲染页面
Clist:
<template>
    <div class="cinema_body">
        <ul>
            <li>
                <div>
                    <span>大地影城(澳东世纪店)</span>
                    <span class="q"><span class="price">22.9</span>元起</span>
                </div>
                <div class="address">
                    <span>金州区大连经济技术开发区澳东世纪3层</span>
                    <span>1783.3km</span>
                </div>
                <div class="card">
                    <div>小吃</div>
                    <div>折扣卡</div>
                </div>
            </li>
        </ul>
    </div>
</template>

<script>
export default {
    name : 'CiList',
}
</script>

<style scoped>
    #content .cinema_body{flex: 1;overflow: auto;}
    .cinema_body ul{padding: 20px;}
    .cinema_body li{border-bottom: 1px solid #e6e6e6;margin-bottom: 20px;}
    .cinema_body div{margin-bottom: 10px;}
    .cinema_body .q{font-size: 11px;color: #f03d37;margin-left: 5px;}
    .cinema_body .price{font-size: 18px;}
    .cinema_body .address{font-size: 13px;color: #666;}
    .cinema_body .address span:nth-of-type(2){float: right;}
    .cinema_body .card{display: flex;}
    .cinema_body .card div{padding: 0 3px;height: 15px;line-height: 15px;border-radius: 2px;color: #f90;border: 1px solid #f90;font-size: 13px;margin-right: 5px;}
    .cinema_body .card div.or{color: #f90;border: 1px solid #f90;}
    .cinema_body .card div.bl{color: #589daf;border: 1px solid #589daf;}
</style>
Cinema:
<template>
    <div id="main">
        <Header title="喵喵影院"/>
        <div id="content">
            <div class="cinema_menu">
                <div class="city_switch">
                    全城<i class="iconfont icon-fengzheng"></i>
                </div>
                <div class="brand_switch">
                    品牌<i class="iconfont icon-hua"></i>
                </div>
                <div class="feature_switch">
                    特色<i class="iconfont icon-jiandan"></i>
                </div>
            </div>
            <CiList />
        </div>
        <TabBar />
    </div>
</template>

<script>

import Header from '@/components/Header';
import TabBar from '@/components/TabBar';
import CiList from '@/components/CiList';

export default {
    name : 'Cinema',
    components : {
        Header,
        TabBar,
        CiList
    }
}
</script>

<style scoped>
    #content .cinema_menu{width: 100%;height: 45px;border-bottom: 1px solid #e6e6e6;display: flex;justify-content: space-around;align-items: center;background: white;}
</style>
页面展示

6.更新Mine界面
Mine页面和Cinema类似都只做样式,具体登入功能等后端的时候解决
先在components创建一个Login组件用来渲染页面
Login:
<template>
    <div class="login_body">
        <div>
            <input class="login_text" type="text" placeholder="用户名">
        </div>
        <div>
            <input type="password" class="login_text" placeholder="请输入你的密码">
        </div>
        <div class="login_btn">
            <input type="submit" value="登入">
        </div>
        <div class="login_link">
            <a href="#">立即注册</a>
            <a href="#">找回密码</a>
        </div>
    </div>
</template>

<script>
export default {
    name : 'Login'
}
</script>

<style scoped>
    #content .login_body{width: 100%;}
    .login_body .login_text{width: 100%;height: 40px;border: none;border-bottom: 1px #ccc solid; margin-bottom: 5px;outline: none;text-align: 10px;}
    .login_body .login_btn{height: 50px;margin: 10px;}
    .login_body .login_btn input{width: 100%;height: 100%;background: #e54847;border-radius: 3px;border: none;display:block;color: white;font-size: 20px;}
    .login_body .login_link{display: flex;justify-content: space-around;}
    .login_body .login_link a{text-decoration: none; margin: 0 5px;font-size: 12px;color: #e54847;}
</style>
Mine:
<template>
    <div id="main">
        <Header title="我的喵喵"/>
        <div id="content">
            <Login />
        </div>
        <TabBar />
    </div>
</template>

<script>

import Header from '@/components/Header';
import TabBar from '@/components/TabBar';
import Login from '@/components/Login';

export default {
    name : 'Mine',
    components : {
        Header,
        TabBar,
        Login
    }
}
</script>
页面展示

五、真实数据渲染
1.配置反向代理
我们获取数据的方法是跨域获取的,所以得配置反向代理才能获取到相应的数据
要想实现反向代理得先在主文件夹下新建vue.config.js文件
然后在文件下写以下代码用来反向代理
module.exports = {
    devServer : {
        proxy : {
            '/ajax/' : {
                target: 'https://m.maoyan.com',
                changeOrigin: true
            }
        }
    }
}
提示:配置反向代理之后一定要重新开启Vue项目 反向代理才能实现
在启动项目前先下载axios用来获取数据
npm i -s axios
2.用真实数据渲染City
在mounted生命周期中代理获取数据
先在项目中引入axios方法
import axios from 'axios'
然后就可以在mounted中获取数据
mounted () {
	axios.get("/dianying/cities.json").then(res => {
    	var statusText = res.statusText
        if(statusText === 'OK'){
     		var cities = res.data.cts;
      		var cityList = this.formatCityList(cities);
    		this.cityList = res.data.cts;
     	}
	});
}
创建formatCityList()函数让数据按照ABCD排序
formatCityList(cities) {
	var cityLies = [];
	for(var i=0;i<cities.length;i++){
		var firstLetter = cities[i].py.substring(0,1).toUpperCase();
		if(toCom(firstLetter)){
			cityLies.push({
				index : firstLetter,
					list : [{
						nm : cities[i].nm,
						id : cities[i].id
					}]
				});
		}else{
			for(var j = 0;j<cityLies.length;j++){
				if( cityLies[j].index === firstLetter ){
					cityLies[j].list.push({
						nm : cities[i].nm,
						id : cities[i].id
					})
				}
			}
		}
	}
	cityLies.sort((n1,n2)=>{
		if(n1.index < n2.index){
			return -1;
		}else if(n1.index > n2.index){
			return 1;
		}else{
			return 0;
		}
	})
	function toCom(firstLetter){
		for(var i = 0; i<cityLies.length;i++){
			if(cityLies[i].index == firstLetter){
				return false;
			}
		}
		return true;
	}
	return cityLies;
},
做好之后我们可以在控制台看到我们获取的城市数据

渲染真实数据到页面
<template>
    <div class="city_body">
        <div class="city_list">
                <div>
                    <div class="city_hot">
                        <h2>热门城市</h2>
                        <div>
                            <ul class="clearfix">
                                <li  v-for="item in hotList" :key="item.id">{{ item.nm }}</li>
                            </ul>
                        </div>
                    </div>
                    <div class="city_sort" ref="city_sort">
                        <div v-for="item in cityList" :key="item.index">
                            <h2>{{ item.index }}</h2>
                            <ul>
                                <li v-for="itemList in item.list" :key="itemList.id">{{ itemList.nm }}</li>
                            </ul>
                        </div>
                    </div>
                </div>
        </div>
        <div class="city_index">
            <ul>
                <li v-for="(item,index) in cityList" :key="item.index">{{ item.index }}</li>
            </ul>
        </div>
    </div>
</template>
真实数据之后的效果

3.用真实数据渲染NowPlaying,ComingSoon
NowPlaying
获取NowPlaying数据
this.isLoading = true;
axios.get("/ajax/hot.json?ci="+1).then(res => {
	var statusText = res.statusText;
	if(statusText == 'OK'){
		this.movieList = res.data.data.hot;
	}
})
渲染NowPlaying数据
<template>
    <div id="NowPlaying" class="movie_body slide-enter-active" ref="movie_body" >
            <ul>
                <li class="pullDown">{{pullDownMsg}}</li>
                <li v-for="item in movieList" :key="item.id">
                    <div class="pic_show"><img :src="item.img | setWH('128.180')" alt=""></div>
                    <div class="info_list">
                        <h2 "> {{item.nm}} </h2>
                        <p>观众评 <span class="grade"> {{item.sc}} </span></p>
                        <p>主演: {{item.star}} </p>
                        <p> {{item.showInfo}} </p>
                    </div>
                    <div class="btn_mall">
                        购票
                    </div>
                </li>
            </ul>
    </div>
</template>
NowPlaying页面

ComingSoon
获取ComingSoon数据
 axios.get("/ajax/hot.json?ci="+1).then(res => {
	var statusText = res.statusText;
		if(statusText == 'OK'){
		this.movieList = res.data.data.hot;
	}
})
渲染ComingSoon数据
<template>
    <div id="NowPlaying" class="movie_body slide-enter-active" ref="movie_body" >
            <ul>
                <li class="pullDown">{{pullDownMsg}}</li>
                <li v-for="item in movieList" :key="item.id">
                    <div class="pic_show"><img :src="item.img | setWH('128.180')" alt=""></div>
                    <div class="info_list">
                        <h2> {{item.nm}} </h2>
                        <p>观众评 <span class="grade"> {{item.sc}} </span></p>
                        <p>主演: {{item.star}} </p>
                        <p> {{item.showInfo}} </p>
                    </div>
                    <div class="btn_mall">
                        购票
                    </div>
                </li>
            </ul>
    </div>
</template>
ComingSoon页面

4.完善Search页面
实时获取数据
提示:这里不能在mounted周期 得用watch周期中进行
watch : {
	axios.get("/ajax/search?kw="+newVal+"&cityId="+1).then((res)=>{
		var statusText = res.statusText;
		var movies = res.data.movies;
		if(statusText == 'OK' && movies){
			this.movieList = res.data.movies.list;
		}
	})
}
渲染数据
<template>
    <div class="search_body">
        <div class="search_input">
            <div class="search_input_wrapper">
                <i class="iconfont icon-search"></i>
                <input type="text" v-model="message">
            </div>
        </div>
        <div class="search_result">
            <h3>电影/电视剧/综艺</h3>
            <ul>
                <li v-for="item in movieList" :key="item.id">
                    <div class="img"><img :src="item.img | setWH('128.180')" alt=""></div>
                    <div class="info">
                        <p><span>{{item.nm}}</span><span>{{item.sc}}</span></p>
                        <p>{{item.cat}}</p>
                        <p>{{item.pubDesc}}</p>
                    </div>
                </li>
            </ul>
        </div>
    </div>
</template>
Search页面展示

5.用真实数据渲染CiList
获取CiList数据
axios.get("/maoyanapi/cinemaList/cityId="+1+".json").then(res => {
	var statusText = res.statusText
	if(statusText === 'OK'){
		this.cityList = res.data.cinemas;
	}
})
渲染CiList页面
<template>
    <div class="cinema_body">
        <ul>
            <li v-for="item in cityList" :key="item.id">
                <div>
                    <span>{{item.nm}}</span>
                    <span class="q"><span class="price">{{item.sellPrice}}</span>元起</span>
                </div>
                <div class="address">
                    <span>{{item.addr | addrless}}</span>
                    <span>{{item.distance}}</span>
                </div>
                <div class="card">
                    <div v-for="(num,key) in item.tag" v-if=" num===1 " :key="key" :class="key | classCard">{{ key | formatCard }}</div>
                </div>
            </li>
        </ul>
    </div>
</template>
页面展示

五、线上发布
1.打包前准备
在route下的index.js文件中进行修改如下所示
// base: process.env.BASE_URL,
  base : 'miaomiao',
提示:注释掉原有的base 然后修改为你创建这个的项目目录名
在vue.config.js中添加以下代码
publicPath : '/miaomiao',
提示:修改静态资源路径
2.打包
在终端下输入
npm run build
如果打包成功就会在项目目录下多一个dist文件夹

3.上线的反向代理配置
我用的是宝塔Linux面板进行上线文件的
先点击自己网站名,然后点反向代理,添加反向代理,将自己的反向代理内容放上去就好了

4.上传文件
直接上次打包的dist文件,然后将dist文件夹修改成项目名称:miaomiao 这样项目就上线好了

六、项目展示
输入对应的网址 http://39.104.90.62/miaomiao即可访问上线的项目
电影页


影院页


 3174
3174

 被折叠的 条评论
为什么被折叠?
被折叠的 条评论
为什么被折叠?
 到【灌水乐园】发言


