


1.Mybatis框架概述
MyBatis 是一款优秀的持久层框架,它支持定制化 SQL、存储过程以及高级映射。MyBatis 避免了几乎所有的 JDBC 代码和手动设置参数以及获取结果集。MyBatis 可以使用简单的 XML 或注解来配置和映射原生信息,将接口和 Java 的 POJOs(Plain Ordinary Java Object,普通的 Java对象)映射成数据库中的记录。
2.Mybatis特点:
- 简单易学:本身就很小且简单。没有任何第三方依赖,最简单安装只要两个jar文件+配置几个sql映射文件易于学习,易于使用,通过文档和源代码,可以比较完全的掌握它的设计思路和实现。
- 灵活:mybatis不会对应用程序或者数据库的现有设计强加任何影响。 sql写在xml里,便于统一管理和优化。通过sql语句可以满足操作数据库的所有需求。
- 解除sql与程序代码的耦合:通过提供DAO层,将业务逻辑和数据访问逻辑分离,使系统的设计更清晰,更易维护,更易单元测试。sql和代码的分离,提高了可维护性。
- 提供映射标签,支持对象与数据库的orm字段关系映射
- 提供对象关系映射标签,支持对象关系组建维护
提供xml标签,支持编写动态sql。
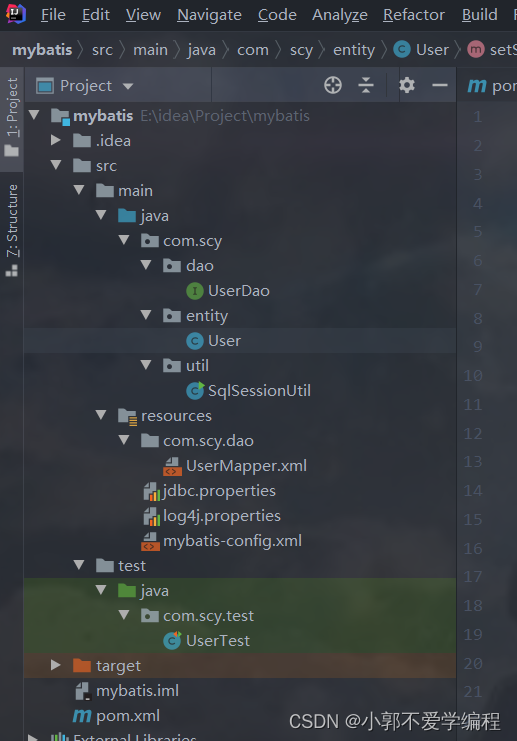
项目列表配置maven
3.Mybatis环境搭建
<?xml version="1.0" encoding="UTF-8"?>
<project xmlns="http://maven.apache.org/POM/4.0.0"
         xmlns:xsi="http://www.w3.org/2001/XMLSchema-instance"
         xsi:schemaLocation="http://maven.apache.org/POM/4.0.0 http://maven.apache.org/xsd/maven-4.0.0.xsd">
    <modelVersion>4.0.0</modelVersion>

    <groupId>com.scy</groupId>
    <artifactId>mybatis</artifactId>
    <version>1.0-SNAPSHOT</version>
    <packaging>jar</packaging>
    <dependencies>
        <dependency>
            <groupId>org.mybatis</groupId>
            <artifactId>mybatis</artifactId>
            <version>3.4.5</version>
        </dependency>
        <dependency>
            <groupId>mysql</groupId>
            <artifactId>mysql-connector-java</artifactId>
            <version>5.1.6</version>
        </dependency>
      <!--  <dependency>
            <groupId>mysql</groupId>
            <artifactId>mysql-connector-java</artifactId>
            <version>8.0.11</version>
        </dependency>-->
        <dependency>
            <groupId>log4j</groupId>
            <artifactId>log4j</artifactId>
            <version>1.2.12</version>
        </dependency>
        <dependency>
            <groupId>junit</groupId>
            <artifactId>junit</artifactId>
            <version>4.10</version>
        </dependency>
    </dependencies>

    <properties>
        <maven.compiler.source>8</maven.compiler.source>
        <maven.compiler.target>8</maven.compiler.target>
    </properties>

</project>
4. 数据库创建
CREATE TABLE `user` (
  `id` int(11) NOT NULL AUTO_INCREMENT,
  `username` varchar(32) COLLATE utf8_bin NOT NULL COMMENT '用户名称',
  `birthday` datetime DEFAULT NULL,
  `sex` char(1) COLLATE utf8_bin DEFAULT NULL,
  `address` varchar(256) COLLATE utf8_bin DEFAULT NULL,
  PRIMARY KEY (`id`)
) ENGINE=InnoDB AUTO_INCREMENT=10 DEFAULT CHARSET=utf8 COLLATE=utf8_bin
5.实体对象User的创建
package com.scy.entity;

import java.io.Serializable;
import java.sql.Date;

public class User implements Serializable {
    private Integer id;
    private String name;
    private Date birthday;
    private String sex;
    private String address;

    public User() {
    }

    public User(Integer id, String name, Date birthday, String sex, String address) {
        this.id = id;
        this.name = name;
        this.birthday = birthday;
        this.sex = sex;
        this.address = address;
    }

    public Integer getId() {
        return id;
    }

    public void setId(Integer id) {
        this.id = id;
    }

    public String getName() {
        return name;
    }

    public void setName(String name) {
        this.name = name;
    }

    public Date getBirthday() {
        return birthday;
    }

    public void setBirthday(Date birthday) {
        this.birthday = birthday;
    }

    public String getSex() {
        return sex;
    }

    public void setSex(String sex)  {
        this.sex = sex;
    }

    public String getAddress() {
        return address;
    }

    public void setAddress(String address) {
        this.address = address;
    }

    @Override
    public String toString() {
        return "User{" +
                "id=" + id +
                ", name='" + name + '\'' +
                ", birthday=" + birthday +
                ", sex='" + sex + '\'' +
                ", address='" + address + '\'' +
                '}';
    }
}
6.配置 log4j.properties日志文件
### 设置###
log4j.rootLogger = debug,stdout
### 输出信息到控制抬 ###
log4j.appender.stdout = org.apache.log4j.ConsoleAppender
log4j.appender.stdout.Target = System.out
log4j.appender.stdout.layout = org.apache.log4j.PatternLayout
log4j.appender.stdout.layout.ConversionPattern = [%-5p] %d{yyyy-MM-dd HH:mm:ss,SSS-------} method:%l%n%m%n
7.配置Mybatis的主配置文件:
配置位置在resources文件下面直接配置
mybatis-config.xml
<?xml version="1.0" encoding="UTF-8" ?>
<!DOCTYPE configuration
        PUBLIC "-//mybatis.org//DTD Config 3.0//EN"
        "http://mybatis.org/dtd/mybatis-3-config.dtd">
<configuration>
    <properties resource="jdbc.properties"></properties>
    <!--配置日志,不需要写log4j-->
   <!-- <settings>
        <setting name="logImpl" value="STDOUT_LOGGING"/>
    </settings>-->
    <!--typeAliases 起别名-->
    <typeAliases>
        <typeAlias type="com.scy.entity.User" alias="user"></typeAlias>
    </typeAliases>

    <environments default="development">
        <environment id="development">
            <transactionManager type="JDBC"></transactionManager>
            <dataSource type="POOLED">
                <property name="driver" value="${jdbc_driverClassName}"/>
                <property name="url" value="${jdbc_url}"/>
                <property name="username" value="${jdbc_username}"/>
                <property name="password" value="${jdbc_password}"/>
            </dataSource>
        </environment>
    </environments>
    <mappers>
        <mapper resource="com/scy/dao/UserMapper.xml"></mapper>
    </mappers>
</configuration>
8.编写dao层接口
package com.scy.dao;

import com.scy.entity.User;

import java.util.List;

public interface UserDao {
    List<User> findAll(); //全部查询
    //插入
    public void insertUser(User user);
    //修改
    public void updateUser(User user);
    //通过id查询
    public User queryUserById(int id);
    //通过id删除
    public void deleteUserById(int id);

}
9.配置Mybatis的关系型映射文件
在resource下创建
com.scy.dao.UesrMapper.xml(一个一个建立)
注意在配置映射文件的时候,映射文件的路径包需要和dao层接口的文件路径包保持一致:
<?xml version="1.0" encoding="UTF-8" ?>
<!DOCTYPE mapper
        PUBLIC "-//mybatis.org//DTD Mapper 3.0//EN"
        "http://mybatis.org/dtd/mybatis-3-mapper.dtd">
<mapper namespace="com.scy.dao.UserDao">
    <!--修改没有字段名的方法    映射-->
    <resultMap id="userResult" type="user">
            <id column="ID" property="id"></id>
            <result column="USERNAME" property="name"></result>
            <result column="BIRTHDAY" property="birthday"></result>
            <result column="SEX" property="sex"></result>
            <result column="ADDRESS" property="address"></result>
    </resultMap>

    <!--全部查询-->
    <!--<select id="findAll" resultType="com.scy.entity.User">
        select id,username,birthday,sex,address from t_user
    </select>-->
    <!-- resultType替换成 resultMap-->
    <select id="findAll" resultMap="userResult">
        select id,username,birthday,sex,address from t_user
    </select>

    <insert id="insertUser">
        insert into t_user(username,birthday,sex,address)values(#{username},#{birthday},#{sex},#{address})
    </insert>
    <update id="updateUser">
        update t_user set username=#{username},birthday=#{birthday},sex=#{sex},address=#{address} where id =#{id}
    </update>
    <!--通过id查询-->
    <select id="queryUserById" resultType="user">
        select * from t_user where id=#{id}
    </select>
    <!--通过id删除-->
    <delete id="deleteUserById">
        delete from t_user where id=#{id}
    </delete>
</mapper>
10. 编写工具类 获取SqlSessionUtil核心对象
//读取配置文件
//创建SqlSessionFactory对象
//创建SqlSession对象
//使用SqlSession对象创建Dao代理对象
//使用代理对象执行方法:
package com.scy.util;

import org.apache.ibatis.io.Resources;
import org.apache.ibatis.session.SqlSession;
import org.apache.ibatis.session.SqlSessionFactory;
import org.apache.ibatis.session.SqlSessionFactoryBuilder;

import java.io.IOException;
import java.io.InputStream;

/**
 * 工具类 获取SqlSessionUtil核心对象
 */

public class SqlSessionUtil {
    private static SqlSession sqlSession;
    public static SqlSession getSqlSession(){
        try {
            InputStream ins = Resources.getResourceAsStream("mybatis-config.xml");
            SqlSessionFactory build = new SqlSessionFactoryBuilder().build(ins);
            sqlSession = build.openSession();

        } catch (IOException e) {
            e.printStackTrace();
        }
        return sqlSession;
    }

    public static void main(String[] args) {
        System.out.println(getSqlSession());
    }
}
11.编写测试类:
package com.scy.test;

import com.scy.dao.UserDao;
import com.scy.entity.User;
import com.scy.util.SqlSessionUtil;
import org.apache.ibatis.session.SqlSession;
import org.junit.After;
import org.junit.Before;
import org.junit.Test;

import java.sql.Date;
import java.util.List;

public class UserTest {
    private SqlSession sqlSession;
    private UserDao userDao;
    @Before
    public void before(){
        sqlSession = SqlSessionUtil.getSqlSession();
        userDao = sqlSession.getMapper(UserDao.class);
    }
    @After
    public void after(){
        sqlSession.commit();
        sqlSession.close();
    }
    @Test
    public void queryAll(){
        List<User> users = userDao.findAll();
        for(User user: users){
            System.out.println(user);
        }
    }
    @Test
    public void insertUser(){
        User user =new User();
        user.setName("赵丽颖");
        user.setBirthday(new Date(90,5,29));
        user.setSex("女");
        user.setAddress("河北");
        userDao.insertUser(user);
    }
    @Test
    public void updateUser(){
        User user =new User();
        user.setName("迪丽热巴");
        user.setBirthday(new Date(95,5,20));
        user.setSex("女");
        user.setAddress("河南");
        user.setId(11);
        userDao.updateUser(user);
    }
    @Test
    public void queryById(){
        User user=userDao.queryUserById(11);
        System.out.println(user);
    }
    @Test
    public void deleteById(){
        userDao.deleteUserById(10);
    }
}
注:本文为笔记,是写完以后才发的,mybatis基本的功能可以实现,可以用作增删改查,如有错误请给我指正一下,谢谢!
欢迎大家学习,转载!!!


 6559
6559


 被折叠的 条评论
为什么被折叠?
被折叠的 条评论
为什么被折叠?
 到【灌水乐园】发言


