


1、Vue3生命周期
在Vue3.x中,新增了一个setup生命周期函数,setup执行的时机是在beforeCreate生命函数之前执行,因为在这个函数中不能通过this来获取实例的;同时为了命名的统一,将beforeDestory改名为beforeUnmount,destoryed改名为unmounted
<script setup>
  import {
    ref,
    reactive,
    onMounted,
    onUpdated,
    onBeforeMount,
    onBeforeUpdate,
    onRenderTracked,
    onRenderTriggered,
    onErrorCaptured
  } from "vue"

  let arr = reactive(["hello", "world", "桃花瓣"])
  let n=ref("hello")

  let fn1 = () => {
    arr[1] = "橘子汽水"
    n.value="nihong"
    console.log(n)
  }
  onUpdated(() => {
    console.log("第1次执行")
  })

  onMounted(() => {
    console.log("第2次执行")
  })

  onBeforeMount(()=>{
    console.log("第3次执行")
  })

  onBeforeUpdate(() => {
    console.log("第4次执行")
  })

  onRenderTracked(() => {
    console.log("onRenderTracked执行")
  })

  onRenderTriggered(()=>{
    console.log("onRenderTriggered执行2222")
  })

  onErrorCaptured(() => {
    console.log("onErrorCaptrued执行12345")
  })
</script>

<template>
  <div>

    <h4 v-for="el in arr">
      {{el}}
    </h4>
    <h4>{{n}}</h4>
    <button @click="fn1">更改</button>
  </div>
</template>

<style scoped>

</style>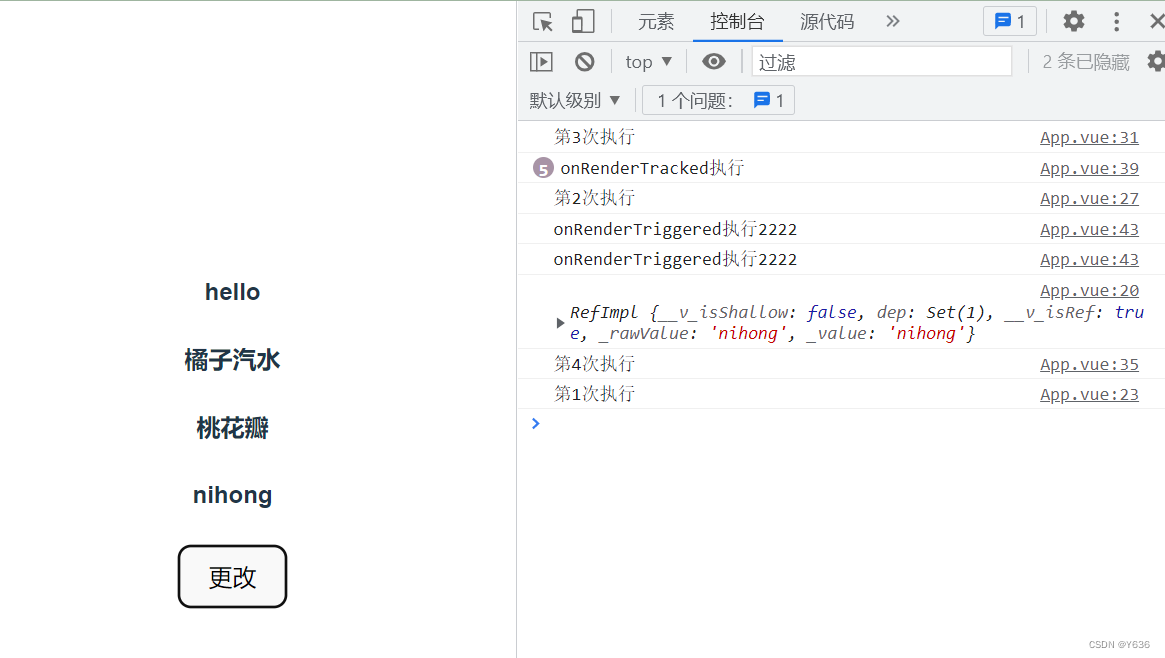
2、Teleport
用于组件模板的一部分逻辑上属于该组件,但从技术角度来看,最好将模板的这一部分移动到 DOM 中 Vue app 之外的其他位置,例如模态弹窗
to属性:放到指定位置
<script setup>
    import {
        ref
    } from "vue"

    let msg = ref("展开")
    let show = ref(true)
    let onshow = () => {
        show.value = true
    }
    let offshow = () => {
        show.value = false
    }
</script>
<template>
    <div>
        <button @click="onshow">{{msg}}</button>
        <button @click="offshow">收起</button>
        <teleport to='body'>
            <div v-show="show" class="box1">
                <h1>饮湖上初晴后雨</h1>
                <h3>水光潋滟晴芳好</h3>
                <h3>山色空蒙雨亦奇</h3>
                <h3>欲把西湖比西子</h3>
                <h3>淡妆浓抹总相宜</h3>
            </div>
        </teleport>
    </div>
</template>
<style scoped>
.box1{
    display: flex;
    margin-top: 20px;
}
</style>
3、属性
可以直接使用props,也可以使用新的defineProps,两者接收相同的值,不需要引入
//App.vue
<script setup>
  import Box from "./Box.vue"
  import Box2 from "./Box2.vue"
  import {ref} from "vue"

  let aa=ref("hello")
  let url=ref("https://img1.baidu.com/it/u=3217543765,3223180824&fm=253&app=120&size=w931&n=0&f=JPEG&fmt=auto?sec=1663779600&t=985f63afe9776ab4e44d72d739681794")
</script>

<template>
  <div>
    <Box :n1="999" :msg="aa"></Box>
    <Box2 :a1="666777" :a2="url"></Box2>
  </div>
</template>

<style scoped>

</style>
//Box2.vue 直接使用props的方式
<script>
export default{
props:["a1","a2"],
setup(props){
let fm=()=>{
console.log(props.a1,props.a2)
}
return {fm}
}
}
</script>
<template>
<div>
<b>{{a1}}----{{a2}}</b>
<img :src="a2" alt="">
<button @click="fm">99</button>
</div>
</template>
<style scoped>
</style>//Box.vue 使用新的defineProps
<script setup>
let obj=defineProps(["msg","n1"])
let fn=()=>{
console.log(obj.n1,obj.msg)
}
</script>
<template>
<div>
<h3>{{obj.n1}}</h3>
<h3>{{obj.msg}}</h3>
<h5>{{msg}}</h5>
<button @click="fn">检查</button>
</div>
</template>
<style scoped>
</style>4、自定义事件
defineEmits接收与$emit相同的值
defineEmits不需要引入,可以直接使用
const emit = defineEmits(['change', 'delete'])5、状态驱动的动态CSS
单文件组件的 <style> 标签可以通过 v-bind 这一 CSS 函数将 CSS 的值关联到动态的组件状态上
<script setup>
    import {
        ref,
        reactive
    } from "vue"

let col=ref("yellow")
let bgc=ref("pink")
let wd=ref("200px")
let ht=ref("100px")
let flag=ref(true)
let fn=()=>{
    flag=!flag
    if(flag){
        col.value="red"
        bgc.value="yellow"
    }else{
        col.value="yellow"
        bgc.value="pink"
    }
}

</script>
<template>
    <div>
        <div class="box1">8888</div>
        <button @click="fn">点击</button>
    </div>
</template>
<style scoped>
.box1{
    color:v-bind(col);
    background: v-bind(bgc);
    width: v-bind(wd);
    height: v-bind(ht);
}
</style>
6、注册组件
defineComponent:在定义 Vue 组件时提供类型推导的辅助函数
defineAsyncComponent:定义一个异步组件,它在运行时是懒加载的。参数可以是一个异步加载函数,或是对加载行为进行更具体定制的一个选项对象。
(1)注册全局组件
//main.js 文件中引入组件文件
import Box from "./Box.vue"

//在App.vue中使用
<template>
<Box></Box>
</template>
(2)注册同步局部组件
使用defineComponent
//Box2.vue 内部
<script>
    import {
        reactive,
        ref,
        defineComponent
    } from "vue"

    let Box2=defineComponent({
        data(){
            return {msg:"hello"}
        },
        setup(){
            let msg1=ref("world")
            return {msg1}
        }
    })
    export default Box2

</script>
(3)定义全局异步组件
//main.js 内部
import { createApp,defineAsyncComponent} from 'vue'
let Box1=defineAsyncComponent(()=>import("./Box4.vue"))
const app=createApp(App)
app.component("Box1",Box1)
(4)定义局部异步组件
import {
    ref,
    reactive,
    defineAsyncComponent
  } from "vue"
  let Box3 = defineAsyncComponent(() => import("./Box3.vue"))
  let Box2 = defineAsyncComponent(() => import("./Box2.vue"))
7、Suepence
用于协调对组件树中嵌套的异步依赖的处理
<Suspense> 接受两个插槽:#default 和 #fallback。它将在内存中渲染默认插槽的同时展示后备插槽内容。
如果在渲染时遇到异步依赖项 (异步组件和具有 async setup() 的组件),它将等到所有异步依赖项解析完成时再显示默认插槽。
<script setup>
  import {
    ref,
    reactive,
    defineAsyncComponent
  } from "vue"
  let Box2 = defineAsyncComponent(() => import("./Box2.vue"))
</script>

<template>
  <div>
    <Box2></Box2>
    <suspense>
      <template #default>
        <Box2></Box2>
      </template>
      <template #fallback>
        <div>加载中...</div>
      </template>
    </suspense>
  </div>
</template>

<style scoped>

</style>
8、toRef,toRefs,readonly
toRef:基于响应式对象上的一个属性,创建一个对应的 ref。这样创建的 ref 与其源属性保持同步:改变源属性的值将更新 ref 的值,反之亦然。
<script setup>
    import {
        reactive,
        toRef
    } from "vue"
    let obj = reactive({name:"lihua",age:20})

    let ageref=toRef(obj,"age")
    let fn=()=>{
        ageref.value++
        // obj.age++
        console.log(ageref.value)
    }
    console.log(ageref.value)

    let nameref=toRef(obj,"name")
    let fn2=()=>{
        nameref.value=ageref
        // obj.name=ageref
        console.log(obj,9999)
    }
    console.log(obj)
</script>
<template>
    <div>
        <h4>{{obj.age}}</h4>
        <h3>{{obj.name}}</h3>
        <button @click="fn">增加</button>
        <button @click="fn2">更改</button>
    </div>
</template>
toRefs:将一个响应式对象转换为一个普通对象,这个普通对象的每个属性都是指向源对象相应属性的 ref。每个单独的 ref 都是使用 toRef() 创建的。
<script>
    import {
        toRefs,
        reactive,
        defineComponent
    } from "vue"

    export default {
        setup() {

            let obj = reactive({
                x: 0,
                y: 0
            })
            let obj1 = toRefs(obj)
            let fn = () => {
                obj1.x.value = obj1.x.value + 4
                console.log(obj1.x.value, obj)
            }
            return {
                ...toRefs(obj),
                fn
            }
        }
    }
</script>
<template>
    <div>
        <h5>{{x}}</h5>
        <button @click="fn">查看</button>
    </div>
</template>
<style scoped>

</style>当从组合式函数中返回响应式对象时,toRefs 相当有用。使用它,消费者组件可以解构/展开返回的对象而不会失去响应性
function useFeatureX() {
  const state = reactive({
    foo: 1,
    bar: 2
  })

  // ...基于状态的操作逻辑

  // 在返回时都转为 ref
  return toRefs(state)
}

// 可以解构而不会失去响应性
const { foo, bar } = useFeatureX()
readonly:接受一个对象 (不论是响应式还是普通的) 或是一个 ref,返回一个原值的只读代理,只读代理是深层的:对任何嵌套属性的访问都将是只读的。它的 ref 解包行为与 reactive() 相同,但解包得到的值是只读的。
<script setup>
    import {
        reactive,
        toRef,
        readonly
    } from "vue"

    let content=reactive(["hello"])
    let content2=readonly(content)
    let fn=()=>{
        setTimeout(()=>{
            content2[0]="world"
            content[0]="大约在冬季"
        },1000)
        console.log(content2[0])
    }
</script>
<template>
    <div>
        <h5>{{content[0]}}---{{content[1]}}</h5>
        <button @click="fn">增加</button>
    </div>
</template>
9、公共数据配置
因为Vue2使用公共配置时一般绑定在原型上无论是否使用都在每一个组件的this链上,这样的设计不太友好,Vue3提供了专门公共数据配置的方式: globalProperties和getCurrentInstance
app.config.globalProperties:这是对 Vue 2 中 Vue.prototype 使用方式的一种替代,此写法在 Vue 3 已经不存在了。与任何全局的东西一样,应该谨慎使用。如果全局属性与组件自己的属性冲突,组件自己的属性将具有更高的优先级
//main.js中
import { createApp } from 'vue'
// import './style.css'
import App from './App.vue'
const app=createApp(App)
app.config.globalProperties.$hqyj="5000e"
app.config.globalProperties.rank=1
app.config.globalProperties.tank={name:"beyond",song:"光辉岁月"}
app.config.globalProperties.arr=[11,23,"animal"]

app.mount('#app')
getCurrentInstance:返回当前活跃的 effect 作用域
<script setup>
  import Box from "./Box.vue"
  import {
    onBeforeMount,
    getCurrentInstance,
    effect
  } from "vue"

  let {
    proxy
  } = getCurrentInstance()
  onBeforeMount(() => {
    console.log(getCurrentInstance(),proxy.$hqyj)
  })

  effect(()=>{
    console.log(getCurrentInstance(),proxy.rank,proxy.tank)
  })

let fn=()=>{
  console.log(proxy.tank)
  proxy.tank.song="海阔天空"
}
</script>

<template>
  <div>
    <h3>{{tank.name}}---{{tank.song}}</h3>
    <button @click="fn">点击</button>
    <Box></Box>
  </div>
</template>

<style scoped>

</style>
10、网络配置
vite环境配置:
//main.js中
import {
    createApp
} from 'vue'
import './style.css'
import App from './App.vue'
import axios from "axios"

const app = createApp(App)

axios.defaults.baseURL = "http://localhost:5173/api"  //如果报错可改为"http://127.0.0.1:7001/api"
app.config.globalProperties.$axios = axios
app.mount('#app')
//vite.config.js中
import {
defineConfig
} from 'vite'
import vue from '@vitejs/plugin-vue'
// https://vitejs.dev/config/
export default defineConfig({
plugins: [vue()],
server: {
// port:"8080",
// host
proxy: {
'/api': {
target: 'http://127.0.0.1:7001', // 代理的目标地址
rewrite: (path) => path.replace(/^\/api/, '/'), // 路径重写
changeOrigin: true,
// secure: true, // target是否https接口
// ws: true, // target是否代理websockets
}
}
}
})//组件.vue中
<script setup>
import {
onMounted,
getCurrentInstance
} from "vue"
let {
proxy
} = getCurrentInstance()
onMounted(async () => {
let res = await proxy.$axios('/test')
console.log(res, 99999)
})
</script>
<template>
<div>
<h3>Box1</h3>
</div>
</template>
<style scoped>
</style>11、app.use
插件配置
同2.0一样use函数接受一个函数或者对象(对象有install函数) 然后会调用这个传入的回调函数 给它传参app对象,以此来实现第三方插件
//main.js中
import {
    createApp
} from 'vue'
import './style.css'
import App from './App.vue'
// import axios from "axios"

const app = createApp(App)

import $axios from  "./http/$axios.js"
app.use($axios)

app.mount('#app')
在src文件夹下新建一个文件夹用来存放app.use的文件
//scr/http/$axios.js文件内部
import axios from "axios"
function $axios(app){
    axios.defaults.baseURL="http://localhost:5173/api"
    app.config.globalProperties.$axios = axios
}
export default $axios
12、路由配置
//路由文件
import {
  createRouter,
  createWebHistory,
} from "vue-router"

const routes = [{
    path: '/',
    name: 'home',
    component: () => import('../views/home.vue')
  },
  {
    path: '/login',
    name: 'login',
    component: () => import('../views/login.vue')
  },
  {
    path: '/info',
    name: 'info',
    component: () => import('../views/info.vue'),
    children: [{
      path: '/info/son',
      name: 'son',
      component: () => import('../views/son.vue')
    }]
  }
]

const router = createRouter({
  history: createWebHistory(),
  routes
})

router.beforeEach((to, from, next) => {
  next()
})

router.beforeResolve((to, from, next) => {
  next()
})

router.afterEach((to, from) => {

})
export default router
//main.js文件中
import {
createApp
} from 'vue'
import App from './App.vue'
import router from "./router/index.js"
let app=createApp(App)
app.use(router)
app.mount('#app')
//组件.vue中
<script setup>
    import {
        onBeforeRouteLeave,
        useRouter
    } from "vue-router"

    let router = useRouter()
    onBeforeRouteLeave((to, from, next) => {
        next()
    })
    let fn = () => {
        router.push({
            path: "/info/son",
            query: {
                id: 123
            }
        })
    }

    let fm = () => {
        router.push({
            path: "/login",
            query: {
                id: 12311
            }
        })
    }
</script>

<template>
    <div>
        <h2>Home</h2>
        <button @click="fn">info</button>
        <button @click="fm">login</button>
    </div>
</template>

<style>

</style>
Vue3和2的router-view和router-link用法相同
13、数据仓库配置
(1)安装
指令:npm i pinia
import {
    createApp
} from 'vue'
import App from './App.vue'
import router from "./router/index.js"
import {createPinia} from "pinia"
let app=createApp(App)
app.use(router)
app.mount('#app')
app.use(createPinia())
(2)在src文件下写一个store文件夹
将数据写入store文件夹下的文件中
//src/store/info.js
import {defineStore} from 'pinia'
export const useInfo=defineStore('info',{
    state:()=>{
        return {
            msg:"hello"
        }
    }
})
(3)在组件中使用
//info.vue
<script setup>
import {useInfo} from "../store/info.js"

let info=useInfo()
console.log(info.msg,9999)
let fn=()=>{
    info.msg="修改了"
}
</script>

<template>
    <div>
        <h3>info</h3>
        <p>{{info.msg}}</p>
        <button @click="fn">修改仓库</button>
    </div>
</template>

<style>

</style>


 8577
8577


 被折叠的 条评论
为什么被折叠?
被折叠的 条评论
为什么被折叠?
 到【灌水乐园】发言


