


#include <time.h>
#include <openvino/openvino.hpp>
#include <opencv2/opencv.hpp>
using namespace cv;
using namespace std;
/*
* 源码训练的时候中心裁剪图片至300*300
*/
std::string path = "acc-76.onnx";//模型文件路径
ov::CompiledModel model;
cv::Mat input_img;
void center_resize(cv::Mat &img, cv::Size new_shape)//中心裁剪方法1
{
float width = img.cols;
float height = img.rows;
int center_x = round(width / 2);
int center_y = round(height / 2);
int dh = int(round((new_shape.height - height) / 2));
int dw = int(round((new_shape.width - width) / 2));
cv::Scalar color = cv::Scalar(0, 0, 0);//填充色
if (width >= 300 && height >= 300)
{
img = img(cv::Range(center_y - (round(new_shape.height / 2)), center_y + (round(new_shape.height / 2))),
cv::Range(center_x - (round(new_shape.width / 2)), center_x + (round(new_shape.width / 2))));
}
else if (width >= 300)
{
cv::copyMakeBorder(img, img, dh, dh, 0, 0, cv::BORDER_CONSTANT, color);
img = img(cv::Range(0, 300), cv::Range(center_x - (round(new_shape.width / 2)), center_x + (round(new_shape.width / 2))));
}
else if (height >= 300)
{
cv::copyMakeBorder(img, img, 0, 0, dw, dw, cv::BORDER_CONSTANT, color);
img = img(cv::Range(center_y - (round(new_shape.height / 2)), center_y + (round(new_shape.height / 2))), cv::Range(0, 300));
}
else
{
cv::copyMakeBorder(img, img, dh, dh, dw, dw, cv::BORDER_CONSTANT, color);
img = img(cv::Range(0, 300), cv::Range(0, 300));
}
}
void center_resize(cv::Mat &src)//中心裁剪方法2
{
int width = src.cols;
int height = src.rows;
Point center(width / 2, height / 2); // 指定的中心点
Size size(300, 300); // 裁剪出的图片大小
getRectSubPix(src, size, center, src); // 裁剪出目标图片
}
void compile_model(std::string xml_path, ov::CompiledModel& compile_model)//加载模型
{
ov::Core core; // core是interference Engine的管理核心,一般使用openvino之前都需要先创建一个core,负责其中的设备管理
compile_model = core.compile_model(xml_path); // 模型加载并编译
}
void openvino_classifer(cv::Mat image, ov::CompiledModel compile_model)//模型推理
{
clock_t startTime, endTime;
/*startTime = clock();*/
Mat out_image;
size_t input_batch_size = 1; // size_t是c和c++标准在stddef.h中定义的,这个类型用于表示对象的大小,其真实类型与操作系统有关
// 在32位架构中被普遍定义为:typedef unsigned int size_t;
size_t input_channel_size = 3; // 而在64位架构中被定义为: typedef unsigned long size_t;
size_t input_height_size = 300;
size_t input_width_size = 300;
auto iq = compile_model.create_infer_request(); // 创建用于推断已编译模型的推理请求对象 创建的请求分配了输入和输出张量
auto input = iq.get_input_tensor(0);
auto output = iq.get_output_tensor(0);
input.set_shape({ input_batch_size, input_channel_size, input_height_size, input_height_size }); // 指定shape的大小
float* input_data_host = input.data<float>(); // 获取输入的地址,并传递给指针input_data_host
startTime = clock();
//auto image = cv::imread("dog.jpg");
float mean[] = { 0.406, 0.456, 0.485 };
float std[] = { 0.225, 0.224, 0.229 };
// 对应于pytorch的代码部分
//cv::resize(image, image, cv::Size(input_height_size, input_width_size));
center_resize(image);
int image_area = image.cols * image.rows;
unsigned char* pimage = image.data;
float* phost_b = input_data_host + image_area * 0; // input_data_host和phost_*进行地址关联
float* phost_g = input_data_host + image_area * 1;
float* phost_r = input_data_host + image_area * 2;
for (int i = 0; i < image_area; ++i, pimage += 3)
{
// 注意这里的顺序rgb调换了
*phost_r++ = (pimage[0] / 255.0f - mean[0]) / std[0]; // 将图片中的像素点进行减去均值除方差,并赋值给input
*phost_g++ = (pimage[1] / 255.0f - mean[1]) / std[1];
*phost_b++ = (pimage[2] / 255.0f - mean[2]) / std[2];
}
iq.infer(); // 模型推理
const int num_classes = 4;
float* prob = output.data<float>();
int predict_label = std::max_element(prob, prob + num_classes) - prob; // 确定预测类别的下标
float confidence = prob[predict_label]; // 获得预测值的置信度
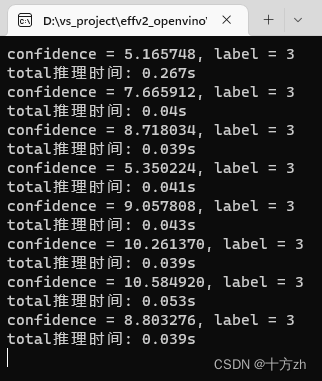
printf("confidence = %f, label = %d\n", confidence, predict_label);
endTime = clock();//计时结束
std::cout << "total推理时间: " << (double)(endTime - startTime) / CLOCKS_PER_SEC << "s" << std::endl;
}
int main()
{
compile_model(path, model);
cv::String pattern = "D:\\vs_project\\effv2_openvino\\effv2_openvino\\wcj\\*.png";//测试图片路径
vector<string>img_path;
vector<cv::String>fn;
glob(pattern, fn, false);
size_t count = fn.size();
for (size_t j = 0; j < count; j++)
{
img_path.push_back(fn[j]);
}
for (int i = 0; i < img_path.size(); i++)
{
string a = to_string(i + 1);// 1开始命名存储
input_img = cv::imread(img_path[i]);
//start = clock();//开始计时
openvino_classifer(input_img, model);
}
return 0;
}推理测试结果:
测试了8张图片,结果正确


 2201
2201


 被折叠的 条评论
为什么被折叠?
被折叠的 条评论
为什么被折叠?
 到【灌水乐园】发言


