


1、Prism的概念,应用场景
- Modules:Modules是能够独立开发、测试、部署的功能单元,Modules可以被设计成实现特定业务逻辑的模块(如Profile Management),也可以被设计成实现通用基础设施或服务的模块(如Logging、Exception Management)。
- ModuleCatalog:在Prism中,Module Catalog指明了要Load哪些Module,和用什么样的顺序去Load这些Module。
- Shell:Shell是宿主应用程序(host application),modules将会被load到Shell中。Shell定义了应用程序的整体布局和结构,而不关心寄宿其中的Module,Shell通常实现通用的application service和infrastructure,而应用的逻辑则实现在具体的Module中,同时,Shell也提供了应用程序的顶层窗口。
- Views:Views是应用中展现特定功能的视图,它展现UI、定义交互行为,并且通过数据绑定的方式与ViewModel进行交互。
- ViewModel和Presenters:View Model用来封装应用程序的UI逻辑及其状态。
- Model:Model被用来封装数据和相应的验证,以及相关的业务规则来保证数据的一致性和正确性。
- Commands:Command被用来封装应用程序功能,Prism提供了DelegateCommand和CompositeCommand两个类。
- Regions(区域):Regions是应用程序UI的逻辑区域,它很像一个PlaceHolder,Views在Regions中展现,很多种控件可以被用作Region:ContentControl、ItemsControl、ListBox、TabControl。Views能在Regions编程或者自动呈现,Prism也提供了Region导航的支持。
2、Prism使用过程(PrismApplication,Prism项目模板),Prism实现Mvvm(BindableBase,RaisePropertyChanged(),DelegateCommand,SetProperty())
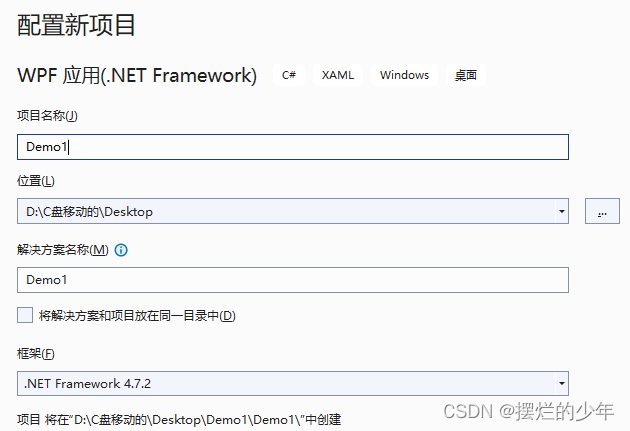
创建Prism项目时可以先创建WPF,然后修改App.xaml内容。也可以使用项目模板,需要在拓展中安装"Prism Tempalte Pack",然后创建新项目时,选择Prism Full App(WPF)项目即可:

下面一个WPF修改成Prism项目为例,简单使用Prism项目:
- 创建WPF窗体项目
- 下载prism.Dryioc依赖包

- 在App.xaml命名空间中添加prism依赖:xmlns:prism="http://prismlibrary.com/"。将App.xaml文件中的Application标签修改成为 prism:PrismApplication 。(wfp项目应用的是Application对象,使用prism框架的项目应用的是PrismApplication。Application对象如何启动主页面, StartupUri, PrismApplication启动主页面可以靠StartupUri(可删去),也可不需要,推荐使用App .xaml.cs中CreateShell()方法中的依赖注入)
<prism:PrismApplication x:Class="PrismDemo.App"
             xmlns="http://schemas.microsoft.com/winfx/2006/xaml/presentation"
             xmlns:x="http://schemas.microsoft.com/winfx/2006/xaml"
             xmlns:local="clr-namespace:PrismDemo"
             xmlns:prism="http://prismlibrary.com/">
    <Application.Resources>
    </Application.Resources>
</prism:PrismApplication>
- 创建Views和ViewModels文件夹,将项目创建时自动创建的MainWindow.xaml视图文件,移动到Views文件夹下(别忘了修改MainWindow.xaml和MainWindow.xaml.cs中的命名空间,要加上.Views)
<Window x:Class="Demo1.MainWindow"></Window>
修改为:
<Window x:Class="Demo1.Views.MainWindow"></Window>- 修改App.xaml.cs继承的类,将继承的Window类改成PrismApplication类,实现PrismApplication类中的CreateShell()方法和RegisterTypes()方法
namespace PrismDemo
{
    /// <summary>
    /// App.xaml 的交互逻辑
    /// </summary>
    public partial class App : PrismApplication
    {
        // 关系:PrismApplication 继承于 PrismApplicationBase 继承于 Application
        // 快捷键:查看对象源码:fn+f12,快速实现接口,方法,抽象类:alt+enter+enter
        // 快速创建构造函数:ctor

        // Window窗体, StartupUri可以启动一个窗体
        // CreateShell()主要负责启动一个主页面。Main
        protected override Window CreateShell()
        {
            // 启动一个窗体MainWindow
            return Container.Resolve<Main>();
        }

        protected override void RegisterTypes(IContainerRegistry containerRegistry)
        {
        }

    }
}- 页面:
点击更改Name按钮后,会与mvvm框架实现效果一样,修改文本框名字,实现视图和后台修改时数据交互。

- MainWindow.xaml视图中测试代码编写:
<Window x:Class="PrismDemo.Views.MainWindow"
        xmlns="http://schemas.microsoft.com/winfx/2006/xaml/presentation"
        xmlns:x="http://schemas.microsoft.com/winfx/2006/xaml"
        xmlns:d="http://schemas.microsoft.com/expression/blend/2008"
        xmlns:mc="http://schemas.openxmlformats.org/markup-compatibility/2006"
        xmlns:local="clr-namespace:PrismDemo"
        mc:Ignorable="d"
        Title="MainWindow" Height="450" Width="800">
    <Grid>
        <!--xaml中binding数据来源于ViewModel,约定:ViewModel放到ViewModels文件夹,命名:以ViewModel结尾,以窗体的名称开头,如:MainWindowViewModel-->

        <StackPanel HorizontalAlignment="Left">
            <TextBox Text="{Binding Name}" Width="100"/>
            <!--准备把xaml视图上的业务逻辑和视图解耦-->
            <Button Content="更改Name" Command="{Binding ChangeNameCommand}" CommandParameter="王五"/>
        </StackPanel>
    </Grid>
</Window>- MainWindow.xaml.cs的DataContext绑定ViewModel类中编写的数据
namespace PrismDemo.Views
{
    /// <summary>
    /// Main.xaml 的交互逻辑
    /// </summary>
    public partial class MainWindow : Window
    {
        MainWindowViewModel viewModel = new MainWindowViewModel();

        public Main()
        {
            InitializeComponent();
            // 把ViewModel和当前窗体MainWindow建立联系
            // 只能保证:ViewModel提供的数据源可以在xaml视图上使用。
            DataContext = viewModel;
        }
    }
}- MainWindowViewModel.cs中代码:
Prism.Mvvm中的BindableBase 相当于CommunityToolkit.Mvvm中的ObservableObject
Prism.Mvvm.BindableBase中的RaisePropertyChanged()相当于CommunityToolkit.Mvvm中的ObservableObject.OnPropertyChanged() 。和视图数据交互的还可以使用SetProperty(ref _title, value);实现
Prism.Commands.DelegateCommand ===> CommunityToolkit.Mvvm中的RelayCommand
namespace PrismDemo.ViewModels
{
    public class MainWindowViewModel : BindableBase
    {
        // DelegateCommand
        public DelegateCommand<string> ChangeNameCommand { get; private set; }
        public MainWindowViewModel()
        {
            Name = "张三";

            ChangeNameCommand = new DelegateCommand<string>(ChangeName);
        }

        private void ChangeName(string obj)
        {
            Name = obj;
        }

        private string name;

        public string Name
        {
            // 通过BindableBase.RaisePropertyChanged()可以保证xaml视图上数据变化,通知ViewModel, 重新渲染到视图。
            get { return name; }
            //set { name = value; RaisePropertyChanged(); }
            set { SetProperty(ref name, value); }
        }
    }
}
3、自动绑定ViewModel
- 实现数据自动绑定(不在视图.xaml.cs中使用this.DataContent绑定)需要满足三条要求
- 窗体|页面|用户控件必须放到Views文件夹下
- 模型必须放到ViewModels文件夹下
- 模型名称的名称,必须是窗体名称开头,且以ViewModel结尾
- 满足以上三条,不需要XXX.xaml.cs中手动绑定DataContext,实现自动绑定ViewModel。
如下图目录结构:

4、Prism区域(负责管理视图中所有定义的区域),实现简单页面点击导航展示新页面
参考上面第3部分,创建WPF项目,将项目改成Prism项目,需要修改如下:
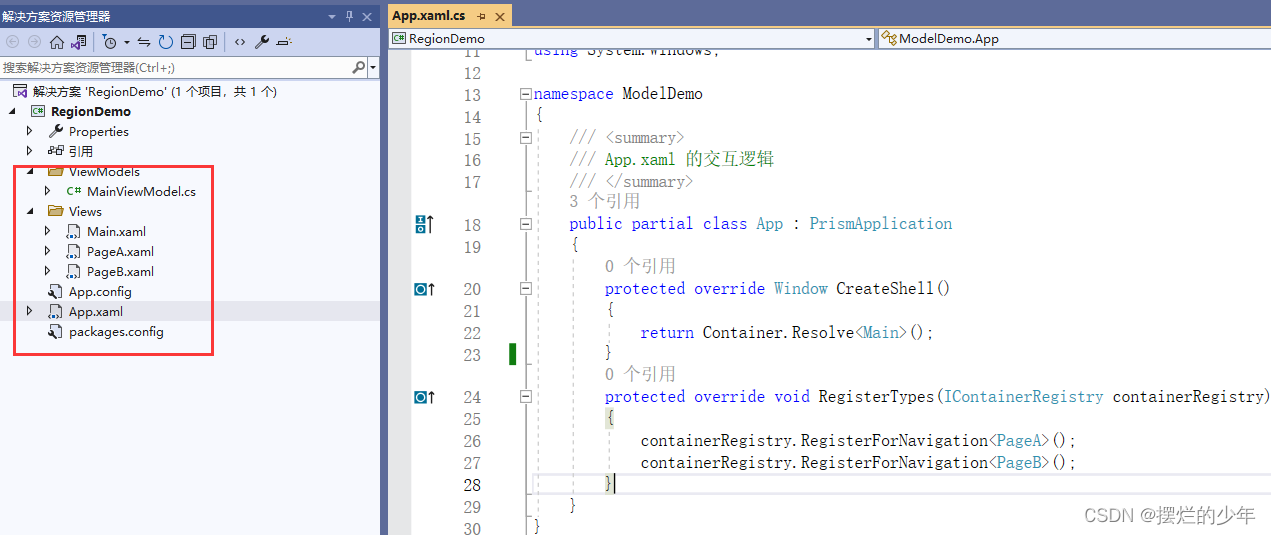
- App.xaml.cs中重写的RegisterTypes()方法中,将导航点击展示需要展示的子窗体,注册进项目(以便在主页面按钮点击时给ContentControl控件使用prism:RegionManager.RegionName="RegionName"绑定后台设置控件内容的操作)。
protected override void RegisterTypes(IContainerRegistry containerRegistry)
{
      containerRegistry.RegisterForNavigation<PageA>();
      containerRegistry.RegisterForNavigation<PageB>();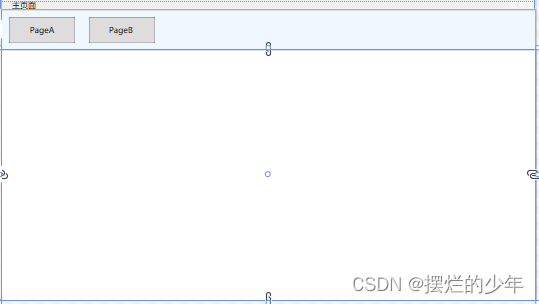
}- Main.xml视图:
需要引入prism的命名依赖:xmlns:prism="http://prismlibrary.com/",以供控件使用。 ContentControl 只能展示用户控件窗体
<Window x:Class="ModelDemo.Views.Main"
        xmlns="http://schemas.microsoft.com/winfx/2006/xaml/presentation"
        xmlns:x="http://schemas.microsoft.com/winfx/2006/xaml"
        xmlns:d="http://schemas.microsoft.com/expression/blend/2008"
        xmlns:mc="http://schemas.openxmlformats.org/markup-compatibility/2006"
        xmlns:local="clr-namespace:ModelDemo"
        xmlns:prism="http://prismlibrary.com/"
        mc:Ignorable="d"
        Title="主页面" Height="450" Width="800">
    <Grid>
        <Grid.RowDefinitions>
            <RowDefinition Height="60"></RowDefinition>
            <RowDefinition></RowDefinition>
        </Grid.RowDefinitions>

        <StackPanel Grid.Row="0" HorizontalAlignment="Left" Orientation="Horizontal" Background="AliceBlue" Width="800">
            <Button Content="PageA" Command="{Binding ChangeCommand}" Width="100" Margin="10" CommandParameter="PageA"/>
            <Button Content="PageB " Command="{Binding ChangeCommand}" Width="100" Margin="10" CommandParameter="PageB"/>
        </StackPanel>
<!-- ContentControl 只能展示用户控件窗体 -->
        <ContentControl Grid.Row="1" prism:RegionManager.RegionName="RegionName"/>
    </Grid>
</Window>
- PageA.xaml视图:
<UserControl x:Class="ModelDemo.Views.PageA"
             xmlns="http://schemas.microsoft.com/winfx/2006/xaml/presentation"
             xmlns:x="http://schemas.microsoft.com/winfx/2006/xaml"
             xmlns:mc="http://schemas.openxmlformats.org/markup-compatibility/2006"
             xmlns:d="http://schemas.microsoft.com/expression/blend/2008"
             xmlns:local="clr-namespace:ModelDemo.Views"
             mc:Ignorable="d"
             d:DesignHeight="450" d:DesignWidth="800" Background="Blue">
    <Grid>
        <TextBlock Text="PageA窗体" FontSize="60"/>
    </Grid>
</UserControl>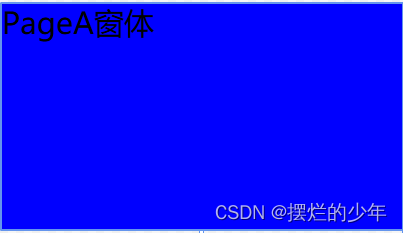
- PageB.xaml视图:
<UserControl x:Class="ModelDemo.Views.PageB"
             xmlns="http://schemas.microsoft.com/winfx/2006/xaml/presentation"
             xmlns:x="http://schemas.microsoft.com/winfx/2006/xaml"
             xmlns:mc="http://schemas.openxmlformats.org/markup-compatibility/2006"
             xmlns:d="http://schemas.microsoft.com/expression/blend/2008"
             xmlns:local="clr-namespace:ModelDemo.Views"
             mc:Ignorable="d"
             d:DesignHeight="450" d:DesignWidth="800" Background="Yellow">
    <Grid>
        <TextBlock Text="PageB窗体" FontSize="60"/>
    </Grid>
</UserControl>
- MainViewModel.cs需要继承BindableBase,在构造函数中注入IRegionManager,才能使用区域块Regions调用在App.xaml.cs中RegisterTypes()方法中注册的用户控件子窗体,实现跳转到主窗体中的ContentControl控件中。
namespace ModelDemo.ViewModels
{
    public class MainViewModel:BindableBase
    {
        private readonly IRegionManager regionManager;

        public DelegateCommand<string> ChangeCommand { set; get; }

        //构造函数里注入IRegionManager类,调用对象才能使用区域块跳转窗体
        public MainViewModel(IRegionManager region)
        {
            ChangeCommand = new DelegateCommand<string>((param) =>
            {
                regionManager.Regions["RegionName"].RequestNavigate(param);
            });
            this.regionManager = region;
        }
    }
}
5、Prism模块化
模块化的意思就是,将上面4中的PageA和PageB页面拆分出去,单独封装为类库模块,在主程序中调用这两个模块,实现导航栏页面展示。

模块类库创建步骤:
- WPF类库项目(也可以用WPF(.Net Framework)应用程序---点击项目属性---改成类库项目)
- 每个模块都要安装程序包Prism.DryIoc
- 按约定编写每个模块库的Views(视图使用用户控件才能在主程序的<ContentControl/>中使用本模块的视图)和ViewModels(没有视图操作可以不写)
- 每个模块库都要创建配置文件XXXProfile配置文件,实现IMoudle接口,并在实现的RegisterTypes()方法中注册该页面。
- 注意: containerRegistry.RegisterForNavigation<PageA>(); 没有对视图操作的可以不用写PageAViewModel参数。例如下面MoudelA的MoudelAProfile配置文件:
namespace ModuleA
{
    public class ModuleAProfile : IModule
    {
        public void OnInitialized(IContainerProvider containerProvider)
        {

        }

        public void RegisterTypes(IContainerRegistry containerRegistry)
        {
            // 注册用户控件,让这个模块的用户控件视图将来在主程序中可以实现导航跳转
            // RegisterForNavigation<视图,视图模型>
            containerRegistry.RegisterForNavigation<PageA, PageAViewModel>();
        }
    }
}
主程序添加模块步骤:
1.创建WPF(.Net Framework)应用程序项目,将这个项目改成Prism项目。
2.按照约定创建Views和ViewModels文件夹存放视图和视图模型。
3.App.xaml.cs中通过重写ConfigureModuleCatalog()方法,将创建的模块库添加进主程序:
namespace ModuleMain
{
    /// <summary>
    /// App.xaml 的交互逻辑
    /// </summary>
    public partial class App : PrismApplication
    {
        protected override Window CreateShell()
        {
            return Container.Resolve<Main>();
        }

        protected override void RegisterTypes(IContainerRegistry containerRegistry)
        {
        }

//=== 方式1: ConfigureModuleCatalog配合Profile(IModule)
// 需要在主项目中把依赖的两个模块库ModuleA和ModuleB的dll依赖引入
// ConfigureModuleCatalog()主要负责把依赖的两个模块添加到Prism框架中进行管理.
        protected override void ConfigureModuleCatalog(IModuleCatalog moduleCatalog)
        {
            moduleCatalog.AddModule<MoudelAProfile>();
            moduleCatalog.AddModule<MoudelBProfile>();
            base.ConfigureModuleCatalog(moduleCatalog);
        }

//===方式2: ModuleMain项目完全不依赖ModuleA和ModuleB,完全解耦。
//在当前项目的bin/debug目录下新建一个Modules文件夹将模块ModuleA、ModuleB的dll复制到此文件夹下,然后下面代码里设置查找改文件夹即可
        //protected override IModuleCatalog CreateModuleCatalog()
        //{
        //    return new DirectoryModuleCatalog() { ModulePath = @".\Modules" };
        //}

//===方式3:通过配置文件app.config实现模块化,提醒:需要把ModuleA.dll和ModuleB.dll放到主项目的bin/debug文件夹中
        //protected override IModuleCatalog CreateModuleCatalog()
        //{
        //    return new ConfigurationModuleCatalog();
        //}

    }
}
4.主视图中引用命名依赖:xmlns:prism="http://prismlibrary.com/"。定义区域块:<ContentControl Grid.Row="1" prism:RegionManager.RegionName="ContentRegion"/>,用来实现用户控件跳转展示
<Window x:Class="MoudelMain.Views.Main"
        xmlns="http://schemas.microsoft.com/winfx/2006/xaml/presentation"
        xmlns:x="http://schemas.microsoft.com/winfx/2006/xaml"
        xmlns:d="http://schemas.microsoft.com/expression/blend/2008"
        xmlns:mc="http://schemas.openxmlformats.org/markup-compatibility/2006"
        xmlns:prism="http://prismlibrary.com/"
        xmlns:local="clr-namespace:MoudelMain.Views"
        mc:Ignorable="d"
        Title="Main" Height="450" Width="800">
    <Grid>
        <Grid.RowDefinitions>
            <RowDefinition Height="auto"/>
            <RowDefinition/>
        </Grid.RowDefinitions>

        <WrapPanel>
            <Button Content="打开PageA" Command="{Binding OpenPage}" CommandParameter="PageA" Margin="10"/>
            <Button Content="打开PageB" Command="{Binding OpenPage}" CommandParameter="PageB" Margin="10"/>
        </WrapPanel>

        <ContentControl Grid.Row="1" prism:RegionManager.RegionName="ContentRegion"/>
    </Grid>
</Window>
5.MainViewModel主程序中视图模型中:
如果需要后台和视图数据交互时,视图模型就需要继承BindableBasea类,在字段的set里就可以编写:RaisePropertyChanged()实现交互。
namespace MoudelMain.ViewModels
{
    public class MainViewModel
    {
        public DelegateCommand<string> OpenPage { get; set; }

        private readonly IRegionManager regionManager;


        //构造函数中注入IRegionManager类实现区域管理。
        //Regions["ContentRegion"]找到视图中定义的区域。
        //RequestNavigate("PageA")实现页面导航跳转展示
        public MainViewModel(IRegionManager regionManager)
        {
            OpenPage = new DelegateCommand<string>(Open);

            this.regionManager = regionManager;
        }

        private void Open(string obj)
        {
            regionManager.Regions["ContentRegion"].RequestNavigate(obj);
        }
    }
}
效果展示:


 1030
1030


 被折叠的 条评论
为什么被折叠?
被折叠的 条评论
为什么被折叠?
 到【灌水乐园】发言


