


数据包流向分析
(1)客户端发送请求到Director Server (负载均衡器),请求的数据报文(源IP是CIP,目标IP是VIP)到达内核空间。
(2)Director Server 和Real Server 在同一个网络中,数据通过二层数据链路层来传输。
(3)内核空间判断数据包的目标IP是本机VIP,此时IPVS(IP虛拟服务器)比对数据包请求的服务是否是集群服务,是集群服务就重新封装数据包修改源MAC地址为Director server 的MAC地址,修改目标MAC地址为Real Server 的MAC 地址,源IP 地址与目标IP地址没有改变,然后将数据包发送给Real Server。
(4)到达Real server 的请求报文的MAC地址是自身的MAC地址,就接收此报文。数据包重新封装报文(源IP地址为VIP,目标IP为CIP),将响应报文通过lo接口传送给物理网卡然后向外发出。
(5)Real Server 直接将响应报文传送到客户端。客户端收到回复报文,认为得到正常的服务,而不会知道是哪一台服务器处理的。
注意:如果跨网段,则报文通过路由器经由Internet返回给用户
DR 模式的特点
(1) Director server 和 Real Server必须在同一个物理网络中。
(2)Real Server 可以使用私有地址,也可以使用公网地址。如果使用公网地址,可以通过互联网对RIP进行直接访问。
(3) Director Server作为群集的访问入口,但不作为网关使用。
(4)所有的请求报文经由 Director Server,但回复响应报文不能经过 Director Server
(5) Real Server的网关不允许指向 Director Server IP,即Real Server发送的数据包不允许经过Director Server
(6) Real server 上的lo接口配置VIP的IP地址。
LVS-DR中的ARP问题
VIP地址相同导致响应冲突
在LVS-DR负载均衡集群中,负载均衡器与节点服务器都要配置相同的VIP地址,在局域网中具有相同的IP地 址,势必会造成各服务器ARP通信的紊乱
- 当ARP广播发送到LVS-DR集群时,因为负载均衡器和节点服务器都是连接到相同的网络上,它们都会收到ARP广播。
- 只有前端的负载均衡器进行响应,其他节点服务器不应该响应ARP广播
解决方法:
对节点服务器进行处理,使其不响应针对VIP的ARP请求
- 使用虚接口lo:0承载VIP地址
- 设置内核参数 arp_ ignore=1:系统只响应目的IP为本地IP(物理网卡的地址,而不是lo网卡的虚接口地址)的ARP请求
路由根据ARP表项,会将新来的请求报文转发给RealServer,导致Director的VIP失效
RealServer返回报文(源IP是VIP)经路由器转发,重新封装报文时,需要先获取路由器的MAC地址,
发送ARP请求时,Linux默认使用IP包的源IP地址(即VIP)作为ARP请求包中的源IP地址,而不使用发送接口的IP地址,
路由器收到ARP请求后,将更新ARP表项,原有的VIP对应Director的MAC地址会被更新为VIP对应RealServer的MAC地址。
路由器根据ARP表项,会将新来的请求报文转发给RealServer,导致Director的VIP失效
解决方法
对节点服务器进行处理
- 设置内核参数arp_announce=2
- 系统不使用IP包的源地址来设置ARP请求的源地址,而选择发送接口的IP地址
两个问题的设置方法
修改/etc/sysctl.conf文件
节点服务器在lo:0虚接口上承载VIP地址
net.ipv4.conf.lo.arp_ignore = 1		  #使本机系统只响应目的IP为本地物理网卡IP的ARP请求
net.ipv4.conf.lo.arp_announce = 2     #本机系统不使用返回数据包的源地址作为ARP请求报文的源地址,而采用发送接口的IP作为ARP请求报文源地址
net.ipv4.conf.all.arp_ignore = 1
net.ipv4.conf.all.arp_announce = 2
LVS-DR 负载均衡群集的部署
实验环境
调度服务器 192.168.137.10
NFS服务器 192.168.137.30
web1服务器 192.168.137.15
web2服务器 192.168.137.20
客户端 192.168.137.100
VIP 192.168.137.188
192.168.137.10调度服务器配置
关闭防火墙,selinux,下载ipvsadm
[root@localhost ~]# systemctl stop firewalld.service
[root@localhost ~]# setenforce 0
[root@localhost ~]# yum -y install ipvsadm
配置虚拟地址
[root@localhost network-scripts]# ls
ifcfg-ens33  ifdown-ippp    ifdown-sit       ifup-bnep  ifup-plip    ifup-Team          network-functions-ipv6
ifcfg-lo     ifdown-ipv6    ifdown-Team      ifup-eth   ifup-plusb   ifup-TeamPort
ifdown       ifdown-isdn    ifdown-TeamPort  ifup-ib    ifup-post    ifup-tunnel
ifdown-bnep  ifdown-post    ifdown-tunnel    ifup-ippp  ifup-ppp     ifup-wireless
ifdown-eth   ifdown-ppp     ifup             ifup-ipv6  ifup-routes  init.ipv6-global
ifdown-ib    ifdown-routes  ifup-aliases     ifup-isdn  ifup-sit     network-functions
[root@localhost network-scripts]# cp ifcfg-ens33 ifcfg-ens33:0
[root@localhost network-scripts]# vim ifcfg-ens33:0

DEVICE=ens33:0
ONBOOT=yes
IPADDR=192.168.137.188
NETMASK=255.255.255.0
#GATEWAY=192.168.137.2
#DNS1=192.168.137.2

重启网卡
[root@localhost network-scripts]# ifdown ifcfg-ens33:0
[root@localhost network-scripts]# ifup ifcfg-ens33:0
调整proc响应参数
[root@localhost network-scripts]# vim /etc/sysctl.conf

net.ipv4.ip_forward = 0
net.ipv4.conf.all.send_redirects = 0
net.ipv4.conf.default.send_redirects = 0
net.ipv4.conf.ens33.send_redirects = 0
刷新配置
[root@localhost network-scripts]# sysctl -p
net.ipv4.ip_forward = 0
net.ipv4.conf.all.send_redirects = 0
net.ipv4.conf.default.send_redirects = 0
net.ipv4.conf.ens33.send_redirects = 0
加载模块
[root@localhost network-scripts]# modprobe ip_vs
[root@localhost network-scripts]# cat /proc/net/ip_vs
IP Virtual Server version 1.2.1 (size=4096)
Prot LocalAddress:Port Scheduler Flags
  -> RemoteAddress:Port Forward Weight ActiveConn InActConn
配置负载分配策略,启动服务
[root@localhost network-scripts]# ipvsadm-save >/etc/sysconfig/ipvsadm
[root@localhost network-scripts]# systemctl start ipvsadm.service
清空ipvsadm
[root@localhost network-scripts]# ipvsadm -C
添加策略
[root@localhost network-scripts]# ipvsadm -A -t 192.168.137.188:80 -s rr
[root@localhost network-scripts]# ipvsadm -a -t 192.168.137.188:80 -r 192.168.137.115:80 -g
[root@localhost network-scripts]# ipvsadm -a -t 192.168.137.188:80 -r 192.168.137.20:80 -g
保存设置
[root@localhost network-scripts]# ipvsadm
IP Virtual Server version 1.2.1 (size=4096)
Prot LocalAddress:Port Scheduler Flags
  -> RemoteAddress:Port           Forward Weight ActiveConn InActConn
TCP  localhost.localdomain:http rr
  -> 192.168.137.15:http          Route   1      0          0
  -> 192.168.137.20:http          Route   1      0          0
[root@localhost network-scripts]# ipvsadm -ln
IP Virtual Server version 1.2.1 (size=4096)
Prot LocalAddress:Port Scheduler Flags
  -> RemoteAddress:Port           Forward Weight ActiveConn InActConn
TCP  192.168.137.188:80 rr
  -> 192.168.137.15:80            Route   1      0          0
  -> 192.168.137.20:80            Route   1      0          0
[root@localhost network-scripts]# ipvsadm -save >/etc/sysconfig/ipvsadm
Try `ipvsadm -h' or 'ipvsadm --help' for more information.
[root@localhost network-scripts]# ipvsadm-save >/etc/sysconfig/ipvsadm

192.168.137.30 NFS服务器配置

[root@localhost ~]# cd /opt/
[root@localhost opt]# ls
rh
[root@localhost opt]# mkdir nfs
[root@localhost opt]# cd nfs/
[root@localhost nfs]# mkdir cxk rap
[root@localhost nfs]# ls
cxk rap
[root@localhost nfs]# echo "ji ni tai mei" >cxk/index.html
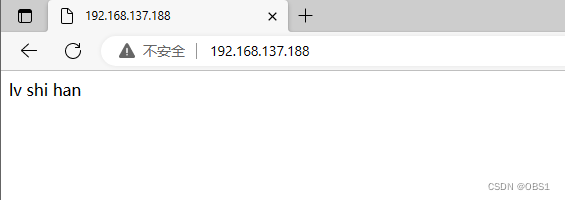
[root@localhost nfs]# echo "lv shi han" >rap/index.html
设置权限
[root@localhost nfs]# chmod 777 *
[root@localhost nfs]# ll
总用量 0
drwxrwxrwx. 2 root root 24 5月  13 16:30 my
drwxrwxrwx. 2 root root 24 5月  13 16:30 qyd
设置共享策略
[root@localhost nfs]# vim /etc/exports

/opt/nfs/cxk 192.168.52.0/24(rw,sync,no_root_squash)
/opt/nfs/rap 192.168.52.0/24(rw,sync,no_root_squash)
开启服务发布共享
[root@localhost nfs]# systemctl start rpcbind
[root@localhost nfs]# systemctl start nfs
[root@localhost nfs]# showmount -e
Export list for localhost.localdomain:
/opt/nfs/rap 192.168.137.0/24
/opt/nfs/cxk 192.168.137.0/24
192.168.137.15 web1服务器配置
查看nfs服务器共享目录
showmount -e 192.168.137.10
Export list for 192.168.137.10:
/opt/nfs/qyd 192.168.137.0/24
/opt/nfs/my  192.168.137.0/24
安装apache服务
yum -y install httpd挂载
mount 192.168.137.10:/opt/nfs/my /var/www/html/
[root@localhost ~]# df -h
文件系统                    容量  已用  可用 已用% 挂载点
devtmpfs                    1.9G     0  1.9G    0% /dev
tmpfs                       1.9G     0  1.9G    0% /dev/shm
tmpfs                       1.9G   13M  1.9G    1% /run
tmpfs                       1.9G     0  1.9G    0% /sys/fs/cgroup
/dev/mapper/centos-root      38G  5.1G   32G   14% /
/dev/sda1                  1014M  185M  830M   19% /boot
/dev/mapper/centos-home      19G   33M   19G    1% /home
tmpfs                       378M   12K  378M    1% /run/user/42
tmpfs                       378M     0  378M    0% /run/user/0
192.168.137.10:/opt/nfs/my   38G  5.9G   32G   16% /var/www/html
[root@localhost ~]# cd /var/www/html/
[root@localhost html]# ls
index.html
[root@localhost html]# cat index.html
this is my
重启服务并输入IP地址查看
[root@localhost html]# systemctl restart httpd.service 
配置网关

[root@localhost network-scripts]# systemctl restart network
[root@localhost network-scripts]# ifconfig
设置路由
[root@localhost network-scripts]# route add -host 192.168.137.188 dev lo:0
[root@localhost network-scripts]# route -n
Kernel IP routing table
Destination     Gateway         Genmask         Flags Metric Ref    Use Iface
0.0.0.0         192.168.137.2   0.0.0.0         UG    100    0        0 ens33
192.168.137.0   0.0.0.0         255.255.255.0   U     100    0        0 ens33
192.168.137.188 0.0.0.0         255.255.255.255 UH    0      0        0 lo
开机执行命令
[root@localhost network-scripts]# cat /etc/rc.d/rc.local
#!/bin/bash
# THIS FILE IS ADDED FOR COMPATIBILITY PURPOSES
#
# It is highly advisable to create own systemd services or udev rules
# to run scripts during boot instead of using this file.
#
# In contrast to previous versions due to parallel execution during boot
# this script will NOT be run after all other services.
#
# Please note that you must run 'chmod +x /etc/rc.d/rc.local' to ensure
# that this script will be executed during boot.


/usr/sbin/route add -host 192.168.137.188 dev lo:0
调整proc响应参数
[root@localhost network-scripts]# cat /etc/sysctl.conf
# sysctl settings are defined through files in
# /usr/lib/sysctl.d/, /run/sysctl.d/, and /etc/sysctl.d/.
#
# Vendors settings live in /usr/lib/sysctl.d/.
# To override a whole file, create a new file with the same in
# /etc/sysctl.d/ and put new settings there. To override
# only specific settings, add a file with a lexically later
# name in /etc/sysctl.d/ and put new settings there.
#
# For more information, see sysctl.conf(5) and sysctl.d(5).

net.ipv4.conf.all.arp_ignore = 1
net.ipv4.conf.all.arp_announce = 2
net.ipv4.conf.default.arp_ignore = 1
net.ipv4.conf.default.arp_announce = 2
net.ipv4.conf.lo.arp_ignore = 1
net.ipv4.conf.lo.arp_announce = 2
[root@localhost network-scripts]# sysctl -p
net.ipv4.conf.all.arp_ignore = 1
net.ipv4.conf.all.arp_announce = 2
net.ipv4.conf.default.arp_ignore = 1
net.ipv4.conf.default.arp_announce = 2
net.ipv4.conf.lo.arp_ignore = 1
net.ipv4.conf.lo.arp_announce = 2
192.168.137.20 web2服务器配置
[root@localhost ~]# showmount -e 192.168.137.10
Export list for 192.168.137.10:
/opt/nfs/qyd 192.168.137.0/24
/opt/nfs/my  192.168.137.0/24
安装apache服务
[root@localhost ~]# yum install httpd -y挂载
[root@localhost ~]# mount 192.168.137.10:/opt/nfs/qyd /var/www/html/
[root@localhost ~]# df -h
文件系统                     容量  已用  可用 已用% 挂载点
devtmpfs                     1.9G     0  1.9G    0% /dev
tmpfs                        1.9G     0  1.9G    0% /dev/shm
tmpfs                        1.9G   13M  1.9G    1% /run
tmpfs                        1.9G     0  1.9G    0% /sys/fs/cgroup
/dev/mapper/centos-root       38G  5.1G   33G   14% /
/dev/sda1                   1014M  185M  830M   19% /boot
/dev/mapper/centos-home       19G   33M   19G    1% /home
tmpfs                        378M   12K  378M    1% /run/user/42
tmpfs                        378M     0  378M    0% /run/user/0
192.168.137.10:/opt/nfs/qyd   38G  5.9G   32G   16% /var/www/html
[root@localhost ~]# cd /var/www/html/
[root@localhost html]# ls
index.html
[root@localhost html]# cat index.html
this is qyd
重启服务并输入IP地址查看
[root@localhost html]# systemctl restart httpd.service 
配置网关
[root@localhost html]# cd /etc/sysconfig/network-scripts/
[root@localhost network-scripts]# ls
ifcfg-ens33  ifdown-ipv6    ifdown-TeamPort  ifup-ippp   ifup-routes       network-functions
ifcfg-lo     ifdown-isdn    ifdown-tunnel    ifup-ipv6   ifup-sit          network-functions-ipv6
ifdown       ifdown-post    ifup             ifup-isdn   ifup-Team
ifdown-bnep  ifdown-ppp     ifup-aliases     ifup-plip   ifup-TeamPort
ifdown-eth   ifdown-routes  ifup-bnep        ifup-plusb  ifup-tunnel
ifdown-ib    ifdown-sit     ifup-eth         ifup-post   ifup-wireless
ifdown-ippp  ifdown-Team    ifup-ib          ifup-ppp    init.ipv6-global
[root@localhost network-scripts]# cp ifcfg-lo ifcfg-lo:0
[root@localhost network-scripts]# vim ifcfg-lo:0

DEVICE=lo:0
IPADDR=192.168.137.188
NETMASK=255.255.255.255
重启服务并查看
[root@localhost network-scripts]# systemctl restart network
[root@localhost network-scripts]# ifconfig
设置路由
[root@localhost network-scripts]# route add -host 192.168.137.188 dev lo:0
[root@localhost network-scripts]# route -n
Kernel IP routing table
Destination     Gateway         Genmask         Flags Metric Ref    Use Iface
0.0.0.0         192.168.137.2   0.0.0.0         UG    100    0        0 ens33
192.168.122.0   0.0.0.0         255.255.255.0   U     0      0        0 virbr0
192.168.137.0   0.0.0.0         255.255.255.0   U     100    0        0 ens33
192.168.137.188 0.0.0.0         255.255.255.255 UH    0      0        0 lo
开机执行命令
[root@localhost network-scripts]# vim /etc/rc.d/rc.local

#!/bin/bash
# THIS FILE IS ADDED FOR COMPATIBILITY PURPOSES
#
# It is highly advisable to create own systemd services or udev rules
# to run scripts during boot instead of using this file.
#

/usr/sbin/route add -host 192.168.137.188 dev lo:0
[root@localhost network-scripts]# chmod +x /etc/rc.d/rc.local
调整proc响应参数
[root@localhost network-scripts]# cat /etc/sysctl.conf
# sysctl settings are defined through files in
# /usr/lib/sysctl.d/, /run/sysctl.d/, and /etc/sysctl.d/.
#
# Vendors settings live in /usr/lib/sysctl.d/.
# To override a whole file, create a new file with the same in
# /etc/sysctl.d/ and put new settings there. To override
# only specific settings, add a file with a lexically later
# name in /etc/sysctl.d/ and put new settings there.
#
# For more information, see sysctl.conf(5) and sysctl.d(5).

net.ipv4.conf.all.arp_ignore = 1
net.ipv4.conf.all.arp_announce = 2
net.ipv4.conf.default.arp_ignore = 1
net.ipv4.conf.default.arp_announce = 2
net.ipv4.conf.lo.arp_ignore = 1
net.ipv4.conf.lo.arp_announce = 2
[root@localhost network-scripts]# sysctl -p
net.ipv4.conf.all.arp_ignore = 1
net.ipv4.conf.all.arp_announce = 2
net.ipv4.conf.default.arp_ignore = 1
net.ipv4.conf.default.arp_announce = 2
net.ipv4.conf.lo.arp_ignore = 1
net.ipv4.conf.lo.arp_announce = 2
客户机测试 192.168.137.100


浏览器输入回环lo:0VIP地址:192.168.52.188


 465
465


 被折叠的 条评论
为什么被折叠?
被折叠的 条评论
为什么被折叠?
 到【灌水乐园】发言


