


目录
1.redux的基本使用
2.redux文件夹的基本拆分
3.redux融入react
4.connect函数的封装
5.redux的store用context处理
6.react-redux的使用
7.redux-thunk中间介的使用
8.redux-saga中间介的使用
9.reducer的拆分以及融入react-redux的combineReducers的使用
10.redux-devTools的使用
11.修改dispatch以扩展需求
redux的基本使用
1)使用:
a.初始化:
创建一个文件夹
执行npm init或npm init -y创建package文件
执行npm install redux安装依赖
修改script的start命令以方便我们直接执行npm start来运行文件
在该文件中我们使用es6模块化(即import导入 和export导出),从 v13.2.0开始,node才对ES6模块化提供了支持,在v-13.2.0之前我们需要在package.json中添加属性: "type": "module";在执行命令中添加如下选项:node --experimental-modules src/index.js,如果是之后版本,只需要添加type即可
npm init或npm init -y

npm install redux

"scripts": {
"start": "node src/index.js"
}

{
  "name": "x",
  "version": "1.0.0",
  "main": "index.js",
  "license": "MIT",
  "dependencies": {
    "redux": "^4.0.5"
  },
  "type": "module",
  "scripts": {
    "start": "node --experimental-modules index.js"
  }
}
2)使用:
a.导入redux
b.创建reducer
c.创建store
d.创建action
e.派发事件
// redux 是一个应用数据流框架,主要是解决了组件间状态共享的问题,原理是集中式管理。
// React-redux是为方便react使用,在redux上封装的库。在实际的项目中我们可以使用redux也可以直接使用react-redux。
//导入redux
import redux from 'redux'
//创建reducer
const defaultState={
    count:0
}
// reducer 传入state作为第一个参数(可以有默认值) 第二个参数是action
//返回值可以是对象也可以是值,最后该返回值会修改传入的state
function reducer(state=defaultState,action){
    //action 就是调用的时候传入的对象
    switch(action.type){
        case 'increaseOne':
            return {...state,count:action.num+state.count}
        default:
      // 默认返回state
            return state;
    }
}
//创建store 需要传入reducer
const store=redux.createStore(reducer)
//创建action   action 是返回一个对象
const increaseOne=(num)=>({
    type:'increaseOne',
    num
})
//store具有subscribe方法可以订阅store的修改 订阅之后可以取消订阅  getState() 可以获取state
const unsubscribe=store.subscribe(() => {
console.log("count:", store.getState());
  })
//派发action已修改store的值
store.dispatch(increaseOne(1))
//取消订阅
unsubscribe()
redux文件夹的基本拆分
如果所有代码写在一块会很乱,所以很多时候我们会对代码进行拆分
src/store/index.js文件:放置store的创建
import redux from 'redux';

import reducer from './reducer.js';

const store = redux.createStore(reducer);

export default store;
src/store/reducer.js文件:放置reducer
import {
  DECREMENT
} from './constants.js';

const defaultState = {
  counter: 0
}
function reducer(state = defaultState, action) {
  switch (action.type) {
    case DECREMENT:
      return { ...state, counter: state.counter - 1 };
    default:
      return state;
  }
}

export default reducer;
src/store/actionCreators.js文件:放置action
import {
  DECREMENT
} from './constants.js';

export const decAction = () => ({
  type: DECREMENT
});
src/store/constants.js文件:放置常量文件,防止没有常量的时候引入错误导致错误,用了常量文件后当引入的时候名字打错了,编译器会主动报错
export const DECREMENT = "DECREMENT";redux融入react
1)首先把store的初始值给到state
2)当组件挂载的时候给store做订阅,以便于每次改变state的时候都会去调用订阅事件,然后更新state,触发重新渲染
3)当按钮点击的时候去派发action
4)触发订阅
5)当组件卸载的时候取消订阅事件
6)函数式组件同理,不过就是换成useEffect和useState进行操作
import React, { PureComponent } from 'react';

import store from '../store';
import {
  subAction
} from "../store/actionCreators";

export default class About extends PureComponent {
  constructor(props) {
    super(props);

    this.state = {
      counter: store.getState().counter
    }
  }

  componentDidMount() {
    this.unsubscribue = store.subscribe(() => {
      this.setState({
        counter: store.getState().counter
      })
    })
  }

  componentWillUnmount() {
    this.unsubscribue();
  }

  render() {
    return (
      <div>
        <h2>当前计数: {this.state.counter}</h2>
        <button onClick={e => this.decrement()}>-1</button>
      </div>
    )
  }

  decrement() {
    store.dispatch(subAction(1));
  }

}
connect函数的封装
由于上文的订阅事件和取消订阅基本上每个页面都需要用到,所以进行封装,在封装完这两个事件后,还是需要每次都引入store的依赖有点繁琐,所以对派发action事件和state进行传入子组件,调用的时候直接props调用即可 redux-react的connect是一个函数return出一个函数,那个函数再return 这里为了方便只用一个函数return一个组件
第一个代码块是用函数组件进行的封装
第二个代码块是用class组件进行的封装
第三个代码块是调用connect
import React, {  useContext, useEffect, useState } from 'react'
import store  from './index.js';

export default function Ab(mapStateToProps,mapDispachToProp,WrappedComponent){
    function Connect(){
        const [count,setState]=useState(store.getState())
        useEffect(()=>{
            const subscribe= store.subscribe(()=>{
                setState(mapStateToProps(store.getState()))
            })
                return ()=>{
                  subscribe()
                }
        },[count])
        return (
            <WrappedComponent {...mapDispachToProp(store.dispatch)} {...mapStateToProps(store.getState())}></WrappedComponent>
        )
    }
    return Connect
}
import React, { Component } from 'react'
import store from './index.js';
export default function Ab(mapStateToProps,mapDispachToProp,WrappedComponent){
class Connect extends Component {
constructor(props){
super(props);
// 定义这个只是为了放一下数据 然后调用setState重新渲染 实际的数据还是在redux里面 这个
//只是一个工具用以实现功能,实际上jsx里面没有使用到这个state
// 这里不用this
this.state={
count:mapStateToProps(store.getState())
}
}
componentDidMount(){
// 这里用this.下面才能取到
this.subscribe= store.subscribe(()=>{
this.setState(mapStateToProps(store.getState()))
})
}
componentWillUnmount(){
this.subscribe()
}
render() {
return (
<WrappedComponent {...mapDispachToProp(this.context.dispatch)} {...mapStateToProps(this.context.getState())}></WrappedComponent>
)
}
}
return Connect
}import React from 'react'
import {increaseOneFn,increaseTenFn} from '../../store/action.js'
import Connect from '../../store/connect.js'
import { connect } from 'react-redux';
function Page1(props) {
//当出错的时候可以在这里打印一下 props 看看传入的值对不对
//state容易错,有可能出现传入的count是对象导致页面出不来
return (
<div>
<h2>Page1</h2>
//在connect里面我们又把值传入了,所以可以直接使用
<h2>{props.count}</h2>
//在connect里面我们又把值传入了,所以可以直接使用
<button onClick={props.increaseOne}>+1</button>
</div>
)
}
//传入对象 便于后面的结构 注意mapDispachToProp和mapStateToProps传入的参数名不要写成一样
const mapDispachToProp=(dispatch)=>({
increaseOne(){
dispatch(increaseOneFn(1))
},
})
//传入对象 便于后面的结构
const mapStateToProps=(state)=>(
{ count:state.count}
)
export default Connect(mapStateToProps,mapDispachToProp,Page1)
// react-redux的connect函数是这样调用的 我只封装了一层 所以按照上面那样调用
// export default connect(mapStateToProps,mapDispachToProp)(Page1)redux的store用context处理
1)建立文件用以创建context,确保用到这个context的时候是同一个context
2)在App文件夹或总文件夹的代码里提供context 并且把store传入
3)在connect文件里使用context
//建立文件用以创建context,确保用到这个context的时候是同一个context
import { createContext} from 'react'
export const Coi=createContext()
//在App文件夹或总文件夹的代码里提供context
import React from 'react'
import Page1 from './pages/page1/page1'
import store from './store/index'
import Provider from './store/content'
export default function App() {
return (
<Provider.Provider store={store}>
< Page1></Page1>
</Provider.Provider>
)
}
//在connect文件里使用context  注释部分是class组件类型的融入
import React, {  useContext, useEffect, useState } from 'react'
import {Coi}  from './content.js';

export default function Ab(mapStateToProps,mapDispachToProp,WrappedComponent){
    function Connect(){
        const context=useContext(Coi)
        const [count,setState]=useState(context.getState())
        useEffect(()=>{
            const subscribe= context.subscribe(()=>{
                setState(mapStateToProps(context.getState()))
                    })
                 return ()=>{
                   subscribe()
                 }
        },[count])
        return (
            <WrappedComponent {...mapDispachToProp(context.dispatch)} {...mapStateToProps(context.getState())}></WrappedComponent>
        )
    }
//      class Connect extends Component {
 可以传入 connect
//     constructor(props,context){
//         super(props,context);
//         this.state={
//             count:mapStateToProps(context.getState())
//         }
//     }
//     componentDidMount(){
//         this.subscribe= this.context.subscribe(()=>{
//                    this.setState(mapStateToProps(this.context.getState()))
//                  })
//     }
//     componentWillUnmount(){
//         this.subscribe()
//     }
//   render() {
//     return (
//         <WrappedComponent {...mapDispachToProp(this.context.dispatch)} {...mapStateToProps(this.context.getState())}></WrappedComponent>
//     )
//   }
// }
//给组件提供context
// Connect.contextType = Coi;
return Connect
}
react-redux的使用
1)在上述基础上 把context换成react-redux
2)在用的组件里面把自己封装的connect换成react-redux的connect
import React from 'react'
import Page1 from './pages/page1/page1'
import store from './store/index'
import {Provider} from 'react-redux'
export default function App() {
  return (
    <Provider store={store}>
     < Page1></Page1>
    </Provider>
  )
}
import React from 'react'
import {increaseOneFn} from '../../store/action.js'
import { connect } from 'react-redux';

 function Page1(props) {
  return (
    <div>
      <h2>Page1</h2>
      <h2>{props.count}</h2>
      <button onClick={props.increaseOne}>+1</button>
    </div>
  )
}
const mapDispachToProp=(dispatch)=>({
   increaseOne(){
    dispatch(increaseOneFn(1))
  },
})
const mapStateToProps=(state)=>(
 { count:state.count}
)
// react-redux的connect函数是这样调用的
export default connect(mapStateToProps,mapDispachToProp)(Page1)
redux-thunk中间介的使用
1)npm install redux-thunk
2)在创建store的文件进行集成:导入applyMiddleware和ThunkMiddleware ThunkMiddleware传入applyMiddleware
3)创建action
4)派发action
import {createStore,applyMiddleware} from 'redux'
import ThunkMiddleware  from 'redux-thunk'
import reducer from './reducer'
const middleWare=applyMiddleware(ThunkMiddleware,sagaMiddleware)
const store=createStore(reducer,middleWare)
export default store
//创建action
//可以传入disPatch 和getState 接口模拟可以用这个网站httpbin.org
const thunkAction =(disPatch,getState)=>{
axios.get(`http://httpbin.org/get`).then((res)=>{
disPatch(changeThunkfn(res.data.url))
})
}//派发 注意这里传入的是函数
const mapDispatchToProps =(dispatch)=>({
thunked:()=>{dispatch(thunkAction)}
})redux-saga中间介的使用
1)npm install redux-saga
2)创建store的文件进行集成
3)创建saga文件 专门进行编写saga代码并且创建action
4)写saga异步函数
5)saga总函数监听
6)派发action
import {createStore,applyMiddleware} from 'redux'
import reducer from './reducer'
//第一步导入
import createSagaMiddleware from 'redux-saga'
import saga from './saga'
//第二步 创建saga中间介
const sagaMiddleware=createSagaMiddleware()
//传入中间介函数
const middleWare=applyMiddleware(sagaMiddleware)
//传入store
const store=createStore(reducer,middleWare)
//运行中间介
sagaMiddleware.run(saga)
export default store
//saga文件
import axios from "axios";
import {put,takeLatest} from 'redux-saga/effects'
//changSagafn是修改store的action changSagafne是派发时候的名称 thunk只有一个
import {changSagafne,changSagafn} from './action'
import {changeThunk} from "./constants";
//*代表生成器
function* mySaga(){
//依次执行 yield 内部有循环next
let result =yield axios.get(`http://httpbin.org/get`)
//用put进行内部派发action修改store 也可以用yield all([ yield put(changSagafn(result.data.url))])
//进行派发
yield put(changSagafn(result.data.url))
}
function* ui (){
// takeLatest takeEvery区别:
// takeLatest: 依次只能监听一个对应的action,执行最后一次action
// takeEvery: 每一个都会被执行
//这里也可以用all
yield takeLatest(changSagafne,mySaga)
}
export default ui//创建action
const changSagafn =(num)=>({
type:changeSaga,
num
})
const changSagafne =()=>({
type:changeSaga,
})//派发action
const dispatchFn =(dispatch)=>({
sagaed:()=>{dispatch(changSagafne)}
})reducer的拆分以及融入react-redux的combineReducers的使用
1)手动拆分
2)调用react-redux的combineReducers进行拆分
const ThunkReducer=(store=defaultStore.thunk, action)=>{
    switch (action.type) {
        case changeThunk:
        return action.num;
        // return {...store,thunk:action.num};
    default:
      return store;
  }
}
const sagaReducer=(store=defaultStore.eSaga, action)=>{
    switch (action.type) {
        case changeSaga:
            return action.num;
    default:
      return store;
  }
}
const reducer=(store = defaultStore,action)=>{
    // reducer 实际就是返回了一个对象
    // 合并的时候注意类型 如果改值是对象 则在reducer里面要返回对象 还有传入store的时候的使用
    return {
        count:countReducer(store.count,action),
        thunk:ThunkReducer(store.thunk,action),
        eSaga:sagaReducer(store.eSaga,action)
    }
}
//调用api进行合并
const reducer=combineReducers({count:countReducer,thunk:ThunkReducer,eSaga:sagaReducer})10.redux-devTools的使用
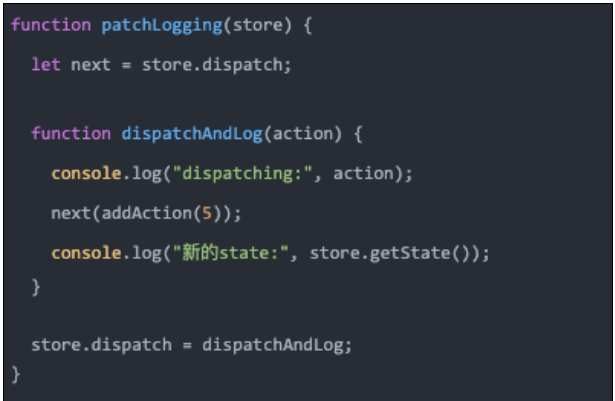
11.修改dispatch以扩展需求
就是利用重新定义进行扩展


 717
717

 被折叠的 条评论
为什么被折叠?
被折叠的 条评论
为什么被折叠?
 到【灌水乐园】发言


