


最近在B站黑马程序员上学SpringBoot框架,记录一下学习笔记,还没学完,后面会更新。
SpringBoot基础篇
导学
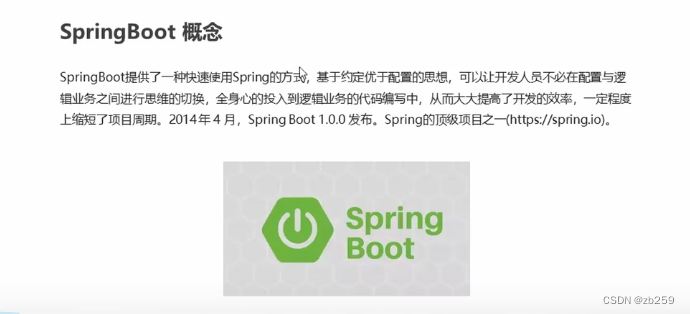
为什么学习SpringBoot?加速Spring框架的开发。
微服务项目需求的兴起。
课程安排
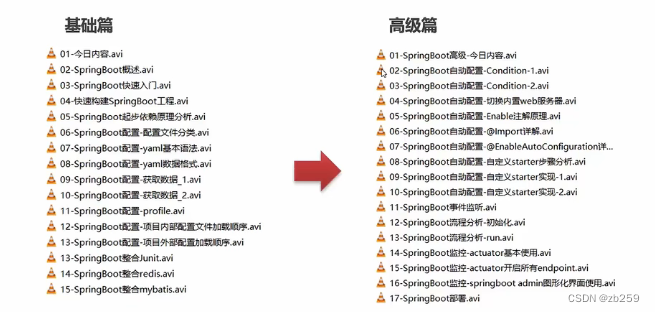
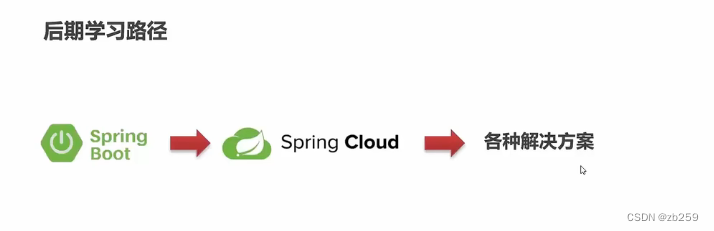
后期学习路径
目录

SpringBoot概述
SpringBoot概念
Spring 缺点

SpringBoot功能

内嵌了tomcat
自动配置→极大地减少了配置的书写
起步依赖→不用担心依赖版本不兼容等问题

SpringBoot快速入门
使用maven原生构建springboot

创建maven项目,配置pom文件
    <!--springboot工程需要继承的父工程-->
    <parent>
        <groupId>org.example</groupId>
        <artifactId>SpringBootLearn</artifactId>
        <version>1.0-SNAPSHOT</version>
    </parent>
    <dependencies>
        <!--web开发的起步依赖-->
        <dependency>
            <groupId>org.springframework.boot</groupId>
            <artifactId>spring-boot-starter-web</artifactId>
        </dependency>
    </dependencies>
创建一个controller类

package com.itheima.controller;

import org.springframework.web.bind.annotation.RequestMapping;
import org.springframework.web.bind.annotation.RestController;

@RestController
public class helloController {
    @RequestMapping("/hello")
    public String hello(){
        return " hello Spring Boot !";
    }
}
创建application类

package com.itheima;

import org.springframework.boot.SpringApplication;
import org.springframework.boot.autoconfigure.SpringBootApplication;

//引导类:SpringBoot项目的入口
@SpringBootApplication
public class helloApplication {
    public static void main(String[] args) {
        SpringApplication.run(helloApplication.class, args);
    }
}
小结

使用idea快速构建springboot工程
我使用的是idea2023
新建模块


最新的3.1.4对java1.8不支持,要用17
视频里说的是新建模块,但是这里我觉得新建项目更好一点,避免一些路径问题
Springboot起步依赖原理分析

SpringBoot配置文件
目录

配置文件分类

properties文件

yaml文件、yml文件


同一配置,优先选择优先级高的文件里的内容
不同配置则不会冲突
YAML


yml简洁,以数据为核心
基本语法:

数据格式:

单引忽略转义字符,双引识别转义字符
server:
  port: 8083

name: abc
# 对象
person:
  name: ${name}
  age: 20

# 对象的行内写法
person2: {name: lisi, age: 30}

# 数组
pets:
  - cat
  - dog
  - pig

# 数组的行内写法
pets2: [cat, dog, pig]

# 纯量
# 字符串默认不用加上单引号或者双引号
# "" 双引号:不会转义字符串里面的特殊字符;特殊字符会作为本身想表示的意思
name2: "zhangsan \n lisi"
# '' 单引号:会转义特殊字符,特殊字符最终只是一个普通的字符串数据
name3: 'zhangsan \n lisi'

小结:

读取配置文件内容

方式一:
通过对properties文件里的单个键进行Value注解,获取单个键的值
方式二:
创建一个environment对象,对这个对象进行Environment注解,获取properties文件里的所有键值
方式三:
创建一个实体类,对这个实体类进行ConfigurationProperties注解,注意类的属性要和properties里对应对象的属性要保持一致,除此之外还要有getter,setter,toString
helloController.java
package com.itheima.springbootinit.controller;

import com.itheima.springbootinit.entity.Person;
import org.springframework.beans.factory.annotation.Autowired;
import org.springframework.beans.factory.annotation.Value;
import org.springframework.core.env.Environment;
import org.springframework.web.bind.annotation.RequestMapping;
import org.springframework.web.bind.annotation.RestController;

@RestController
public class helloController {
    @RequestMapping("/hello")
    public String hello(){
        return "hello Spring Boot3.14!";
    }

    //方式一: 使用@Value注解获取
    // 加上 @Value 注解,可以从 application 配置文件中读取配置
    @Value("${name}")
    public String my_name;

    @RequestMapping("/hello2")
    public String hello2(){
        return my_name;
    }

    @Value("${person.name2}")
    public String my_name2;

    @Value("${person.age}")
    public String my_age;

    @Value("${pets[0]}")
    public String pet0;

    @Value("${msg2}")
    public String msg2;

    @Value("${msg3}")
    public String msg3;

    @RequestMapping("/hello3")
    public void hello3(){
        System.out.println("my_name2: " + my_name2);
        System.out.println("my_age: " + my_age);
        System.out.println("pet0: " + pet0);
        System.out.println("msg2: " + msg2);
        System.out.println("msg3: " + msg3);
    }

    //方式二: 使用environment对象获取
    @Autowired
    private Environment env;
    @RequestMapping("/hello4")
    public void hello4(){
        System.out.println("my_name2: " + env.getProperty("person.name2"));
        System.out.println("my_age: " + env.getProperty("person.age"));
        System.out.println("pet0: " + env.getProperty("pets[0]"));
        System.out.println("msg2: " + env.getProperty("msg2"));
        System.out.println("msg3: " + env.getProperty("msg3"));
    }

    //方式三: 使用@ConfigurationProperties注解获取
    @Autowired
    private Person person=new Person();
    @RequestMapping("/hello5")
    public void hello5(){
        System.out.println("person: " + person);
        String[] pets = person.getPets();
        for (String pet : pets) {
            System.out.println("pet: " + pet);
        }
    }

}
使用方式三时,在pom文件里加上这个依赖,更加方便
<dependency>
            <groupId>org.springframework.boot</groupId>
            <artifactId>spring-boot-configuration-processor</artifactId>
            <optional>true</optional>
        </dependency>
Person.java
package com.itheima.springbootinit.entity;

import org.springframework.boot.context.properties.ConfigurationProperties;
import org.springframework.stereotype.Component;

import java.util.Arrays;

@Component
@ConfigurationProperties(prefix = "person")
public class Person {
    private String name;
    private String name2;
    private int age;

    private String[] pets;

    @Override
    public String toString() {
        return "Person{" +
                "name='" + name + '\'' +
                ", name2='" + name2 + '\'' +
                ", age=" + age +
                ", pets=" + Arrays.toString(pets) +
                '}';
    }

    public String getName2() {
        return name2;
    }

    public void setName2(String name2) {
        this.name2 = name2;
    }

    public String[] getPets() {
        return pets;
    }

    public void setPets(String[] pets) {
        this.pets = pets;
    }

    public String getName() {
        return name;
    }

    public void setName(String name) {
        this.name = name;
    }

    public int getAge() {
        return age;
    }

    public void setAge(int age) {
        this.age = age;
    }
}
profile

方式一:多profile文件方式
在application.properties文件中通过spring.profies.active可以切换激活生产、测试、运维环境下不同的properties配置
application.properties
spring.profiles.active=dev
application-dev.properties
server.port=8081
application-test.properties
server.port=8082
application-pro.properties
server.port=8083
方式二:yml里写多文档
各文档以三个横杠为区分,在最底下选择spring.profiles.active来激活对应文档
---
server:
  port: 8081
spring:
  profiles:dev
---
server:
  port: 8082
spring:
  profiles:test
---
server:
  port: 8083
spring:
  profiles:pro
---

spring:
  profiles:
    active: pro
在idea启动配置里设置激活profile,注:我用的idea版本为2023.2

用maven打包,在用命令行启动时设置激活方式


java -jar ./SpringBoot-profile-0.0.1-SNAPSHOT.jar --spring.profiles.active=pro
注意命令行中的java版本要和jar包使用的java版本保持一致

虚拟机参数这块,在idea2023里照着上面的截图里设置
内部配置加载顺序

resource里的properties配置默认在classpath的文件夹下


SpringBoot整合其他框架

UserServiceTest.java
package com.itheima.springboottest;

import org.junit.Test;
import org.junit.runner.RunWith;
import org.springframework.beans.factory.annotation.Autowired;
import org.springframework.boot.test.context.SpringBootTest;
import org.springframework.test.context.junit4.SpringRunner;

//userservice的测试类
@RunWith(SpringRunner.class)
@SpringBootTest(classes = SpringBootTestApplication.class)
public class UserServiceTest {
    @Autowired
    private UserService userService;

    @Test
    public void testAdd(){
        userService.add();
    }
}
UserService.java
package com.itheima.springboottest;

import org.springframework.stereotype.Service;

@Service
public class UserService {
    public void add(){
        System.out.println("UserService add...");
    }
}
若包名一样,则不用指定classes属性


 519
519


 被折叠的 条评论
为什么被折叠?
被折叠的 条评论
为什么被折叠?
 到【灌水乐园】发言


