


插件安装:lombok、mybatisX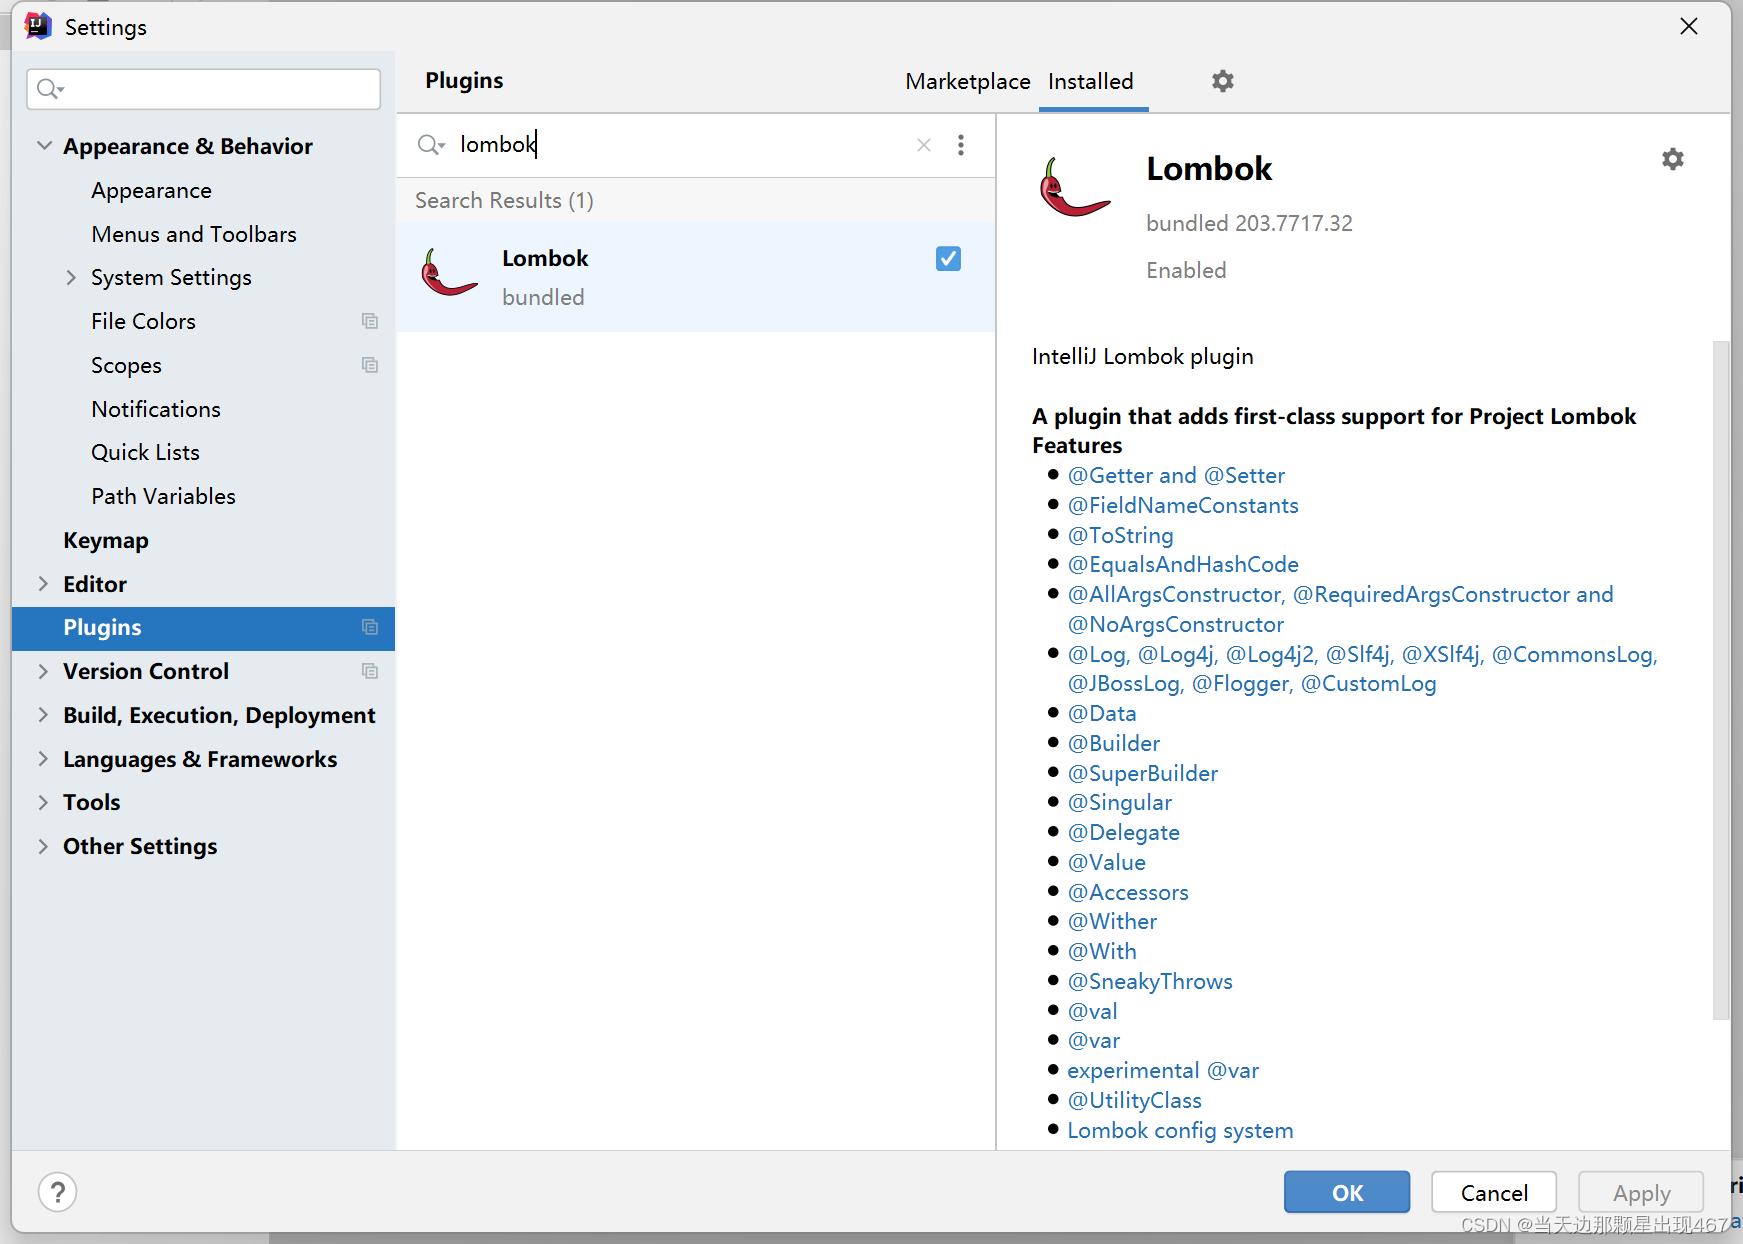
一:创建spring项目
1.要添加的依赖
spring Web 、Lombok、Mybatis Framework、MySQL Driver
二:配置application.yml
创建成功后
可以再在resource下面删除掉,application.properties,然后新建个application.yml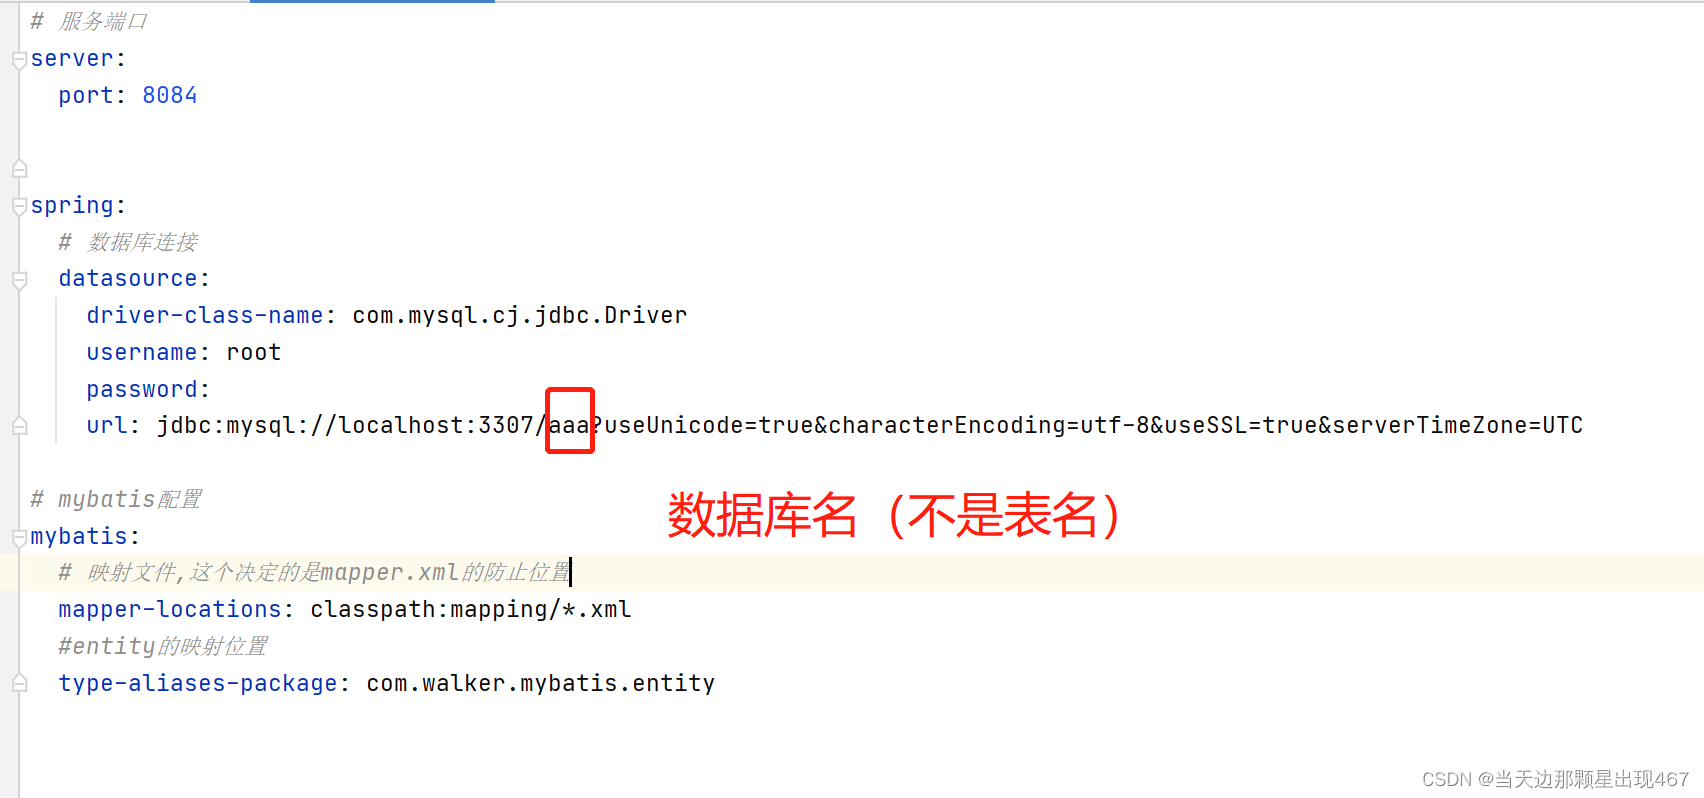
# 服务端口
server:
  port: 8084


spring:
  # 数据库连接
  datasource:
    driver-class-name: com.mysql.cj.jdbc.Driver
    username: root
    password:
    url: jdbc:mysql://localhost:3307/aaa?useUnicode=true&characterEncoding=utf-8&useSSL=true&serverTimeZone=UTC

# mybatis配置
mybatis:
  # 映射文件,这个决定的是mapper.xml的防止位置
  mapper-locations: classpath:mapping/*.xml
  #entity的映射位置
  type-aliases-package: com.walker.mybatis.entity
三:创建基础目录
总目录: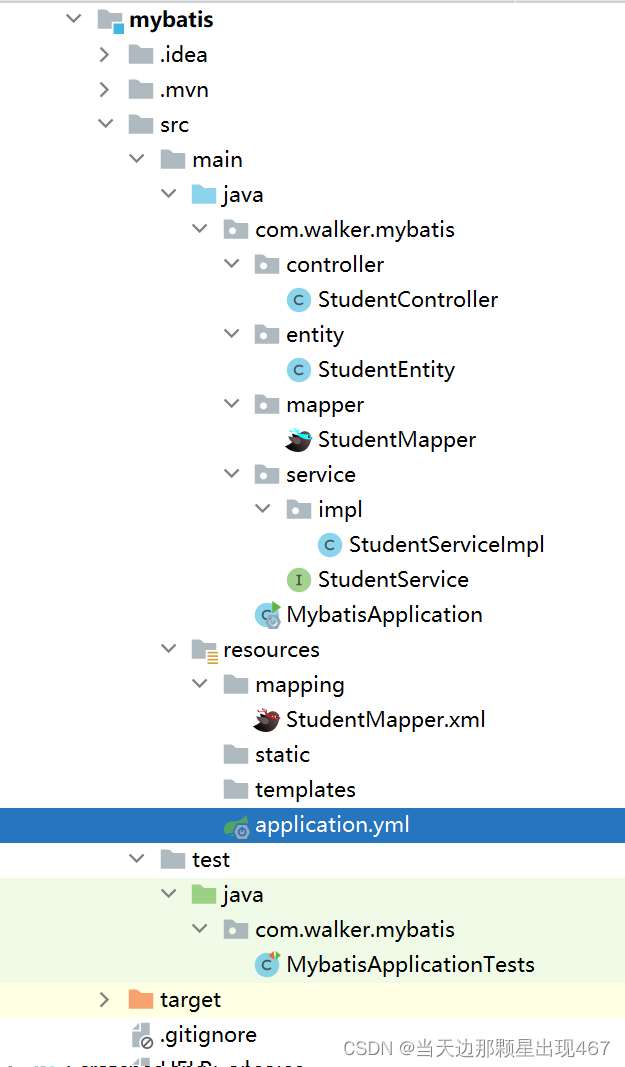
创建包
entity:用于存放实体类
mapper:mapper接口包
mapping:用于存放xml
......
四:配置Application扫描路径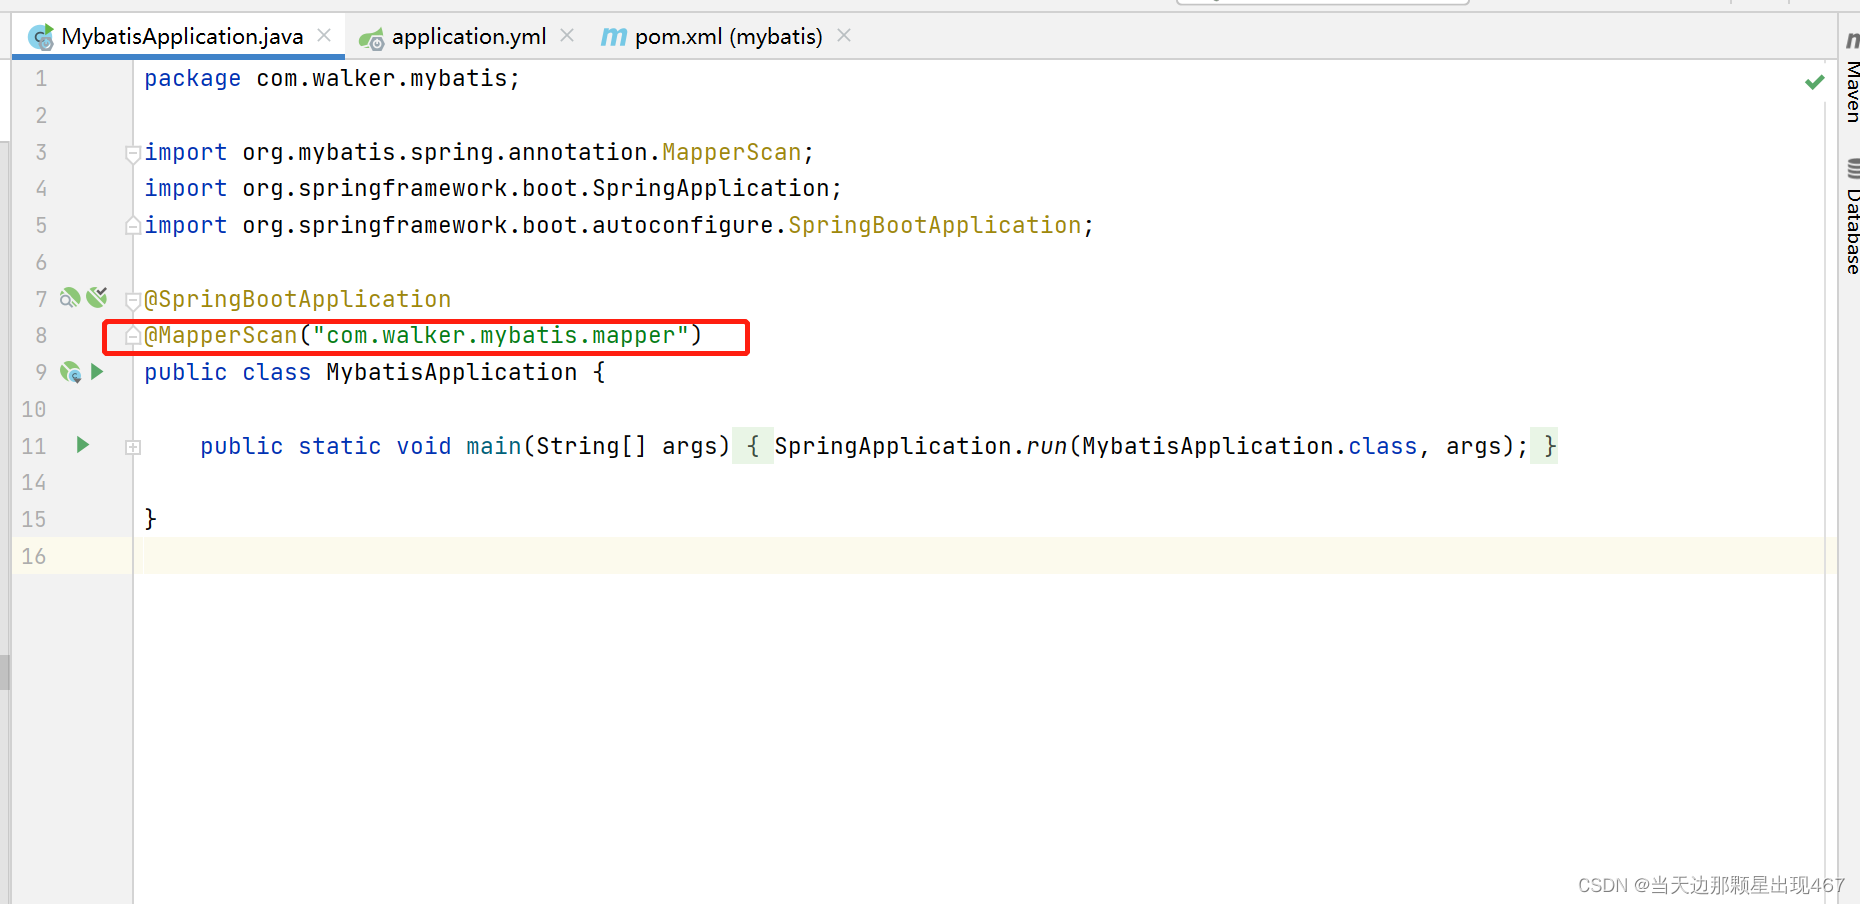
五:创建表
- 在mysql中创建学生表
-
CREATE TABLE `student` (
  `id` varchar(32) NOT NULL,
  `class_no` varchar(32) DEFAULT NULL,
  `name` varchar(128) DEFAULT NULL,
  `age` int NOT NULL,
  `idcard` varchar(32) DEFAULT NULL,
  PRIMARY KEY (`id`)
) ENGINE=InnoDB DEFAULT CHARSET=utf8mb4 COLLATE=utf8mb4_0900_ai_ci;
六:各个包下创建代码
在entity包下创建实体类
package com.walker.mybatis.entity;

import lombok.Data;

@Data
public class StudentEntity {
    private String id;
    private String classNo;
    private String name;
    private String age;
    private String idcard;
}
在mapper包下创建Mapper接口
package com.walker.mybatis.mapper;

import com.walker.mybatis.entity.StudentEntity;
import org.apache.ibatis.annotations.Mapper;

@Mapper
public interface StudentMapper {

    //添加办法
    int save(StudentEntity studentEntity);

    //删除办法
    int deleteById(String id);

    //修改办法
    int updateById(StudentEntity studentEntity);

    //根据id获取数据
    StudentEntity getById(String id);
}
- 之后创建需要创建mapper对应的xml,注意这里需要再resources下面的mapping中创建xml文件
-
<?xml version="1.0" encoding="UTF-8"?>
<!DOCTYPE mapper PUBLIC "-//mybatis.org//DTD Mapper 3.0//EN" "http://mybatis.org/dtd/mybatis-3-mapper.dtd">
<!--namespace:命名空间,用来映射对应的mapper
相当于将mapper和mapper.xml连接起来,这一步很重要-->
<mapper namespace="com.walker.mybatis.mapper.StudentMapper">

    <insert id="save" parameterType="com.walker.mybatis.entity.StudentEntity">
        insert into student
        <trim prefix="(" suffix=")" suffixOverrides=",">
            <if test="id!=null">id,</if>
            <if test="classNo!=null">classNo,</if>
            <if test="name!=null">`name`,</if>
            <if test="age!=null">age,</if>
            <if test="idcard!=null">idcard,</if>
        </trim>
        <trim prefix="values (" suffix=")" suffixOverrides=",">
            <if test="id!=null">#{id},</if>
            <if test="classNo!=null">#{classNo},</if>
            <if test="name!=null">#{name},</if>
            <if test="age!=null">#{age},</if>
            <if test="idcard!=null">#{idcard},</if>
        </trim>
    </insert>
    <update id="updateById" parameterType="com.walker.mybatis.entity.StudentEntity">
        update student
        <set>
            <if test="classNo!=null">class_no=#{classNo},</if>
            <if test="name!=null">`name`=#{name},</if>
            <if test="age!=null">age=#{age},</if>
            <if test="idcard!=null">idcard=#{idcard}</if>
        </set>
        where id=#{id}

    </update>
    <delete id="deleteById">delete from student where id=#{id}</delete>
    <select id="getById" resultType="com.walker.mybatis.entity.StudentEntity">
        select * from student
        where id=#{id}
    </select>

</mapper>
七:测试
-
测试的方式有两种,一种是再springbootTest下面进行测试,这种方式是比较容易的。
另外一种是编写接口,使用接口调用 -
第一种办法(springTest测试)
-
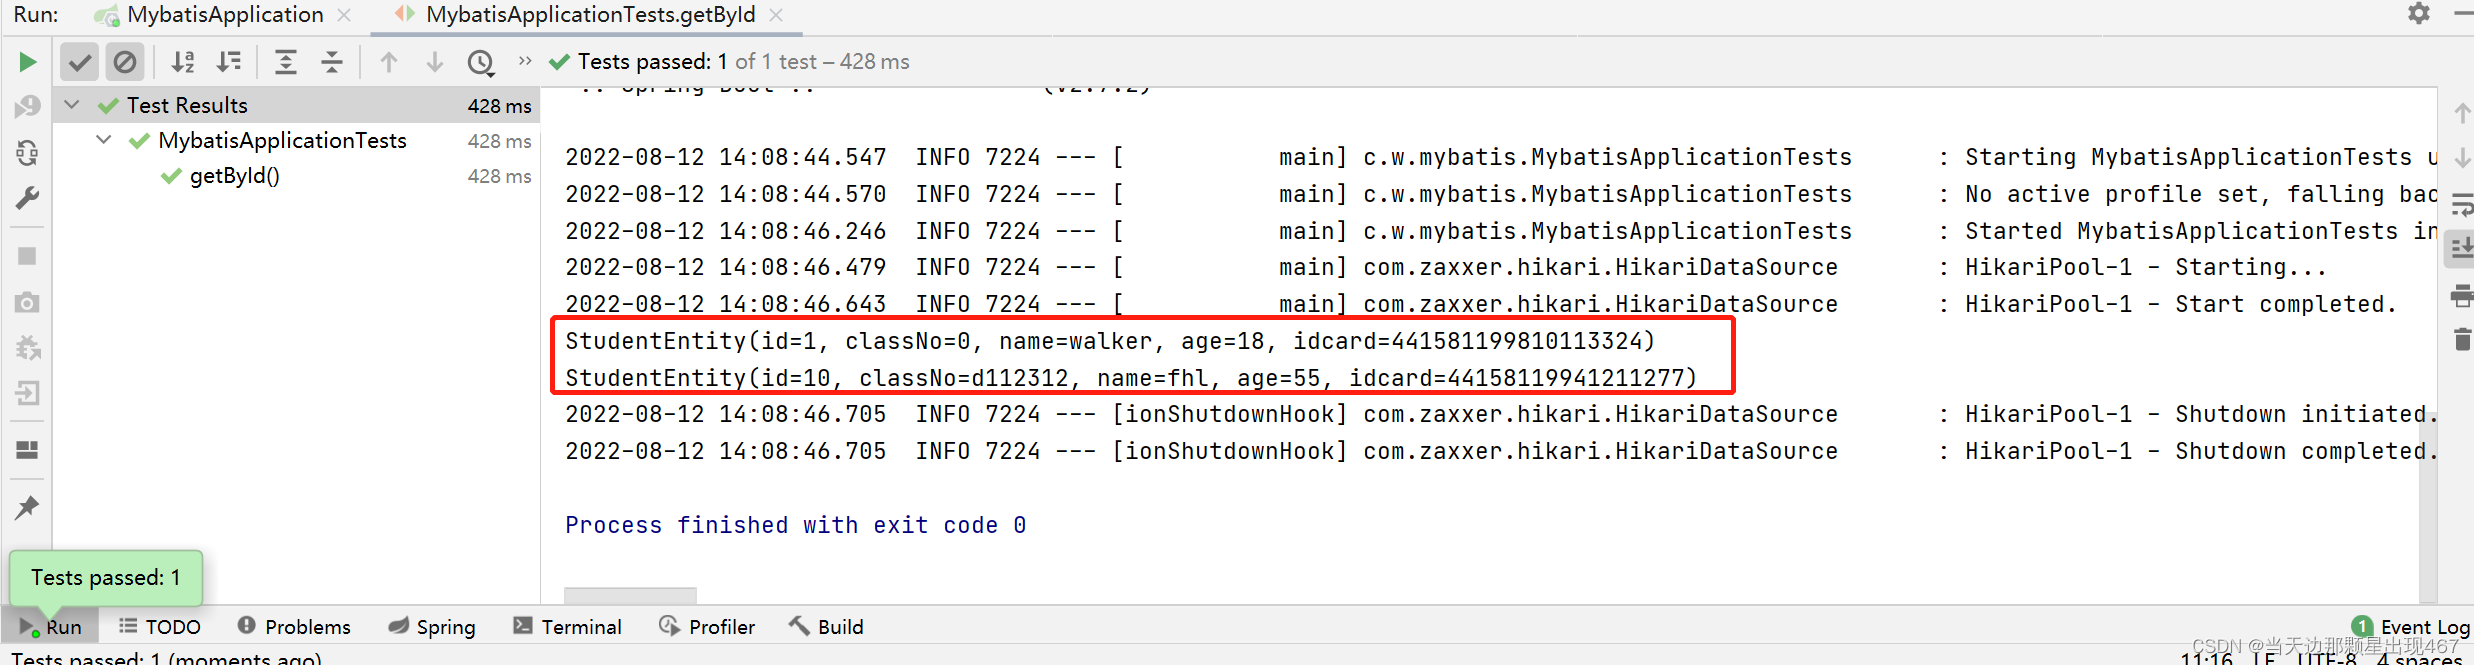
package com.walker.mybatis;

import com.walker.mybatis.entity.StudentEntity;
import com.walker.mybatis.mapper.StudentMapper;
import org.junit.jupiter.api.Test;
import org.springframework.beans.factory.annotation.Autowired;
import org.springframework.boot.test.context.SpringBootTest;

import java.util.Random;

@SpringBootTest
class MybatisApplicationTests {

    //1、标注springboot测试
    @Autowired
    private StudentMapper studentMapper;

    //添加测试
    @Test
    void contextLoads() {
        //4、创建学生类
        StudentEntity studentEntity = new StudentEntity();
        studentEntity.setId("11");
        studentEntity.setAge("18");
//        studentEntity.setClassNo(String.valueOf(new Random().nextInt(2)));
        studentEntity.setClassNo("3");
        studentEntity.setIdcard("441581199810113324");
        studentEntity.setName("walker");
        //5、调用方法
        studentMapper.save(studentEntity);
    }

    //删除测试
    @Test
    public void testDeleteById(){
        studentMapper.deleteById("9");
    }

    //修改测试
    @Test
    public void testUpdateById(){
        StudentEntity studentEntity=new StudentEntity();
        studentEntity.setId("10");
        studentEntity.setAge("55");
        studentEntity.setName("fhl");
        studentMapper.updateById(studentEntity);
    }

    //根据id获取数据
    @Test
    public void getById(){
        StudentEntity studentEntity1=studentMapper.getById("1");
        StudentEntity studentEntity2=studentMapper.getById("10");
        System.out.println(studentEntity1);
        System.out.println(studentEntity2);
    }

}
执行结果:
发现数据库插入了一条数据了 -

删除、修改同理
-
获取
第二种办法(接口测试)
-
一般编写接口的时候,使用的是传统三层架构
分别是controller+service+mapper
一般controller是控制层
service:用于处理逻辑
mapper:用于和数据库的交互 -
1.编写mapper接口(同上)
-
2.编写serivce接口和实现类
-
service接口
-
package com.walker.mybatis.service;

import com.walker.mybatis.entity.StudentEntity;

public interface StudentService {
    void save(StudentEntity studentEntity);

//    void deleteById(StudentEntity studentEntity);
}
service实现类
-
package com.walker.mybatis.service.impl;

import com.walker.mybatis.entity.StudentEntity;
import com.walker.mybatis.mapper.StudentMapper;
import com.walker.mybatis.service.StudentService;
import org.springframework.beans.factory.annotation.Autowired;
import org.springframework.stereotype.Service;

@Service
public class StudentServiceImpl implements StudentService {
    @Autowired
    private StudentMapper studentMapper;

    @Override
    public void save(StudentEntity studentEntity) {
        //调用mapper的办法
        studentMapper.save(studentEntity);
    }

//    @Override
//    public void deleteById(StudentEntity studentEntity) {
//        studentMapper.deleteById(studentEntity.getId());
//    }
}
3.编写controller
-
package com.walker.mybatis.controller;

import com.walker.mybatis.entity.StudentEntity;
import com.walker.mybatis.service.StudentService;
import org.springframework.beans.factory.annotation.Autowired;
import org.springframework.web.bind.annotation.PostMapping;
import org.springframework.web.bind.annotation.RequestBody;
import org.springframework.web.bind.annotation.RequestMapping;
import org.springframework.web.bind.annotation.RestController;

@RestController
@RequestMapping("/student")
public class StudentController {
    @Autowired
    StudentService studentService;

    @PostMapping("/save")
    public String save(@RequestBody StudentEntity studentEntity){
        //调用service的办法
        studentService.save(studentEntity);
        return "success";
    }


}
调用测试
-
这边使用的Apifox进行接口调用测试
-
第一步:启动springboot项目
-
第二步:输入地址http://localhost:8084/student/save
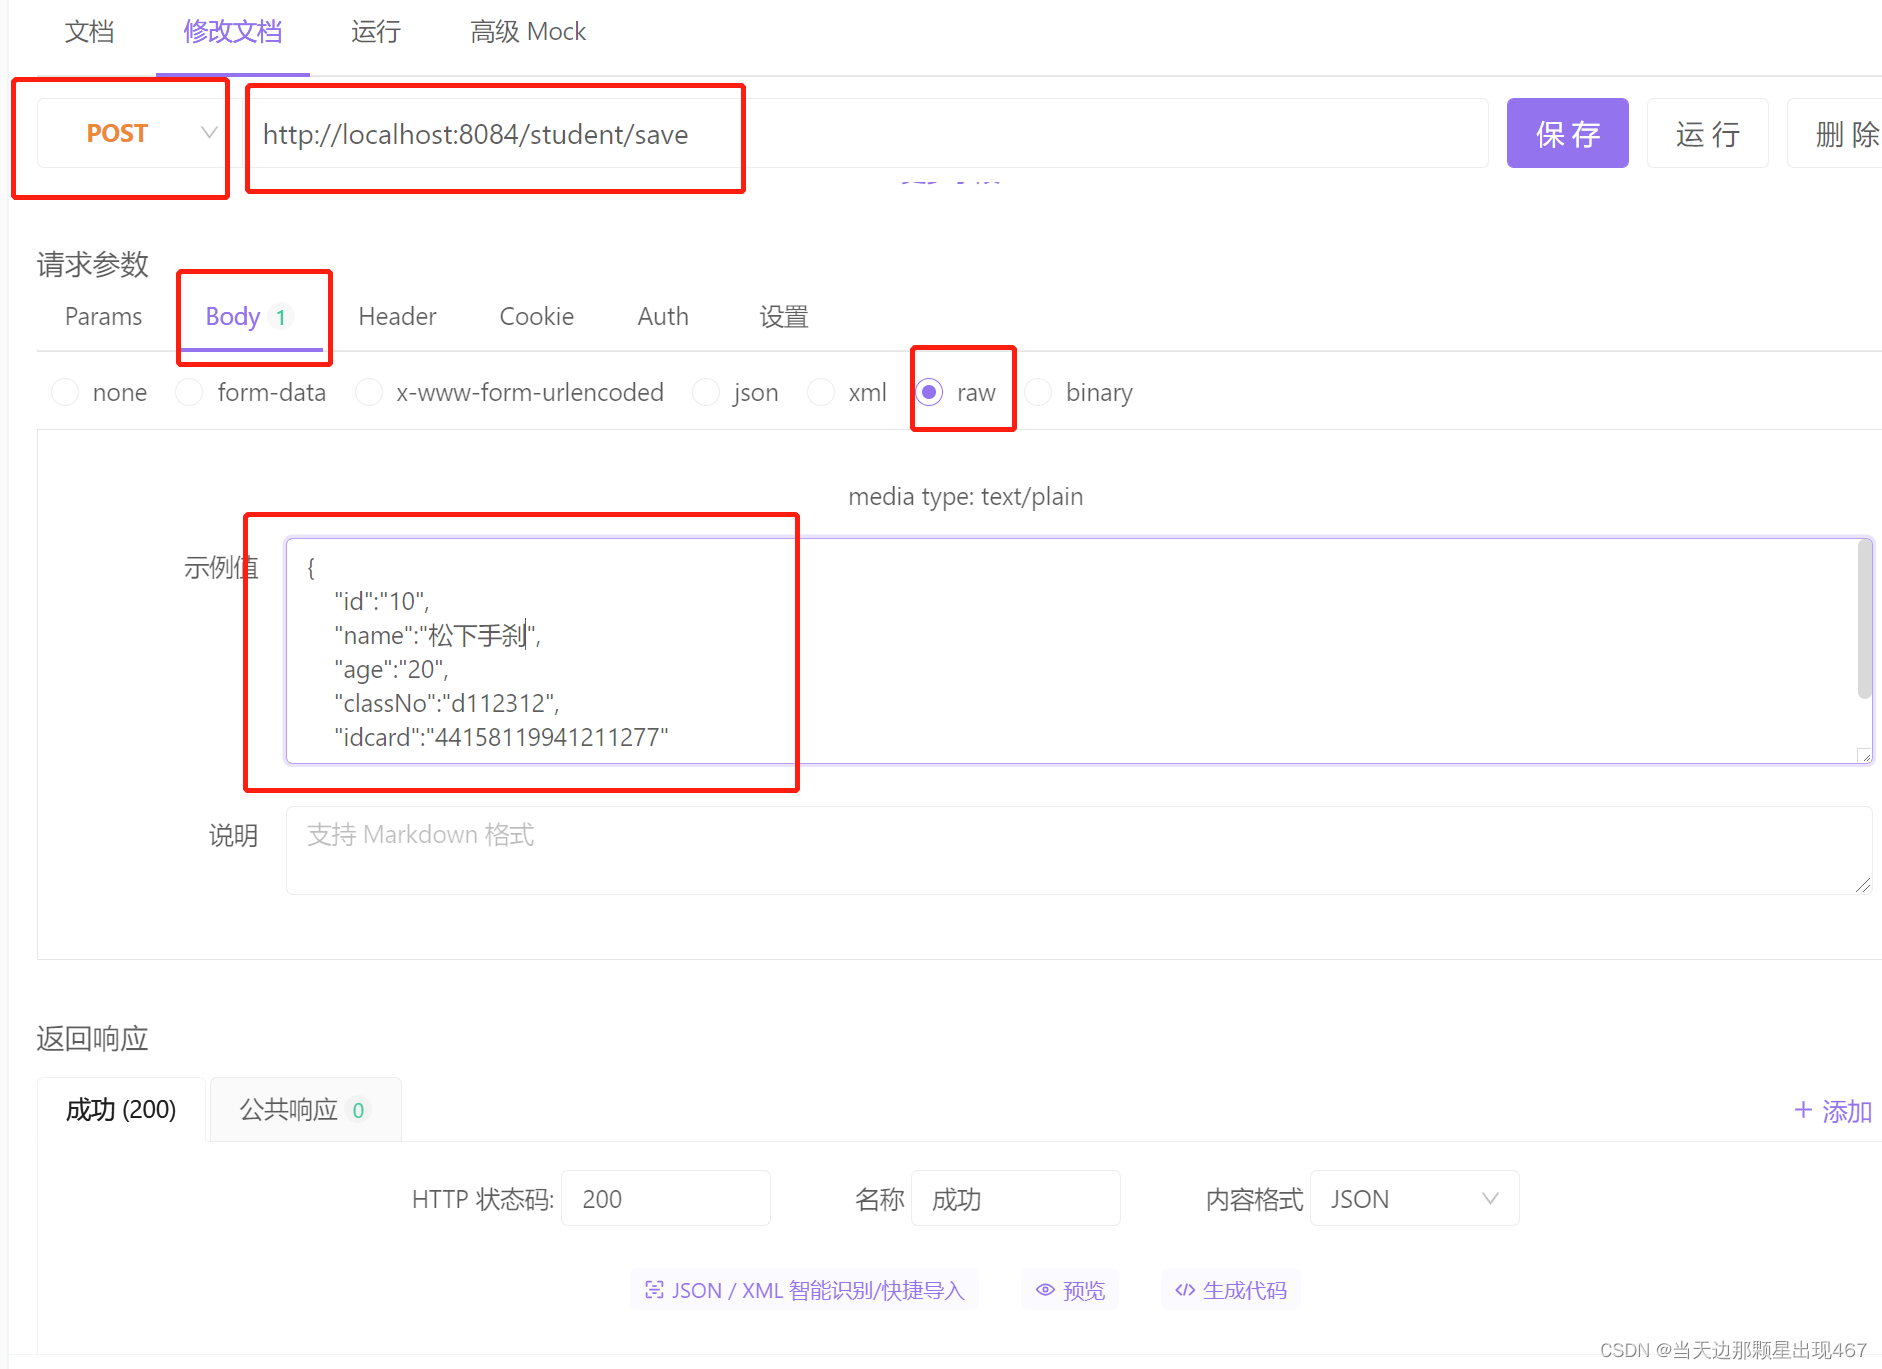
之后查看数据库,发现有数据,代表结果成功了(注:接口测试办法只写了添加办法,删除,修改,获取后续代码补上)


 674
674


 被折叠的 条评论
为什么被折叠?
被折叠的 条评论
为什么被折叠?
 到【灌水乐园】发言


