


简单模式
设置启动类
//消息的简单模式
@SpringBootApplication
public class Main1 {
    public static void main(String[] args) {
        SpringApplication.run(Main1.class,args);
    }
    @Bean
    public Queue helloworld(){
        return new Queue("helloworld",false,false,false);
    }
    @Autowired
    private Producer p;

    /**spring的执行流程
     * 自动扫描创建实例 --> 完成依赖注入--> @PostConstruct-->后续步骤*/
    @PostConstruct
    public void test(){
        //在新的线程中执行自己的运算,不阻塞spring主线程执行
        new Thread(()->{
            try {
                Thread.sleep(3000L);//等待helloworld队列创建
            }catch (InterruptedException e){
                e.printStackTrace();
            }
            p.send();
        }).start();
    }
}
生产者
@Component
public class Producer {
    //发送消息的封装工具
    @Autowired
    private AmqpTemplate t;

    public void send(){
        //队列的参数在启动类中设置
        t.convertAndSend("helloworld","helloworld");
    }

}
消费者
//@RabbitListener(queues = "helloworld")//也可以注解到方法上,就不需要RabbitHandler
@Component
public class Consumer {
    @RabbitListener(queues = "helloworld")
    public void receive(String msg){
        System.out.println("收到"+msg);
    }

}
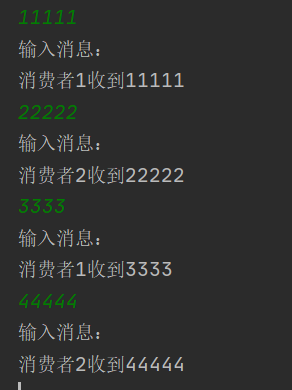
工作模式
启动类
//消息的工作模式
@SpringBootApplication
public class Main2 {
    public static void main(String[] args) {
        SpringApplication.run(Main2.class,args);
    }

    @Bean
    public Queue TaskQueue(){
        return new Queue("task_queue",true,false,false);
    }
    @Autowired
    private Producer p;

    /**spring的执行流程
     * 自动扫描创建实例 --> 完成依赖注入--> @PostConstruct-->后续步骤*/
    @PostConstruct
    public void test(){
        //在新的线程中执行自己的运算,不阻塞spring主线程执行
        new Thread(() -> {
            while (true){
            System.out.println("输入消息:");
            String s = new Scanner(System.in).nextLine();
            p.send(s);}
        }).start();

    }
}
生产者
@Component
public class Producer {
    //发送消息的封装工具
    @Autowired
    private AmqpTemplate t;

    public void send(String s){
        //队列的参数在启动类中设置
        t.convertAndSend("task_queue",s);
        /**
         * t.convertAndSend("task_queue",s,消息预处理对象);
         * 在预处理对象中,可以对消息的参数进行调整
         *
         * */
    }
}
消费者
@Component
public class Consumer {
    @RabbitListener(queues = "task_queue")
    public void receive1(String msg){
        System.out.println("消费者1收到"+msg);
    }
    @RabbitListener(queues = "task_queue")
    public void receive2(String msg){
        System.out.println("消费者2收到"+msg);
    }

}
发布和订阅模式
启动类中配置
  @Bean
    public FanoutExchange logs(){
        return new FanoutExchange("logs",false,false);
    }
生产者
@Component
public class Producer {
    //发送消息的封装工具
    @Autowired
    private AmqpTemplate t;

    public void send(String s){
        //队列的参数在启动类中设置
        t.convertAndSend("logs","",s);//第二个参数(路由键)可以不写,没用
    }

}
消费者
@Component
public class Consumer {
    @RabbitListener(bindings = @QueueBinding(
            value = @Queue,//队列,默认,随机命名,false,true,true
            //declare="false"表示不创建,使用已存在的交换机
            exchange = @Exchange(value = "logs",declare = "false")//交换机
    ))
    public void receive1(String msg){
        System.out.println("消费者1收到"+msg);
    }

    @RabbitListener(bindings = @QueueBinding(
            value = @Queue,//队列,默认,随机命名,false,true,true
            exchange = @Exchange(value = "logs",declare = "false")//交换机
    ))
    public void receive2(String msg){
        System.out.println("消费者2收到"+msg);
    }
}

路由模式
启动类
@Bean
    public DirectExchange logs(){
        return new DirectExchange("direct_logs",false,false);
    }
生产者
@Component
public class Producer {
    //发送消息的封装工具
    @Autowired
    private AmqpTemplate t;

    public void send(String k, String s){
        //队列的参数在启动类中设置
        t.convertAndSend("direct_logs",k,s);
    }
}
消费者
多加个key键
@Component
public class Consumer {
    @RabbitListener(bindings = @QueueBinding(
            value = @Queue,//队列,默认,随机命名,false,true,true
            //declare="false"表示不创建,使用已存在的交换机
            exchange = @Exchange(value = "direct_logs",declare = "false"),//交换机
            key = {"error"}
    ))
    public void receive1(String msg){
        System.out.println("消费者1收到"+msg);
    }

    @RabbitListener(bindings = @QueueBinding(
            value = @Queue,//队列,默认,随机命名,false,true,true
            exchange = @Exchange(value = "direct_logs",declare = "false"),//交换机
            key = {"info","error","warning"}
    ))
    public void receive2(String msg){
        System.out.println("消费者2收到"+msg);
    }
}

主题模式
启动类修改
@Bean
    public TopicExchange logs(){
        return new TopicExchange("topic_logs",false,false);
    }
生产者修改
public void send(String k, String s){
        //队列的参数在启动类中设置
        t.convertAndSend("topic_logs",k,s);
    }
消费者修改
@Component
public class Consumer {
    @RabbitListener(bindings = @QueueBinding(
            value = @Queue,//队列,默认,随机命名,false,true,true
            //declare="false"表示不创建,使用已存在的交换机
            exchange = @Exchange(value = "topic_logs",declare = "false"),//交换机
            key = {"*.orange.*"}
    ))
    public void receive1(String msg){
        System.out.println("消费者1收到"+msg);
    }

    @RabbitListener(bindings = @QueueBinding(
            value = @Queue,//队列,默认,随机命名,false,true,true
            exchange = @Exchange(value = "topic_logs",declare = "false"),//交换机
            key = {"*.*.rabbit","lazy.#"}
    ))
    public void receive2(String msg){
        System.out.println("消费者2收到"+msg);
    }
}


 3420
3420


 被折叠的 条评论
为什么被折叠?
被折叠的 条评论
为什么被折叠?
 到【灌水乐园】发言


