


声明:本篇文章属古乃特个人所有,不涉及商业目的,仅用于学习记录。
Redis-standalone环境搭建(单台Redis)
-
Redis文件挂载目录准备
mkdir \
/gonait/docker-amount/redis/redis-standalone/logs \
/gonait/docker-amount/redis/redis-standalone/conf \
/gonait/docker-amount/redis/redis-standalone/data
tree /gonait/docker-amount/redis/redis-standalone/
-
创建或修改配置文件
更详细的配置文件:点击获取
vim /gonait/docker-amount/redis/redis-standalone/conf/redis.conf# 限制可访问redis的主机ip # bind 127.0.0.1 ::1 # bind 127.0.0.1 # 关闭保护模式,开启后在没有设定bind ip且没有设密码的情况下,只接受本机的访问。 protected-mode no # 指定redis的端口号,默认情况下6379 port 16379 # tcp半连接队列长度配置 # tcp-backlog 511 # redis访问密码 requirepass 123456 # 超时(秒)连接关闭,0表示不关闭 timeout 0 # tcp心跳检测,(秒)一次 tcp-keepalive 60 # 是否以守护进程形式启动,即后台启动 daemonize no # pid文件位置,每个实例都会产生一个文件 # pidfile /var/run/redis_16379.pid # 日志级别:debug、verbose、notice、warning loglevel debug # 日志文件 logfile "/redis/logs/redis.log" # redis数据库数量,默认16 databases 16 # 是否显示logo always-show-logo yes # 客户端最大连接数 maxclients 10000 # redis最大内存配置 # maxmemory <bytes> # redis移除策略:volatile-lru、allkeys-lru、volatile-lfu、allkeys-lfu、volatile-random、allkeys-random、volatile-ttl、noeviction # maxmemory-policy noeviction # 设置每次移除检查的样本数量 # maxmemory-samples 5 # RDB持久化频率,时间(s) 次数,即300秒内修改10次则触发,""表示不开启 save 300 10 # 发生错误停止写操作 stop-writes-on-bgsave-error yes # RDB持久化压缩,节省内存,消耗CPU资源 rdbcompression yes # RDB校验 rdbchecksum yes # RDB持久化文件 dbfilename dump.rdb # RDB持久化文件存放目录 dir "/redis/data/" # 开启aof持久化 appendonly yes # aof持久化文件 appendfilename "appendonly.aof" # 持久化同步策略:everysec、always、no appendfsync always # 写入时停止appendfsync no-appendfsync-on-rewrite no # 自动重写aof文件 auto-aof-rewrite-percentage 100 auto-aof-rewrite-min-size 64mb # AOF文件末尾截断时的处理策略 aof-load-truncated yes # 开启混合持久化 aof-use-rdb-preamble yes # 配置LUA脚本最大执行时长 lua-time-limit 5000 # 慢查询日志功能用于记录执行时间超过给定时长的命令请求。 slowlog-log-slower-than 10000 # 慢日志文件大小 slowlog-max-len 128 # 延迟监控,默认关闭 latency-monitor-threshold 0 # 事件通知 notify-keyspace-events "" # 设置Hash底层数据结构由ziplist转为hashtable的阈值 hash-max-ziplist-entries 512 hash-max-ziplist-value 64 # 设置List底层数据结构quicklist中单个ziplist的大小 list-max-ziplist-size -2 # 设置如何继续压缩List中ziplist list-compress-depth 0 # 设置set底层intset升级为hashtable的阈值 set-max-intset-entries 512 # ZSet底层数据结构由ziplist转为skiplist的阈值 zset-max-ziplist-entries 128 zset-max-ziplist-value 64 # 设置HyperLogLog底层稀疏矩阵转为稠密矩阵的阈值 hll-sparse-max-bytes 3000 # 自定义Stream宏节点大小 stream-node-max-bytes 4096 stream-node-max-entries 100 # 是否开启Rehash activerehashing yes # 执行任务频率 hz 10 dynamic-hz yes # AOF重写时执行fsync策略 aof-rewrite-incremental-fsync yes # 保存RDB文件时执行fsync策略 rdb-save-incremental-fsync yes -
Docker启动Redis容器
注意,需要先要修改文件访问权限,否则启动失败。
chmod -R 777 /gonait/docker-amount/redis/redis-standalone/;docker run -d -p 16379:16379 \ --name redis-standalone \ -v /gonait/docker-amount/redis/redis-standalone/:/redis:z \ redis:latest redis-server \ /redis/conf/redis.conf
-
查看挂载目录结构,进入Redis容器内部
tree /gonait/docker-amount/redis/redis-standalone/
docker exec -it redis-standalone /bin/bashredis-cli -p 16379 -a 123456
# 另一种进入redis-cli的方式 docker exec -it redis-standalone redis-cli -p 16379 -a 123456 -
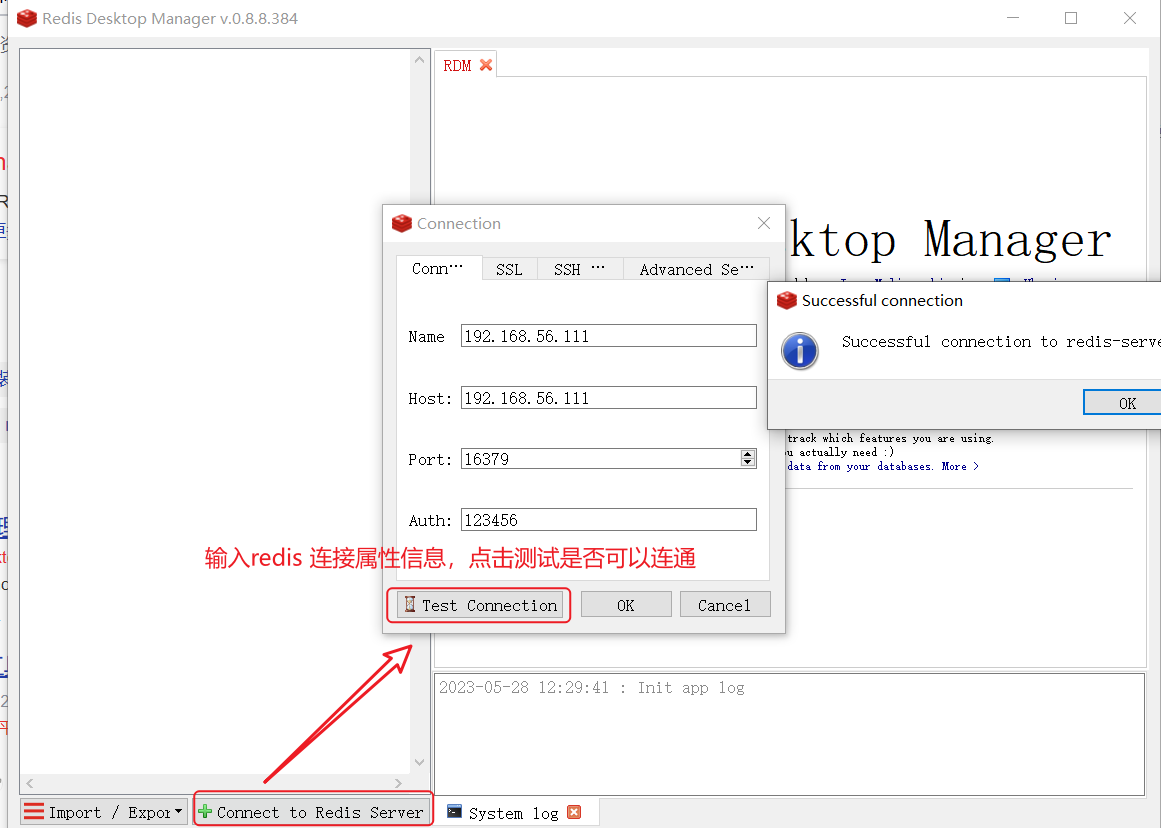
RDM 连接 redis
RDM 获取方式:点击获取Redis Desktop Manager
至此,Docker 安装 portainer/portainer 已经全部完成。如果在安装的过程中出现任何问题,可以私信我~


 2万+
2万+


 被折叠的 条评论
为什么被折叠?
被折叠的 条评论
为什么被折叠?
 到【灌水乐园】发言


