


hi,大家好,今天为大家带来MyBatis操作数据库的知识

文章目录
🐷1.根据MyBatis操作数据库
1.接口:方法的声明(给Service层调用)
2. XML:实现接口
🧊1.1查询操作
🍇1.1.1无参查询
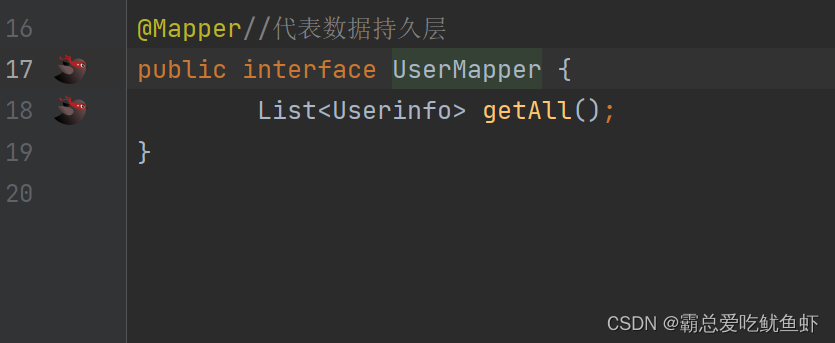
1.定义接口
@Mapper//代表数据持久层
public interface UserMapper {
        List<Userinfo> getAll();
}
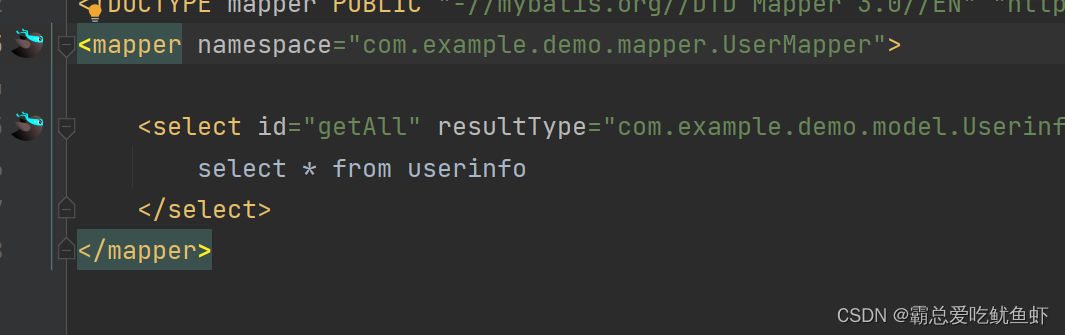
2.在xml里面写接口的实现
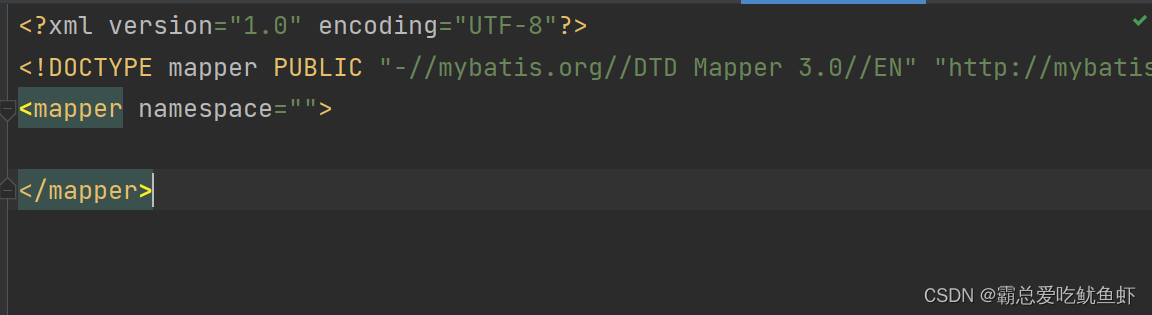
这里的namespace里面的内容表明了当前xml实现的是哪个接口,和文件名关系不大
<?xml version="1.0" encoding="UTF-8"?>
<!DOCTYPE mapper PUBLIC "-//mybatis.org//DTD Mapper 3.0//EN" "http://mybatis.org/dtd/mybatis-3-mapper.dtd">
<mapper namespace="com.example.demo.mapper.UserMapper">

    <select id="getAll" resultType="com.example.demo.model.Userinfo">
        select * from userinfo
    </select>
</mapper>
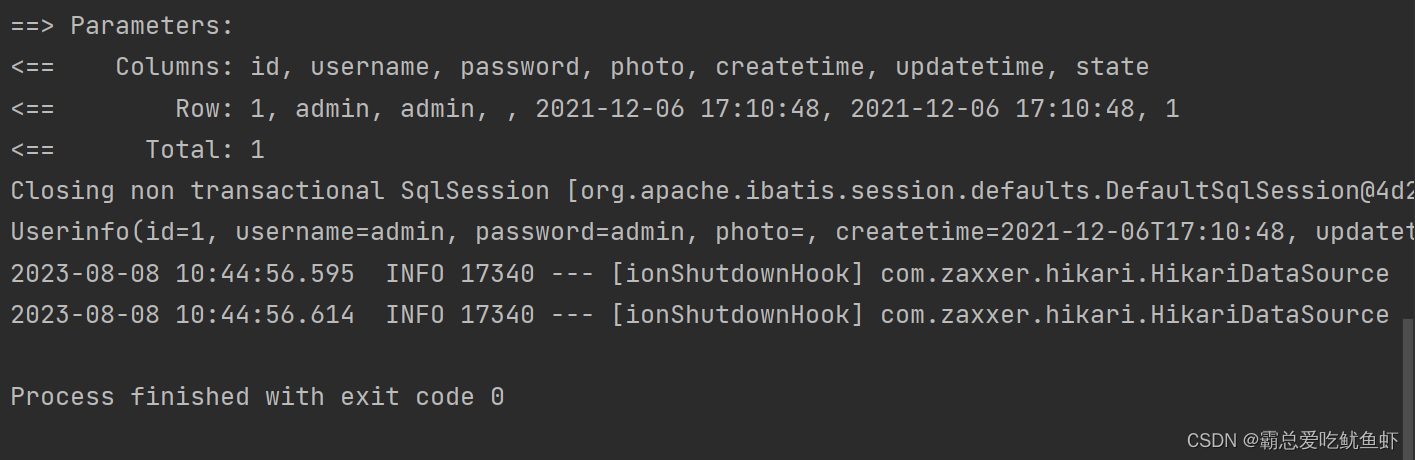
根据接口写测试类
package com.example.demo.mapper;

import com.example.demo.model.Userinfo;
import org.junit.jupiter.api.Test;
import org.springframework.beans.factory.annotation.Autowired;
import org.springframework.boot.autoconfigure.SpringBootApplication;
import org.springframework.boot.test.context.SpringBootTest;

import java.util.List;

import static org.junit.jupiter.api.Assertions.*;

/**
 * Created with IntelliJ IDEA.
 * Description:
 * User: WHY
 * Date: 2023-08-08
 * Time: 9:56
 */
@SpringBootTest //不能省略,表明当前测试程序当前项目是运行在spring boot项目中的
class UserMapperTest {
    @Autowired
    private UserMapper userMapper;

    @Test
    void getAll() {
        List<Userinfo> list=userMapper.getAll();
        System.out.println(list);
    }
}

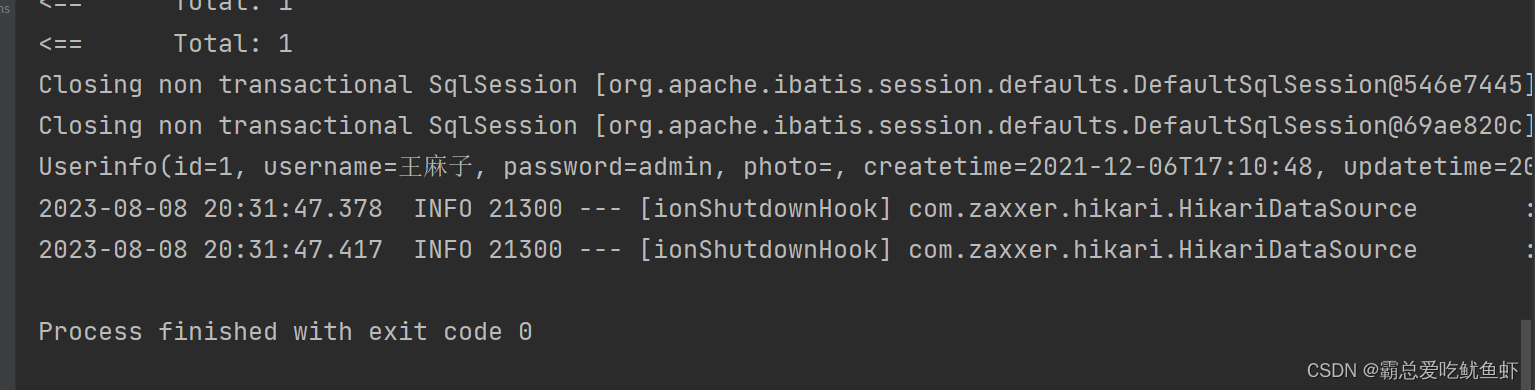
从结果中可以看到运行是成功的,打印了sql语句,也打印了结果
为了方便开发MyBatis,实现XML和对应的接口之间的快速跳转,我们可以安装一个MyBatisX插件
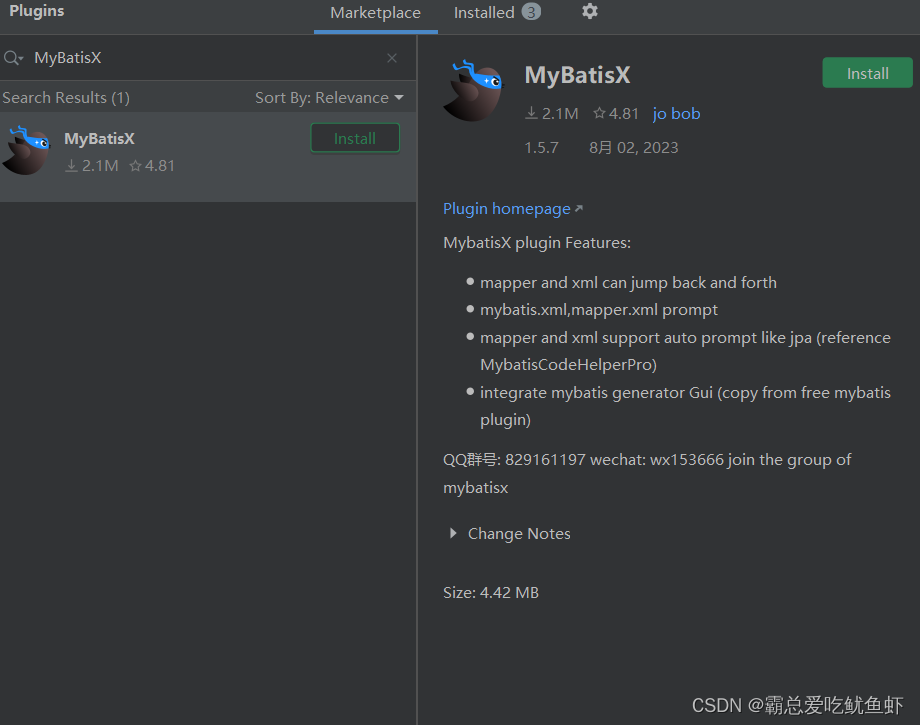
红色的小鸟和蓝色的小鸟相互点击就可以跳转
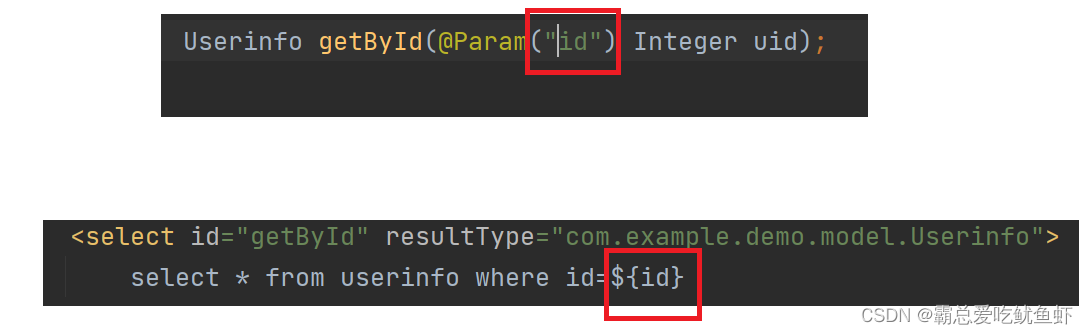
🍇1.1.2有参查询

    <select id="getById" resultType="com.example.demo.model.Userinfo">
        select * from userinfo where id=${uid}
    </select>

加上这个@Param注解,在传参的时候就必须用该注解里面的名字
我们可以测试一下


错误显示说ID不存在
改成id

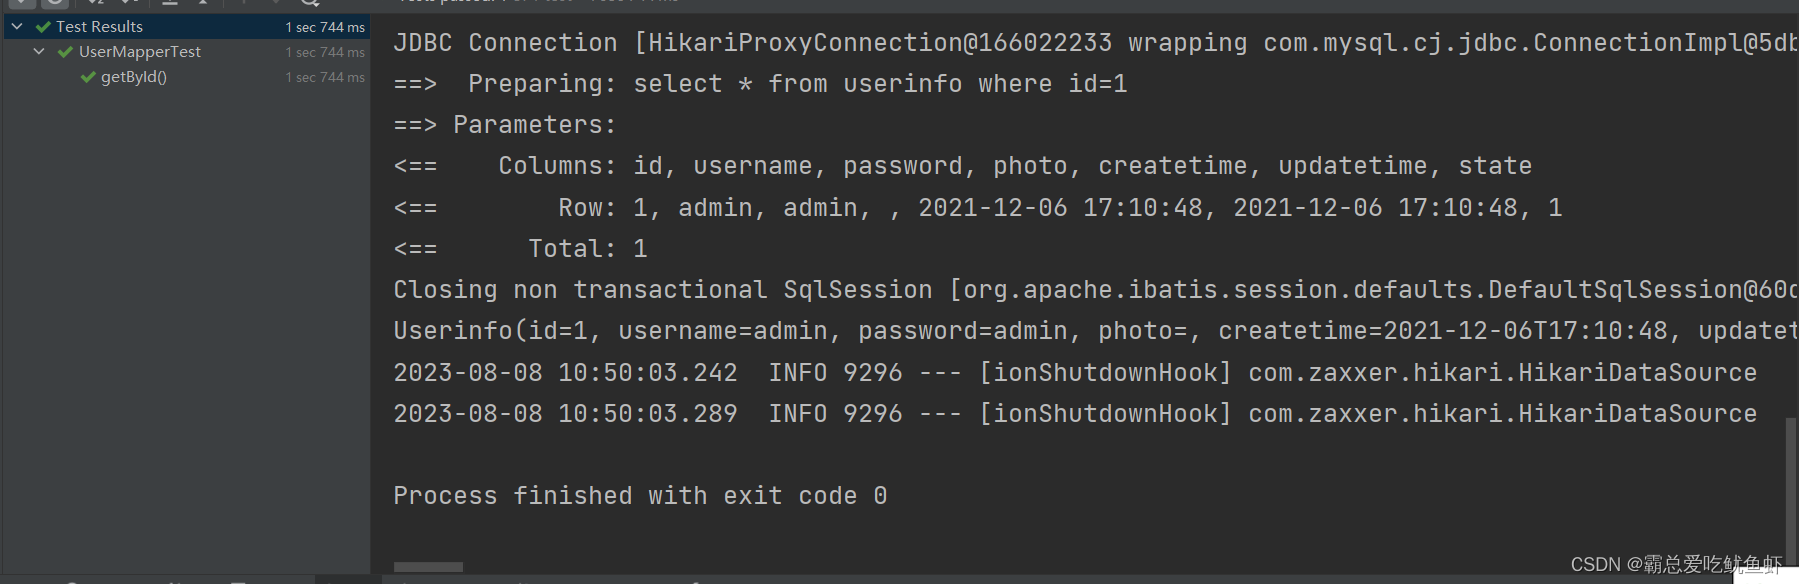
运行成功了
MyBatis有参查询的时候传递参数的方法有两个
1.使用$符
 这俩相对应,结果 显示的是直接替换,也叫做及时执行

这是直接将id位置的数字替换成出传过来的参数
2.采用#
运行结果是采用了JDBC里面那种占位符的形式

意味sql执行是预编译执行的
问题:${}和#{}的区别
1.${}是直接替换,#{}是预执行
2.${}不安全,存在sql注入,#{}安全,不存在sql注入
sql注入:使用一些特殊的sql语句完成一些非法操作,比如一个登录功能,只有用户名和密码均输入正确,才能登录成功,但是当密码胡乱输入也登陆成功,也就是sql注入
${}可以实现的功能#{}都能实现.
👀👀👀而且${}还存在sql注入的问题,为啥还要用它?
因为有一种场景预编译做不到!
比如在网上购物时,浏览商品的时候有按照价格升序或者降序,此时如果使用#{}那么就会把升序或者降序当做value值,加一个单引号,那么在sql语句中自然是错误的,使用${}就直接替换,采用string拼接的方式,不会报错,举个例子


换成$符号


运行成功了
总结:$应用场景:当业务需要传递sql命令的时候
注意事项:使用$符传的的参数一定要被穷举
我们刚才的例子里面参数可以被穷举,一个是asc,一个是desc,符合条件
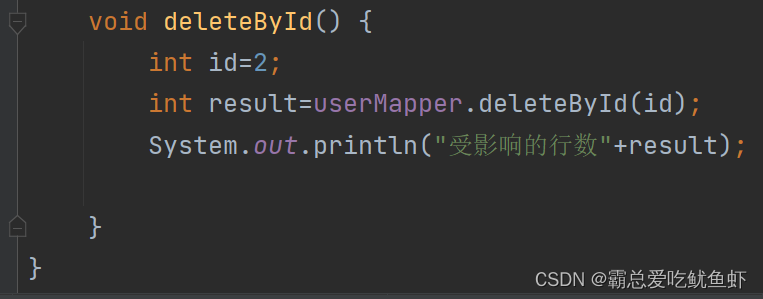
🧊1.2删除操作


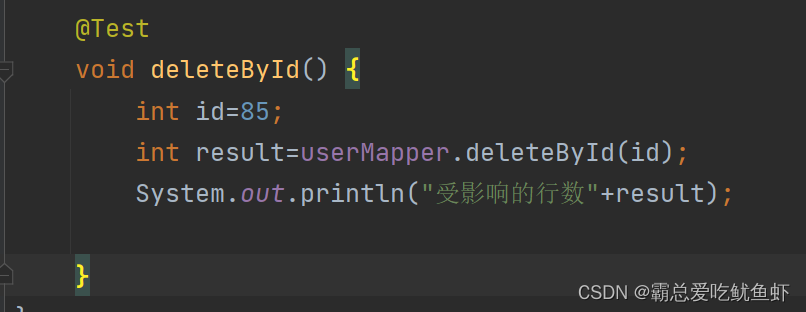

因为id=85的用户压根不存在
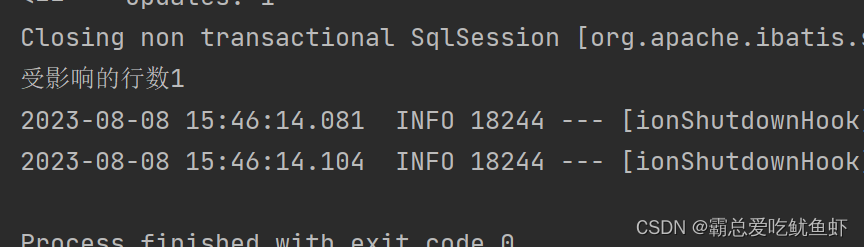
当在测试的时候想要保证不影响数据库的数据,可以加上一个transitional注解,代表开启是事务,可以回滚
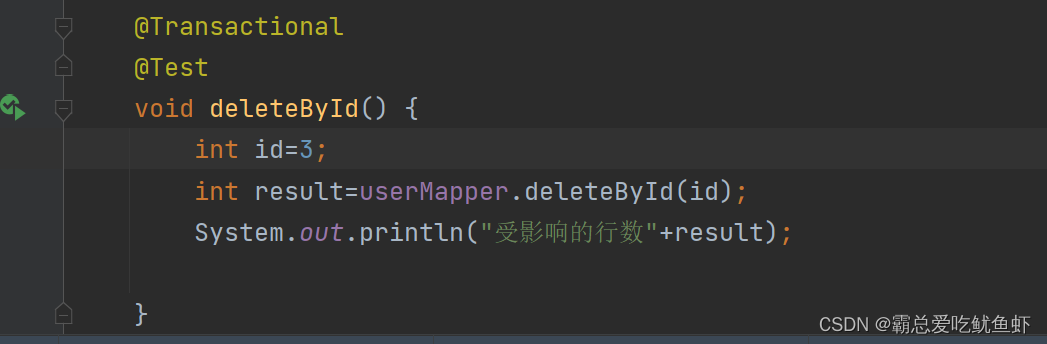
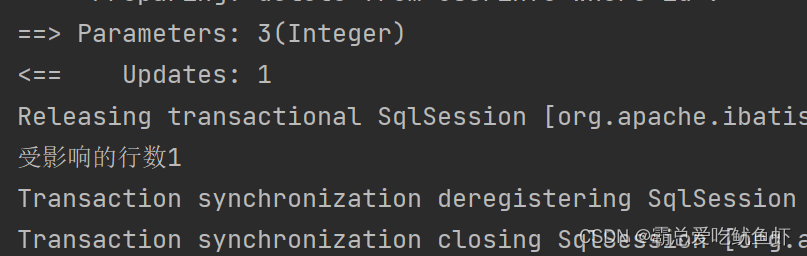
我们可以看到受影响的行数,但是也不影响数据库的数据

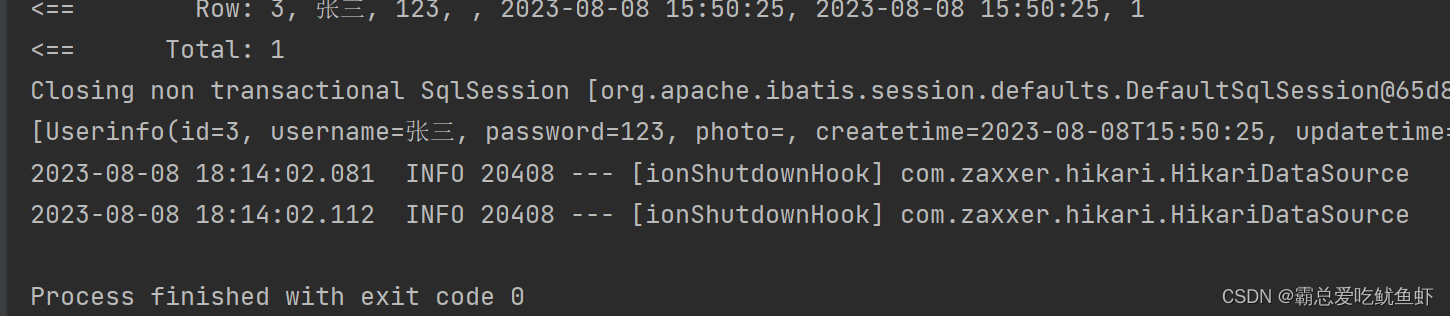
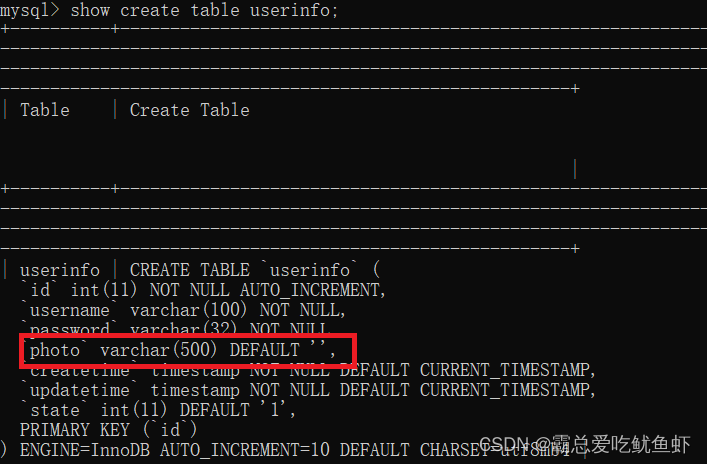
注意但类中属性和数据库表中的字段名不一样时.查询结果可能为null
解决办法:
🥝1.将类名属性和表中字段名改为一致
🥝2.使用sqi语句的as进行字段名重命名

🥝3.定义一个resultMap,将属性名和字段名进行手动映射


<resultMap id="AseMap" type="com.example.demo.model.Userinfo">
    <id column="id" property="id"></id>
    <result column="username" property="name"></result>
    <result column="password" property="password"></result>
    <result column="photo" property="photo"></result>
    <result column="createtime" property="createtime"></result>
    <result column="updatetime" property="updatetime"></result>
    <result column="state" property="state"></result>
</resultMap>
column代表的是字段名,property代表的是属性名


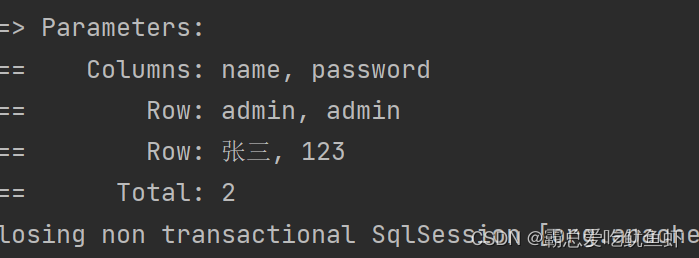
可以看到显示了名字
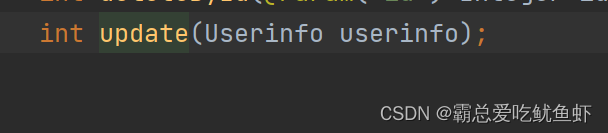
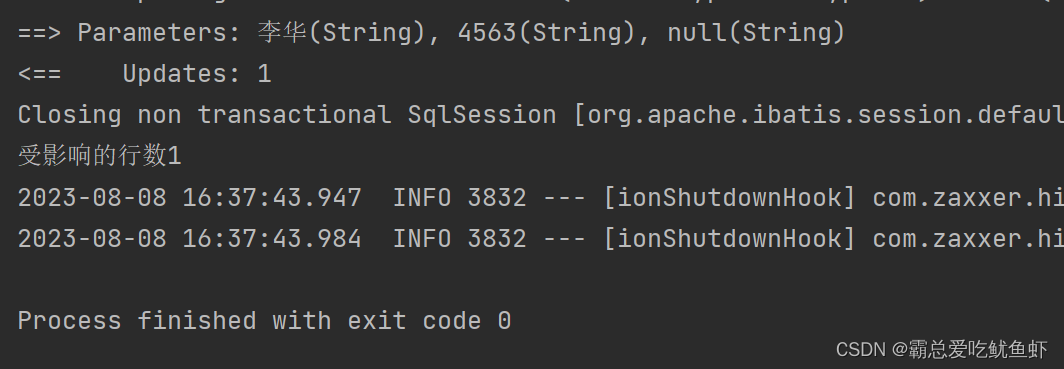
🧊1.3修改操作

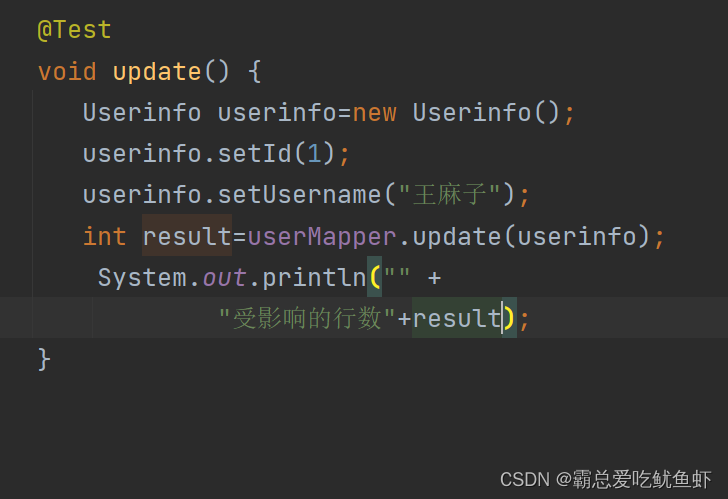
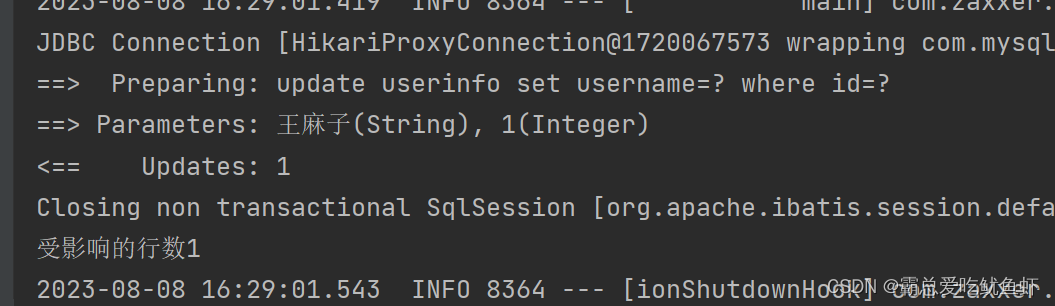

可以看到修改成功
修改,删除,增加都默认返回受影响的行数
🧊1.4增加操作


插入成功
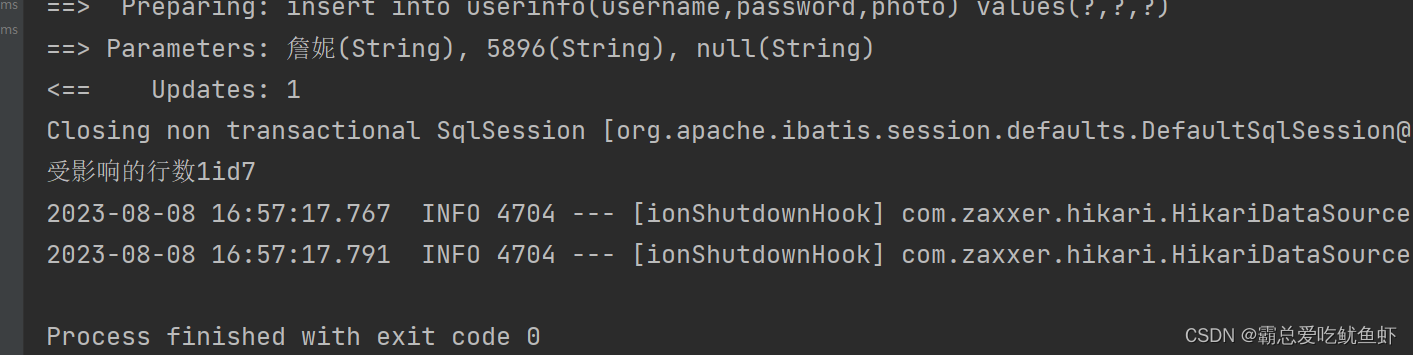
🧊1.5特殊的添加:返回自增id

<insert id="add2" useGeneratedKeys="true" keyColumn="id" keyProperty="id">
        insert into userinfo(username,password,photo) values(#{username},#{password},#{photo})
    </insert>

 @Test
    void add2() {
        Userinfo userinfo=new Userinfo();
        userinfo.setUsername("詹妮");
        userinfo.setPassword("5896");
        userinfo.setPhoto("null");
        int result=userMapper.add2(userinfo);
        System.out.println("受影响的行数"+result+"id"+userinfo.getId());
    }
为什么我这里没有设置id我却可以使用getid方法?
因为数据库的id已经设置到了该属性中

🧊1.6like查询
List<Userinfo> getByLike();
<select id="getByLike" resultType="com.example.demo.model.Userinfo">
        select * from userinfo where username like '_%三'
    </select>
 @Test
    void getByLike() {
        List<Userinfo> list=userMapper.getByLike();
        System.out.println(list.toString());
    }

当查询的时候不一定是按照这个字匹配,可以换成一个动态的,把匹配条件放到测试类里面
<select id="getByLike" resultType="com.example.demo.model.Userinfo">
        select * from userinfo where username like #{username}
    </select>
  @Test
    void getByLike() {
        String username="_三%";
        List<Userinfo> list=userMapper.getByLike(username);
        System.out.println(list.toString());
    }
2.使用mysql内置函数concat
<select id="getByLike" resultType="com.example.demo.model.Userinfo">
        select * from userinfo where username like concat('%',#{username},'%')
    </select>
 @Test
    void getByLike() {
        String username="三";
        List<Userinfo> list=userMapper.getByLike(username);
        System.out.println(list.toString());
    }
}
🧊1.7多表查询
🍇1.7.1一对一查询
在查询文章表的过程中显示用户姓名
我们不采用xml实现接口,我们采用注解的方式
增删改查都有对应的注解
package com.example.demo.model;

import lombok.Data;

import java.time.LocalDateTime;

/**
 * Created with IntelliJ IDEA.
 * Description:
 * User: WHY
 * Date: 2023-08-08
 * Time: 18:43
 */
@Data
public class Articleinfo {
    private int id;
    private  String title;
    private  String content;
    private LocalDateTime createtime;
    private LocalDateTime updatetime;
    private int uid;
    private int rcount;
    private int state;
    //联表字段
    private  String username;

}
@Mapper
public interface ArticleMapper {
    @Select("select * from articleinfo")
        List<Articleinfo> getAll();
}
package com.example.demo.mapper;

import com.example.demo.model.Articleinfo;
import com.example.demo.model.Userinfo;
import org.junit.jupiter.api.Test;
import org.springframework.beans.factory.annotation.Autowired;
import org.springframework.boot.test.context.SpringBootTest;

import java.util.List;

import static org.junit.jupiter.api.Assertions.*;

/**
 * Created with IntelliJ IDEA.
 * Description:
 * User: WHY
 * Date: 2023-08-08
 * Time: 18:52
 */
@SpringBootTest
class ArticleMapperTest {
    @Autowired
    private  ArticleMapper articleMapper

    @Test
    void getAll() {

        List<Articleinfo> list=articleMapper.getAll();

        System.out.println(list.toString());


    }
}

将联合查询的语写在注解里面即可
@Mapper
public interface ArticleMapper {
    @Select("select articleinfo.*,userinfo.username from articleinfo,userinfo where articleinfo.uid=userinfo.id")
        List<Articleinfo> getAll();
}

所以MyBatis不仅可以采用接口+xml实现
还可以采用接口+注解的方式实现
🍇1.7.2一对多查询
查询一个用户的多篇文章
我们采用线程的方式
一个查用户表,一个查文章表,最后拼接起来
先采用单线程的方式来写
@Data
public class Userinfo {
    //这里的属性要和数据库表的字段对应
    private int  id;
    private  String username;
    private String password;
    private String photo;
    private LocalDateTime createtime;
    private LocalDateTime updatetime;
    private  int state;
    private List<Articleinfo> article;
}
 List<Userinfo> getByLike(@Param("username") String username);
        @Select("select * from userinfo where id=#{id}")
       Userinfo getByid(@Param("id") Integer id);
@Select("select * from articleinfo where uid=#{uid}")
    List<Articleinfo> getByarticle(@Param("uid") Integer uid);
 @Test
    void getUserList(){
        int uid=1;
        //1.先根据uid查询用户表
       Userinfo userinfo= userMapper.getByid(uid);
        System.out.println(userinfo);
        //2.根据uid查询文章
     List<Articleinfo> list=  articleMapper.getByarticle(uid);
     //组装数据
     userinfo.setArticle(list);
        System.out.println(userinfo);

    }
}

采用多线程的方式
 @Test
    void getUserList(){
        int uid=1;
        //定义线程池
        ThreadPoolExecutor threadPoolExecutor=new ThreadPoolExecutor(5,10,3000, TimeUnit.SECONDS,
                new LinkedBlockingDeque<>(100));
       final Object[] result=new Object[2];
        //1.先根据uid查询用户表
        threadPoolExecutor.submit(new Runnable() {
            @Override
            public void run() {
           result[0] =    userMapper.getByid(uid);
            }
        });
        //2.根据uid查询文章
        threadPoolExecutor.submit(new Runnable() {
            @Override
            public void run() {
           result[1]    = articleMapper.getByarticle(uid);
            }
        });
            //组装数据(等线程池执行结束以后)
        while (threadPoolExecutor.getTaskCount() !=
                threadPoolExecutor.getCompletedTaskCount()
        ) {

        }
        Userinfo userinfo=(Userinfo) result[0];
        userinfo.setArticle((List<Articleinfo>)result[1]);
        System.out.println(userinfo);

    }
🧊1.8动态sql
动态sql是MyBatis的强大特性之一
在填写某一个页面的时候,有些页面不需要填写,不插入这个字段
动态sql主要是在xml里面动态的进行判断
我们拿userinfo表中的photo来进行举例
看到photo默认是空


现在的问题是当不设定时photo啥也没有,符合预期,当设定photo的时候,就出现了值,我们想要的效果是当该字段默认为空,不可进行显示设置,所以我们需要使用标签
🐷2.动态标签
🧊2.1 标签
 <insert id="add3">
            insert into userinfo(username,password
            <if test="photo!=null">
                ,photo
            </if>
            )values(#{username},#{password}
            <if test="photo!=null">
                ,#{photo}
            </if>
            )
        </insert>
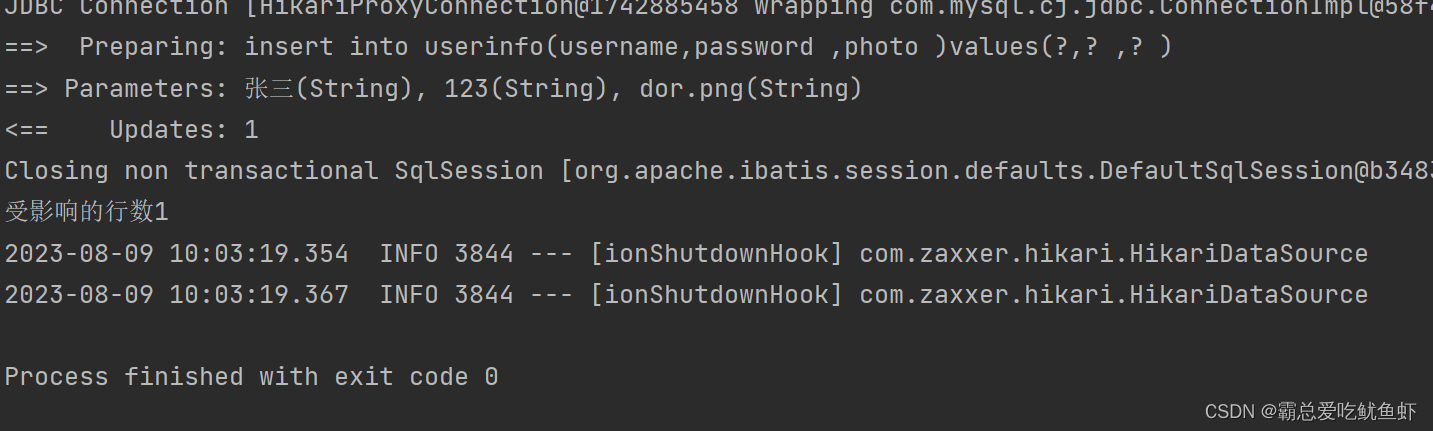
单元测试来一波~~~
 @Test
    void add3() {
        Userinfo userinfo=new Userinfo();
        userinfo.setUsername("张三");
        userinfo.setPassword("123");
        userinfo.setPhoto("dor.png");
        int result=userMapper.add3(userinfo);
        System.out.println("受影响的行数"+result);


    }
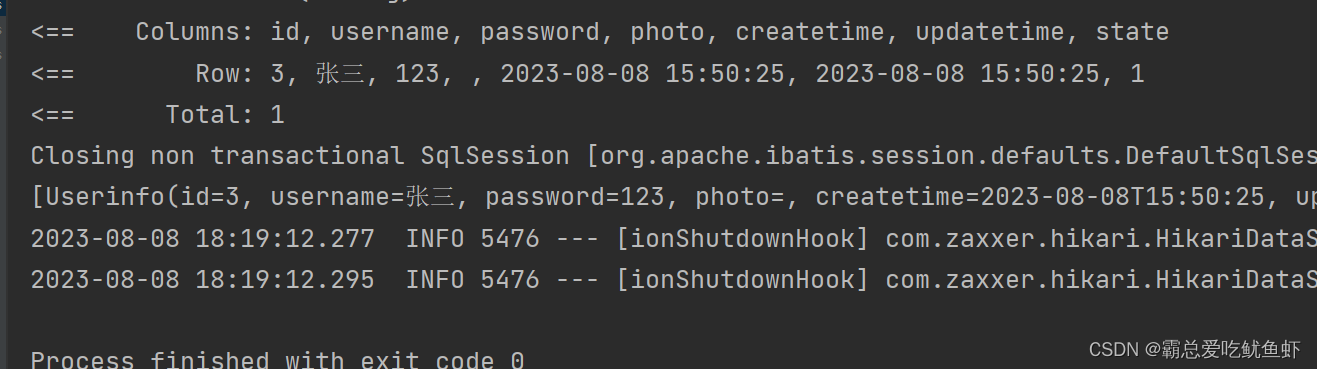
现在将photo的设定取消
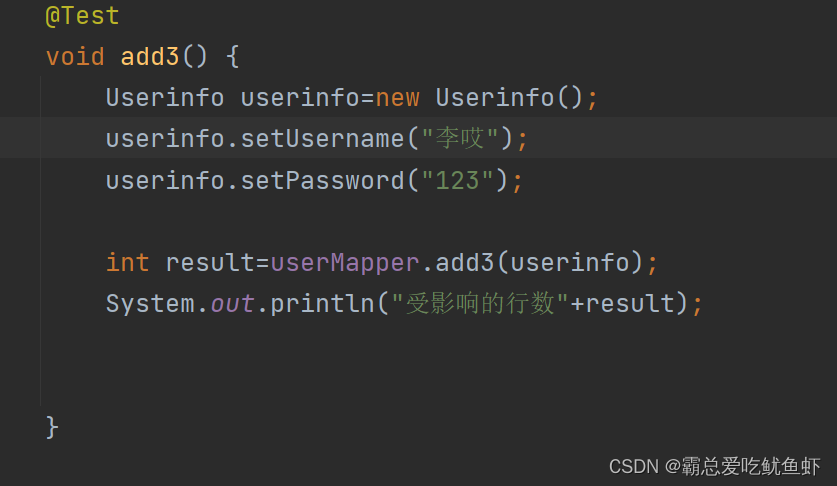

可以看到没有photo再出现
🧊2.2标签
标签针对单个字段是选填项的时候比较方便,当所有字段都是选填项时,我们可以使用标签
标签中有如下属性:
prefix:表示整个语句块,以prefix的值作为前缀
suffix:表示整个语句块,以suffix的值作为后缀
prefixOverrides:表示整个语句块要去除掉的前缀
suffixOverrides:表示整个语句块要去除掉的后缀
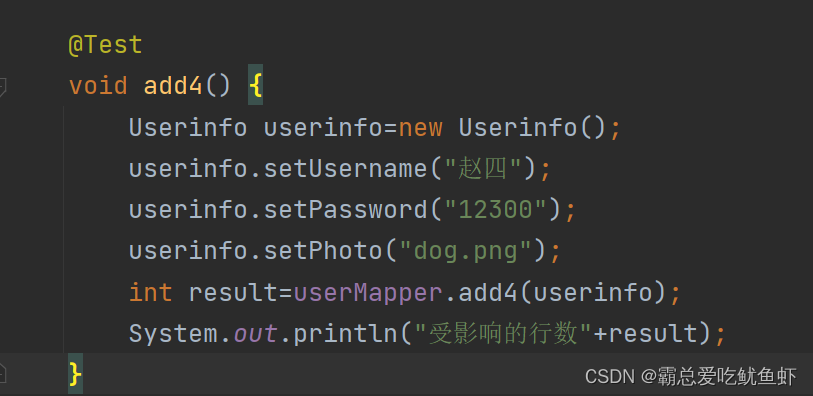
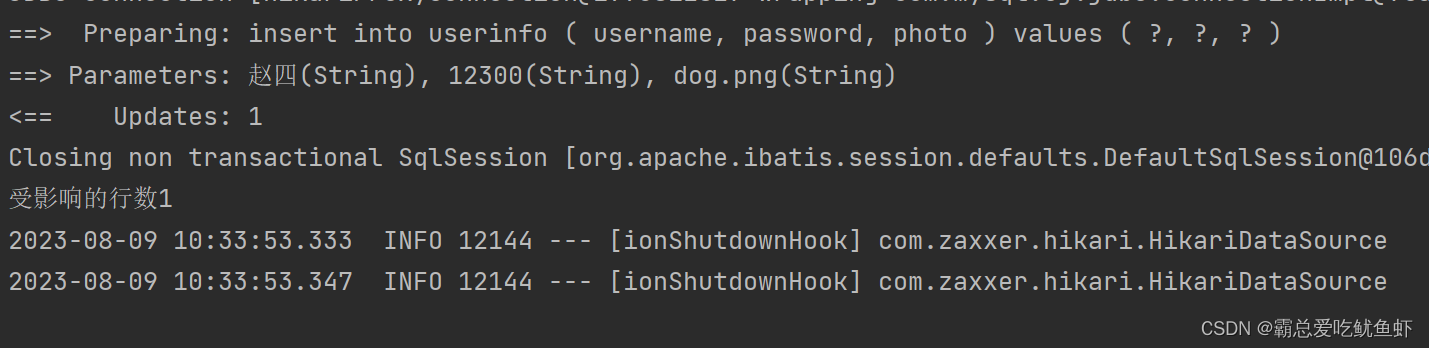
<insert id="add4">
        insert into userinfo
        <trim  prefix="(" suffix=")" suffixOverrides=",">
        <if test="username!=null">
            username,
        </if>
            <if test="password!=null">
                password,
            </if>
            <if test="photo!=null">
                photo
            </if>
        </trim>
        values
        <trim prefix="(" suffix=")" suffixOverrides="," >
        <if test="username!=null">
            #{username},
        </if>
            <if test="password!=null">
                #{password},

            </if>
            <if test="photo!=null">
                #{photo}

            </if>
        </trim>
    </insert>
🧊2.3标签
该标签也是和标签一起使用的.但是仅仅使用在where查询当中
<select id="getBywhere" resultType="com.example.demo.model.Userinfo">
            select * from userinfo
        <where>
            <if test="id>0">
                id=#{id}
            </if>
            <if test="username!=null">
               and username=#{username}
            </if>
            <if test="photo!=null">
                and password=#{password}
            </if>
        </where>
    </select>
这个and为什么要加在属性的前面
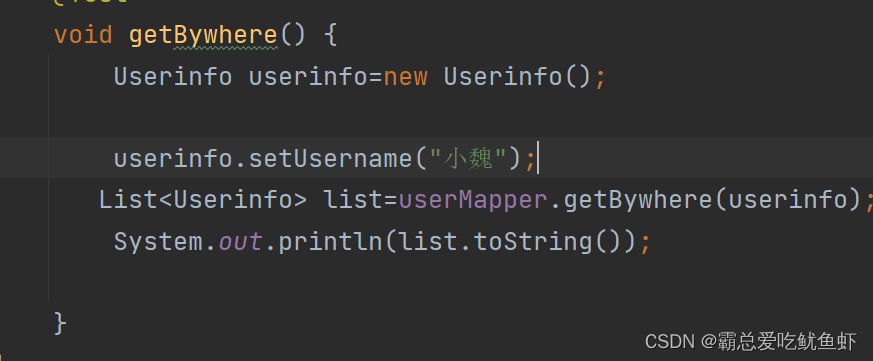
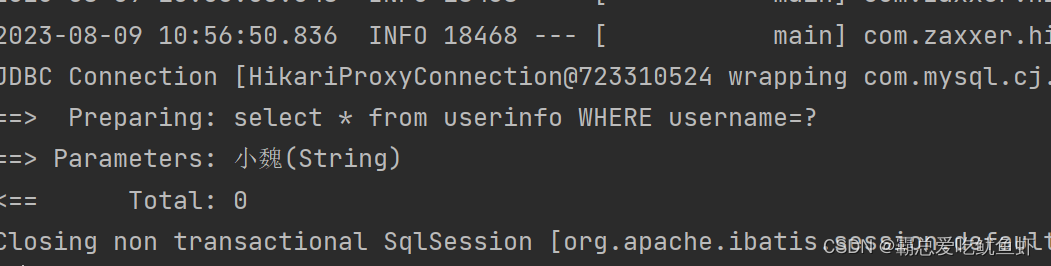
可以看到没有sql语句,没有多余的and
这也恰恰体现了标签的特性
1.根据标签里面的内容决定是否生成关键字
2.去除最前面的and
那么where的功能用trim可以实现吗?
当然啦
 <select id="getBywhere" resultType="com.example.demo.model.Userinfo">
            select * from userinfo
        <trim prefix="where" prefixOverrides="and">
            <if test="id>0">
                id=#{id}
            </if>
            <if test="username!=null">
                and username=#{username}
            </if>
            <if test="photo!=null">
                and password=#{password}
            </if>
        </trim>
         </select>
🧊2.4标签
用来修改数据,有值生成set,去掉的是最后面的符号
<update id="update2">
        update userinfo
        <set>
            <if test="username!=null">
                username=#{username},
            </if>
            <if test="password!=null">
                password=#{password}

            </if>
            <if test="photo!=null">
                photo=#{photo}

            </if>

        </set>
        where id=#{id}
    </update>

🧊2.5标签
<foreach> 标签常用于遍历集合或数组类型的数据。其属性如下:
collection: 指定要遍历的集合或数组类型的数据item: 指定遍历的集合中的元素别名,可以在标签中使用该别名访问元素index: 指定遍历的集合中的元素索引别名,可以在标签中使用该别名访问元素索引open: 指定遍历的开始标记close: 指定遍历的结束标记separator: 指定遍历元素之间的分隔符javaType: 指定集合或数组所对应的 Java 类型,如果未指定,则 MyBatis 会自动选择最匹配的类型。
适用情况:适用于多条sql删除的时候

<delete id="deleteById2">
        delete from userinfo
        where id in
        <foreach collection="ids" open="(" close=")" item="id" separator=",">
                #{id}
        </foreach>
    </delete>
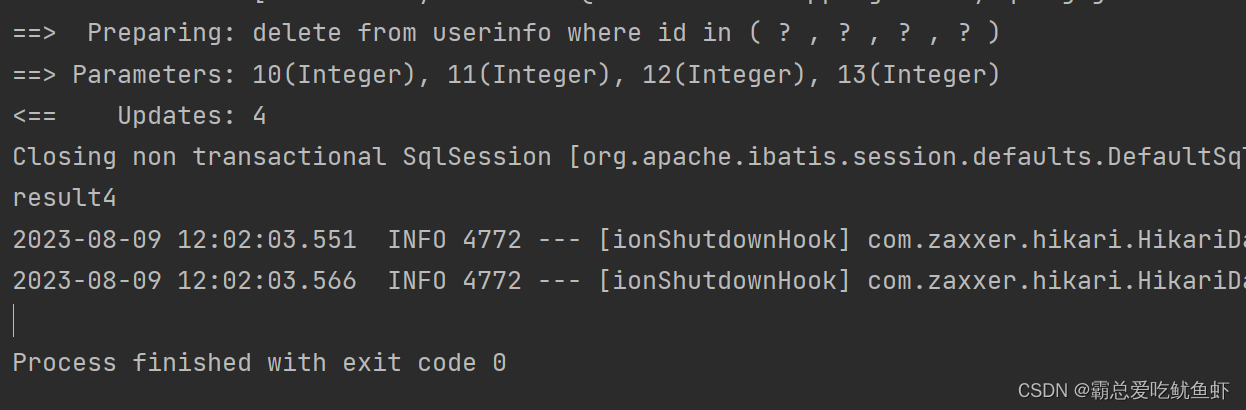
 @Test
    void deleteById2() {
        List<Integer> list =
                new ArrayList<Integer>() {{
                add(10);
                add(11);
                add(12);
                add(13);
                }};
        int result=userMapper.deleteById2(list);
        System.out.println("result"+result);

    }
这期的内容就到这,我们下期再见咯~~


 530
530


 被折叠的 条评论
为什么被折叠?
被折叠的 条评论
为什么被折叠?
 到【灌水乐园】发言


