


1、了解docker-compose工具(轻量级容器编排)
docker-compose 是一个命令行工具,用于管理和操作 Docker 容器化应用程序。它使用一个 YAML 文件(通常命名为 docker-compose.yml)来定义和配置多个服务、网络、卷等组件,从而实现容器编排和部署。
[root@docker ~]#cd /usr/local/harbor
以下是一些常用的 docker-compose 命令:
docker-compose up                      #构建并启动在 docker-compose.yml 中定义的所有服务。
docker-compose down                    #停止并删除在 docker-compose.yml 中定义的所有服务以及相关的网络、卷等资源。
docker-compose start                   #启动在 docker-compose.yml 中定义的所有服务。
docker-compose stop                    #停止在 docker-compose.yml 中定义的所有服务。
docker-compose restart                 #重启在 docker-compose.yml 中定义的所有服务。
2、下载安装docker-compose
注意:使用yum安装版本较低,建议先下载较新版docker-compose,此处使用版本为 v2.23.2
[root@docker ~]# ls
docker-compose-linux-x86_64
[root@docker ~]# mv docker-compose-linux-x86_64  /usr/local/bin/docker-compose
[root@docker bin]# chmod +x docker-compose
[root@docker local]# docker-compose version
Docker Compose version v2.23.2
3、下载安装harbor(先行下载harbor包)
https://github.com/goharbor/harbor/releases
解压到指定路径
[root@docker ~]# tar -xf harbor-offline-installer-v2.9.1.tgz -C /usr/local
--->最新版
[root@docker ~]# cd /usr/local/harbor/
[root@docker harbor]# cp harbor.yml.tmpl harbor.yml
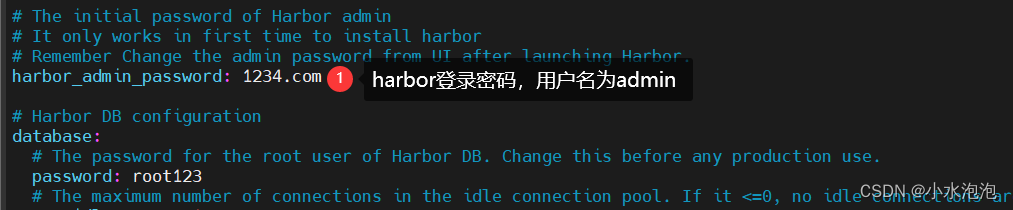
[root@docker harbor]# vim harbor.yml
修改配置文件如下图所示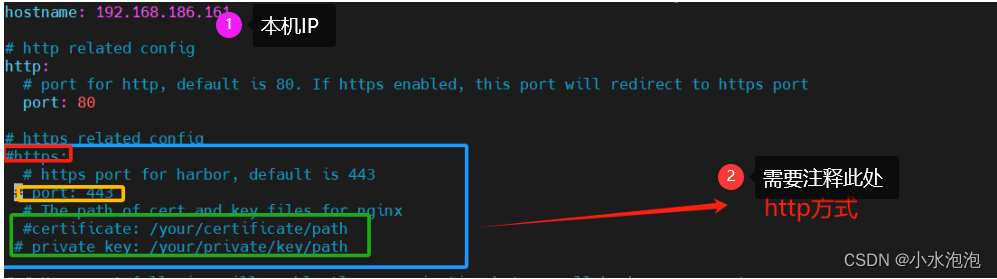
4 、执行安装脚本
[root@docker01 ~]# cd /usr/local/harbor
[root@docker01 harbor]# ./install.sh


!!!若出现如下错误:
[Step 5]: starting Harbor ...
WARN[0000] a network with name harbor_harbor exists but was not created by compose.
Set `external: true` to use an existing network
network harbor_harbor was found but has incorrect label com.docker.compose.network set to ""

[root@docker01 harbor]# docker network ls
NETWORK ID     NAME            DRIVER    SCOPE
db5261e437b4   bridge          bridge    local
14509fd9f32d   harbor_harbor   bridge    local


[root@docker01 harbor]#docker network  rm  harbor_harbor  #删除该网络
重启:
[root@docker01 harbor]# ./install.sh
[root@docker ~]# docker ps
CONTAINER ID IMAGE COMMAND CREATED STATUS PORTS NAMES
55d52cb782cc goharbor/harbor-jobservice:v2.9.1 "/harbor/entrypoint.…" 4 hours ago Up 4 hours (healthy) harbor-jobservice
efd12f961d67 goharbor/nginx-photon:v2.9.1 "nginx -g 'daemon of…" 4 hours ago Up 4 hours (healthy) 0.0.0.0:80->8080/tcp, :::80->8080/tcp
0bd58445ccdb goharbor/harbor-core:v2.9.1 "/harbor/entrypoint.…" 4 hours ago Up 4 hours (healthy) harbor-core
b42071158581 goharbor/harbor-db:v2.9.1 "/docker-entrypoint.…" 4 hours ago Up 4 hours (healthy) harbor-db
0073737d7172 goharbor/harbor-registryctl:v2.9.1 "/home/harbor/start.…" 4 hours ago Up 4 hours (healthy) registryctl
ecc879d76817 goharbor/registry-photon:v2.9.1 "/home/harbor/entryp…" 4 hours ago Up 4 hours (healthy) registry
d8ae879c49c7 goharbor/redis-photon:v2.9.1 "redis-server /etc/r…" 4 hours ago Up 4 hours (healthy) redis
44051e9c46ee goharbor/harbor-portal:v2.9.1 "nginx -g 'daemon of…" 4 hours ago Up 4 hours (healthy) harbor-portal
71c28c88c35a goharbor/harbor-log:v2.9.1 "/bin/sh -c /usr/loc…" 4 hours ago Up 4 hours (healthy) 127.0.0.1:1514->10514/tcp harbor-log
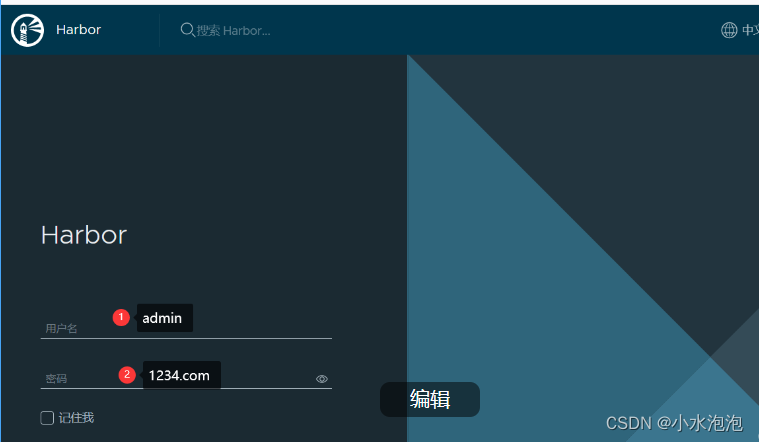
5、浏览器访问
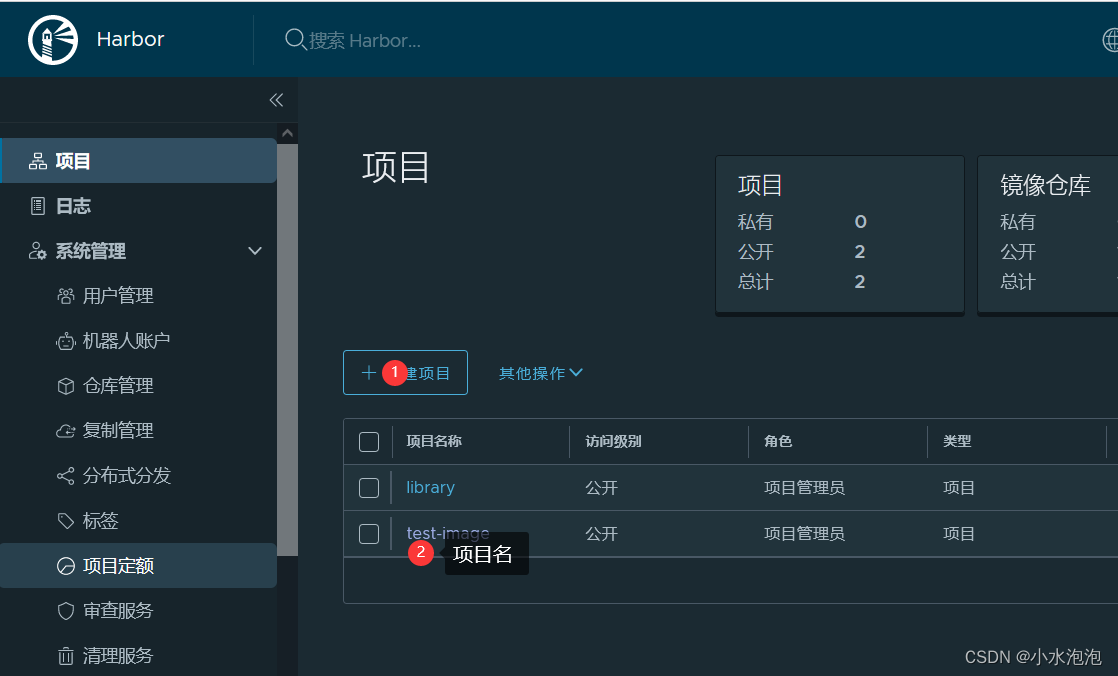
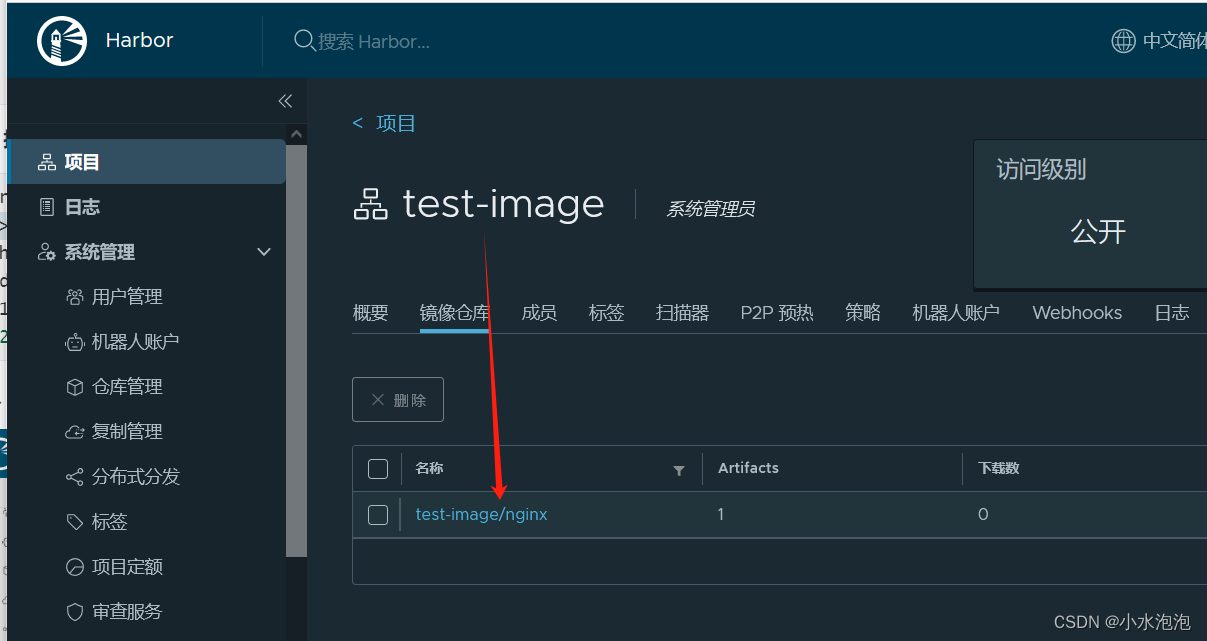
6、添加一个项目进行镜像push、pull测试
7、准备推送环境
[root@docker01 ~]# docker tag  nginx:latest 192.168.186.161/test-image/nginx:v1
--->不标记成IP/项目名/镜像名:版本,否则无法推送到指定的仓库

#nginx:latest 本地镜像
#192.168.186.161  ip
#test-image       Harbor镜像仓库项目
#nginx:v1       创建的镜像和版本
------------------------------------------>注意两镜像id一致
-----------------------------------------------------------------------------------------
[root@docker01 ~]# docker images
REPOSITORY                      TAG       IMAGE ID       CREATED         SIZE
192.168.186.161/test-image/nginx   v1        605c77e624dd   23 months ago   141MB
nginx                              latest    605c77e624dd   23 months ago   141MB

------------------------------------------------------------------------------------------
[root@docker01 ~]# vim /etc/docker/daemon.json
{
  "registry-mirrors": ["https://mb8n4btz.mirror.aliyuncs.com"],
  "insecure-registries": ["http://192.168.186.161"]
}
-----------------------------------------------------------------------------------------
[root@docker01 ~]# docker login 192.168.186.161   #登录仓库
Username: admin
Password:
WARNING! Your password will be stored unencrypted in /root/.docker/config.json.
Configure a credential helper to remove this warning. See
https://docs.docker.com/engine/reference/commandline/login/#credentials-store

Login Succeeded
-----------------------------------------------------------------------------------------
!!!该命令会自动生成一个认证文件:/root/.docker/config.json
若输入用户名密码失败,需将该文件内容清除,再重新登录(仅需要第一次认证)

[root@docker01 .docker]# cat config.json
{
        "auths": {
                "192.168.186.161": {
                        "auth": "YWRtaW46MTIzNC5jb20="
                }
        }
}
8、推送镜像到指定项目
[root@docker harbor]# docker push 192.168.186.161/test-image/nginx:v1  #上传到指定的仓库项目-->test-image
The push refers to repository [192.168.186.161/test-image/nginx]
d874fd2bc83b: Pushed
32ce5f6a5106: Pushed
f1db227348d0: Pushed
b8d6e692a25e: Pushed
e379e8aedd4d: Pushed
2edcec3590a4: Pushed
v1: digest: sha256:ee89b00528ff4f02f2405e4ee221743ebc3f8e8dd0bfd5c4c20a2fa2aaa7ede3 size: 1570
9、拉取该镜像
[root@docker02 ~]# hostname -I
192.168.186.199
[root@docker02 ~]# vim /etc/docker/daemon.json
{
  "insecure-registries": ["http://192.168.186.161"]
  #拉取该镜像时仅配置该项---->之后(① docker  login  192.168.186.161   ② docker   pull 拉取)
}
[root@docker02 ~]# docker login 192.168.186.161
[root@docker02 ~]#docker pull  nginx:v1
------------------------------------------------>即可拉取指定镜像到本地!


 3679
3679


 被折叠的 条评论
为什么被折叠?
被折叠的 条评论
为什么被折叠?
 到【灌水乐园】发言


