


目录
0.前言
作为一个刚刚接触Linux的小白,我手中恰好有一块Firefly RK3399开发板。之前,我都是直接使用官方提供的镜像进行烧录,但现在我希望能够通过移植uboot,甚至未来可能还会涉及内核和根文件系统的移植,来更深入地了解嵌入式系统的制作流程。
在移植的过程中,我主要参考了 @大奥特曼打小怪兽 @Amonter @嵌入式Linux,等博主所撰写的精彩帖子。对于RK3399芯片的相关原理,我也会在这些博主的文章中深入学习。他们的文章不仅内容丰富,而且具有很高的参考价值。
在此,我主要是想记录下自己的学习过程,以便日后回顾,同时也希望这些记录能对其他学习者提供一定的参考和帮助。
1.交叉工具链安装
可以根据芯片架构从Arm GNU Toolchain Downloads – Arm Developer官网下载交叉编译工具链,这里用的是:

下载后解压到/usr/local/arm目录下,修改/etc/profile文件,将工具链添加到环境变量:
sudo vim /etc/profile

export PATH=/usr/local/arm/arm-gnu-toolchain-13.2.Rel1-x86_64-aarch64-none-linux-gnu/bin:$PATH

#保存后重新加载环境变量

source /etc/profile
查看是否安装成功:
aarch64-none-linux-gnu-gcc -v2.配置u-boot
下载:
wget https://ftp.denx.de/pub/u-boot/u-boot-2023.07.tar.bz2
tar -jxf u-boot-2023.07.tar.bz2
配置:
sudo make firefly-rk3399_defconfig V=1
sudo make menuconfig
修改串口波特率:
Device Drivers  --->
      Serial --->
           (115200) Default baudrate
修改emmc:
将CONFIG_MMC_HS400_SUPPORT,CONFIG_MMC_SDHCI_SDMA配置关掉,这两个选项和emmc的读写方式有关,现在打开会造成无法读取emmc的问题,后续移植相关的驱动后再尝试适配。
Device Drivers  --->
      MMC Host controller Support  --->
            [ ] MMC debugging
            [ ] enable HS400 support
            [ ] Support IO voltage configuration
            [ ] Support SDHCI SDMA
配置FIT:
下载rockchip瑞芯微官方的u-boot,将官方源码中生成fit文件的脚本拷贝过来:
git clone https://github.com/rockchip-linux/u-boot.git
cp rockchip-linux/u-boot/arch/arm/mach-rockchip/make_fit_atf.py u-boot-2023.07/arch/arm/mach-rockchip/
然后在menuconfig中添加脚本路径:
Boot options  --->
     Boot images  --->
         [*] Use a script to generate the .its script
        (arch/arm/mach-rockchip/make_fit_atf.py) .its file generator script for U-Boot FIT image
配置boot delay:(可选)
Boot options  --->
     Autoboot options --->
         (5) delay in seconds before automatically booting
设置完成后将此配置保存为my-rk3399_defconfig,后续的移植就在此配置基础上进行修改。
3.获取bl31.elf
rk3399是Armv8-A架构,也需要arm可信固件(arm-trusted-firmware)的验证方式。所以需要先编译TF-A获取bl31.elf,用于之后与u-boot合并。
下载arm-trusted-fireware源码,进入该目录后使用命令进行编译。
sudo git clone https://github.com/ARM-software/arm-trusted-firmware.git --depth 1
cd arm-trusted-firmware
make CROSS_COMPILE=aarch64-none-linux-gnu- PLAT=rk3399编译后报出一个缺少arm-none-eabi-gcc工具链的错误。
sudo apt-get install gcc-arm-none-eabi
make CROSS_COMPILE=aarch64-none-linux-gnu- PLAT=rk3399
发现错误,我解决不了,有方法解决的欢迎在评论区留言。
当然RK官方也提供了bl31.elf文件,这样就不用自己编译bl31.elf了,可以在Rockchip官方github下载。
sudo git clone https://github.com/rockchip-linux/rkbin.gitbl31.elf拷贝到u-boot的根目录下,并重命名。
#<path>自己的目录
cp <path>/rkbin/bin/rk33/rk3399_bl31_v1.36.elf u-boot-2023.07/
cp rk3399_bl31_v1.36.elf atf-bl31
4.编译u-boot
在u-boot的根目录下编译。
make ARCH=arm CROSS_COMPILE=aarch64-none-linux-gnu-问题1:
make[2]: *** [scripts/kconfig/Makefile:75:syncconfig] 错误 1
make[1]: *** [Makefile:576:syncconfig] 错误 2
make: *** 没有规则可制作目标“include/config/auto.conf”,由“include/config/uboot.release” 需求。 停止。
sudo chmod 777 -R u-boot-2023.07
make ARCH=arm CROSS_COMPILE=aarch64-none-linux-gnu-
问题2:
Traceback (most recent call last):
File "scripts/dtc/pylibfdt/setup.py", line 23, in <module>
from setuptools import setup, Extension
ModuleNotFoundError: No module named 'setuptools'
make[2]: *** [scripts/dtc/pylibfdt/Makefile:33:rebuild] 错误 1
make[1]: *** [scripts/Makefile.build:397:scripts/dtc/pylibfdt] 错误 2
make: *** [Makefile:2009:scripts_dtc] 错误 2
sudo apt-get install python3-setuptools
make ARCH=arm CROSS_COMPILE=aarch64-none-linux-gnu-
问题3:
/usr/lib/python3/dist-packages/setuptools/dist.py:473: UserWarning: Normalizing '2023.07' to '2023.7'
warnings.warn(
unable to execute 'swig': No such file or directory
error: command 'swig' failed with exit status 1
make[2]: *** [scripts/dtc/pylibfdt/Makefile:33:rebuild] 错误 1
make[1]: *** [scripts/Makefile.build:397:scripts/dtc/pylibfdt] 错误 2
make: *** [Makefile:2009:scripts_dtc] 错误 2
sudo apt install swig
make ARCH=arm CROSS_COMPILE=aarch64-none-linux-gnu-
问题4:
/usr/lib/python3/dist-packages/setuptools/dist.py:473: UserWarning: Normalizing '2023.07' to '2023.7'
warnings.warn(
scripts/dtc/pylibfdt/libfdt_wrap.c:157:11: fatal error: Python.h: 没有那个文件或目录
157 | # include <Python.h>
| ^~~~~~~~~~
compilation terminated.
error: command 'cc' failed with exit status 1
make[2]: *** [scripts/dtc/pylibfdt/Makefile:33:rebuild] 错误 1
make[1]: *** [scripts/Makefile.build:397:scripts/dtc/pylibfdt] 错误 2
make: *** [Makefile:2009:scripts_dtc] 错误 2
sudo apt-get update
sudo apt install python3.8-dev
make ARCH=arm CROSS_COMPILE=aarch64-none-linux-gnu-
问题5:
Wrote map file './simple-bin.map' to show errors
binman: Node '/binman/simple-bin/fit': subnode 'images/@atf-SEQ': Failed to read ELF file: Python: No module named 'elftools'
make: *** [Makefile:1111:.binman_stamp] 错误 1
sudo apt install python3-pip
pip install pyelftools
make ARCH=arm CROSS_COMPILE=aarch64-none-linux-gnu-
成功编译
5.生成idbloader.img文件
基于uboot源码编译出TPL/SPL,其中TPL负责实现DDR初始化,TPL初始化结束之后会回跳到BootROM程序,BootROM程序继续加载SPL,SPL加载u-boot.itb文件,然后跳转到uboor执行。
idbloader.img是由tpl/u-boot-tpl.bin和spl/u-boot-spl.bin文件生成,需要使用到tools目录下的mkimage工具。
tools/mkimage -n rk3399 -T rksd -d tpl/u-boot-tpl.bin idbloader.img-n rk3399将镜像文件的名称设置为"rk3399";
-T rksd将映像类型指定为Rockchip SD卡启动映像;
-d tpl/u-boot-tpl.bin将生成的TPL镜像文件"tpl/u-boot-tpl.bin"指定为输入文件,而idbloader.img则指定为输出文件。
将spl/u-boot-spl.bin合并到idbloader.img:
cat spl/u-boot-spl.bin >> idbloader.img6.生成u-boot.its文件
make u-boot.itb ARCH=arm CROSS_COMPILE=aarch64-none-linux-gnu-这个命令编译时会报错,是因为脚本可以一次编译出多个文件,而填入的参数只有its相关的。编译完成后,在当前目录下存在u-boot.its和u-boot.itb文件即可。
7.烧录
我手中这块开发板基于emmc启动,按照RK官方要求将idbloader.img烧录到emmc的0x40扇区,u-boot.itb烧录到0x4000扇区。
烧录方法有两种,一种是基于RK的官方烧录工具AndroidTool.exe,另外一种是在开发板上直接烧写emmc。
官方AndroidTool.exe是基于recovery模式实现的,板子带有recovery按键,可以使用这种方式。
我用基于AndroidTool.exe烧录:
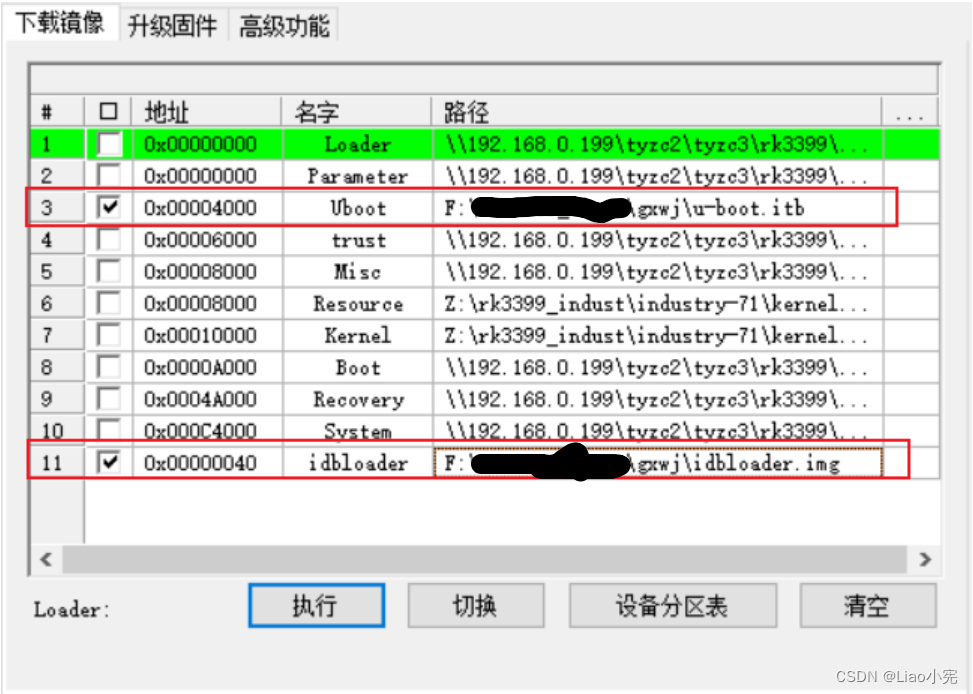
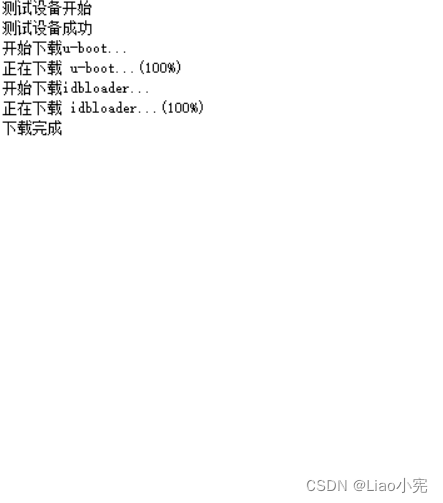
按住recovery按键上电,板子会进入recovery模式,点击执行,开始烧录。
参考文章
Rockchip RK3399 - TPL/SPL方式加载uboot - 大奥特曼打小怪兽 - 博客园 (cnblogs.com)


 5580
5580

 被折叠的 条评论
为什么被折叠?
被折叠的 条评论
为什么被折叠?
 到【灌水乐园】发言


