


一、bert
bert模型的下载:去抱抱脸网站bert-base-cased at main下载预训练模型,下载对应的这三个文件,这里下载的是pytorch版本
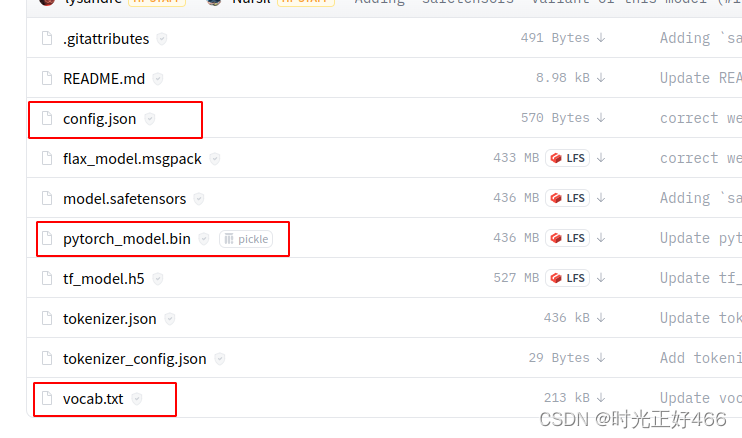
下载后放入对应文件夹,是这样的:

验证bert能不能调用成功:
from transformers import BertModel,BertTokenizer
BERT_PATH = './bert-base-cased'
tokenizer = BertTokenizer.from_pretrained(BERT_PATH)
print(tokenizer.tokenize('I have a good time, thank you.'))
bert = BertModel.from_pretrained(BERT_PATH)
print('load bert model over')

['I', 'have', 'a', 'good', 'time',
',', 'thank', 'you', '.']
load bert model over
BertTokenizer解析:BertTokenizer将数据处理成bert需要的格式
from transformers import BertTokenizer
tokenizer = BertTokenizer.from_pretrained('bert-base-cased')
example_text = 'I will watch Memento tonight'
bert_input = tokenizer(example_text,padding='max_length',
                       max_length = 10,
                       truncation=True,
                       return_tensors="pt")
# ------- bert_input ------
print(bert_input['input_ids'])
print(bert_input['token_type_ids'])
print(bert_input['attention_mask'])

tensor([[  101,   146,  1209,  2824,  2508,
         26173,  3568,   102,     0,     0]])
tensor([[0, 0, 0, 0, 0, 0, 0, 0, 0, 0]])
tensor([[1, 1, 1, 1, 1, 1, 1, 1, 0, 0]])
BertTokenizer参数:
padding:将每个sequence填充到指定的最大长度。max_length: 每个sequence的最大长度。本示例中我们使用 10,但对于本文实际数据集,我们将使用 512,这是 BERT 允许的sequence 的最大长度。truncation:如果为True,则每个序列中超过最大长度的标记将被截断。return_tensors:将返回的张量类型。由于我们使用的是 Pytorch,所以我们使用pt;如果你使用 Tensorflow,那么你需要使用tf
BertTokenizer输出:bert_input
input_ids,它是每个 token 的 id 表示,101代表[CLS],102代表[SEP],0代表[PAD]token_type_ids,它是一个 binary mask,用于标识 token 属于哪个 sequence。如果我们只有一个 sequence,那么所有的 token 类型 id 都将为 0。对于文本分类任务,token_type_ids是 BERT 模型的可选输入参数。attention_mask,它是一个 binary mask,用于标识 token 是真实 word 还是只是由填充得到。如果 token 包含 [CLS]、[SEP] 或任何真实单词,则 mask 将为 1。如果 token 只是 [PAD] 填充,则 mask 将为 0
二、定义模型
bert的输出送入一层全连接层,再通过一层relu层
from torch import nn
from transformers import BertModel
import torch

class BertClassifier(nn.Module):
    def __init__(self, dropout=0.5):
        super(BertClassifier, self).__init__()
        #self.bert = BertModel.from_pretrained('bert-base-cased')
        self.bert = BertModel.from_pretrained('/home/jiqiboyi03/chenpp/bert-classification/bert-base-cased')
        self.dropout = nn.Dropout(dropout)
        self.linear = nn.Linear(768, 7)
        self.relu = nn.ReLU()

    def forward(self, input_id, mask):
        _, pooled_output = self.bert(input_ids= input_id, attention_mask=mask,return_dict=False)
       # print(pooled_output.size())#[batch_size,768] CLS的向量
        dropout_output = self.dropout(pooled_output)
        linear_output = self.linear(dropout_output)
        final_layer = self.relu(linear_output)
        return final_layer
输入input_ids和mask的格式应该是:以batch_size=2为例,input_ids应该是二维的,mask二维三维都可以
input_id=torch.tensor([[ 101,   178,   112,   173,  1176,   170,   189,  3624,  3043,  1121,
          17496,  1396, 11305,  1106,  1207, 26063,  4661,  1664, 26645,   102],

        [  101,  1110,  1175,   170, 20811,  3043,  1121, 10552,  4121,  1106,
          21718,  1179,   175,  4047, 21349,  2528,   102,     0,     0,     0]])
mask=torch.tensor([[[1, 1, 1, 1, 1, 1, 1, 1, 1, 1, 1, 1, 1, 1, 1, 1, 1, 1, 1, 1]],

        [[1, 1, 1, 1, 1, 1, 1, 1, 1, 1, 1, 1, 1, 1, 1, 1, 1, 0, 0, 0]]])
三、数据预处理
import torch
import numpy as np
from transformers import BertTokenizer
import torch.utils.data as data

bert_path='/home/jiqiboyi03/chenpp/bert-classification/bert-base-cased'
tokenizer = BertTokenizer.from_pretrained(bert_path)
labels={'AddToPlaylist':0,'BookRestaurant':1,'GetWeather':2,'PlayMusic':3,'RateBook':4,'SearchCreativeWork':5,'SearchScreeningEvent':6}

class Dataset(data.Dataset):
    def __init__(self, df):
        self.labels = [labels[label] for label in df['category']]
        self.texts = [tokenizer(text,
                                padding='max_length',
                                max_length = 20,
                                truncation=True,
                                return_tensors="pt")
                      for text in df['text']]
    def classes(self):
        return self.labels

    def __len__(self):
        return len(self.labels)

    def get_batch_labels(self, idx):
        # Fetch a batch of labels
        return np.array(self.labels[idx])

    def get_batch_texts(self, idx):
        # Fetch a batch of inputs
        return self.texts[idx]

    def __getitem__(self, idx):
        batch_texts = self.get_batch_texts(idx)
        batch_y = self.get_batch_labels(idx)
        return batch_texts, batch_y
其中df的格式应该是:
{'category': ['PlayMusic', .....],
'text': ['open groove shark and play native us',..... }
四、训练
from torch.optim import Adam
from tqdm import tqdm
from snips_process import Dataset
import torch
import torch.utils.data as data
import torch.nn as nn
import matplotlib.pyplot as plt


def train(model, train_data, val_data, learning_rate, epochs):
    # 通过Dataset类获取训练和验证集
    train, val = Dataset(train_data), Dataset(val_data)
    # DataLoader根据batch_size获取数据,训练时选择打乱样本
    train_dataloader = torch.utils.data.DataLoader(train, batch_size=32, shuffle=True)
    val_dataloader = torch.utils.data.DataLoader(val, batch_size=32)
    # 判断是否使用GPU
    use_cuda = torch.cuda.is_available()
    device = torch.device("cuda" if use_cuda else "cpu")
    # 定义损失函数和优化器
    criterion = nn.CrossEntropyLoss()
    optimizer = Adam(model.parameters(), lr=learning_rate)

    train_loss=[]
    train_acc=[]
    val_loss=[]
    val_acc=[]
    EPOCH=[]

    if use_cuda:
        model = model.cuda()
        criterion = criterion.cuda()
    # 开始进入训练循环
    for epoch_num in range(epochs):
        # 定义两个变量,用于存储训练集的准确率和损失
        total_acc_train = 0
        total_loss_train = 0
        # 进度条函数tqdm
        for train_input, train_label in tqdm(train_dataloader):
            train_label = train_label.to(device)#1维
            mask = train_input['attention_mask'].to(device)
            input_id = train_input['input_ids'].squeeze(1).to(device)
            # print("input_id size:",input_id.size())#[32,20]
            # print("mask size:",mask.size())
            # 通过模型得到输出
            output = model(input_id, mask)#[32,21]
            # 计算损失
            batch_loss = criterion(output, train_label)
            total_loss_train += batch_loss.item()
            # 计算精度
            acc = (output.argmax(dim=1) == train_label).sum().item()
            total_acc_train += acc
            # 模型更新
            model.zero_grad()
            batch_loss.backward()
            optimizer.step()
        # ------ 验证模型 -----------
        # 定义两个变量,用于存储验证集的准确率和损失
        total_acc_val = 0
        total_loss_val = 0
        # 不需要计算梯度
        with torch.no_grad():
            # 循环获取数据集,并用训练好的模型进行验证
            for val_input, val_label in val_dataloader:
                # 如果有GPU,则使用GPU,接下来的操作同训练
                val_label = val_label.to(device)
                mask = val_input['attention_mask'].to(device)
                input_id = val_input['input_ids'].squeeze(1).to(device)

                output = model(input_id, mask)

                batch_loss = criterion(output, val_label)
                total_loss_val += batch_loss.item()

                acc = (output.argmax(dim=1) == val_label).sum().item()
                total_acc_val += acc

        train_loss.append(total_loss_train / len(train_data['text']))
        train_acc.append(total_acc_train / len(train_data['text']))
        val_loss.append(total_loss_val / len(val_data['text']))
        val_acc.append(total_acc_val / len(val_data['text']))
        EPOCH.append(epoch_num+1)
        print(
            f'''Epochs: {epoch_num + 1}
              | Train Loss: {total_loss_train / len(train_data['text']): .3f}
              | Train Accuracy: {total_acc_train / len(train_data['text']): .3f}
              | Val Loss: {total_loss_val / len(val_data['text']): .3f}
              | Val Accuracy: {total_acc_val / len(val_data['text']): .3f}''')

    print("saving bert model......")
    torch.save(model.state_dict(),'../bert-base-cased/bert_trained_snips_full.pt')

    #画图
    plt.plot(EPOCH,train_loss,'b',label='train_loss')
    plt.plot(EPOCH, train_acc,'g',label='train_acc')
    plt.plot(EPOCH, val_loss, 'r', label='val_loss')
    plt.plot(EPOCH, val_acc, 'c', label='val_acc')
    plt.show()
注:train_data即数据预处理中的df,经过DataLoader会加一维batch_size,变成3维,但是bert的输入得是2维,因此经过了squeeze(1)操作
五、验证
from snips_process import Dataset,df_test
import torch
from model import BertClassifier
import torch.utils.data as data


def evaluate(model, test_data):
    test = Dataset(test_data)
    length=len(test_data['text'])
    test_dataloader = torch.utils.data.DataLoader(test, batch_size=2)
    use_cuda = torch.cuda.is_available()
    device = torch.device("cuda" if use_cuda else "cpu")
    if use_cuda:
        model = model.cuda()

    total_acc_test = 0
    with torch.no_grad():
        for test_input, test_label in test_dataloader:
            test_label = test_label.to(device)
            mask = test_input['attention_mask'].to(device)
            input_id = test_input['input_ids'].squeeze(1).to(device)
            output = model(input_id, mask)
            acc = (output.argmax(dim=1) == test_label).sum().item()
            total_acc_test += acc
    print(f'Test Accuracy: {total_acc_test / length: .3f}')


 2211
2211


 被折叠的 条评论
为什么被折叠?
被折叠的 条评论
为什么被折叠?
 到【灌水乐园】发言


