


1.公共字段填充
1.实现思路
| 序号 | 字段名 | 含义 | 数据类型 | 操作类型 |
| 1 | create_time | 创建时间 | datetime | insert |
| 2 | create_user | 创建人id | bigint | |
| 3 | update_time | 修改时间 | datetime | insert、update |
| 4 | update_user | 修改人id | bigi |
- 自定义注解 AutoFill,用于标识需要进行公共字段自动填充的方法
- 自定义切面类 AutoFillAspect,统一拦截加入了 AutoFill 注解的方法,通过反射为公共字段赋值
- 在 Mapper 的方法上加入 AutoFill 注解
技术点:枚举、注解、AOP、反射
2.自定义注解 AutoFill
/**
 * 自定义注解 AutoFill,用于标识需要进行公共字段自动填充的方法
 */
//固定写法
@Target(ElementType.METHOD)
@Retention(RetentionPolicy.RUNTIME)
public @interface AutoFill {
    //数据库操作类型 insert update
    OperationType value();
}3.自定义切面 AutoFillAspect
/**
* 自定义切面,实现公共字段自动填充的逻辑
*/
//@Aspect表示是切面;@Component是因为这实际还是一个bean所以要交给容器spring管理;@Slf4j为了方便添加日志
@Aspect
@Component
@Slf4j
public class AutoFillAspect {
/**
* 切入点(对哪些类的哪些方法进行拦截)
*/
@Pointcut("execution(* com.sky.mapper.*.*(..)) && @annotation(com.sky.annotation.AutoFill)")
public void autoFillPointCut(){}
/**
* 前置通知,在通知中进行公共字段的赋值
* @param joinPoint
*/
@Before("autoFillPointCut()")
public void autoFill(JoinPoint joinPoint) throws NoSuchMethodException {
log.info("开始进行公共字段自动填充");
//获取当前被拦截的方法上的数据库操作类型
//Signature是一个接口,实际拦截的是一个方法,所以需要做转型
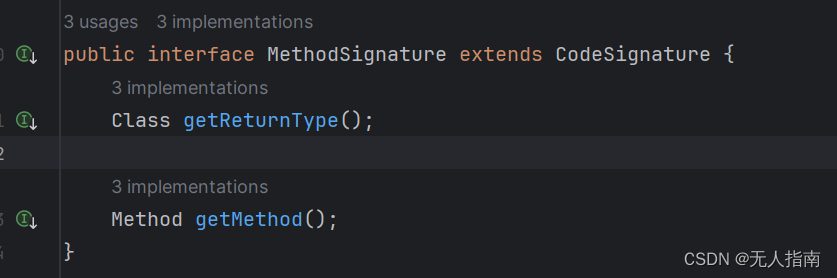
MethodSignature signature = (MethodSignature) joinPoint.getSignature();//方法签名对象
AutoFill autoFill = signature.getMethod().getAnnotation(AutoFill.class);//获得方法上的注解对象
OperationType operationType = autoFill.value();//获得数据库操作类型
//获取当前被拦截方法的参数--实体对象
Object[] args = joinPoint.getArgs();//获取所尤的参数
if(args == null || args.length == 0){
return;
}
Object entity=args[0];//获取到了实体对象
//准备赋值的数据
LocalDateTime now = LocalDateTime.now();
Long currentId = BaseContext.getCurrentId();
//根据当前不同的操作类型,为对应的属性进行反射赋值
if(operationType==OperationType.INSERT){
//为4个公共字段赋值
try {
Method setCreateTime = entity.getClass().getDeclaredMethod(SET_CREATE_TIME, LocalDateTime.class);
Method setCreateUser = entity.getClass().getDeclaredMethod(SET_CREATE_USER, Long.class);
Method setUpdateTime = entity.getClass().getDeclaredMethod(SET_UPDATE_TIME, LocalDateTime.class);
Method setUpdateUser = entity.getClass().getDeclaredMethod(SET_UPDATE_USER, Long.class);
}catch (Exception e){
e.printStackTrace();
}
} else if (operationType==OperationType.UPDATE) {
//为2个公共字段赋值
try {
Method setUpdateTime = entity.getClass().getDeclaredMethod(SET_UPDATE_TIME, LocalDateTime.class);
Method setUpdateUser = entity.getClass().getDeclaredMethod(SET_UPDATE_USER, Long.class);
}catch (Exception e){
e.printStackTrace();
}
}
}
}(//Signature是一个接口,实际拦截的是一个方法,所以需要做转型)这一步就是将Signature的接口强转为MethodSignature,后续就可以调用接口MethodSignature的getMethod方法,获得被拦截的方法。
ctrl+alt+b可以打开如下画面:
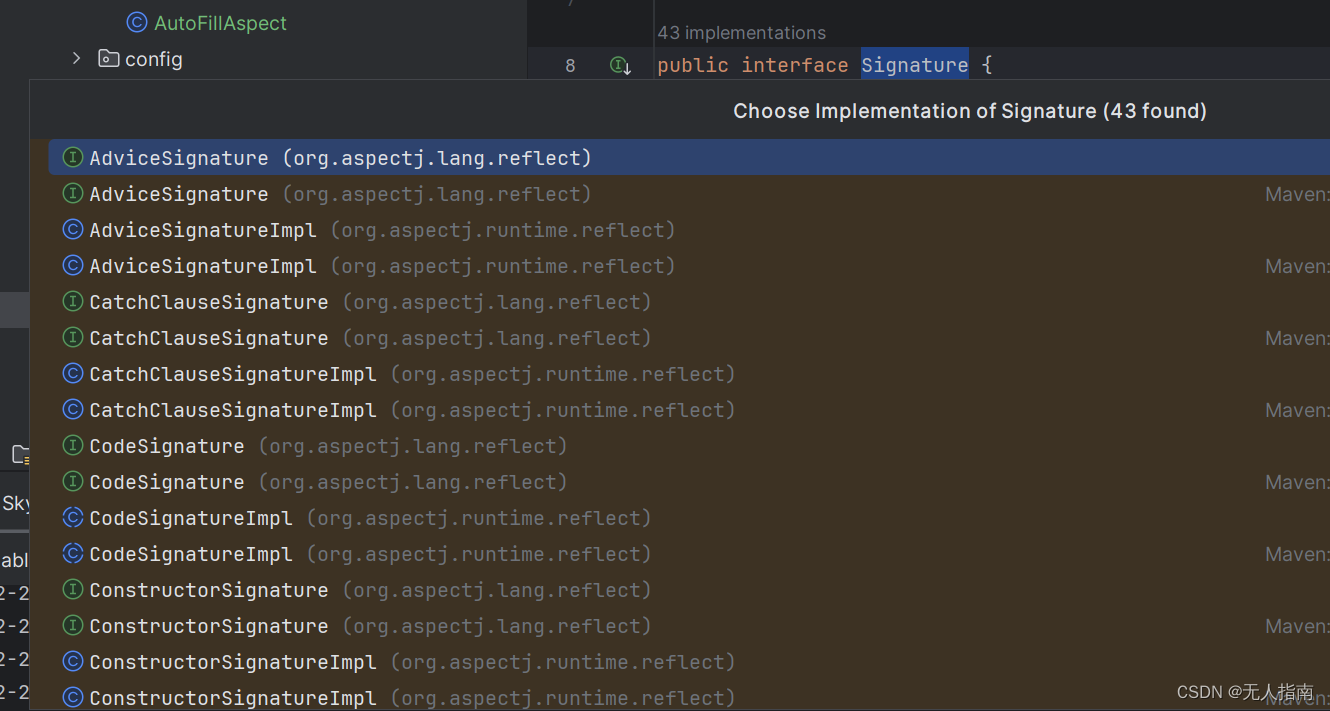
选择MethodSignature得到如下画面:
注意:SET_CREATE_TIME等不用字符串是为了规范化(也不容易出错)
2.新增菜品
1.文件上传
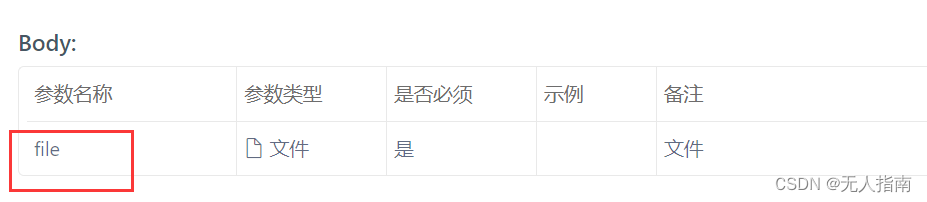
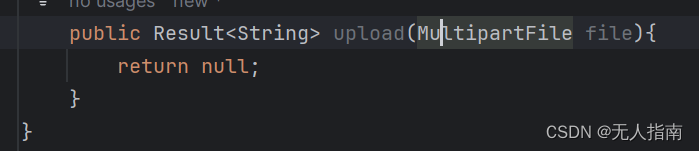
由于前端传过来的是文件类型,所以直接采用springMvc封装的MultipartFile进行接收。
注意:后端接收的参数名必须和前端传过来的参数名file保持一致。
application-dev.yml
注意要缩进正确,我就是一开始缩进不正确,运行出现错误,说循环调用了名字(就是application.yml自己调用了自己)。(对了,这里要用自己的oss,oss的运用可以看java-web148集,不然前端联调后端时,获取不到图片-->当时看评论这么说的,我也没用自己的,就没管了)

application.yml

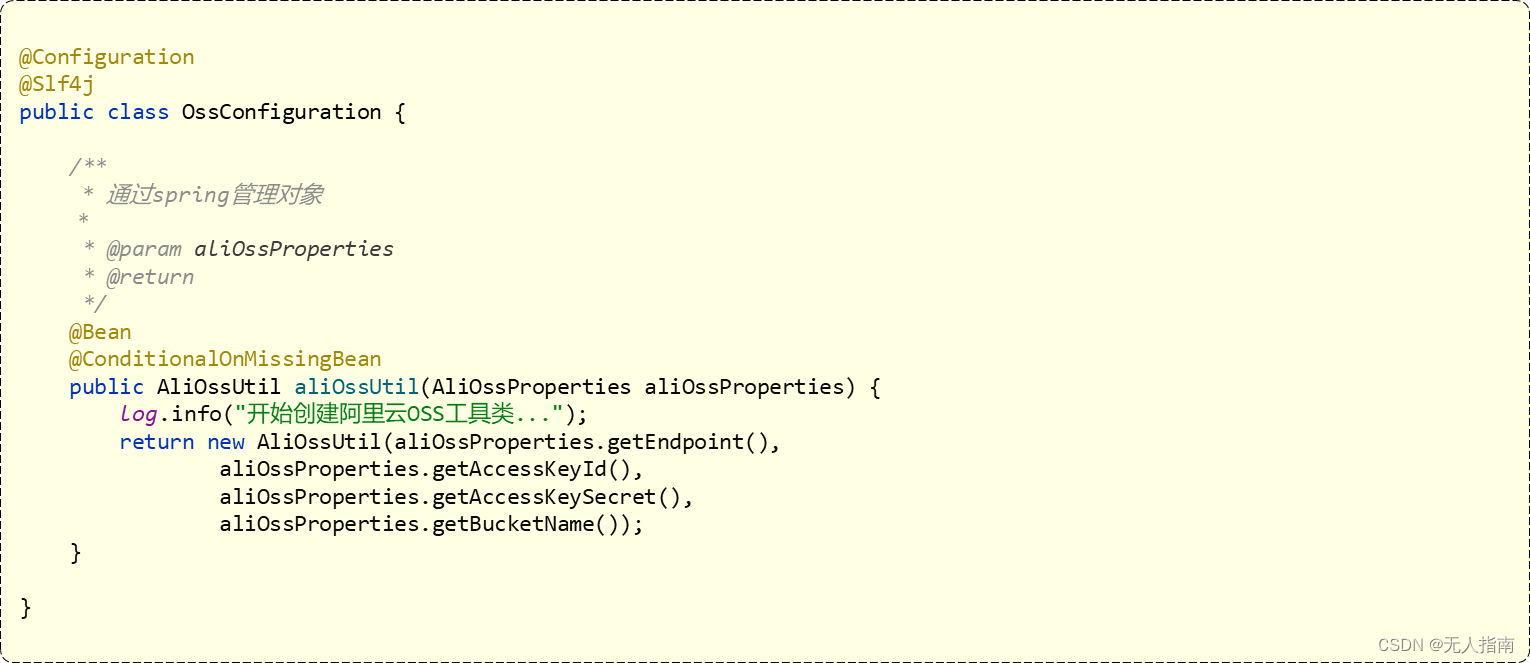
OssConfiguration
CommonController
/**
 * 通用接口
 */
@RestController
@RequestMapping("/admin/common")
@Api(tags = "通用接口")
@Slf4j
public class CommonController {
    @Autowired
    private AliOssUtil aliOssUtil;
    @PostMapping("/upload")
    @ApiOperation("文件上传")
    public Result<String> upload(MultipartFile file){
        log.info("文件上传:{}",file);
        try {
            //原始文件名
            String originalFilename = file.getOriginalFilename();
            //截取原始文件名的后缀 .png
            String extension=originalFilename.substring(originalFilename.lastIndexOf("."));
            //构造新的文件名称(UUID防止文件名重复)
            String objectName=UUID.randomUUID().toString()+extension;
            //文件的请求路径
            String filePath = aliOssUtil.upload(file.getBytes(), objectName);
            return Result.success(filePath);
        } catch (IOException e) {
            log.error("文件上传失败:{}",e);
        }
        return Result.error(MessageConstant.UPLOAD_FAILED);
    }
}
2.新增菜品接口
1.注解解释
@Autowired作用:
@Autowired是Spring框架中的一个注解,用于自动装配Bean。当一个类使用@Autowired注解时,Spring会自动在应用的上下文中查找匹配的Bean,并将其注入到该类中的对应属性中。这样就可以避免手动编写大量的配置代码,减少了开发工作量。自动装配可以通过构造函数、成员变量或者方法进行注入。通常配合使用@Component、@Service、@Repository等注解来标识类为Spring的组件,以便Spring能够正确地扫描和装配Bean。
@Service的作用:
在Spring框架中,@Service是用来标识一个类为服务层组件的注解。通过将@Service注解标记在类上,Spring容器会自动扫描并识别这个类,将其实例化为一个Bean,并管理其生命周期。
通常情况下,@Service注解被用于标识业务逻辑层(Service层)的类。Service层通常用来处理业务逻辑,调用持久层(DAO层)进行数据访问,并提供操作数据的方法给Controller层调用。使用@Service注解可以帮助开发者将Service层类标识为Spring的组件,方便自动装配和管理。
总结一下,@Service的作用是表明一个类是服务层组件,供Spring容器管理,并且通常包含业务逻辑的处理。
@Transactional的作用:
@Transactional 是 Spring 框架中用来声明事务性操作的注解。在使用 @Transactional 注解时,Spring 将会在方法被调用时自动开启一个事务,并在方法执行结束时根据方法的执行情况来提交或回滚该事务。
当一个方法被声明为 @Transactional 时,如果该方法执行过程中发生异常,则事务会被回滚,即所有操作都会被撤销。如果方法执行完成且没有抛出异常,则事务会被提交,即所有操作会被持久化。
通过使用 @Transactional 注解,可以确保在需要事务处理的方法中能够正确地管理事务,保证数据的一致性和完整性。
需要注意的是,@Transactional 注解通常和 Spring 的事务管理器一起使用,以确保事务能够正确地被管理和执行。在配置文件中需要配置事务管理器,以便 @Transactional 注解可以生效。
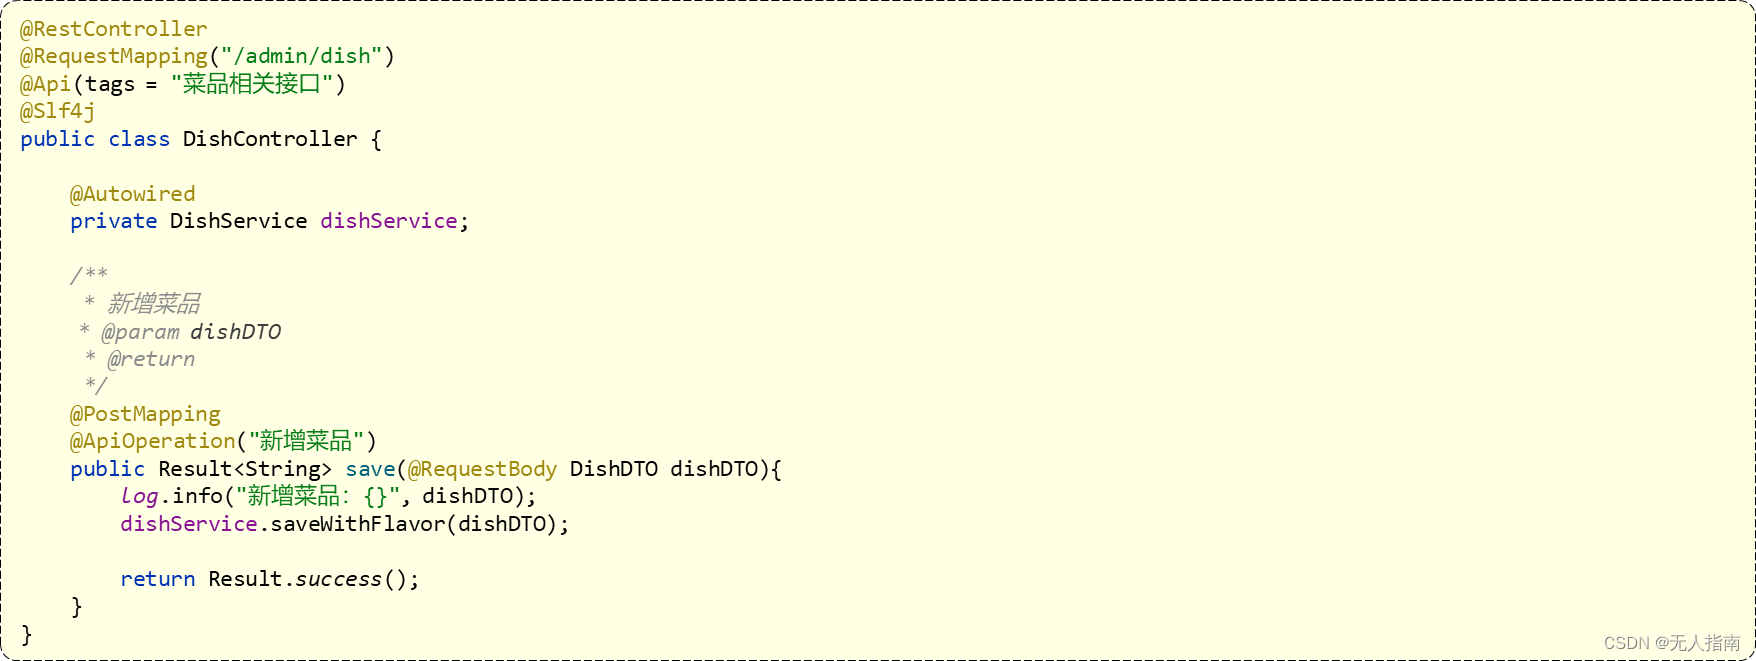
2.DishController
3.DishService

4.DishServiceImpl
@Service
@Slf4j
public class DishServiceImpl implements DishService {
    @Autowired
    private DishMapper dishMapper;
    @Autowired
    private DishFlavorMapper dishFlavorMapper;
    /**
     * 新增菜品和对应的口味数据
     * @param dishDTO
     */
    @Transactional
    public void saveWithFlavor(DishDTO dishDTO) {
        Dish dish = new Dish();
        BeanUtils.copyProperties(dishDTO,dish);
        //向菜品表插入1条数据
        dishMapper.insert(dish);
        //获取DishMapper.xml中insert语句生成的主键值
        Long dishId = dish.getId();
        //向口味表插入n条数据
        List<DishFlavor> flavors = dishDTO.getFlavors();
        if(flavors !=null && flavors.size()>0){
            flavors.forEach(dishFlavor -> {
                dishFlavor.setDishId(dishId);
            });
            //向口味表插入n条数据
            dishFlavorMapper.insertBatch(flavors);
        }

    }
}
5.DishMapper

xml

6.DishFlavorMapper

xml

3.菜品分页查询
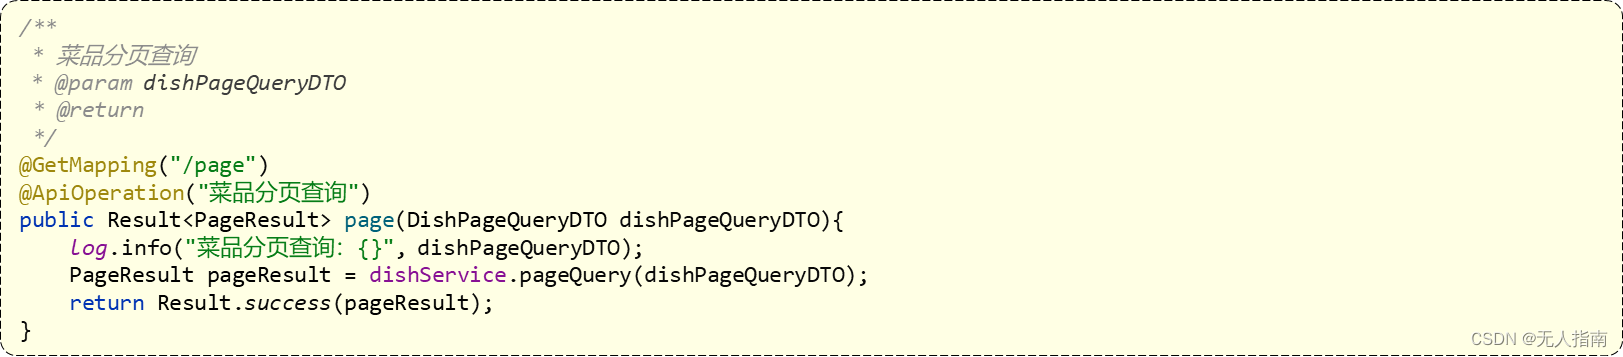
1.DishController的page分页查询方法
2.DishService

3.DishServiceImpl 中实现分页查询方法

4.DishMapper 接口中声明 pageQuery 方法

5.在 DishMapper.xml 中编写SQL
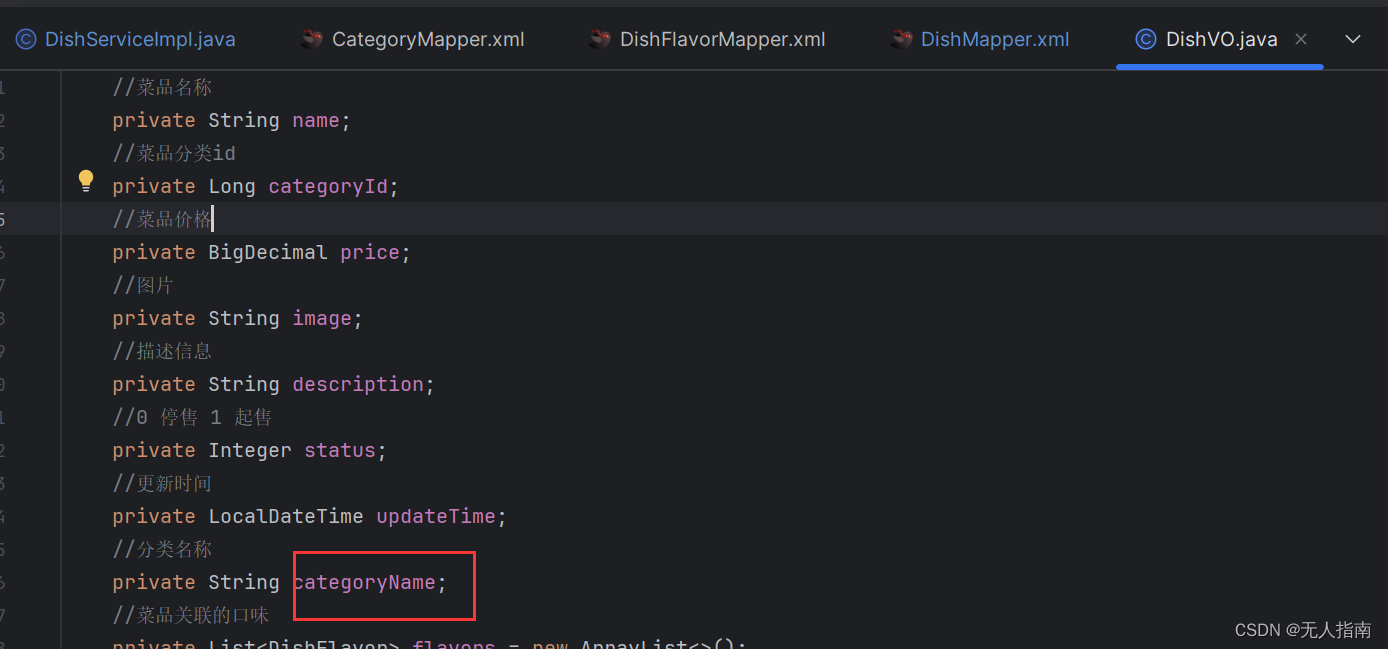
select d.*,c.name categoryName from dish d left join category c on d.category_id = c.id
对于复杂的SQL我们可以通过MYSQL的GUI界面进行编写,调试过后没问题,再复制进来。
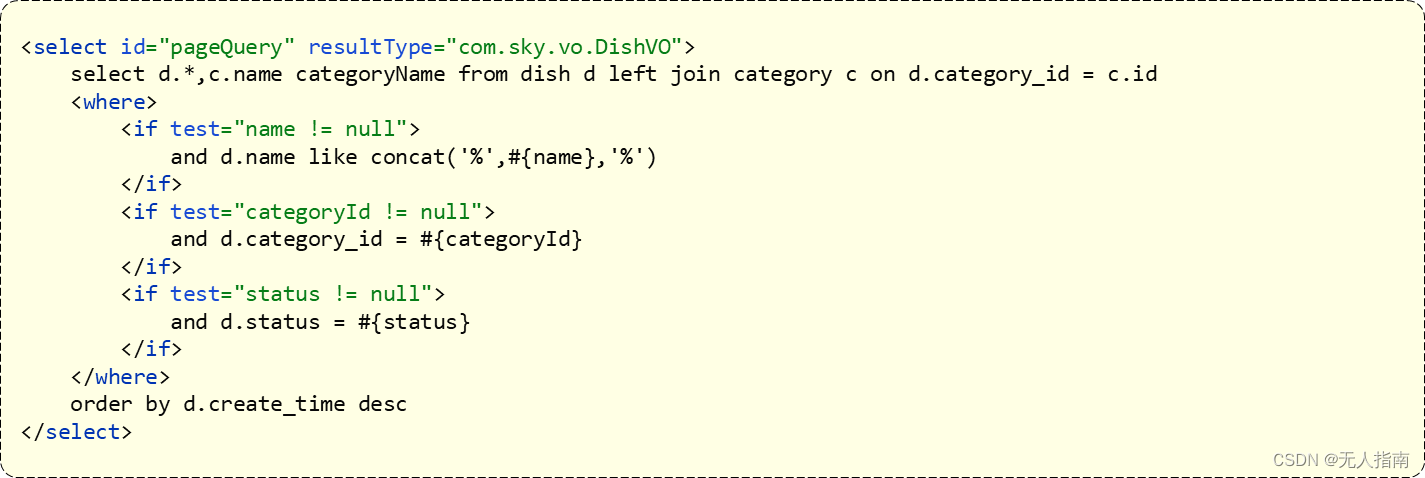
这里一开始查询的c.name改成categoryName的原因时要与DishVO中对应。
4.删除菜单
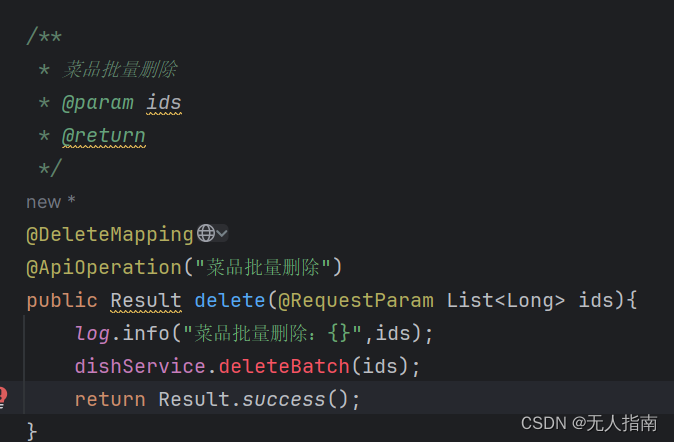
1.删除菜品的接口定义在DishController中创建方法
由于我们想要直接通过Spring Mvc得到List<Long>这样的数据,所以需要加@RequestParam注解
2.在DishService接口中声明deleteBatch方法

3.在DishServiceImpl中实现deleteBatch方法
//由于每个dishId对应菜品删除都需要执行上述两条SQL语句,所以为了提高性能,我们可以采用批量删除
/**
* 菜品批量删除
* @param ids
* @return
*/
public void deleteBatch(List<Long> ids) {
//判断当前菜品能够删除--是否存在起售中?
for (Long id : ids) {
Dish dish=dishMapper.getById(id);
//判断当前要删除的菜品状态是否为起售中
if (dish.getStatus()== StatusConstant.ENABLE){
//如果是起售中,抛出业务异常
throw new DeletionNotAllowedException(MessageConstant.DISH_ON_SALE);
}
}
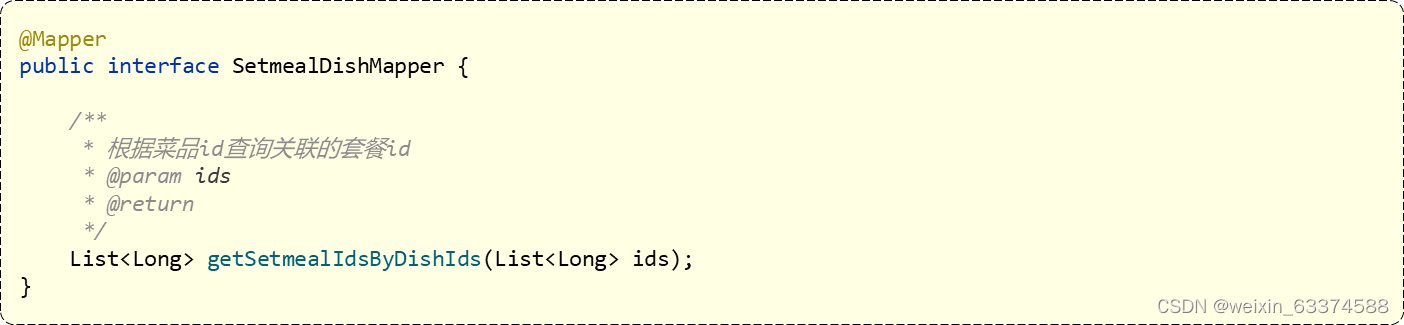
//判断当前菜品能够删除--是否被套餐关联了?
List<Long> setmealIds = setmealDishMapper.getSetmealIdByDishIds(ids);
if(setmealIds!=null&&setmealIds.size()>0){
//如果关联了,抛出业务异常
throw new DeletionNotAllowedException(MessageConstant.DISH_BE_RELATED_BY_SETMEAL);
}
//删除菜品表的菜品数据
// ids.forEach(id->{
// dishMapper.deleteById(id);
// //删除菜品关联的口味数据
// dishFlavorMapper.deleteByDishId(id);
// });
//由于每个dishId对应菜品删除都需要执行上述两条SQL语句,所以为了提高性能,我们可以采用批量删除
//根据菜品id集合批量删除菜品数据
//sql: delete from dish where id in (?,?,?)
dishMapper.deleteByIds(ids);
//根据菜品id集合批量删除口味数据
//sql: delete from dish_flavor where dish_id in (?,?,?)
dishFlavorMapper.deleteByDishIds(ids);
}4.DishMapper中声明getById方法,并配置SQL

5.创建SetmealDishMapper
xml

6.DishMapper中声明deleteById方法并配置SQL

7.DishFlavorMapper中声明deleteByDishId方法并配置SQL

8.性能优化
1.DishMapper新增deleteByIds方法
xml
<delete id="deleteByIds">
        delete from dish where id in
        <foreach collection="ids" open="(" close=")" separator="," item="id">
            #{id}
        </foreach>
    </delete>
2.DishFlavorMapper新增deleteByDishIds方法
xml
<delete id="deleteByDishIds">
        delete from dish_flavor where dish_id
        <foreach collection="dishIds" open="(" close=")" separator="," item="dishId">
            #{dishId}
        </foreach>
    </delete>
5.修改菜品
1.根据id查询菜品和关联口味相关的数据接口
1.DishController

2.DishServiceImpl
 /**
     * 根据id查询菜品和关联口味相关的数据
     * @param id
     * @return
     */
    public DishVO getByIdWithFlavor(Long id) {
        //根据id查询菜品数据
        Dish dish = dishMapper.getById(id);
        //根据菜品id查询口味数据
        List<DishFlavor> dishFlavorList=dishFlavorMapper.getByDishId(id);
        //将查询到的数据封装到dishVO
        DishVO dishVO = new DishVO();
        BeanUtils.copyProperties(dish,dishVO);
        dishVO.setFlavors(dishFlavorList);
        return dishVO;
    }
3.DishFlavorMapper增加getByDishId方法

2.修改菜品接口
1.DishController
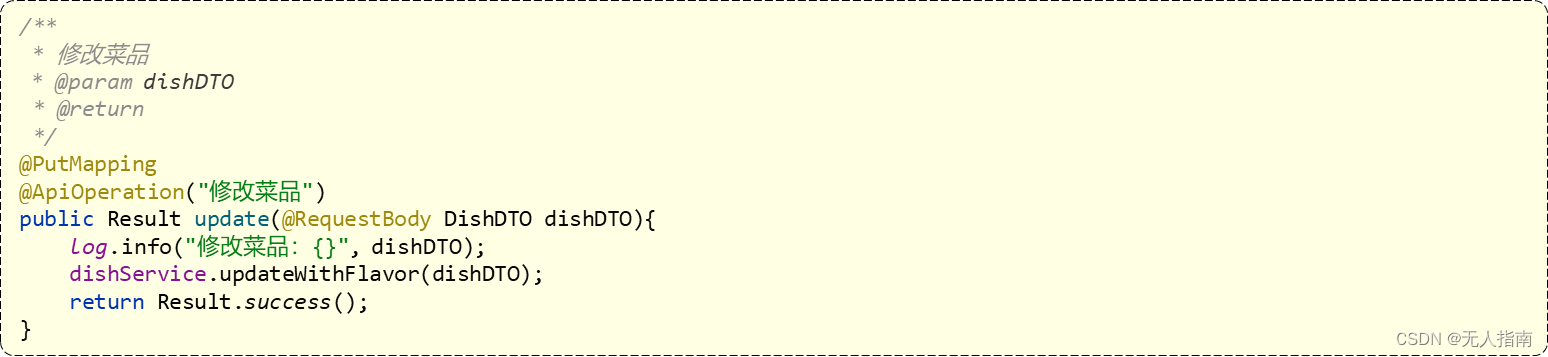
2.DishServiceImpl实现updateWithFlavor
/**
     * 修改菜品基本信息和对应的口味信息
     * @param dishDTO
     */
    @Transactional
    public void updateWithFlavor(DishDTO dishDTO) {
        //由于dishDTO中还包含flavor数据,第一步只是修改菜品数据,所以只需要传一个dish对象即可
        Dish dish = new Dish();
        BeanUtils.copyProperties(dishDTO,dish);

        //修改菜品表基本信息
        dishMapper.update(dish);
        //删除原有的口味数据
        dishFlavorMapper.deleteByDishId(dishDTO.getId());
        //重新插入口味数据
        List<DishFlavor> flavors = dishDTO.getFlavors();
        if(flavors !=null && flavors.size()>0){
            flavors.forEach(dishFlavor -> {
                dishFlavor.setDishId(dishDTO.getId());
            });
            //向口味表插入n条数据
            dishFlavorMapper.insertBatch(flavors);
        }
    }
3.DishMapper.xml新增update
注意,这里每一个if里面有个”,“,不然测试时会报错500。
 <update id="update">
        update dish
        <set>
            <if test="name !=null">name=#{name},</if>
            <if test="categoryId !=null">category_id=#{categoryId},</if>
            <if test="price !=null">price=#{price},</if>
            <if test="image !=null">image=#{image},</if>
            <if test="description !=null">description=#{description},</if>
            <if test="status !=null">status=#{status},</if>
            <if test="updateTime !=null">update_time=#{updateTime},</if>
            <if test="updateUser !=null">update_user=#{updateUser},</if>
        </set>
        where id=#{id}
    </update>
6.菜品停售启售
1.DishCtroller
/**
     * 菜品的起售停售
     * @return
     */
    @PostMapping("/status/{status}")
    @ApiOperation("菜品的起售停售")
    public Result startOrStop(@PathVariable Integer status,Long id){
        dishService.startOrStop(status,id);
        return Result.success();
    }
2.DishServiceImpl编写startOrStop方法
//getSetmealIdByDishIds这个方法在前面,根据菜品id查询对应的套餐id,中已经写过,
// 所以把id改为符合getSetmealIdByDishIds参数的类型
/**
     * 菜品的起售停售
     * @param status
     * @param id
     */
    @Transactional
    public void startOrStop(Integer status, Long id) {
        //菜品起售停售状态更改
        Dish dish = Dish.builder()
                .id(id)
                .status(status)
                .build();
        dishMapper.update(dish);

        //如果是停售,还需要包含当前的菜品套餐停售
        if (status==StatusConstant.DISABLE){
            ArrayList<Long> dishIds = new ArrayList<>();
            dishIds.add(id);

            //getSetmealIdByDishIds这个方法在前面,根据菜品id查询对应的套餐id,中已经写过,
            // 所以把id改为符合getSetmealIdByDishIds参数的类型
            List<Long> setmealIds=setmealDishMapper.getSetmealIdByDishIds(dishIds);
            for (Long setmealId : setmealIds) {
                Setmeal setmeal = Setmeal.builder()
                        .id(setmealId)
                        .status(StatusConstant.DISABLE)
                        .build();
                setmealDishMapper.update(setmeal);

            }
        }
    }
3.SetmealDishMapper接口新增update方法
/**
     * 根据id修改套餐
     * @param setmeal
     */
    @AutoFill(value = OperationType.UPDATE)
    void update(Setmeal setmeal);
xml
<update id="update" parameterType="Setmeal">
        update setmeal
        <set>
            <if test="name != null">
                name = #{name},
            </if>
            <if test="categoryId != null">
                category_id = #{categoryId},
            </if>
            <if test="price != null">
                price = #{price},
            </if>
            <if test="status != null">
                status = #{status},
            </if>
            <if test="description != null">
                description = #{description},
            </if>
            <if test="image != null">
                image = #{image},
            </if>
            <if test="updateTime != null">
                update_time = #{updateTime},
            </if>
            <if test="updateUser != null">
                update_user = #{updateUser}
            </if>
        </set>
        where id = #{id}
    </update>


 1077
1077


 被折叠的 条评论
为什么被折叠?
被折叠的 条评论
为什么被折叠?
 到【灌水乐园】发言


