一、SSH服务建立远程连接
建立远程连接
ssh 主机号
-p 加端口号,默认连接是22端口
![](https://img-blog.csdnimg.cn/img_convert/263e83eb8ba276447ccb5da0c2e5d1c7.png)
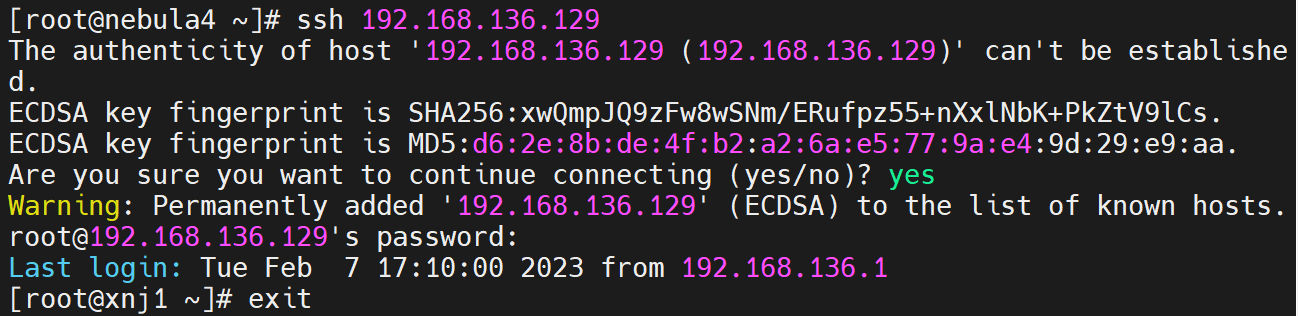
cat ~/.ssh/known_hosts #当第一次SSH连接的时候,本地产生的密钥文件
2、基于口令认证,也就是说每次连接都需要输入密码
![](https://img-blog.csdnimg.cn/img_convert/2be4bb95325fba4f1c82b7c7c412e590.png)
3、基于密钥认证,也就是说不用输入密码就可建立连接
步骤:
ssh-keygen -t dsa #"dsa"也可替换成"rsa"
cd .ssh;ll
![](https://img-blog.csdnimg.cn/img_convert/a83a82863cbf5681a7cf3931f27ba0f4.png)
ssh-copt-id -i id_dsa.pub root@主机号
![](https://img-blog.csdnimg.cn/img_convert/633863a8ed1ebb8c4cb4474f3e806fd6.png)
![](https://img-blog.csdnimg.cn/img_convert/8af6a4a2e1b35d2ad27ce86b35c26844.png)
二、ssh服务常见配置
修改默认端口,重新建立连接
vim /etc/ssh/sshd_config
![](https://img-blog.csdnimg.cn/img_convert/3321b4803b8da68054745e075948a7df.png)
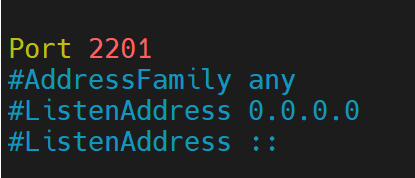
注!! 修改完端口后在重启ssh服务之前一定要检查一下selinux和firewalld一定要是关闭状态,否则ssh服务无法重启,主机连接不上。
1)selinux和firewalld关闭方法:
vim /etc/selinux/config #将原来的"enforcing"改为"disabled"
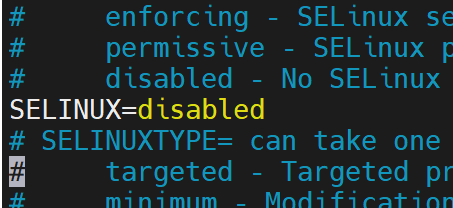
![](https://img-blog.csdnimg.cn/img_convert/aa0e245cedaa20d9511b12eb278959bb.png)
systemctl stop firewalld
systemctl restart sshd
禁止使用root用户连接
vim /etc/ssh/sshd_config #将pemitrootlogin中的"yes"改为”"no"
![](https://img-blog.csdnimg.cn/img_convert/7eb533be4e2bde557c0bc9afac4d91d1.png)
限制ssh监听的ip
vim /etc/ssh/sshd_config #添加本地内网IP
![](https://img-blog.csdnimg.cn/img_convert/59fb159f694c5be1eadf6378cec85e0c.png)
测试连接:
![](https://img-blog.csdnimg.cn/img_convert/0ddcb17e084e5edbb1f82d86a6b2950a.png)
![](https://img-blog.csdnimg.cn/img_convert/b4a484e11eb89a341ec035f7cec36972.png)
三、scp客户端附带的远程拷贝命令
scp /path/to/file root@主机号:/path/to/
scp root@主机号:/path/to/file /path/to/
![](https://img-blog.csdnimg.cn/img_convert/57a8cf29cfeb1383dfbbe78949d5356c.png)
-P(大写):接端口,默认22
-r:递归,表示拷贝目录
-p:表示在拷贝前后保持文件或目录属性
-l limit:限制速度