


文章目录
Environments
- Windows 11
- Ubuntu 24.04 LTS
- Laptop: Yoga Pro 14S ARH7
- Allocated Disk For Ubuntu: 146.5GB
Step I: Download Ubuntu Package
-
Download the Ubuntu ISO file from the official website: https://ubuntu.com/download/desktop
-
Just select the version of
Ubuntu 24.04 LTSand download the ISO file.

Step II: Make a Bootable USB Stick
Preparation
- Prepare a USB stick with a capacity of at least
8GB
The USB stick will be formatted so you need to back up any important data on it. - Install the software UltraISO
We use the software UltralSO to write the ISO file to the USB stick. UltraISO requires a paid registration, but we only need to use it for a short period, so we can click ‘Trial’ without purchasing a registration code.
Steps
-
Open the UltraISO and select the downloaded ISO file from the local directory
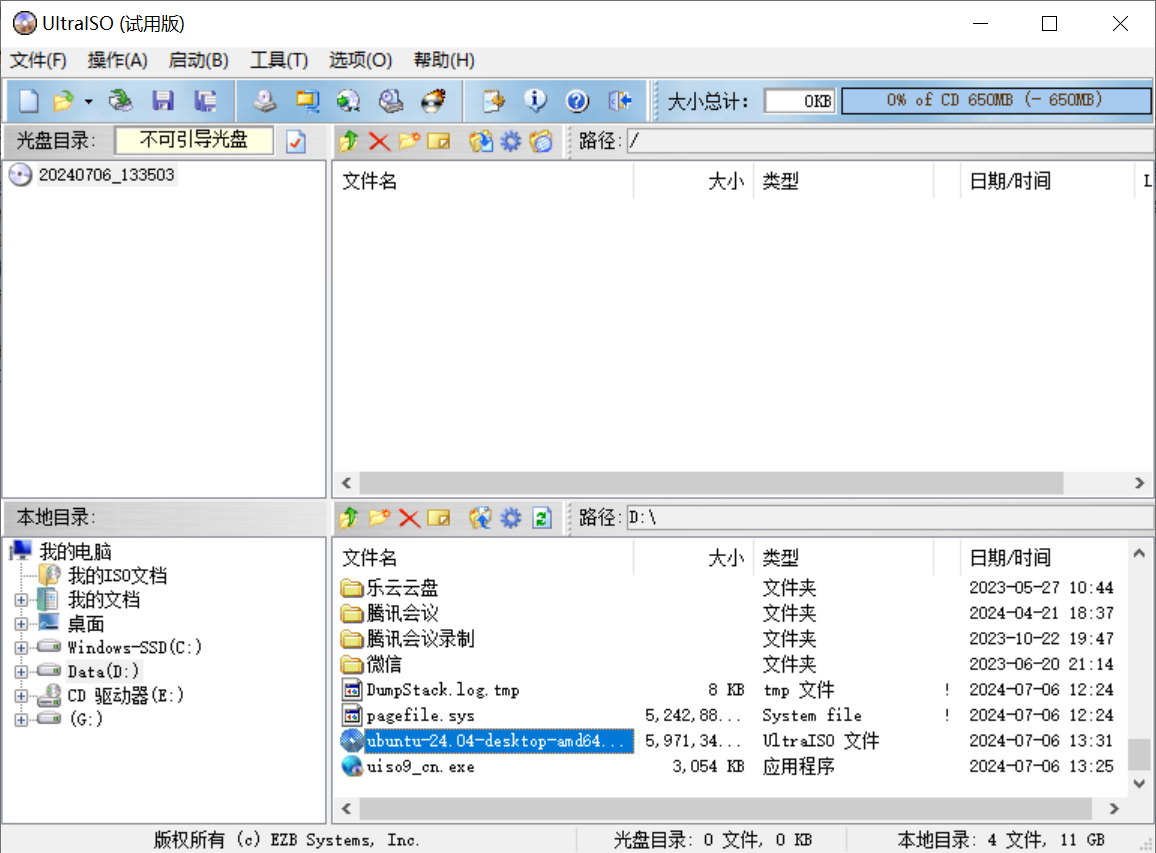
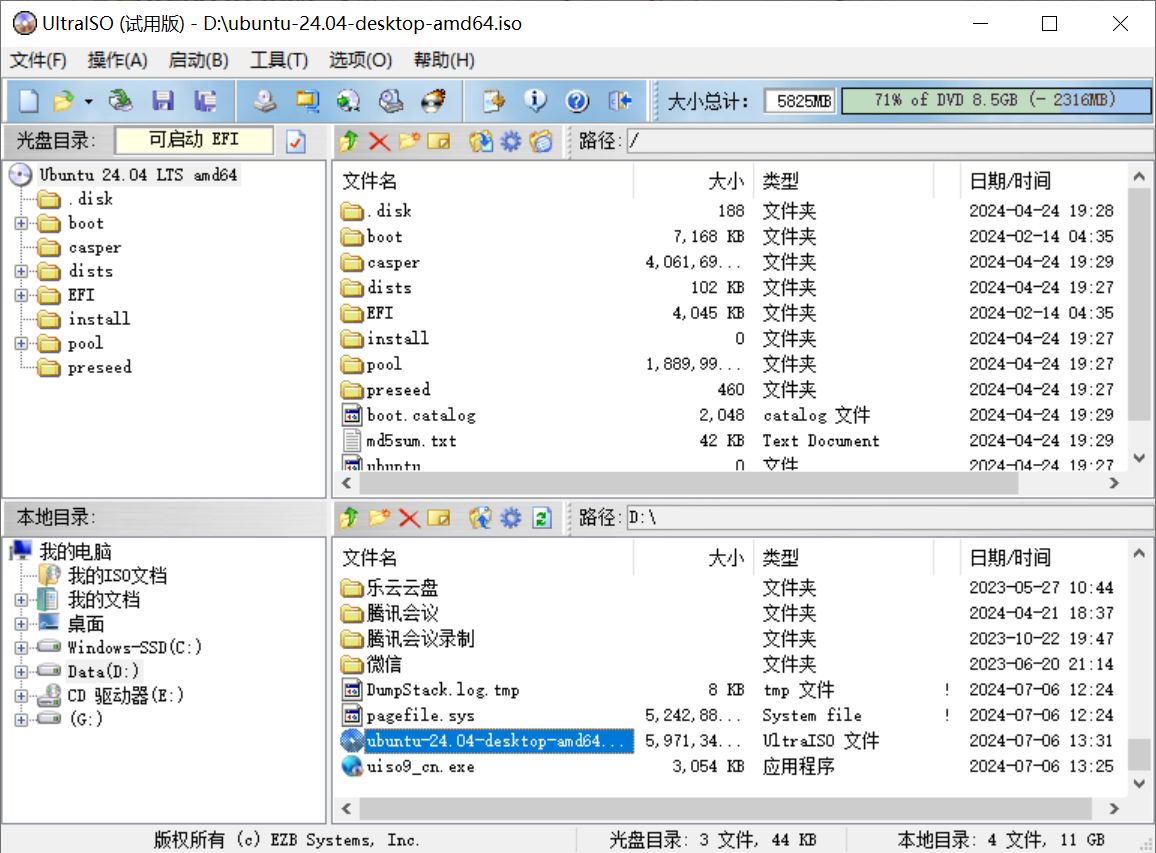
-
Double-click the ISO file:
ubuntu-24.04-desktop-and64.iso
-
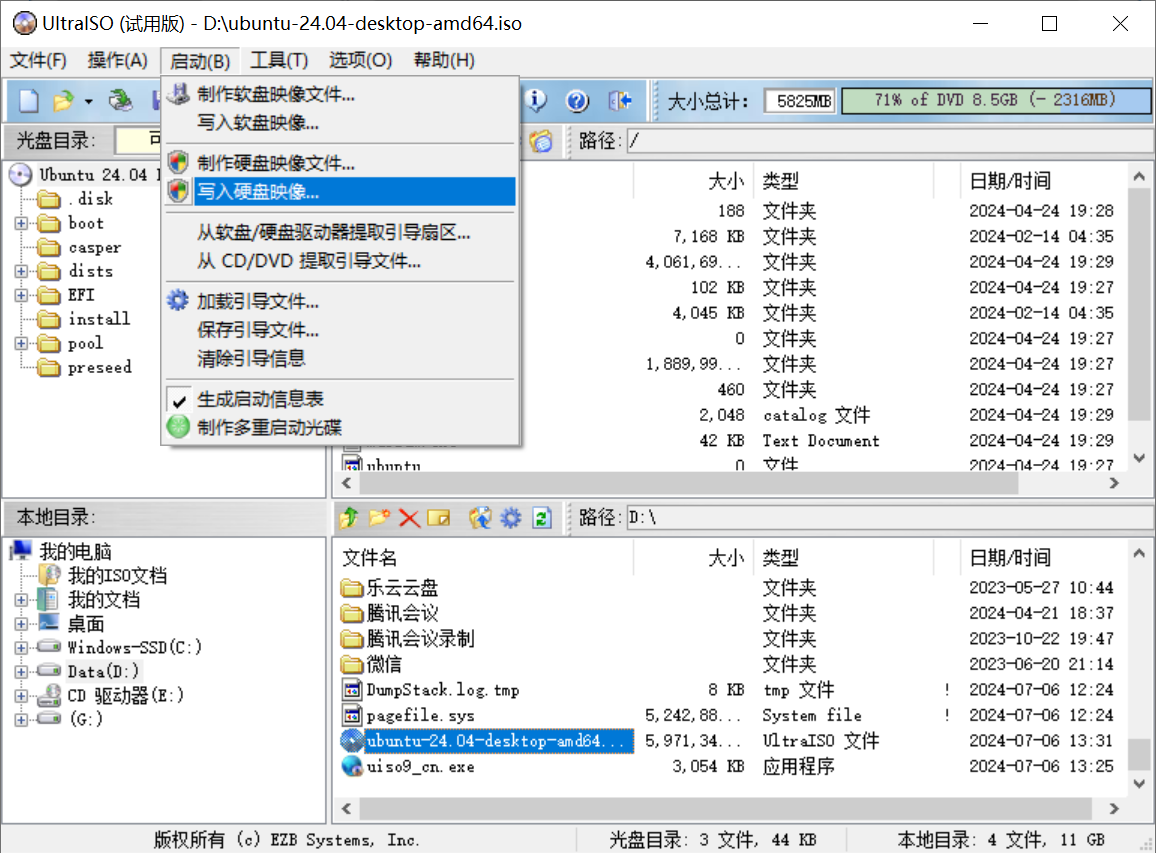
Select “Boot” in the menu bar above UltraISO, then click on “Write Disk Image”
-
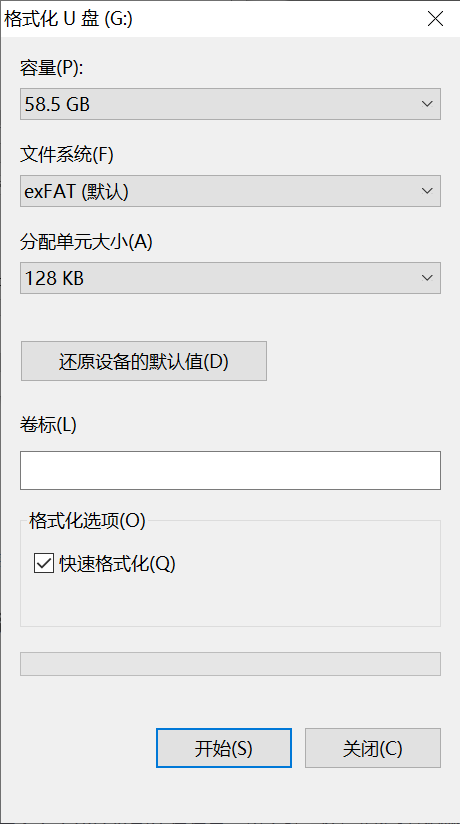
Check the configuration
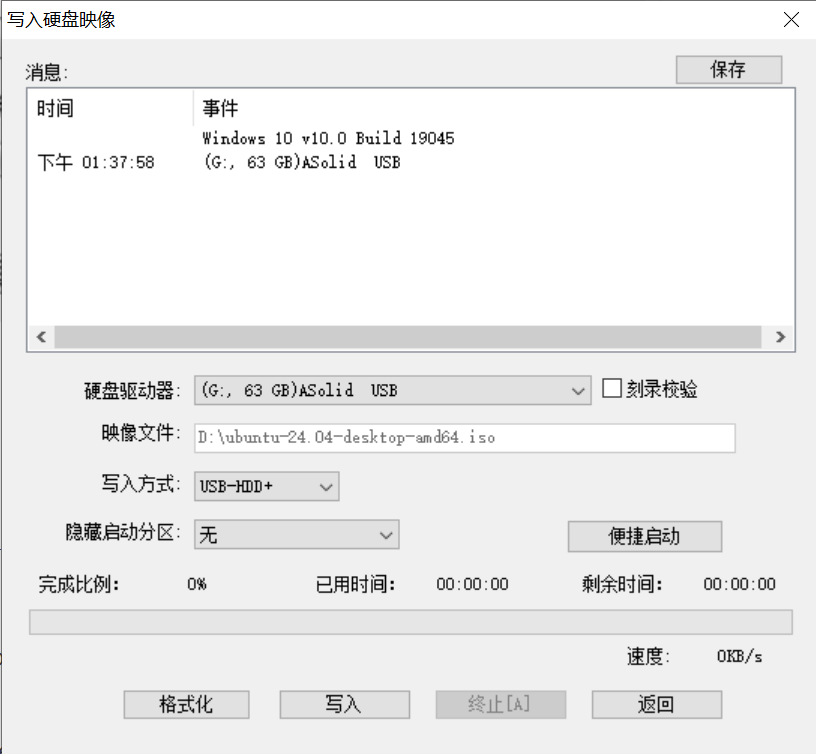
-
Format the USB stick by clicking the button of ‘format’
-
Write the ISO file to the USB stick by clicking the button of ‘Write’
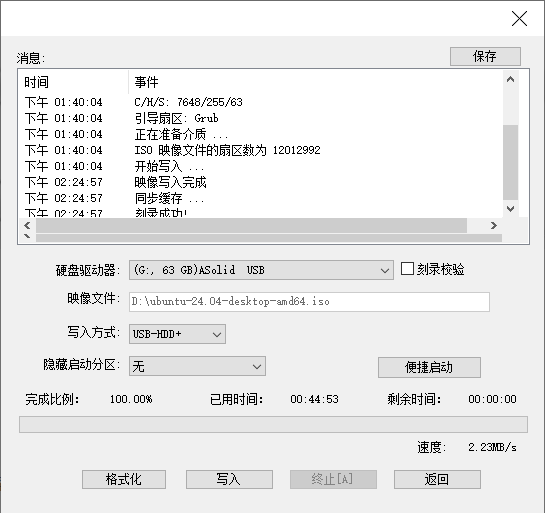
This process will take a long time period and after writing the stage have just been finished.
Step III: Allocate the Disk Space for Ubuntu
-
Open the disk management tool in Windows
You can search theComputer Managementin the search bar and open it. And in the left menu, selectDisk Managementunder theMemorysection. -
Right-click on the disk, preferably
DDisk, that you want to allocate space for Ubuntu and selectShrink Volume
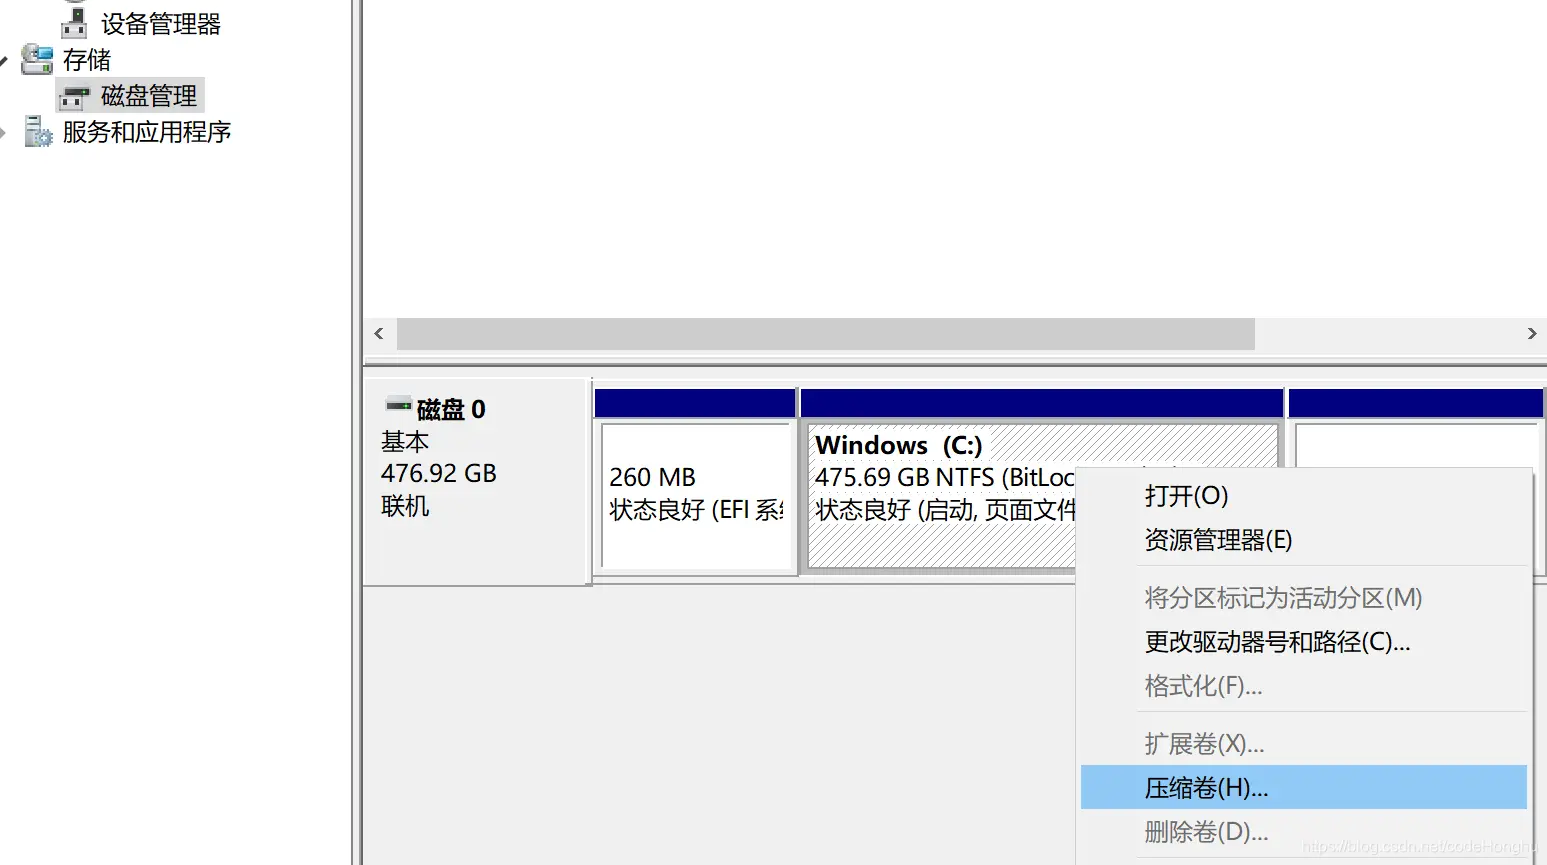
-
Enter the amount of space you want to allocate for Ubuntu, and then click “Shrink”
It will be recommended to allocate around100GBof space for Ubuntu. This will make sure that you have enough space for the operating system and other applications.
Step IV: Install Ubuntu
- Insert the USB stick into the computer
Method I: BIOS mode
Press the key of F12 or F2 to enter the BIOS setting and select the USB stick as the boot device
Method II: Advanced Restart
Sometimes entering the BIOS setting is not easy, but there have another way to boot the system from the USB stick.
-
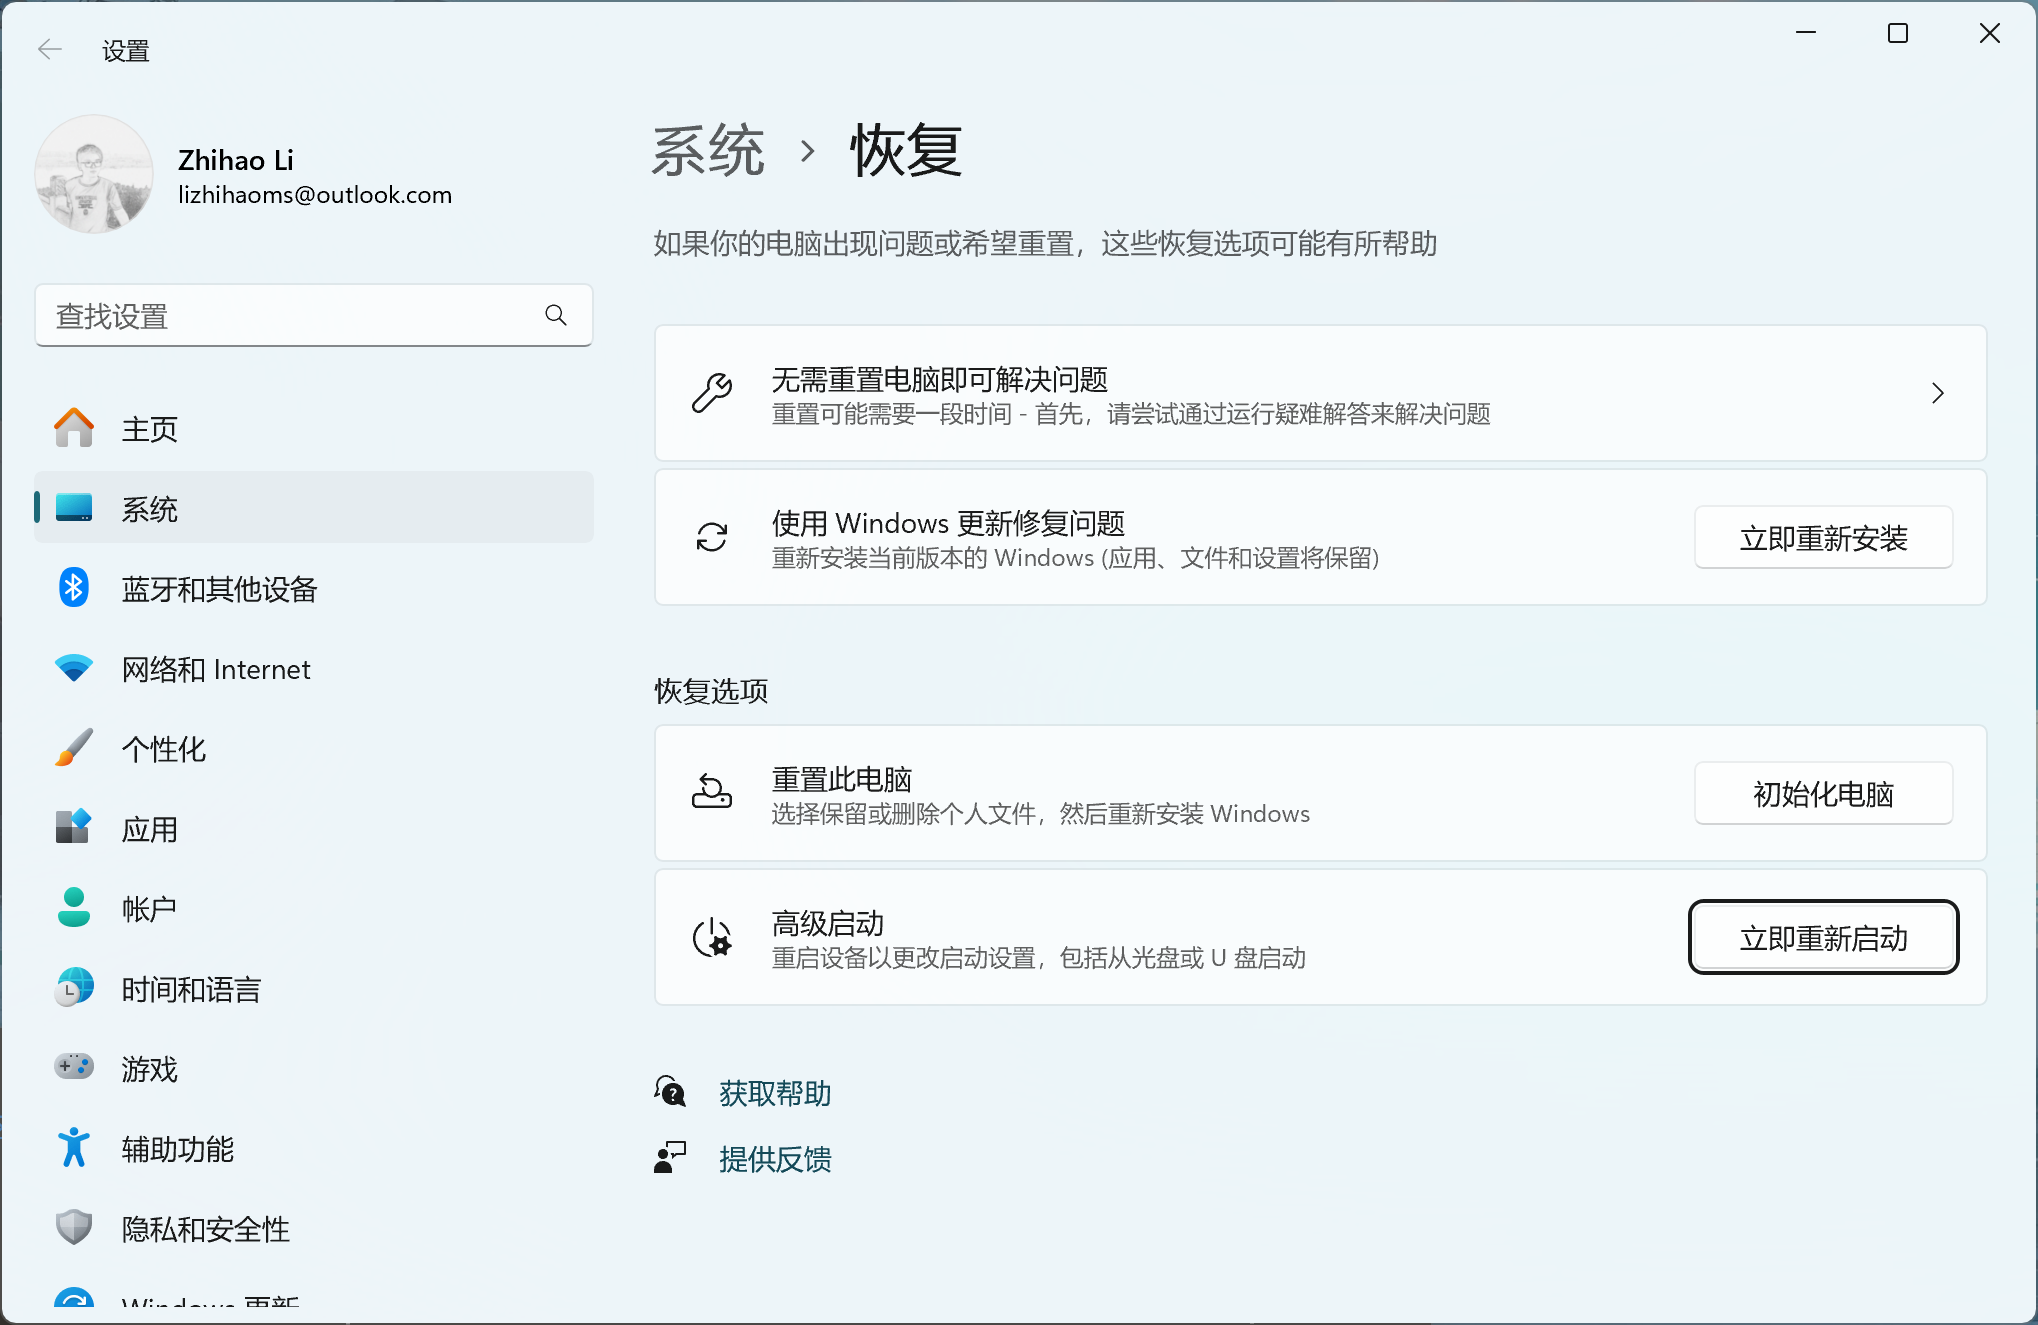
Search the
Restorein the windows search bar and open it. -
Click on the
Restart Immediatelybutton to restart the computer.
-
After the computer restarts, it will enter the Advanced Boot Options menu. Select the
Using Deviceoption.

-
About
EFImode we just choose theEFI USB Deviceto boot the operating system.

-
Entering this page, we just choose to install Ubuntu

-
When it boots the Ubuntu system, it will prepare the environment.

-
Configure the Ubuntu system and just wait for several minutes.

-
When all installation have been finished

Step V: Restart the System
After the installation, we need to restart the system to make sure that the system is working properly.

- Boot Ubuntu
We just click theUbuntubutton to boot the Ubuntu system. - Boot Windows
We just click theWindows Boot Managerbutton to boot the Windows system.
Configuration
We can see that the system is installed successfully, but we still need to configure it. For personalized usage needs, we can configure specific applications. Firstly, just have a look for my configuration.

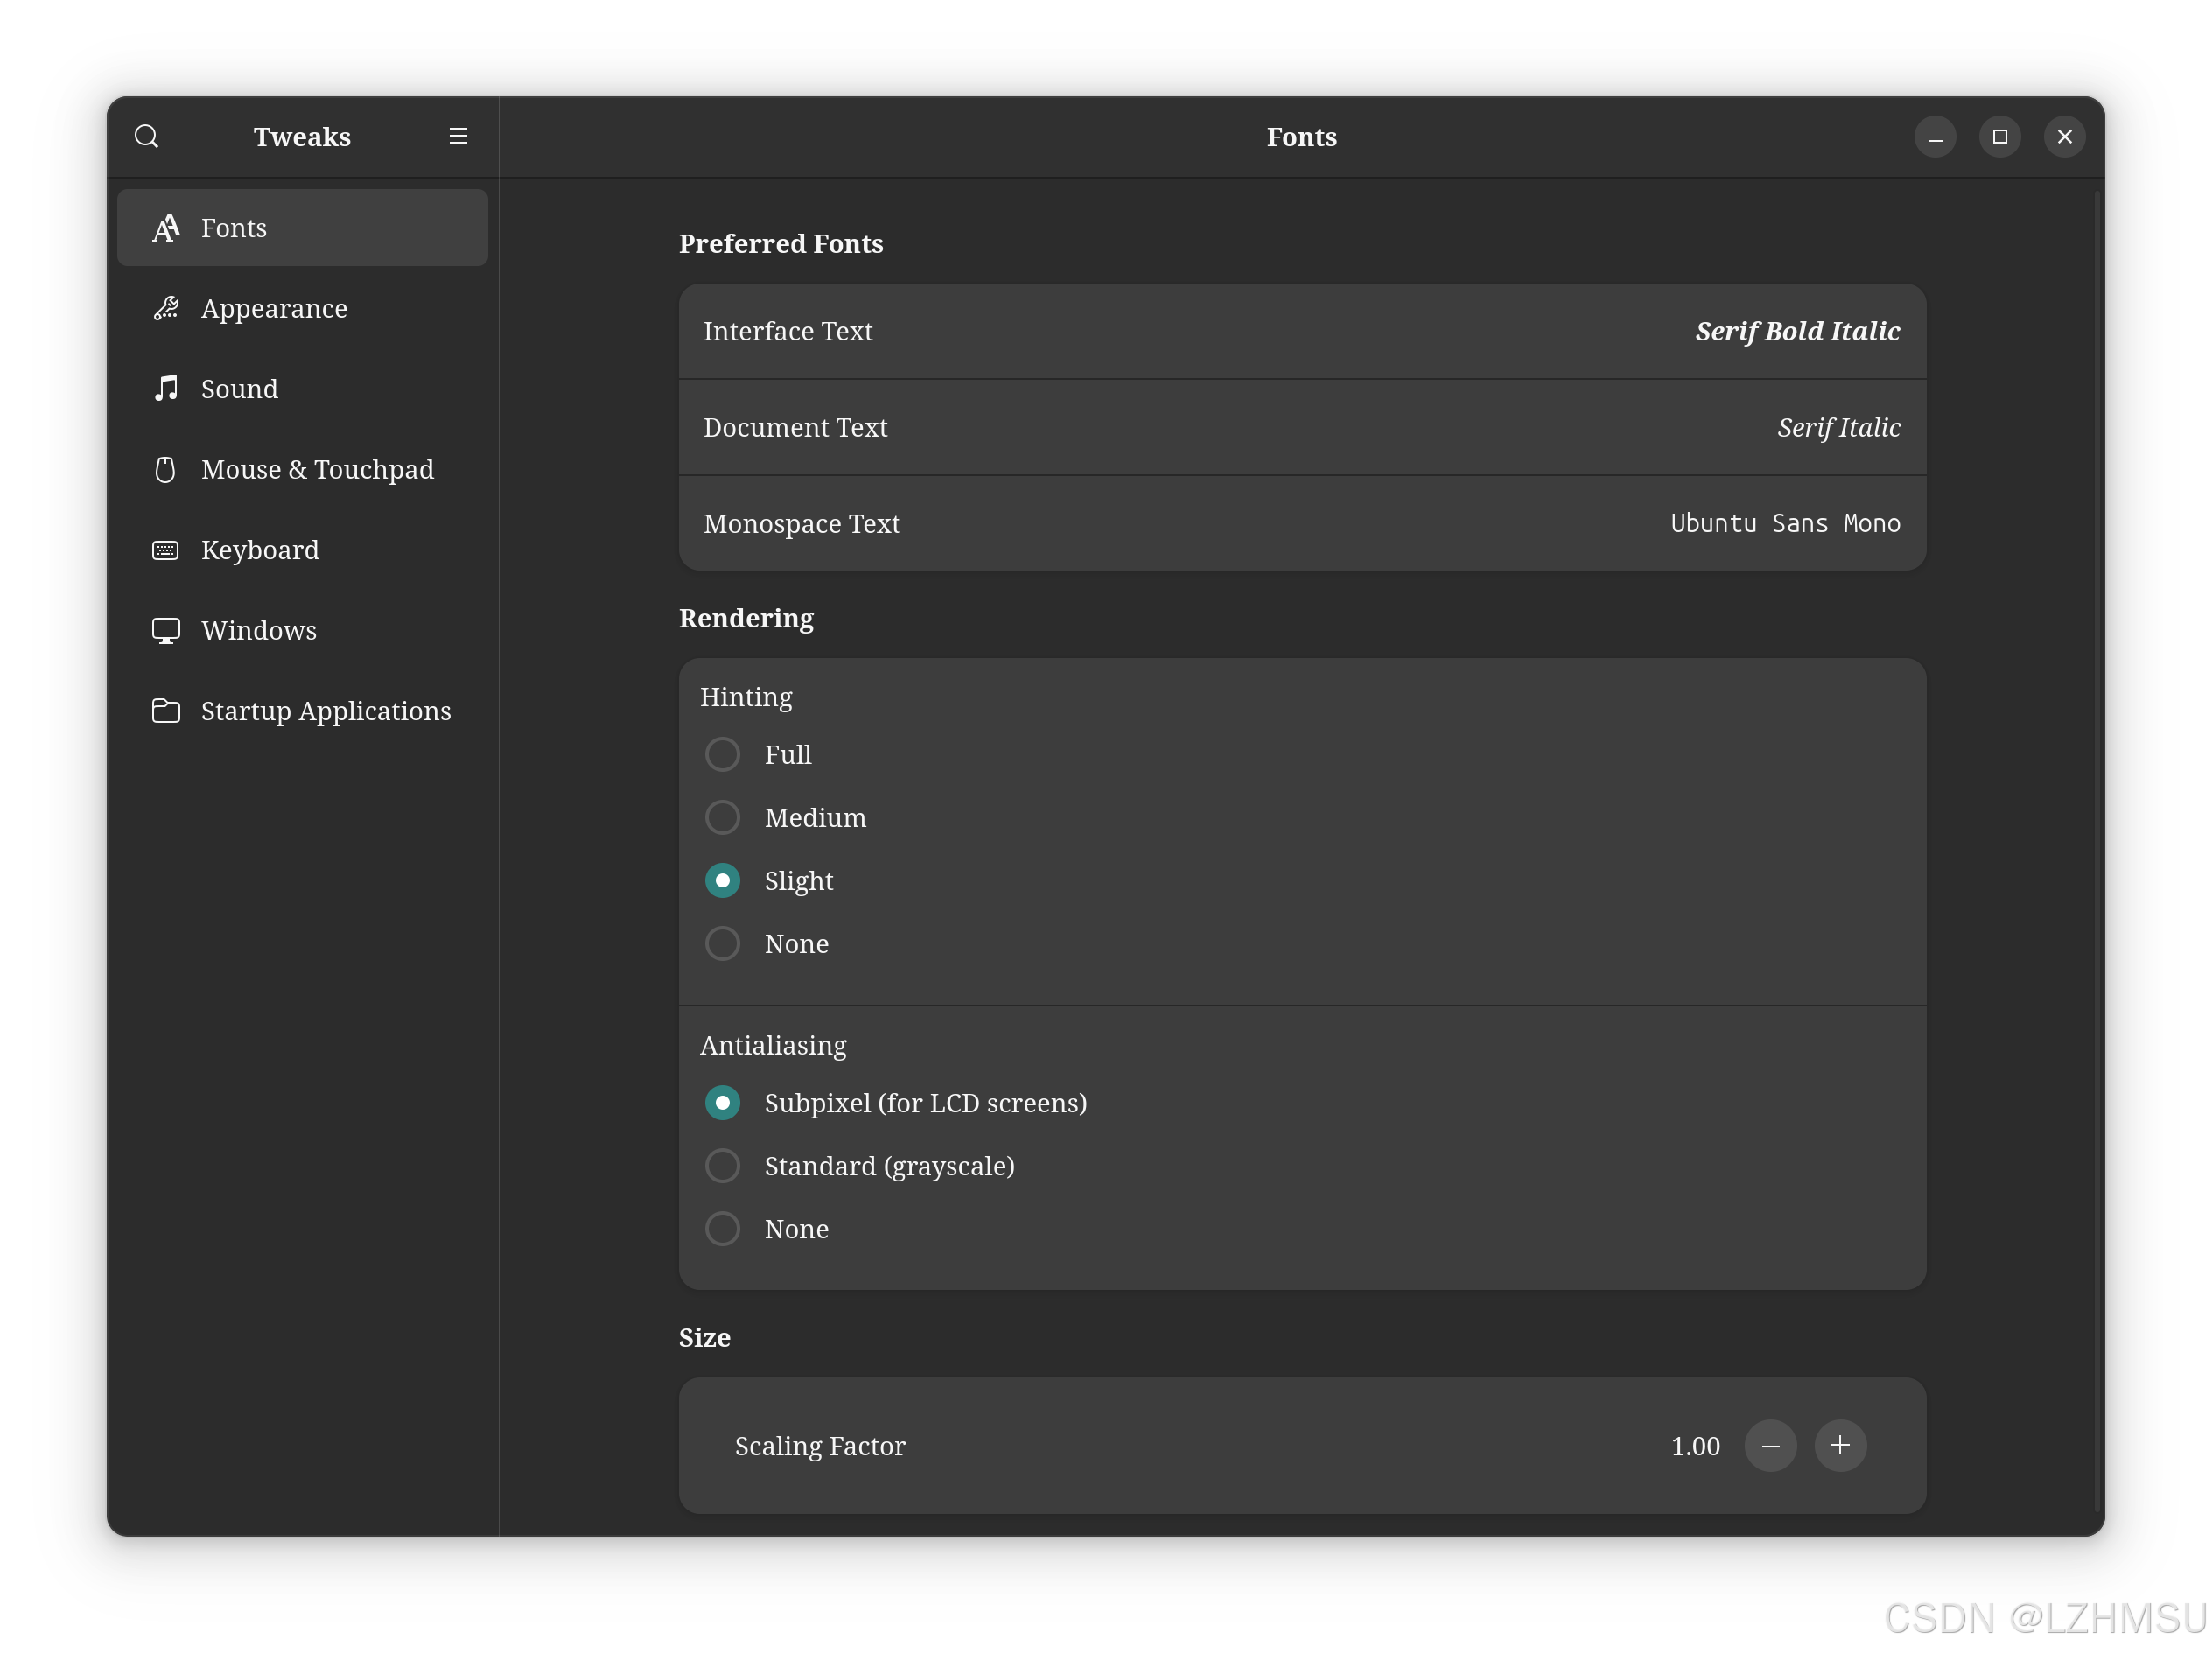
System Fonts
- Install the packages
sudo apt install gnome-tweaks
- Run the command
gnome-tweaks
It will open the configuration interface, and we just click Fonts. It has three fonts to configure the displayed fonts style under different positions. And importantly, it has the Scaling Factor below the interface to configure the interface size.

Chinese Input
- Install the packages
There has several Chinese input methods, but I recommendibus-libpinyinbecause it is simple and easy to use.
sudo apt-get install ibus-libpinyin
- Run the command
After installation, we need tolog outto fresh the package. And logging in again, we just run the following command to add thePinyinmethod under theChinesesection.
ibus-setup
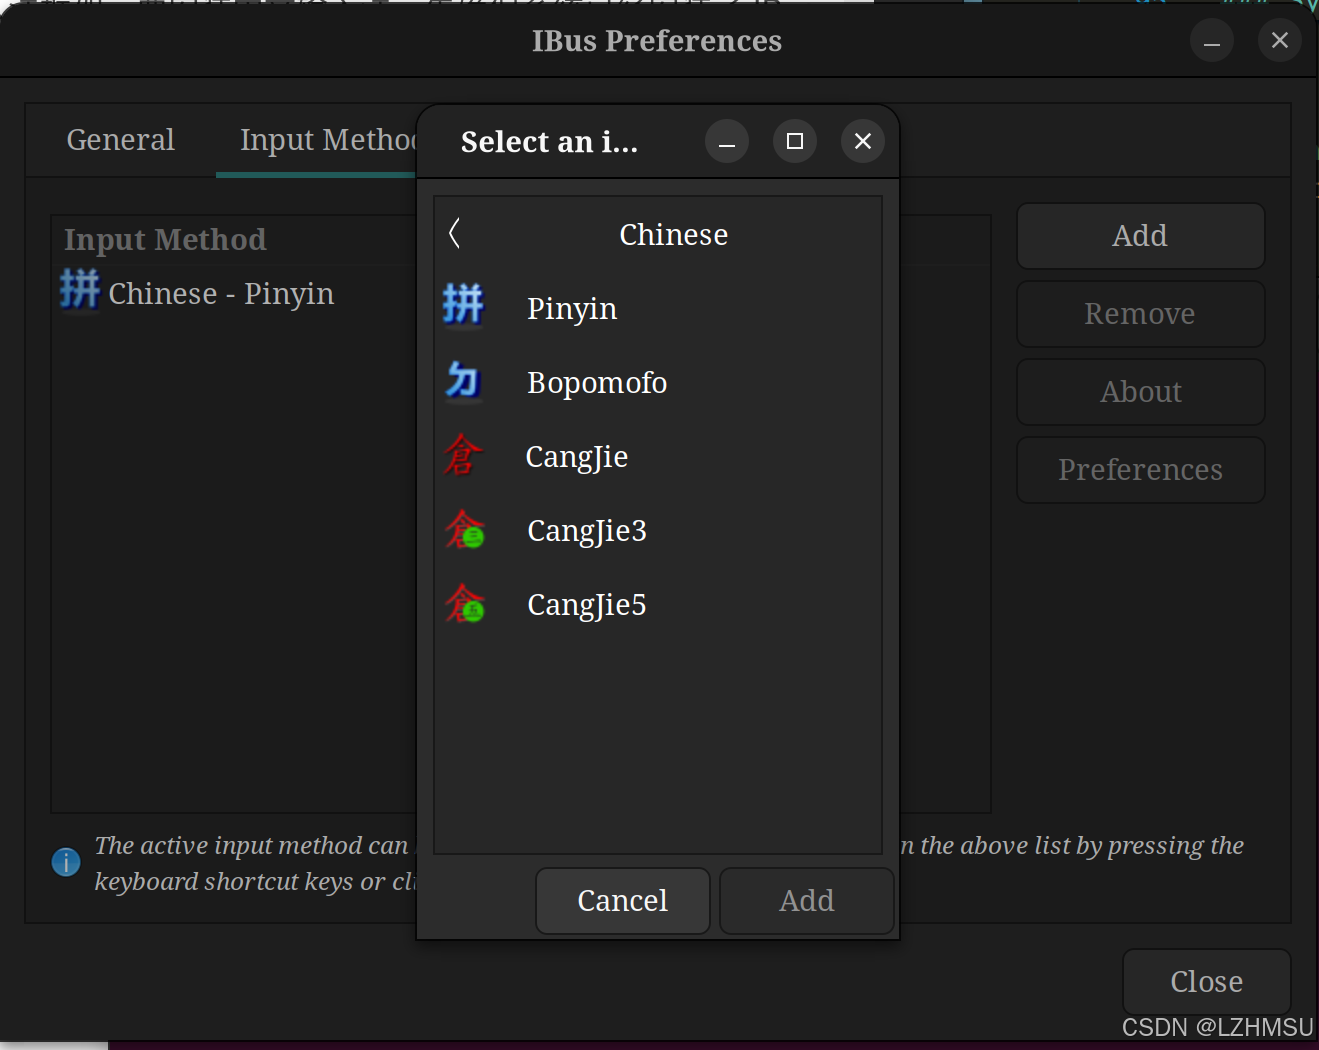
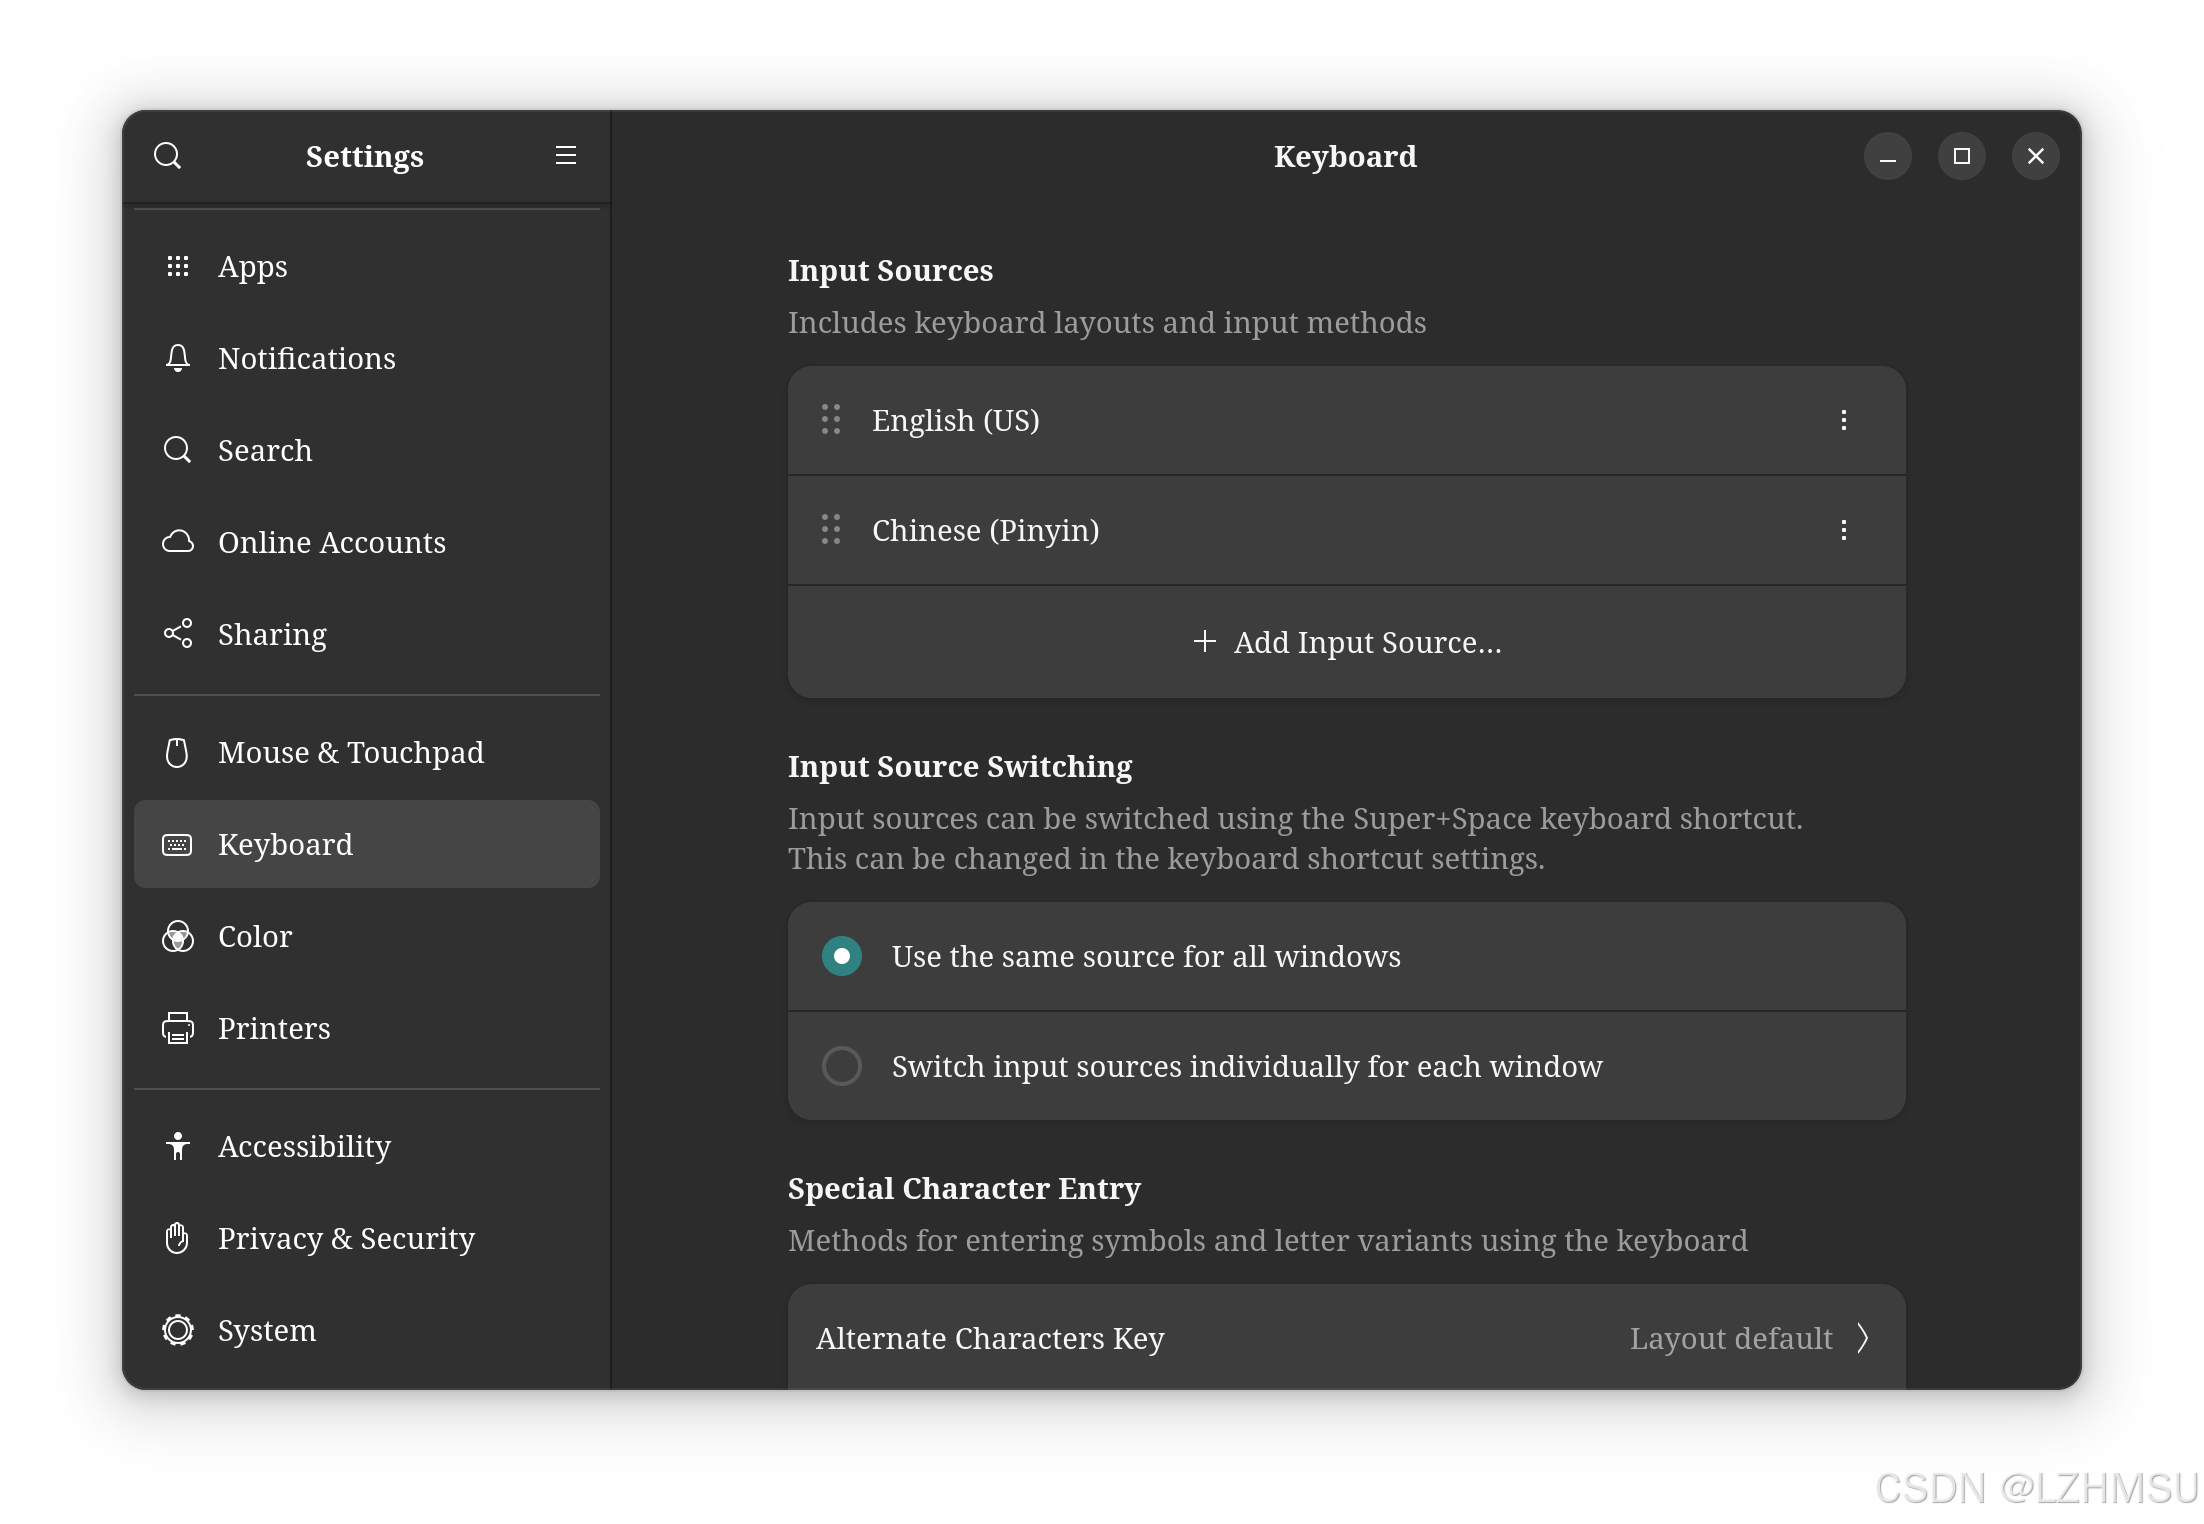
- Configure the input method in the system settings
Just see the following picture. We need to add the input source ofChinese(Pinyin)under theKeyboardsection.
Clash Verge
-
Download the package from website: https://github.com/clash-verge-rev/clash-verge-rev/releases
-
Follow the instructions to install the package: https://clash-verge-rev.github.io/faq/linux.html
-
A Fantastic Application
Blue Mail
It’s also a fantastic application on linux system. It is a mail client and it has a very beautiful interface.
Wemeet
- Download the package from website: https://meeting.tencent.com/download/
- Install the package and run it.
- Solve the problem:
wayland
sudo vim /etc/gdm3/custom.conf
#WaylandEnable=false   ==> WaylandEnable=false
sudo service gdm3 restart
Installation Command
.deb file
sudo dpkg -i package_file.deb
sudo apt install ./package_file.deb
.AppImage file
chmod +x package_file.AppImage
./package_file.AppImage
.rpm file
sudo rpm -i package_file.rpm


 被折叠的 条评论
为什么被折叠?
被折叠的 条评论
为什么被折叠?
 到【灌水乐园】发言


