


目录
创建必要的接口和实现类(controller service dao)
一,前置准备
我们本次是使用的电商项目中的商品、订单、用户为案例进行讲解。
技术选型
maven:3.5.4
数据库:MySQL 5.7
持久层: SpingData Jpa/Mybatis-plus
其他: SpringCloud Alibaba 技术栈
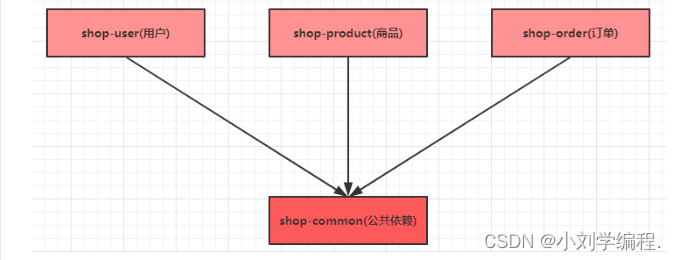
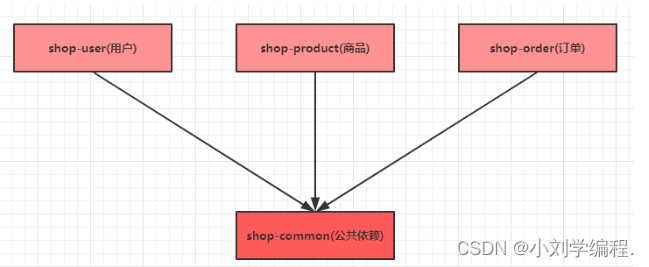
模块设计
springcloud-shop父工程
shop-common 公共模块【实体类】
shop-user 用户微服务 【端口: 807x】
shop-product 商品微服务 【端口: 808x】
shop-order 订单微服务 【端口: 809x】
二,项目准备
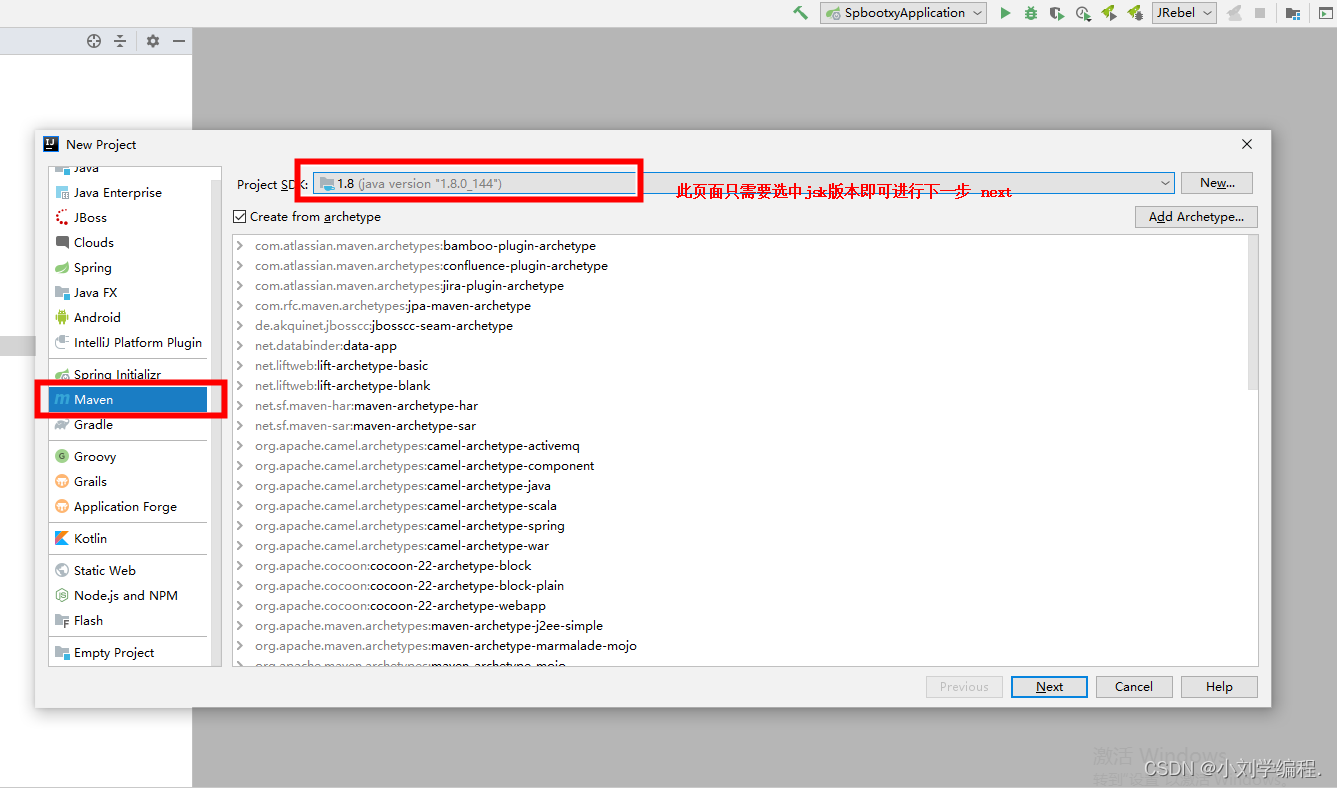
2.1 创建一个父工程
maven项目 选中jdk
项目名与存放地址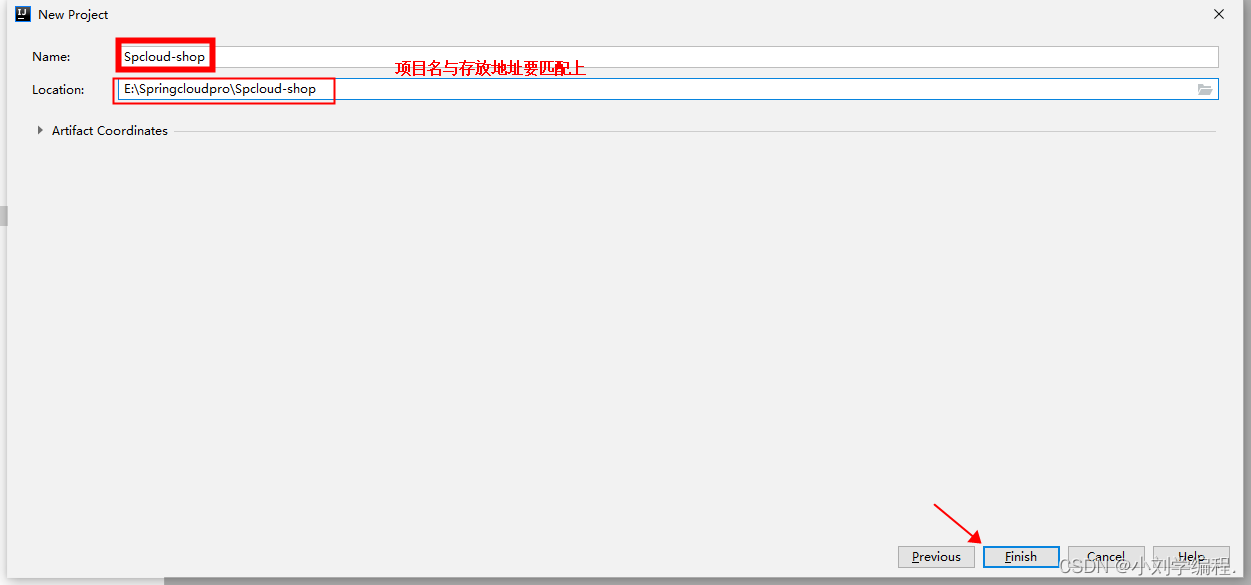
创建完成过后更改maven地址

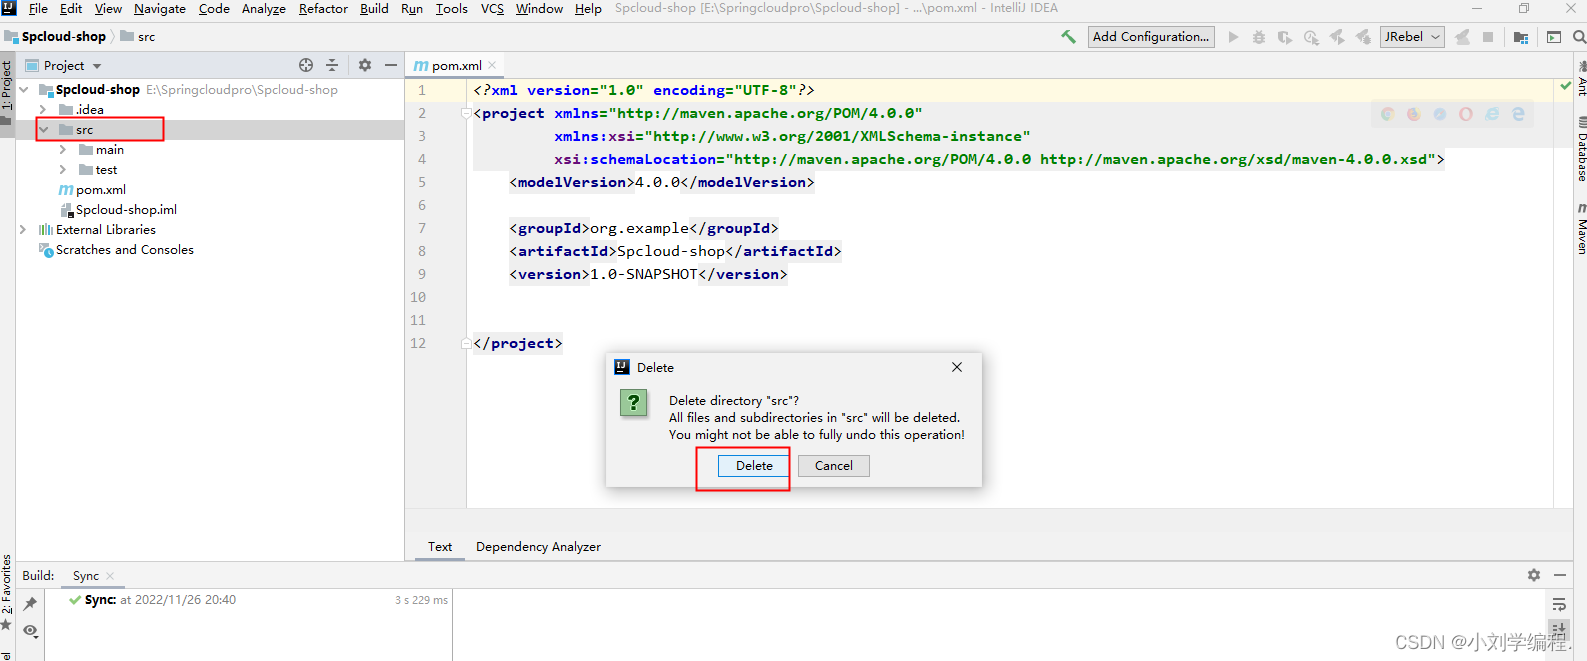
由于我们不需要在src中编写代码,所以可以直接将他删除
pom.xml文件中添加依赖 锁定版本
<!--依赖版本的锁定-->
<properties>
<java.version>1.8</java.version>
<project.build.sourceEncoding>UTF-8</project.build.sourceEncoding>
<project.reporting.outputEncoding>UTF-8</project.reporting.outputEncoding>
<spring-boot.version>2.3.2.RELEASE</spring-boot.version>
<spring-cloud.version>Hoxton.SR9</spring-cloud.version>
<spring-cloud-alibaba.version>2.2.6.RELEASE</spring-cloud-alibaba.version>
</properties>

<dependencyManagement>
    <dependencies>
        <!-- SpringBoot 依赖配置 -->
        <dependency>
            <groupId>org.springframework.boot</groupId>
            <artifactId>spring-boot-dependencies</artifactId>
            <version>${spring-boot.version}</version>
            <type>pom</type>
            <scope>import</scope>
        </dependency>
    </dependencies>
</dependencyManagement>
在这里我们需要注意的一点事Springcloud与Springboot的版本问题:
这里给出
对应的版本对应关系表:
 https://github.com/alibaba/spring-cloud-alibaba/wiki/%E7%89%88%E6%9C%AC%E8%AF%B4%E6%98%8E
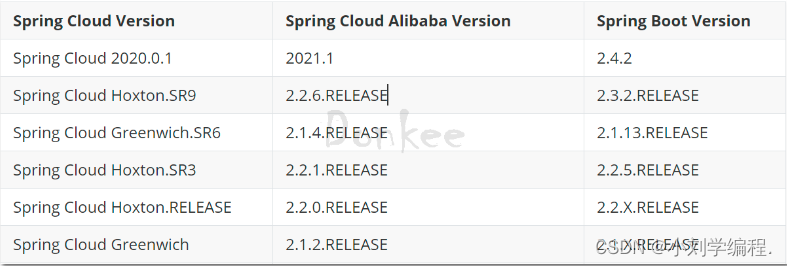
2.2 创建基础模块
基础模块也是Maven项目所以步骤和上面创建父工程一样
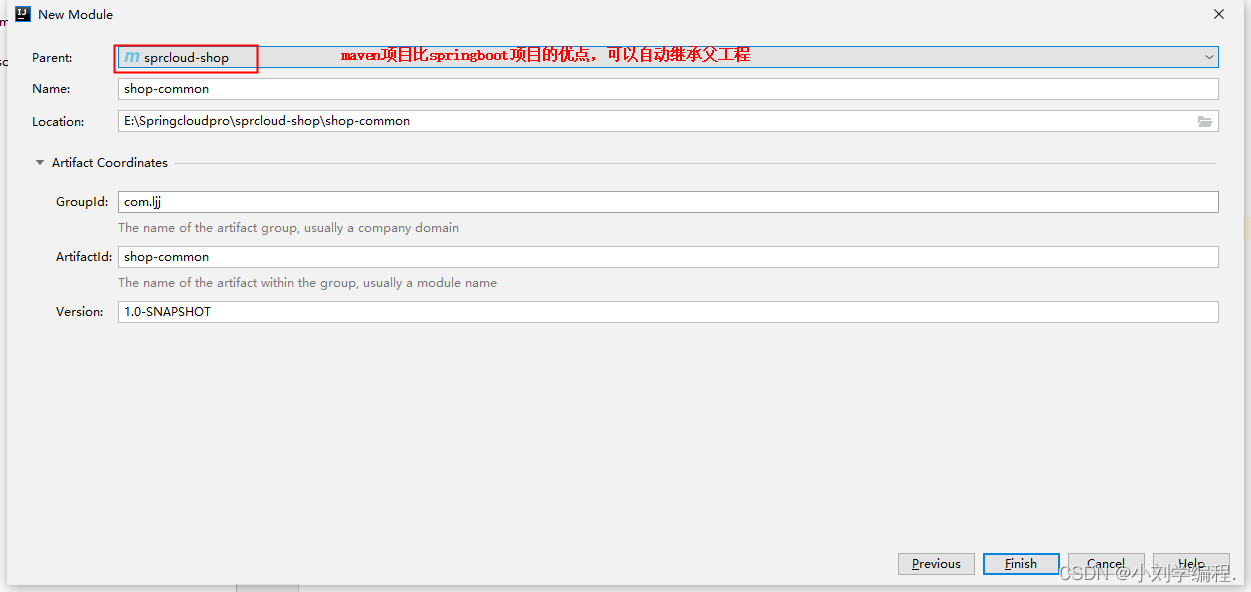
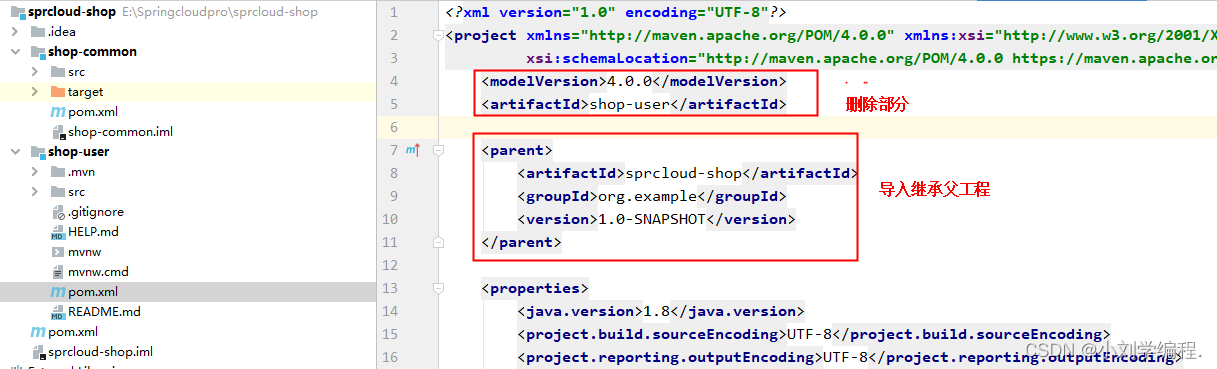
在这里区别创建Maven和Springboot项目,我们创建Maven项目,在父工程的pom.xml中会自动的产生子模块的标记:而springboot项目需要自己手动添加

导入基础模块的pom依赖
 <!--依赖-->
    <dependencies>
        <dependency>
            <groupId>org.springframework.boot</groupId>
            <artifactId>spring-boot-starter-data-jpa</artifactId>
        </dependency>
        <dependency>
            <groupId>org.projectlombok</groupId>
            <artifactId>lombok</artifactId>
        </dependency>
        <dependency>
            <groupId>com.alibaba</groupId>
            <artifactId>fastjson</artifactId>
            <version>1.2.56</version>
        </dependency>
        <dependency>
            <groupId>mysql</groupId>
            <artifactId>mysql-connector-java</artifactId>
            <version>5.1.44</version>
        </dependency>
    </dependencies>
2.2 创建实体类
在common子项目中添加代码 公共模块主要就是添加一些实体类 工具包等等
Order
package com.ljj.entity;

import lombok.Data;

import javax.persistence.Entity;
import javax.persistence.GeneratedValue;
import javax.persistence.GenerationType;
import javax.persistence.Id;

/**
 * @author ljj
 * @site www.xiaomage.com
 * @company
 * @create  2022-11-26 21:06
 */
//订单
@Entity(name = "shop_order")
@Data
public class Order {
    @Id
    @GeneratedValue(strategy = GenerationType.IDENTITY)
    private Long oid;//订单id

    //用户
    private Integer uid;//用户id
    private String username;//用户名

    //商品
    private Integer pid;//商品id
    private String pname;//商品名称
    private Double pprice;//商品单价

    //数量
    private Integer number;//购买数量
}
Product
package com.ljj.entity;

import lombok.Data;

import javax.persistence.Entity;
import javax.persistence.GeneratedValue;
import javax.persistence.GenerationType;
import javax.persistence.Id;

//商品
@Entity(name = "shop_product")
@Data
public class Product {
    @Id
    @GeneratedValue(strategy = GenerationType.IDENTITY)
    private Integer pid;//主键

    private String pname;//商品名称
    private Double pprice;//商品价格
    private Integer stock;//库存
}
User
package com.ljj.entity;
import lombok.Data;
import javax.persistence.Entity;
import javax.persistence.GeneratedValue;
import javax.persistence.GenerationType;
import javax.persistence.Id;
//用户
@Entity(name = "shop_user")//实体类跟数据表的对应
@Data//不再去写set和get方法
public class User {
@Id
@GeneratedValue(strategy = GenerationType.IDENTITY)//数据库自增
private Integer uid;//主键
private String username;//用户名
private String password;//密码
private String telephone;//手机号
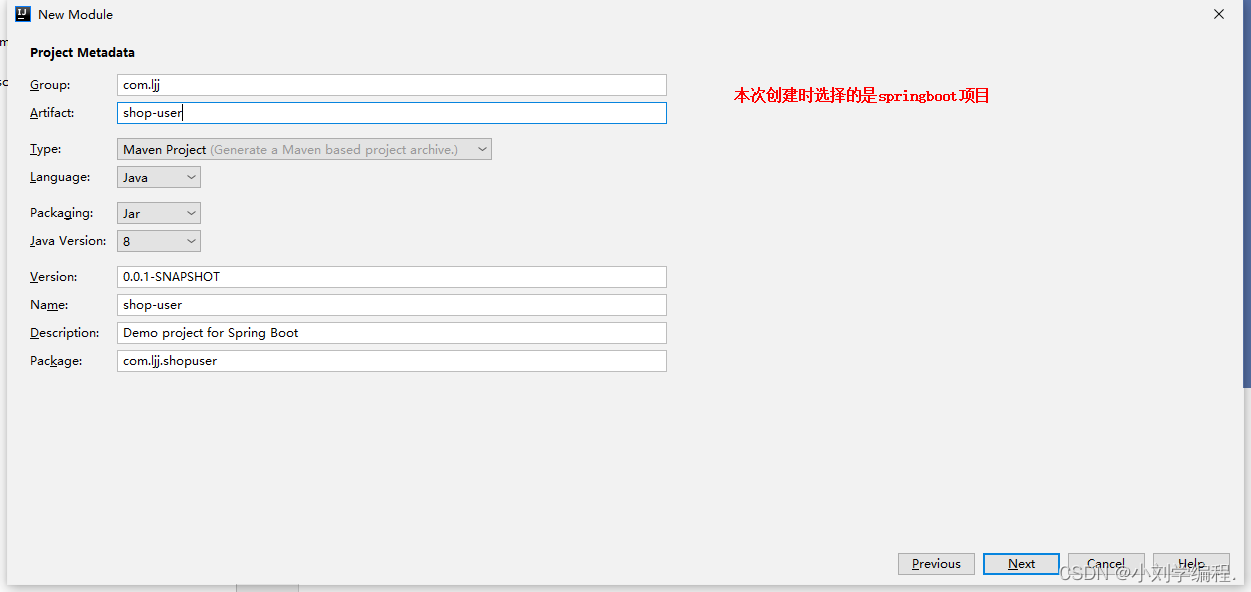
}2.3 创建用户微服务
步骤:
1 创建模块 导入依赖
2 创建SpringBoot主类
3 加入配置文件
1 创建模块 导入依赖
直接下一步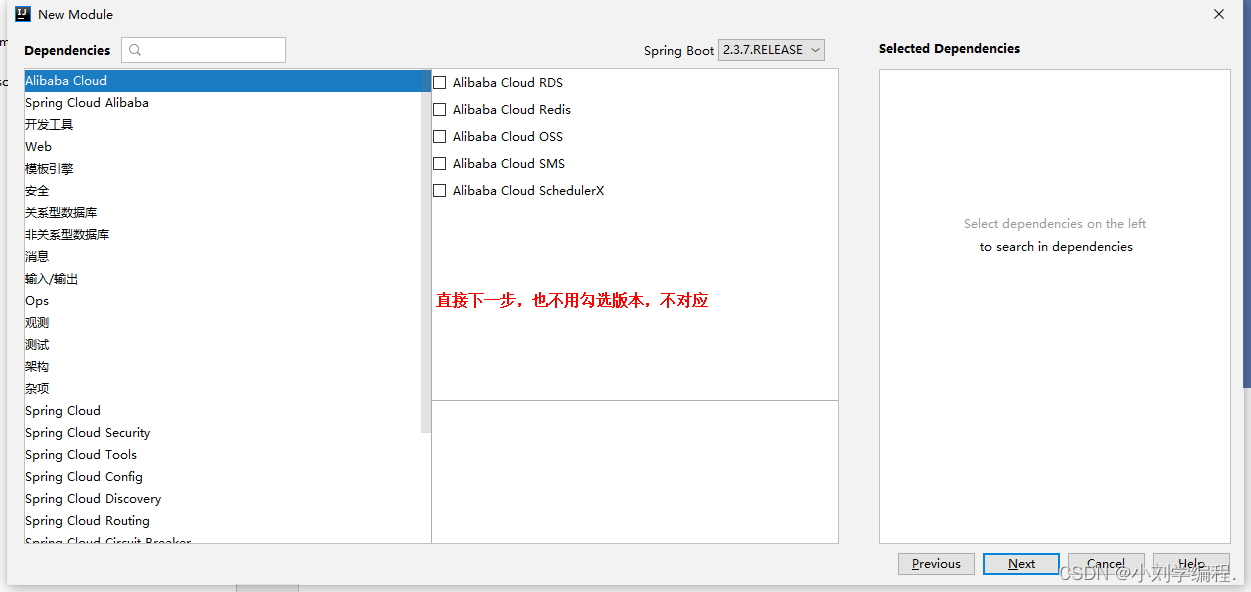
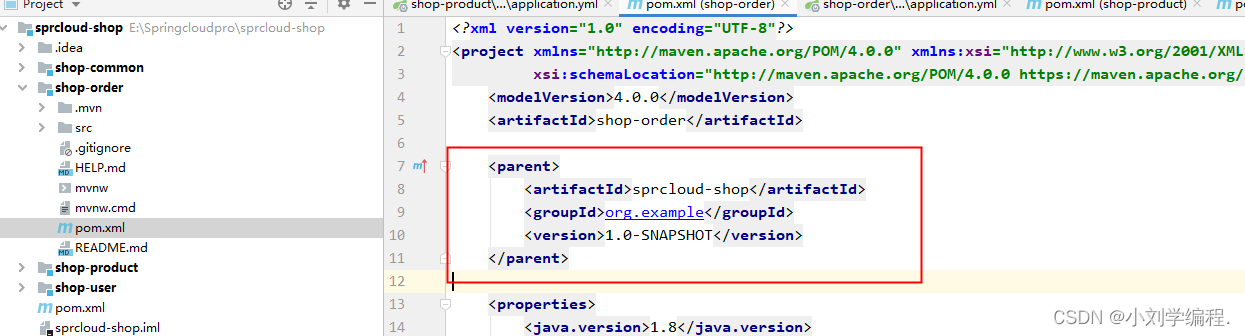
手动继承父工程
(创建SpringBoot主类)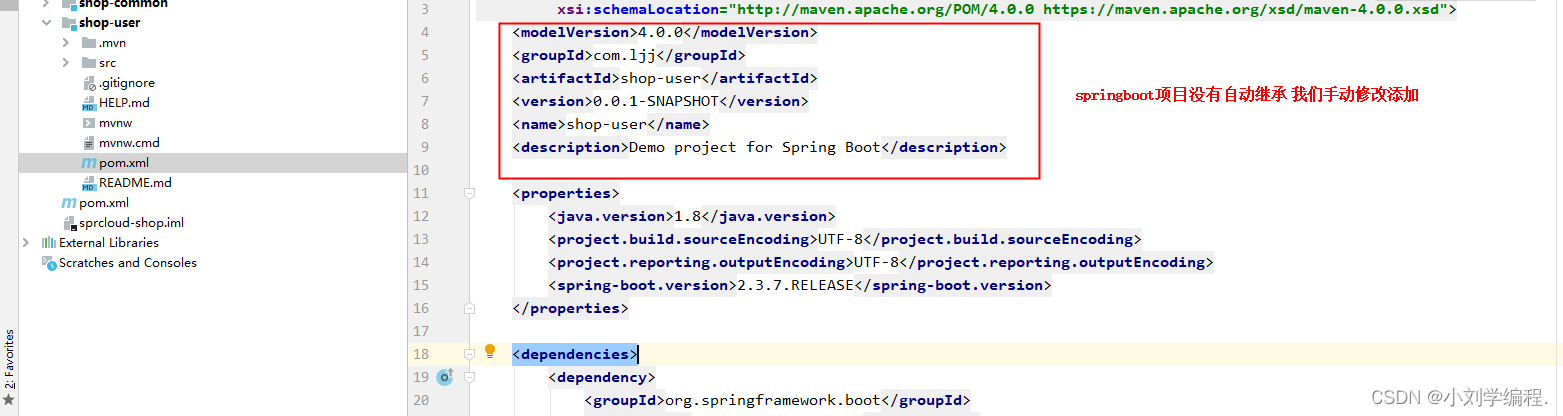
添加依赖
  <!--springboot-web-->
        <dependency>
            <groupId>org.springframework.boot</groupId>
            <artifactId>spring-boot-starter-web</artifactId>
        </dependency>
        <!--shop-common-->
        <dependency>
            <groupId>com.ljj</groupId>
            <artifactId>shop-common</artifactId>
            <version>1.0-SNAPSHOT</version>
        </dependency>
    </dependencies>
由此可见,在基础模块里面,我们可以定义一些共有的pom依赖,比如:数据库连接,解析json对象 lombok组件
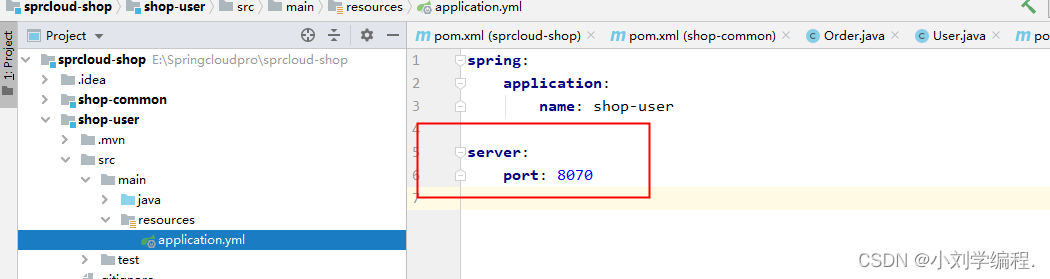
由于微服务需要同时启动 所以我们需要修改端口
微服务模块设计
2 创建SpringBoot主类
springcloud-shop父工程
shop-common 公共模块【实体类】
shop-user 用户微服务 【端口: 807x】
shop-product 商品微服务 【端口: 808x】
shop-order 订单微服务 【端口: 809x】
修改yml文件
2.4 创建商品微服务(步骤同上)

 <!--springboot-web-->
        <dependency>
            <groupId>org.springframework.boot</groupId>
            <artifactId>spring-boot-starter-web</artifactId>
        </dependency>
        <!--shop-common-->
        <dependency>
            <groupId>com.ljj</groupId>
            <artifactId>shop-common</artifactId>
            <version>1.0-SNAPSHOT</version>
        </dependency>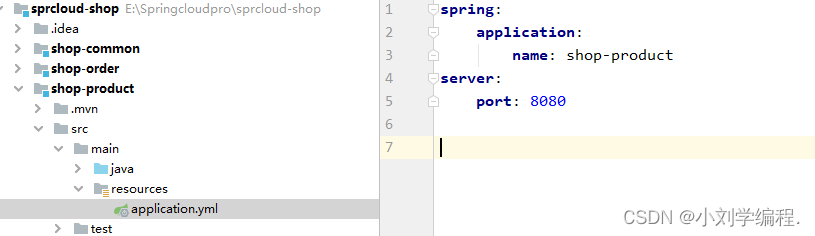
2.5 创建订单微服务(步骤同上)
 <!--springboot-web-->
        <dependency>
            <groupId>org.springframework.boot</groupId>
            <artifactId>spring-boot-starter-web</artifactId>
        </dependency>
        <!--shop-common-->
        <dependency>
            <groupId>com.ljj</groupId>
            <artifactId>shop-common</artifactId>
            <version>1.0-SNAPSHOT</version>
        </dependency>
三,实现跨项目调用
创建必要的接口和实现类(controller service dao)
3.1用户微服务Controller代码编写
package com.ljj.shopuser;
import com.ljj.entity.User;
import org.springframework.web.bind.annotation.PathVariable;
import org.springframework.web.bind.annotation.RequestMapping;
import org.springframework.web.bind.annotation.RestController;
@RequestMapping("/user")
@RestController
public class UserController {
@RequestMapping("/get/{id}")
public User get(@PathVariable("id") Integer id){
// 查询数据库
return new User(id,"ljj","123456","666");
}
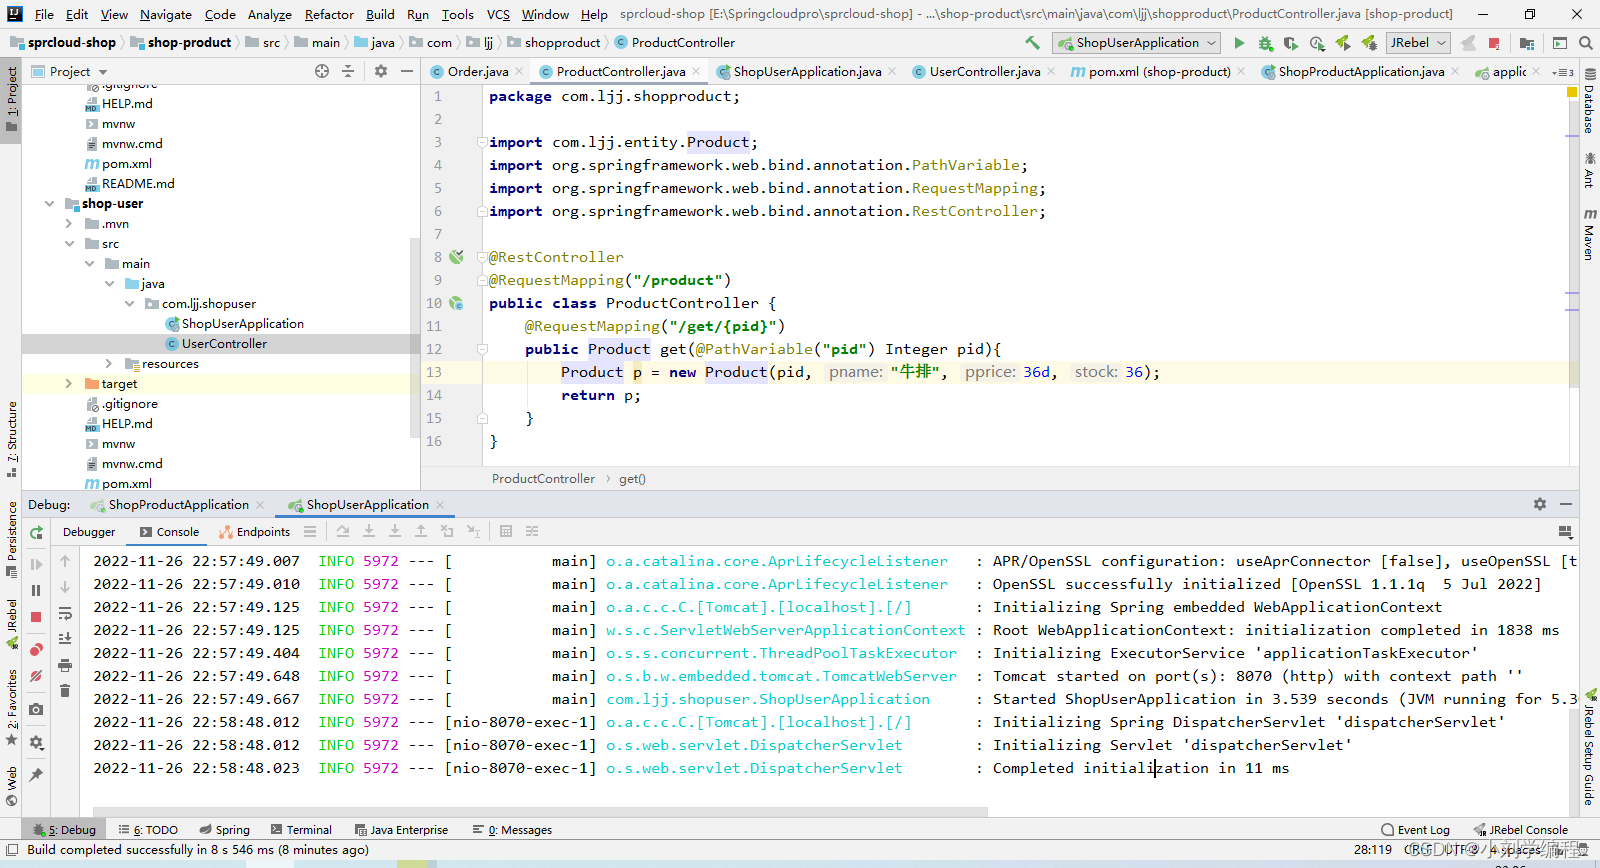
}3.2 商品微服务Controller代码编写
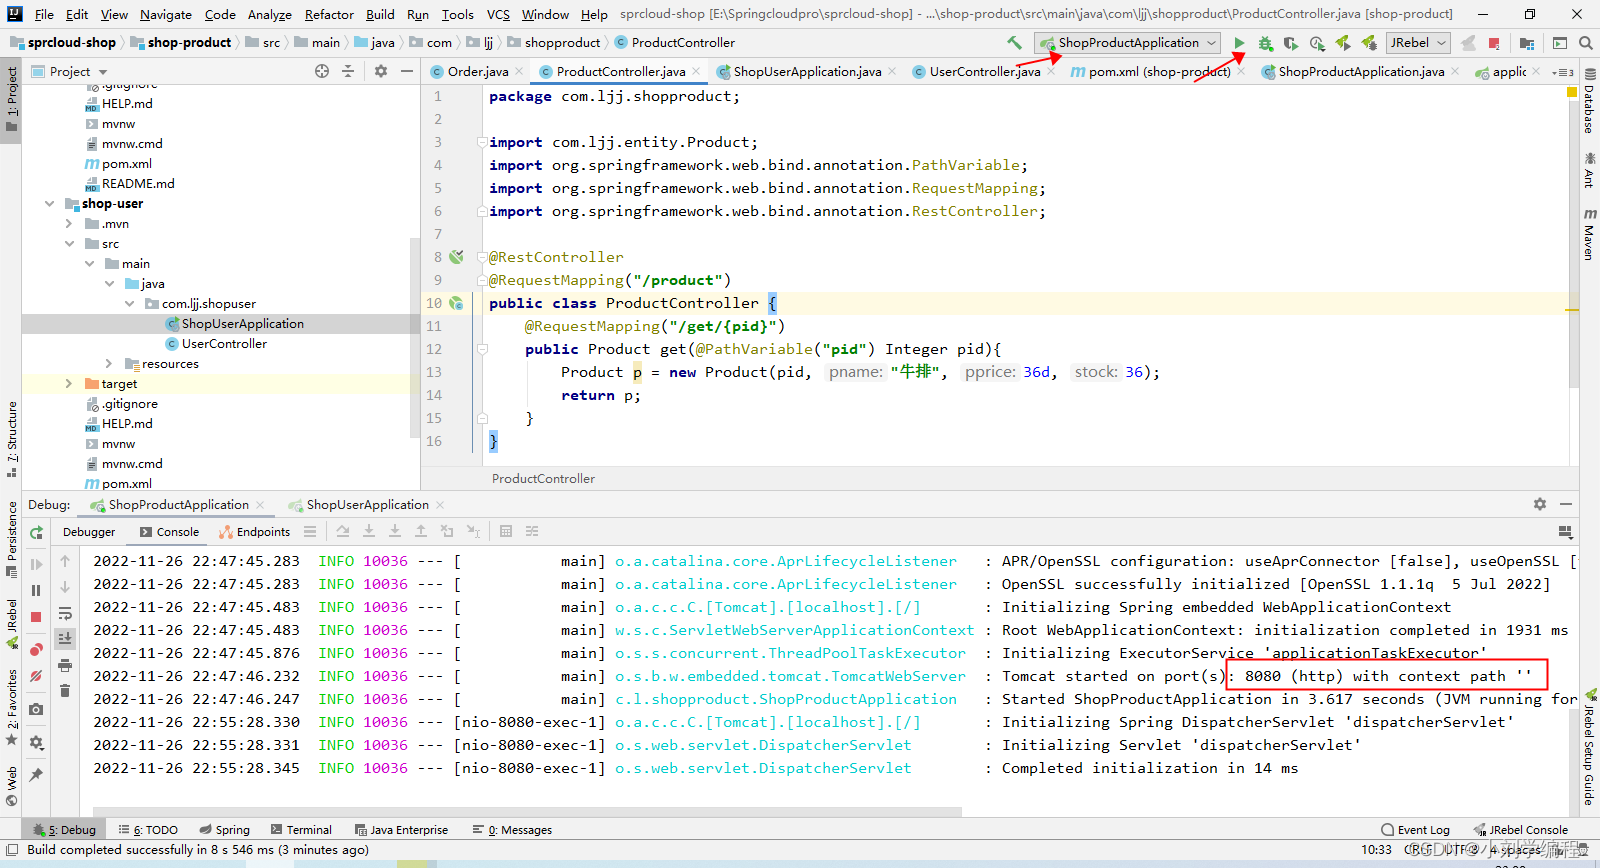
package com.ljj.shopproduct;
import com.ljj.entity.Product;
import org.springframework.web.bind.annotation.PathVariable;
import org.springframework.web.bind.annotation.RequestMapping;
import org.springframework.web.bind.annotation.RestController;
@RestController
@RequestMapping("/product")
public class ProductController {
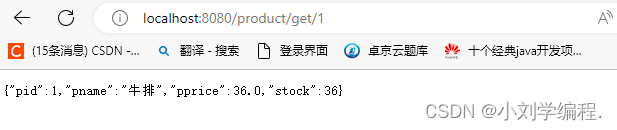
@RequestMapping("/get/{pid}")
public Product get(@PathVariable("pid") Integer pid){
Product p = new Product(pid, "牛排", 36d, 36);
return p;
}
}3.3订单微服务Controller代码编写
package com.ljj.shoporder;

import com.ljj.entity.Order;
import com.ljj.entity.Product;
import com.ljj.entity.User;
import org.springframework.beans.factory.annotation.Autowired;
import org.springframework.web.bind.annotation.PathVariable;
import org.springframework.web.bind.annotation.RequestMapping;
import org.springframework.web.bind.annotation.RestController;
import org.springframework.web.client.RestTemplate;

@RequestMapping("/order")
@RestController
public class OrderController {

    @Autowired
    private RestTemplate restTemplate;

    @RequestMapping("/get/{uid}/{pid}")
    public Order get(@PathVariable("uid") Integer uid,
                     @PathVariable("pid") Integer pid){
        User user = restTemplate.getForObject("http://localhost:8070/user/get/" + uid, User.class);
        Product product = restTemplate.getForObject("http://localhost:8080/product/get/" + pid, Product.class);
        Order order = new Order();
        order.setNumber(product.getStock());
        order.setOid(System.currentTimeMillis());
        order.setPid(pid);
        order.setPname(product.getPname());
        order.setPprice(product.getPprice() * order.getNumber());
        order.setUid(user.getUid());
        order.setUsername(user.getUsername());
        return order;
    }
}
本次将使用订单服务微服务调用用户以及商品的微服务,我们先启动用户以及商品的微服务 最后使用订单微服务调用
 启动订单微服务调用:
微服务之间采用Restful等轻量级http协议相互调用
在启动类中添加
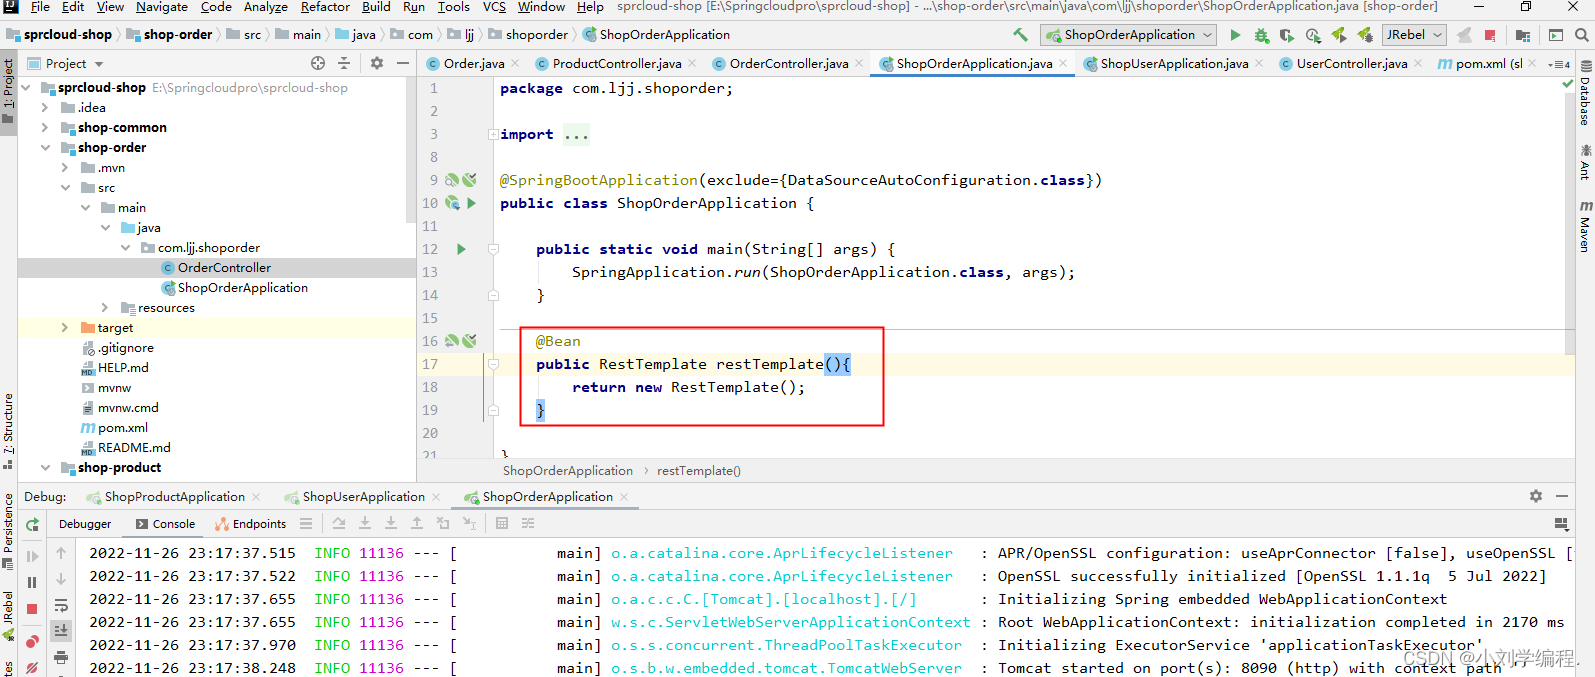
@SpringBootApplication注解包含了配置类 代表当前启动类就是可以当作一个配置类来使用


 4055
4055


 被折叠的 条评论
为什么被折叠?
被折叠的 条评论
为什么被折叠?
 到【灌水乐园】发言


