


目录
一、Spring简介
String是什么
Spring是一个开源框架,它由Rod Johnson创建。它是为了解决企业应用开发的复杂性而创建的。
Spring使用基本的JavaBean来完成以前只可能由EJB完成的事情。
然而,Spring的用途不仅限于服务器端的开发。从简单性、可测试性和松耦合的角度而言,任何Java应用都可以从Spring中受益。
目的:解决企业应用开发的复杂性
功能:使用基本的JavaBean代替EJB,并提供了更多的企业应用功能
范围:任何Java应用
简单来说,Spring是一个轻量级的控制反转(IoC)和面向切面(AOP)的容器框架。
Spring的作用
容器框架 用来整合其他的第三方框架 (中间层框架、万能胶)
Spring出来以前,是框架与框架之间相互要整合
Spring出来之后,是所有框架跟Spring整合就可以了
二、Spring中ioc的特点
建一个maven项目
步骤小编在(http://t.csdn.cn/XUaUN)中有讲解
pom.xml
<project xmlns="http://maven.apache.org/POM/4.0.0" xmlns:xsi="http://www.w3.org/2001/XMLSchema-instance"
	xsi:schemaLocation="http://maven.apache.org/POM/4.0.0 http://maven.apache.org/maven-v4_0_0.xsd">
	<modelVersion>4.0.0</modelVersion>
	<groupId>com.oyang</groupId>
	<artifactId>oyang_Spring_ioc</artifactId>
	<packaging>war</packaging>
	<version>0.0.1-SNAPSHOT</version>
	<name>oyang_Spring_ioc Maven Webapp</name>
	<url>http://maven.apache.org</url>

	<!-- 将当前项目所用的jar包依赖版本定义在外部,目的在于所有jar包版本进行统一管理 -->
		<properties>
		<spring.version>5.0.1.RELEASE</spring.version>
		<javax.servlet.version>4.0.0</javax.servlet.version>
		<junit.version>4.12</junit.version>
	</properties>

	<dependencies>
		<dependency>
			<groupId>junit</groupId>
			<artifactId>junit</artifactId>
			<version>3.8.1</version>
			<scope>test</scope>
		</dependency>
		<!-- 2、导入spring依赖 -->
		<dependency>
			<groupId>org.springframework</groupId>
			<artifactId>spring-context</artifactId>
			<version>${spring.version}</version>
		</dependency>
		<dependency>
			<groupId>org.springframework</groupId>
			<artifactId>spring-aspects</artifactId>
			<version>${spring.version}</version>
		</dependency>
		<!-- 5.1、junit -->
		<dependency>
			<groupId>junit</groupId>
			<artifactId>junit</artifactId>
			<version>${junit.version}</version>
			<scope>test</scope>
		</dependency>
		<!-- 5.2、servlet -->
		<dependency>
			<groupId>javax.servlet</groupId>
			<artifactId>javax.servlet-api</artifactId>
			<version>${javax.servlet.version}</version>
			<scope>provided</scope>
		</dependency>
	</dependencies>

	<build>
		<finalName>oyang_Spring_ioc</finalName>
		<plugins>
			<!--第一步就是配置maven-compiler-plugin插件 -->
			<plugin>
				<groupId>org.apache.maven.plugins</groupId>
				<artifactId>maven-compiler-plugin</artifactId>
				<version>3.7.0</version>
				<configuration>
					<source>1.8</source>
					<target>1.8</target>
					<encoding>UTF-8</encoding>
				</configuration>
			</plugin>
		</plugins>
	</build>
</project>
web.xml
<web-app xmlns="http://xmlns.jcp.org/xml/ns/javaee"
         xmlns:xsi="http://www.w3.org/2001/XMLSchema-instance"
         xsi:schemaLocation="http://xmlns.jcp.org/xml/ns/javaee http://xmlns.jcp.org/xml/ns/javaee/web-app_3_1.xsd"
         version="3.1">
  <display-name>Archetype Created Web Application</display-name>
</web-app>
控制反转
UserBiz
package com.oyang.biz;

/**
 * 用户业务类
 */
public interface UserBiz {

	void list();
}
UserBizImpl1
package com.oyang.biz.impl;

import com.oyang.biz.UserBiz;

public class UserBizImpl1 implements UserBiz {

	@Override
	public void list() {
		System.out.println("查询用户数据,按照年龄排序。。");
	}

}
UserBizImpl2
package com.oyang.biz.impl;

import com.oyang.biz.UserBiz;

public class UserBizImpl2 implements UserBiz {

	@Override
	public void list() {
		System.out.println("查询用户数据,按照入职时间排序。。");
	}

}
OrderAction
package com.oyang.web;

import java.util.List;

import com.oyang.biz.UserBiz;
import com.oyang.biz.impl.UserBizImpl1;

public class OrderAction {

//	private UserBiz userBiz=new UserBizImpl1();
	private UserBiz userBiz;


	public UserBiz getUserBiz() {
		return userBiz;
	}


	public void setUserBiz(UserBiz userBiz) {
		this.userBiz = userBiz;
	}

	private String name;
	private int age;
	private List<String> hobby;

	public OrderAction() {
		super();
	}

	public OrderAction(String name, int age, List<String> hobby) {
		super();
		this.name = name;
		this.age = age;
		this.hobby = hobby;
	}

	public void list() {
		System.out.println(name);
		System.out.println(age);
		System.out.println(hobby);
		userBiz.list();

	}
}
常规做法即运用spring之前的处理方法
* 用户业务类
* 需求:
* 同时在用户模块、订单模块拿到所有的用户数据
* 需求变更:
* 同时在用户模块、订单模块拿到所有的用户数据,并且要求用户数据已经是通过年龄排序了的
* 对应策略:修改userBiz中list方法,添加排序功能
* 需求变更2:
* 同时在用户模块、订单模块拿到所有的用户数据,并且要求用户数据已经是通过注册的时间点排序
* 对应策略:修改userBiz中list方法,添加排序功能,按照时间点排序
* ...
* 总结:
* 最原始的方法:频繁修改业务层biz的代码
* 多实现:凡是涉及到 用户业务层 调用的地方,都需要更改代码
将spring的配置文件加入
<?xml version="1.0" encoding="UTF-8"?>
<beans xmlns="http://www.springframework.org/schema/beans"
	xmlns:xsi="http://www.w3.org/2001/XMLSchema-instance"
	xmlns:aop="http://www.springframework.org/schema/aop"
	xmlns:context="http://www.springframework.org/schema/context"
	xsi:schemaLocation="http://www.springframework.org/schema/beans http://www.springframework.org/schema/beans/spring-beans.xsd
		http://www.springframework.org/schema/aop http://www.springframework.org/schema/aop/spring-aop-4.3.xsd
		http://www.springframework.org/schema/context http://www.springframework.org/schema/context/spring-context-4.3.xsd">


</beans>注意:一定要在有网络的情况下进行,否则约束不生效
IOC的主要作用管理整个项目的Javabean:依靠依赖注入、控制反转的特点进行管理
spring-context.xml
<?xml version="1.0" encoding="UTF-8"?>
<beans xmlns="http://www.springframework.org/schema/beans"
	xmlns:xsi="http://www.w3.org/2001/XMLSchema-instance"
	xmlns:aop="http://www.springframework.org/schema/aop"
	xmlns:context="http://www.springframework.org/schema/context"
	xsi:schemaLocation="http://www.springframework.org/schema/beans http://www.springframework.org/schema/beans/spring-beans.xsd
		http://www.springframework.org/schema/aop http://www.springframework.org/schema/aop/spring-aop-4.3.xsd
		http://www.springframework.org/schema/context http://www.springframework.org/schema/context/spring-context-4.3.xsd">

	<!-- IOC的主要作用管理整个项目的Javabean:依靠依赖注入、控制反转的特点进行管理 -->
	<!-- <bean class="com.oyang.biz.impl.UserBizImpl1" id="userBiz1"></bean> -->
	<bean class="com.oyang.biz.impl.UserBizImpl2" id="userBiz2"></bean>
	<bean class="com.oyang.web.UserAction" id="userAction">
		<property name="userBiz" ref="userBiz2"></property>
	</bean>
	<bean class="com.oyang.web.OrderAction" id="orderAction"></bean>
</beans>
UserAction
package com.oyang.web;

import com.oyang.biz.UserBiz;
import com.oyang.biz.impl.UserBizImpl1;

public class UserAction {

	//private UserBiz userBiz = new UserBizImpl1();
	private UserBiz userBiz;

	public void list() {
		userBiz.list();
	}
	public UserBiz getUserBiz() {
		return userBiz;
	}
	public void setUserBiz(UserBiz userBiz) {
		this.userBiz = userBiz;
	}


}在里面建一个Demo1的类
建模,打印com.cdl.biz.impl.UserBizImpl2中的语句
package com.oyang.ioc;

import org.springframework.context.support.ClassPathXmlApplicationContext;

import com.oyang.web.UserAction;

public class Demo1 {
	@SuppressWarnings("resource")
	public static void main(String[] args) {
		//建模
		ClassPathXmlApplicationContext context = new ClassPathXmlApplicationContext("/spring-context.xml");
		UserAction userAction = (UserAction) context.getBean("userAction");
		userAction.list();
	}


}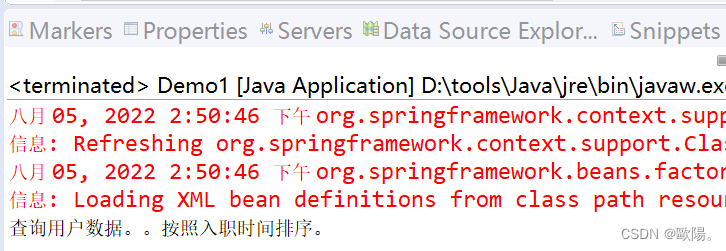
总结
1.对spring框架的配置文件进行建模,建模之后spring-context.xml中所有的Javabean信息
都会加载进spring容器的上下文中
2.上下文中就包含了spring-context.xml 所有对象结论:IOC特点(控制反转):将创建对象的权利反转给spring容器来完成
注入依赖
<?xml version="1.0" encoding="UTF-8"?>
<beans default-autowire="byType" xmlns="http://www.springframework.org/schema/beans"
	xmlns:xsi="http://www.w3.org/2001/XMLSchema-instance"
	xmlns:aop="http://www.springframework.org/schema/aop"
	xmlns:context="http://www.springframework.org/schema/context"
	xsi:schemaLocation="http://www.springframework.org/schema/beans http://www.springframework.org/schema/beans/spring-beans.xsd
		http://www.springframework.org/schema/aop http://www.springframework.org/schema/aop/spring-aop-4.3.xsd
		http://www.springframework.org/schema/context http://www.springframework.org/schema/context/spring-context-4.3.xsd">

	<!-- ioc的主要作用管理整个项目的Javabean,依赖注入,控制反转的特点进行管理 -->
<bean class="com.oyang.biz.impl.UserBizImpl1" id="userBiz"></bean>
<!-- <bean class="com.oyang.biz.impl.UserBizImpl2" id="userBi1"></bean> -->
	<!-- set注入 -->
	<bean class="com.oyang.web.UserAction" id="userAction">
		<property name="userBiz" ref="userBiz"></property>
		<property name="age" value="18"></property>
		<property name="name" value="oyang"></property>
		<property name="hobby">
			<list>
				<value>运动</value>
				<value>nv</value>
				<value>音乐</value>
			</list>
		</property>
	</bean>
	<!-- 构造注入 -->
	<bean class="com.oyang.web.OrderAction" id="orderAction">
		<property name="userBiz" ref="userBiz"></property>
		<constructor-arg name="name" value="oyang"></constructor-arg>
		<constructor-arg name="age" value="20"></constructor-arg>
		<constructor-arg name="hobby">
			<list>
				<value>运动</value>
				<value>nv</value>
				<value>音乐</value>
			</list>
		</constructor-arg>
	</bean>
</beans>

自动装配
default-autowire="byName"
byName:是通过spring管理的bean对象的ID进行查找,如果找不到,则注入失败,反之成功
byType:是通过spring管理的bean对象的接口实现类进行查找,如果没有或者2个以上,则注入失败,反之成功
三、spring与web容器的整合
分析:
spring与web容器的整合原理
why:建模的过程是十分耗时的
解决问题:
1.建模必不可少
2.建模只保障只执行一次
3.建模后期望在每一个servlet都能够拿到spring的上下文对象ClassPathXmlApplicationContext
how:
1.监听器的初始化方法 只执行一次
2.spring的上下文要存放在Tomcat上下文中
listener
package com.oyang.ioc.listener;
import javax.servlet.ServletContext;
import javax.servlet.ServletContextEvent;
import javax.servlet.ServletContextListener;
import org.springframework.context.support.ClassPathXmlApplicationContext;
public class SpringLoadListener implements ServletContextListener{
@Override
public void contextInitialized(ServletContextEvent sce) {
System.out.println("初始化执行");
ServletContext servletContext = sce.getServletContext();
String springConfigLocation = servletContext.getInitParameter("springConfigLocation");
System.out.println(springConfigLocation+"...");
//拿到spring上下文
ClassPathXmlApplicationContext context = new ClassPathXmlApplicationContext("/spring-context.xml");
//将spring的上下文保存在Tomcat上下文中
servletContext.setAttribute("springContext", context);
}
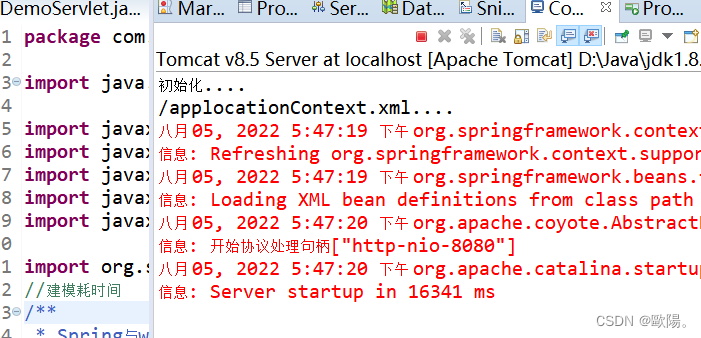
}DemoServlet
package com.oyang.web;

import java.io.IOException;

import javax.servlet.ServletException;
import javax.servlet.annotation.WebServlet;
import javax.servlet.http.HttpServlet;
import javax.servlet.http.HttpServletRequest;
import javax.servlet.http.HttpServletResponse;

import org.springframework.context.support.ClassPathXmlApplicationContext;
//建模耗时间
/**
 * Spring与web容器的整合原理
 * why:建模的过程是十分耗时的
 * 	解决问题:
 * 		1.建模必不可少
 * 		2.建模要保障只执行一次
 * 		3.建模后期望在每一个servelt都能够拿到spring的上下文对象ClassPathXmlApplicationContext
 * how:
 *	1.监听器的初始化方法
 *	2. Spring的上下文,要存放在tomcat上下文中
 *
 *
 * @author Administrator
 *
 */
@WebServlet("/springDemo")
public class DemoServlet extends HttpServlet{

	@Override
	protected void service(HttpServletRequest req, HttpServletResponse resp) throws ServletException, IOException {

//		ClassPathXmlApplicationContext context = new ClassPathXmlApplicationContext("/spring-context.xml");
		ClassPathXmlApplicationContext context =(ClassPathXmlApplicationContext) req.getServletContext().getAttribute("SpringContext");
		UserAction userAction = (UserAction) context.getBean("userAction");
		userAction.list();
	}
}
spring-context.xml
<?xml version="1.0" encoding="UTF-8"?>
<beans default-autowire="byType" xmlns="http://www.springframework.org/schema/beans"
	xmlns:xsi="http://www.w3.org/2001/XMLSchema-instance"
	xmlns:aop="http://www.springframework.org/schema/aop"
	xmlns:context="http://www.springframework.org/schema/context"
	xsi:schemaLocation="http://www.springframework.org/schema/beans http://www.springframework.org/schema/beans/spring-beans.xsd
		http://www.springframework.org/schema/aop http://www.springframework.org/schema/aop/spring-aop-4.3.xsd
		http://www.springframework.org/schema/context http://www.springframework.org/schema/context/spring-context-4.3.xsd">

	<!-- ioc的主要作用管理整个项目的Javabean,依赖注入,控制反转的特点进行管理 -->
<bean class="com.oyang.biz.impl.UserBizImpl1" id="userBiz"></bean>
<!-- <bean class="com.oyang.biz.impl.UserBizImpl2" id="userBi1"></bean> -->
	<!-- set注入 -->
	<bean class="com.oyang.web.UserAction" id="userAction">
		<property name="userBiz" ref="userBiz"></property>
		<property name="age" value="18"></property>
		<property name="name" value="oyang"></property>
		<property name="hobby">
			<list>
				<value>运动</value>
				<value>nv</value>
				<value>音乐</value>
			</list>
		</property>
	</bean>
	<!-- 构造注入 -->
	<bean class="com.oyang.web.OrderAction" id="orderAction">
		<property name="userBiz" ref="userBiz"></property>
		<constructor-arg name="name" value="oyang"></constructor-arg>
		<constructor-arg name="age" value="20"></constructor-arg>
		<constructor-arg name="hobby">
			<list>
				<value>运动</value>
				<value>nv</value>
				<value>音乐</value>
			</list>
		</constructor-arg>
	</bean>
</beans>
web.xml
<!-- 修改web.xml由2.3至3.1 -->
<web-app xmlns="http://xmlns.jcp.org/xml/ns/javaee"
         xmlns:xsi="http://www.w3.org/2001/XMLSchema-instance"
         xsi:schemaLocation="http://xmlns.jcp.org/xml/ns/javaee http://xmlns.jcp.org/xml/ns/javaee/web-app_3_1.xsd"
         version="3.1">
  <display-name>Archetype Created Web Application</display-name>

	<context-param>
		<param-name>springConfigLocation</param-name>
		<param-value>/applocationContext.xml</param-value>
	</context-param>
	<listener>
		<listener-class>com.oyang.ioc.listener.SpringLoadListener</listener-class>
	</listener>

</web-app>
OK,今日的学习就到此结束啦,如果对个位看官有帮助的话可以留下免费的赞哦(收藏或关注也行),如果文章中有什么问题或不足以及需要改正的地方可以私信博主,博主会做出改正的。个位看官,小陽在此跟大家说拜拜啦


 573
573


 被折叠的 条评论
为什么被折叠?
被折叠的 条评论
为什么被折叠?
 到【灌水乐园】发言


