目录
5.2 在WEB-INF下添加springmvc-servlet.xml(spring-mvc.xml)
一、SpringMvC简介
1. 什么是SpringMVC?
Spring Web MVC是一种基于Java的实现了MVC设计模式的、请求驱动类型的、轻量级Web框架。
也有人说是视图层框架、控制层框架。当然这些也对,不能说不对。
视图层框架:SpringMVC部分功能是向用户渲染展示数剧
控制层框架:DispatcherServlet:接收浏览器前端的任意请求然后寻找对应的 子控制器(适配器*Adapter) 处理浏览器请求
2. SpringMVC处理请求的流程
2.1 首先用户发送请求-->DispatherServlet
2.2 DispatcherServlet-->HandlerMapping
2.3 DispatcherServlet-->HandlerAdapter
2.4 HandlerAdapter-->处理器功能处理方法的调用
2.5 ModelAndView的逻辑视图名-->ViewRecolver
2.6 View-->渲染
2.7 返回控制权给DispatcherServlet,由DispatcherServlet返回呼应给用户,流程结束
3. SpringMVC核心开发步骤
3.1 DispatcherServlet在web.xml中的部署描述,从而拦截请求到springMVC
3.2 HandlerMapping的配置,从而将请求映射到处理器
3.3 HandlerAdapter的配置,从而支持多种类型的处理器
3.4 处理器(页面控制器)的配置,从而刊行功能处理
3.5 ViewResolver的配置,从而将逻辑视图名解析为具体的视图技术
4. SpringMVC的组件
4.1 前端控制器(DispatcherServlet)
4.2 请求到处理器映射(HandlerMapping)
4.3 处理器适配器(HandlerAdapter)
4.4 视图解析器(ViewResolver)
4.5 处理器或页面控制器(Controller)
4.6 验证器(Validator)
4.6 命令对象(Command 请求参数绑定到的对象就叫命令对象)
4.7 表单对象(Form Object提供给表单展示和提交到的对象就叫表单对象)
5.如何在项目中添加springmvc
5.1添加相关依赖
    <dependency>
      <groupId>org.springframework</groupId>
      <artifactId>spring-webmvc</artifactId>
      <version>${spring.version}</version>
    </dependency>
<!-- ********************** JSTL依赖 ********************** -->
<!-- 缺少下面的这两个jar包会报java.lang.NoClassDefFoundError: javax/servlet/jsp/jstl/core/Config-->
<!-- 原因:org.springframework.web.servlet.view.JstlView在视图解析时需要这二个jar包--><dependency>
<groupId>jstl</groupId>
<artifactId>jstl</artifactId>
<version>1.2</version>
</dependency>
<dependency>
<groupId>taglibs</groupId>
<artifactId>standard</artifactId>
<version>1.1.2</version>
</dependency>
</dependencies>5.2 在WEB-INF下添加springmvc-servlet.xml(spring-mvc.xml)
<?xml version="1.0" encoding="UTF-8"?>
<beans xmlns="http://www.springframework.org/schema/beans"
       xmlns:xsi="http://www.w3.org/2001/XMLSchema-instance"
       xmlns:context="http://www.springframework.org/schema/context"
       xmlns:mvc="http://www.springframework.org/schema/mvc" xmlns:aop="http://www.springframework.org/schema/aop"
       xsi:schemaLocation="http://www.springframework.org/schema/beans http://www.springframework.org/schema/beans/spring-beans.xsd
      http://www.springframework.org/schema/context http://www.springframework.org/schema/context/spring-context-4.3.xsd http://www.springframework.org/schema/mvc http://www.springframework.org/schema/mvc/spring-mvc.xsd http://www.springframework.org/schema/aop http://www.springframework.org/schema/aop/spring-aop.xsd">
    <!-- 通过context:component-scan元素扫描指定包下的控制器-->
    <!--1) 扫描com.javaxl.zf及子子孙孙包下的控制器(扫描范围过大,耗时)-->
    <aop:aspectj-autoproxy/>
    <context:component-scan base-package="com.javaxl.ssm"/>

    <!--2) 此标签默认注册DefaultAnnotationHandlerMapping和AnnotationMethodHandlerAdapter -->
    <!--两个bean,这两个bean是spring MVC为@Controllers分发请求所必须的。并提供了数据绑定支持,-->
    <!--@NumberFormatannotation支持,@DateTimeFormat支持,@Valid支持,读写XML的支持(JAXB),读写JSON的支持(Jackson)-->
    <mvc:annotation-driven></mvc:annotation-driven>

    <!--3) ViewResolver -->
    <bean class="org.springframework.web.servlet.view.InternalResourceViewResolver">
        <!-- viewClass需要在pom中引入两个包:standard.jar and jstl.jar -->
        <property name="viewClass"
                  value="org.springframework.web.servlet.view.JstlView"></property>
        <property name="prefix" value="/"/>
        <property name="suffix" value=".jsp"/>
    </bean>

    <!--4) 单独处理图片、样式、js等资源 -->
    <!--<mvc:resources location="/css/" mapping="/css/**"/>-->
    <mvc:resources location="/images/" mapping="/images/**"/>
    <!--<mvc:resources location="/js/" mapping="/js/**"/>-->


</beans>
5.3 修改web.xml
<web-app xmlns="http://xmlns.jcp.org/xml/ns/javaee"
         xmlns:xsi="http://www.w3.org/2001/XMLSchema-instance"
         xsi:schemaLocation="http://xmlns.jcp.org/xml/ns/javaee http://xmlns.jcp.org/xml/ns/javaee/web-app_3_1.xsd"
         version="3.1">
  <display-name>Archetype Created Web Application</display-name>
  <context-param>
    <param-name>contextConfigLocation</param-name>
    <param-value>classpath:applicationContext.xml</param-value>
  </context-param>
  <!-- 读取Spring上下文的监听器 -->
  <listener>
    <listener-class>org.springframework.web.context.ContextLoaderListener</listener-class>
  </listener>

  <!-- Spring MVC servlet -->
  <servlet>
    <servlet-name>SpringMVC</servlet-name>
    <servlet-class>org.springframework.web.servlet.DispatcherServlet</servlet-class>
    <!--此参数可以不配置,默认值为:/WEB-INF/springmvc-servlet.xml-->
    <init-param>
      <param-name>contextConfigLocation</param-name>
      <param-value>/WEB-INF/spring-mvc.xml</param-value>
    </init-param>
    <load-on-startup>1</load-on-startup>
    <!--web.xml 3.0的新特性,是否支持异步-->
    <async-supported>true</async-supported>
  </servlet>
  <servlet-mapping>
    <servlet-name>SpringMVC</servlet-name>
    <url-pattern>/</url-pattern>
  </servlet-mapping>
</web-app>
5.4、applicationContext.xml
<?xml version="1.0" encoding="UTF-8"?>
<beans xmlns="http://www.springframework.org/schema/beans"
       xmlns:xsi="http://www.w3.org/2001/XMLSchema-instance"
       xmlns:context="http://www.springframework.org/schema/context" xmlns:tx="http://www.springframework.org/schema/tx"
       xmlns:aop="http://www.springframework.org/schema/aop"
       xsi:schemaLocation="http://www.springframework.org/schema/beans http://www.springframework.org/schema/beans/spring-beans.xsd http://www.springframework.org/schema/context http://www.springframework.org/schema/context/spring-context.xsd http://www.springframework.org/schema/tx http://www.springframework.org/schema/tx/spring-tx.xsd http://www.springframework.org/schema/aop http://www.springframework.org/schema/aop/spring-aop.xsd">
    <!--随着后续开发,框架越来越多,不能将所有的框架配置,放到同一个配置间,否则不便于管理-->
    <import resource="applicationContext-mybatis.xml"></import>
</beans>
二、Springmvc之helloword实现
1、HelloController
package com.ouyang.ssm.controller;

import org.springframework.stereotype.Component;
import org.springframework.stereotype.Controller;
import org.springframework.stereotype.Repository;
import org.springframework.stereotype.Service;
import org.springframework.web.bind.annotation.RequestMapping;
import org.springframework.web.servlet.ModelAndView;

import javax.servlet.http.HttpServletRequest;

/**
 * 被controller标记的类 会交给 spring 进行管理
 * @Controller
 * @Service
 * @Repository
 * @Component
 * 以上四个都代表 当前类 交给Spring容器进行管理
 *
 *
 * @author oyang
 * @site https://blog.csdn.net
 * @qq 1828190940
 * @create  2022-08-17 8:16
 */

@Controller
public class HelloController {

//    自定义mvc:浏览器发送请求 http://localhost:8080/hello.action?methodName=hello
//    springmvc:浏览器发送请求 http://localhost:8080/helloReq
//    此处是下面的简写版
    @RequestMapping("/helloReq")
    public String hello(){
        System.out.println("hello springmvc...");
//        /hello.jsp
        return "hello";
    }

    @RequestMapping("/hello2")
    public ModelAndView hello2(HttpServletRequest req){
        ModelAndView mv=new ModelAndView();
        mv.setViewName("hello");
        mv.addObject("msg","success");
        return mv;
    }
}
2、hello.jsp
<%--
  Created by IntelliJ IDEA.
  User: Administrator
  Date: 2022/8/16
  Time: 17:26
  To change this template use File | Settings | File Templates.
--%>
<%@ page contentType="text/html;charset=UTF-8" language="java" %>
<html>
<head>
    <title>Title</title>
</head>
<body>
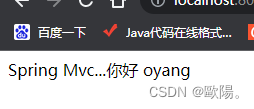
Spring MVC...你好 ouyang
${msg}
</body>
</html>


三、CRUD之常用注解及返回值
Controller
Requestmapping
Requestparam
BookController
package com.ouyang.ssm.controller;

import com.ouyang.ssm.biz.BookBiz;
import com.ouyang.ssm.model.Book;
import com.ouyang.ssm.util.PageBean;
import org.springframework.beans.factory.annotation.Autowired;
import org.springframework.stereotype.Controller;
import org.springframework.web.bind.annotation.*;

import javax.servlet.http.HttpServletRequest;
import java.util.HashMap;
import java.util.List;
import java.util.Map;

/**
 * @RequestMapping 加在 类上面,称窄化路径,其实相当于包的概念
 */
@Controller
@RequestMapping("/book")
public class BookController {
    @Autowired
    private BookBiz bookBiz;

//    http://localhost:8080/book/list
    @RequestMapping
//    @GetMapping=@RequestMapping(value = "/list",method = RequestMethod.GET)
//    @PostMapping
//    @DeleteMapping
//    @PutMapping
    public String hello(HttpServletRequest req){
        System.out.println("hello springmvc...");
        PageBean pageBean=new PageBean();
        pageBean.setRequest(req);
        Map map=new HashMap();
        String bname = req.getParameter("bname");
        map.put("bname",bname);
        List<Map> maps = this.bookBiz.listPager(map, pageBean);
        req.setAttribute("lst",maps);
        return "hello";
    }

    @RequestMapping("/add")
    public String add(Book book){
        this.bookBiz.insertSelective(book);
        return "redirect:/book/list";
    }

    @RequestMapping("/edit")
    public String edit(Book book){
        this.bookBiz.insertSelective(book);
        return "redirect:/book/list";
    }

    @RequestMapping("/del/{bid}")
    public String del(@PathVariable("bid") Integer bid){
        this.bookBiz.deleteByPrimaryKey(bid);
        return "redirect:/book/list";
    }
}
index.jsp
<%--
  Created by IntelliJ IDEA.
  User: Administrator
  Date: 2022/8/16
  Time: 21:52
  To change this template use File | Settings | File Templates.
--%>
<%@ page contentType="text/html;charset=UTF-8" language="java" %>
<html>
<head>
    <title>Title</title>
</head>
<body>
    <a href="${pageContext.request.contextPath}/book/list?bname=圣墟">查询所有</a>
    <a href="${pageContext.request.contextPath}/book/add?bid=2&bname=sb&price=9.9">增加</a>
    <a href="${pageContext.request.contextPath}/book/edit?bid=2&bname=suibian&price=9.8">修改</a>
    <a href="${pageContext.request.contextPath}/book/del/2">删除</a>
</body>
</html>
hello.jsp
<%--
  Created by IntelliJ IDEA.
  User: Administrator
  Date: 2022/8/16
  Time: 17:26
  To change this template use File | Settings | File Templates.
--%>
<%@ page contentType="text/html;charset=UTF-8" language="java" %>
<%@taglib prefix="c" uri="http://java.sun.com/jsp/jstl/core"%>
<html>
<head>
    <title>Title</title>
</head>
<body>
SpringMVC 你好
${msg}
<hr>
${lst}
<c:forEach items="${lst}" var="l">
    ${l.bid}:${l.bname}<hr>
</c:forEach>
</body>
</html>
补充:springMvc的工作原理
1、浏览器发送请求到中央控制器Dispatcherservlet
2、中央控制器DispatcherServlet通过处理器映射器HandlerMapping找到处理器适配器HandlerAdapter
3、执行HandlerAdapter,返回值ModelAndView回传给DispatcherServlet
4、视图解析器viewResolver会对 返回值ModelAndView进行渲染,得到view视图对象
5、最后DispatcherServlet会将view视图对象返回给用户
转发与重定向的设置
"hello"转发到/hello.jsp
"forward:hello" 转发到/hello.jsp
"redirect:/hello" 重定向到.../项目名/hello book/list
四、SpringMVC静态资源处理
<mvc:resources location="/static/" mapping="/static/** "/>


 265
265


 被折叠的 条评论
为什么被折叠?


