


简介:
python 主流自动化测试报告插件有三个:HTMLTestRunner、BeautifulReport 和 Allure。HTMLTestRunner是一个比较古老的报告模板,界面也不是很好看。BeautifulReport 界面很简洁,看起来也很直观,是一款比较不错的报告插件。如果你想提升一下你的level,让你的自动化测试报告变得高大上,那么请选择 Allure 。
Allure 是一款轻量级的开源自动化测试报告生成框架。它支持绝大部分测试框架,比如 TestNG、Junit 、pytest、unittest 等。本文主要介绍 pytest 框架结合 Allure 生成 格式统一、美观的 测试报告。
1.Allure 下载安装
mac版本:Mac下 allure的下载与配置
windows版本:
先下载allure压缩包:Allure 下载最新版本 ,下载完成之后,解压到 pytest 目录中。然后设置环境变量,简单一点就是进入 \allure-2.13.0\bin 目录执行 allure.bat 。cmd 输入 allure 查看环境变量是否设置成功。

2. allure-pytest
下载 allure-pytest 插件,用来生成 Allure 测试报告所需要的数据。
pip3 install allure-pytest案例分析:
1、编写一段使用 pytest 框架的测试代码:
#!/usr/bin/env python
# coding=utf-8
import pytest
import allure
import os
@pytest.fixture(scope='function')
def login():
print("登录")
yield
print("登录完成")
@allure.feature('加入购物车')
def test_1(login):
'''将苹果加入购物车'''
print("测试用例1")
@allure.feature('加入购物车')
def test_2():
'''将橘子加入购物车'''
print("测试用例2")
if __name__ =="__main__":
# 执行pytest单元测试,生成 Allure 报告需要的数据存在 /temp 目录
pytest.main(['--alluredir', './temp'])
# 执行命令 allure generate ./temp -o ./report --clean ,生成测试报告
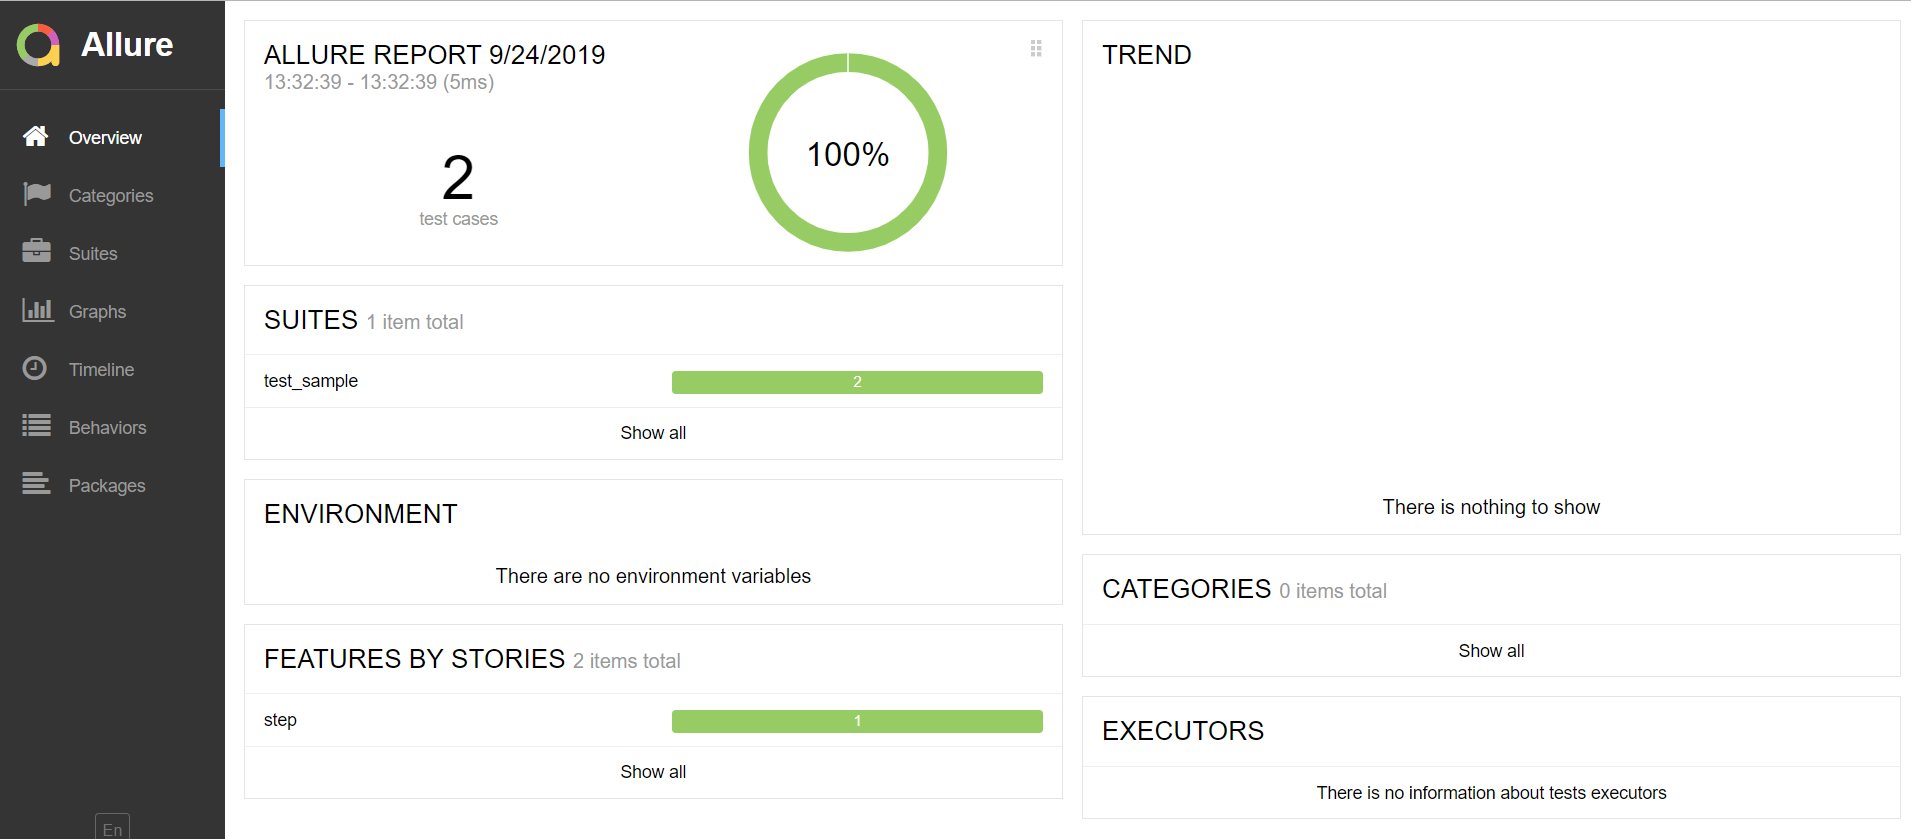
os.system('allure generate ./temp -o ./report --clean') 2、执行后生成 Allure 报告:

打开 index.html ,测试报告如下:
3、@allure 装饰器中的一些功能点:
1)想对你的用例集分层,增加可读性,可以使用以下三个装饰器,写在类或方法前面:
- @allure.epic :敏捷里的概念,定义史诗
- @allure.feature :用于定义被测试的功能,被测产品的需求点
- @allure.story : 用于定义被测功能的用户场景,即子功能点
#!/usr/bin/env python
# coding=utf-8
import pytest
import allure
import os

@pytest.fixture(scope='function')
def login():
    print("登录")
    yield
    print("登录完成")

@allure.epic('这是一个测试')
@allure.feature('购物车')
@allure.story('加购商品')
def test(login):
    '''将苹果加入购物车'''
    print("测试用例")


if __name__ =="__main__":
    # 执行pytest单元测试,生成 Allure 报告需要的数据存在 /temp 目录
    pytest.main(['--alluredir', './temp'])
    # 执行命令 allure generate ./temp -o ./report --clean ,生成测试报告
    os.system('allure generate ./temp -o ./report --clean')
2)想对单个用例添加标题和用例描述,增加可读性,使用以下两个装饰器:
- @allure.description :添加测试用例描述,参数类型为str,与使用''' '''效果类似。如果想传html,请使用 @allure.description_html
- @allure.title :修改单个测试用例标题,支持传递关键字参数
#!/usr/bin/env python
# coding=utf-8
import pytest
import allure
import os

path = os.path.join(os.path.abspath('').replace('testcase','testcase_data\\excel'),'order.xlsx')
data_test_order_balance = Readexcel.readrows(path,'test_order_balance')


@allure.description('测试用例描述')
@allure.title('参数:{phone},{password},{money}')
@pytest.mark.parametrize('case,cityflag,phone,password,money,sourcetype,products,code', data_test_order_balance)
def test(case,cityflag,phone,password,money,sourcetype,products,code):

    print("测试用例")


if __name__ =="__main__":
    # 执行pytest单元测试,生成 Allure 报告需要的数据存在 /temp 目录
    pytest.main(['--alluredir', './temp'])
    # 执行命令 allure generate ./temp -o ./report --clean ,生成测试报告
    os.system('allure generate ./temp -o ./report --clean')
3)动态生成功能,以下方法都支持动态生成,也可以覆盖装饰器 @allure 的内容
- allure.dynamic.feature
- allure.dynamic.link
- allure.dynamic.issue
- allure.dynamic.testcase
- allure.dynamic.story
- allure.dynamic.title
- allure.dynamic.description
#!/usr/bin/env python
# coding=utf-8
import pytest
import allure
import os


@allure.description('测试用例描述')
@allure.title('测试标题')
def test():
    allure.dynamic.description('动态描述')
    allure.dynamic.title('动态标题')

    print("测试用例")


if __name__ =="__main__":
    # 执行pytest单元测试,生成 Allure 报告需要的数据存在 /temp 目录
    pytest.main(['--alluredir', './temp'])
    # 执行命令 allure generate ./temp -o ./report --clean ,生成测试报告
    os.system('allure generate ./temp -o ./report --clean')
4)如果想对每个测试用例进行非常详细的步骤信息说明,提高可读性,可以使用以下两个方法:
- allure.step :对每个测试用例进行步骤说明
- allure.attach :输出内容
先看下 allure.attach(body, name=None, attachment_type=None, extension=None) 定义,参数如下
- body:要显示的内容(附件)
- name:附件名字
- attachment_type:附件类型,是 allure.attachment_type 里面的其中一种
- extension:附件的扩展名
也可以使用文件路径:allure.attach.file( source, body, name=None, attachment_type=None, extension=None),source为文件路径,其他参数和上述一致
#!/usr/bin/env python
# coding=utf-8
import pytest,allure,os,requests

@allure.description('测试用例描述')
@allure.title('测试标题')
def test():
    url = 'http://www.baidu.com'
    h  = requests.get(url=url)
    with allure.step('请求'):
        allure.attach('{}'.format(url),name='get请求')
    with allure.step('响应'):
        allure.attach('{}'.format(h.status_code),name='状态码')
    with allure.step('断言'):
        assert h.status_code == 200
        allure.attach('OK',name='断言')


if __name__ =="__main__":
    # 执行pytest单元测试,生成 Allure 报告需要的数据存在 /temp 目录
    pytest.main(['--alluredir', './temp'])
    # 执行命令 allure generate ./temp -o ./report --clean ,生成测试报告
    os.system('allure generate ./temp -o ./report --clean')


 1848
1848


 被折叠的 条评论
为什么被折叠?
被折叠的 条评论
为什么被折叠?
 到【灌水乐园】发言


