


第一步:创建发布目录和发布文件。
mkdir-p/www/{web/,blog/}
echo "welcome to xiongba's web-
server">>web/index.html
echo "welcome to xiongbas blog server">>blog/index/html
[root@web www]# ls blog web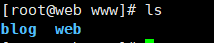
第二步:修改主配置文件: cd/usr/local/nginx/conf/ vim nginx.conf
添加以下内容:(在默认server模块结束后面添加) server {
listen 80;
server name blogwenge.com blog1.xio ngba.com blog2wenge.com;#可以是多个域名并列,域名之间用空格 隔开,
location/{
root /www/blog;
index index.html index.htm;
}
server {
listen 80;
server name web.xiongba.com
location/{
root /www/web;
index index.html index.htm;}}
第三步:重启nginx
/usr/local/nginx/sbin/nginx-sreload
第四步:添加hosts文件 vim/etc/hosts添加以下内容:
192.168.17.128 webxiongba.com #IP为
服务器IP
192.168.17.128 webxiongba.com
第五步:在本机设置hosts文件
C:WindowslSystem32\driversleto找到hosts文件并添加内容为:
192.168.31.136 webxiongba.com
192.168.31.136 blog.xiongba.com
(注意修改文件需要权限)
第六步:访问域名 web.xiongba.com blog.xiongba.com
xwoukngta


 558
558


 被折叠的 条评论
为什么被折叠?
被折叠的 条评论
为什么被折叠?
 到【灌水乐园】发言


