前置工作
本机安装maven
安装步骤:打开此电脑,右键属性——高级系统设置——环境变量——在系统变量里面添加Maven版本和Path里面添加Maven的路径
配置。前提是必须要有JDK
![](https://img-blog.csdnimg.cn/img_convert/5b5481ba0f5db1b710314c32d68c4c74.png)
Path里面
![](https://img-blog.csdnimg.cn/img_convert/8394b1c50fc43615c4bb9aac31c918a9.png)
Idea 设置使用本机maven 工具
Settings--->Maven
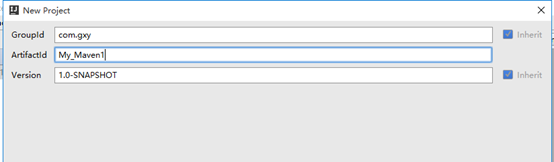
1.新建项目选择Maven, 创建maven项目,勾选通过模板创建,选择maven-archetype-webapp 模板
![](https://img-blog.csdnimg.cn/img_convert/9c4e0c99fd70984f03c4503d6e83d0de.png)
GroupId: 公司名倒序
ArtifactId: 项目名
![](https://img-blog.csdnimg.cn/img_convert/1fd74458f0311451a3f6dd2439cb3039.png)
设置本地maven仓库配置
![](https://img-blog.csdnimg.cn/img_convert/6f59a18b0d542e1ff93c5a08edce8354.png)
项目文件显示名,和项目名一致
![](https://img-blog.csdnimg.cn/img_convert/3ebea74c87d7b493e190e6da9d05863f.png)
等待结果:出现成功
![](https://img-blog.csdnimg.cn/img_convert/259f62fbb51a83ef41c25c4d174b4e4e.png)
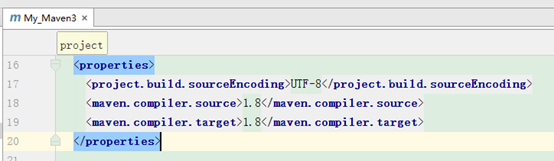
确认或修改maven支持的JDK版本为1.8
打开pom.xml文件
![](https://img-blog.csdnimg.cn/img_convert/ed7c1063aace872ff63302783fe4f527.png)
构建maven目录,创建对应文件夹
![](https://img-blog.csdnimg.cn/img_convert/ce34467062513f4c13f64f003ce33aad.png)
并设置src\main\java为代码源目录
![](https://img-blog.csdnimg.cn/img_convert/cb73981d3ada6a75b2fd8aac3a16317f.png)
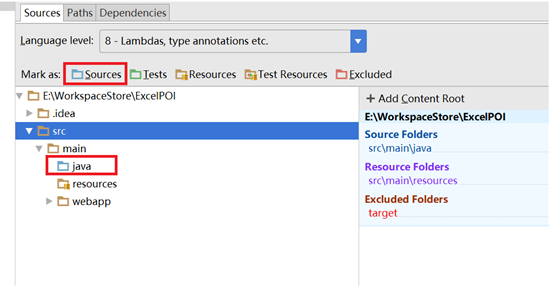
6. 设置src\main\resources为资源文件源目录
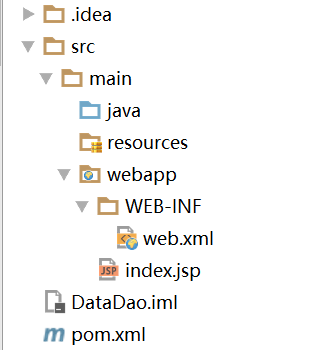
后期原config下的配置文件,复制到resources下,并修改对应路径
![](https://img-blog.csdnimg.cn/img_convert/3a6edc1d5497d1dea1dcf6d65696fecf.png)
新增目录结构如下
![](https://img-blog.csdnimg.cn/img_convert/ed4c356ee29ead932ff5049566ba78f4.png)
7. 添加tomcat组件
Run – Edit Configuration
![](https://img-blog.csdnimg.cn/img_convert/75aa3fd4db6475ef9693e33449ddd5e4.png)
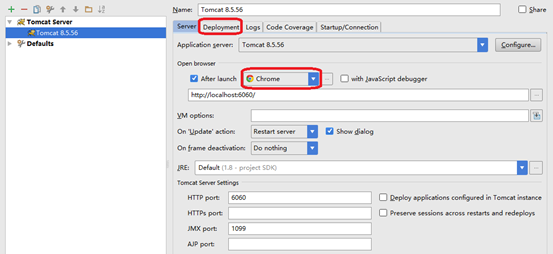
点击Deployment,部署当前maven项目
设定url访问的根目录 http://localhost:6060/
![](https://img-blog.csdnimg.cn/img_convert/58c9f4dd7f09244e3b9b9c14e4552d51.png)
启动tomcat测试一下
![](https://img-blog.csdnimg.cn/img_convert/3d10667a596d3909fc9f7362acd580a4.png)