


目录
1.使用rpm安装zsh(忽略依赖关系安装)
| 参数 | 说明 |
| -i, --install | 安装软件包 |
| --nodeps | 不验证软件包依赖 |
| -v, --verbose | 提供更多的详细信息输出 |
| -h, --hash | 软件包安装的时候列出哈希标记 |
| -U | 软件包升级 |
| -e | 软件包卸载 |
该软件没有依赖软件,我们可以不使用--nodeps不验证软件包依赖。如果使用rpm安装的软件,需要安装依赖软件的话,我们可以使用--nodeps。
[root@localhost ~]# ls -l zsh*
-rw-r--r-- 1 root root 3035888 Jul 21 08:57 zsh-5.5.1-9.el8.x86_64.rpm
[root@localhost ~]# rpm -ivh zsh-5.5.1-9.el8.x86_64.rpm
Verifying... ################################# [100%]
Preparing... ################################# [100%]
Updating / installing...
1:zsh-5.5.1-9.el8 ################################# [100%]
查询是否已安装
| 参数 | 说明 |
| -a | 查询所有已安装的软件包 |
| -l | 显示已安装软件包的相关文件列表和信息 |
| -f | 查询文件所属软件包 |
| -i | 显示已经安装的 rpm 软件包信息 |
[root@localhost ~]# rpm -qa zsh
zsh-5.5.1-9.el8.x86_64
卸载zsh
[root@localhost ~]# rpm -e zsh
查询所有已安装软件
[root@localhost ~]# rpm -qa #-a查询所有已安装的软件包必须要与-q搭配使用
查询date命令所在软件包
[root@localhost ~]# whereis date
date: /usr/bin/date /usr/share/man/man1/date.1.gz /usr/share/man/man1p/date.1p.gz
[root@localhost ~]# rpm -qf /usr/bin/date
coreutils-8.30-6.el8_1.1.x86_64
查询未安装的zsh的文件信息
[root@localhost ~]# rpm -ql zsh
package zsh is not installed
2.YUM/DNF管理工具
yum本地源配置
[root@localhost ~]# mount /dev/cdrom /mnt #本地光盘挂载到本地目录下
[root@localhost ~]# vim /etc/yum.repos.d/redhat.repo
[root@localhost ~]# cat /etc/yum.repos.d/redhat.repo
#
# Certificate-Based Repositories
# Managed by (rhsm) subscription-manager
#
# *** This file is auto-generated. Changes made here will be over-written. ***
# *** Use "subscription-manager repo-override --help" if you wish to make changes. ***
#
# If this file is empty and this system is subscribed consider
# a "yum repolist" to refresh available repos
#
[BaseOS]
name=BaseOS
baseurl=file:///mnt/BaseOS
gpgcheck=0[AppStream]
name=AppStream
baseurl=file:///mnt/AppStream
gpgcheck=0
yum网络源配置
阿里云网络源, aliyun 的镜像站点为 https://mirrors.aliyun.com/
[root@localhost ~]# cd /etc/yum.repos.d
[root@localhost yum.repos.d]# touch aliyun.repo[root@localhost yum.repos.d]# vim aliyun.repo
[root@localhost yum.repos.d]# cat /etc/yum.repos.d/aliyun.repo
[appstream]
name=appstream
baseurl=https://mirrors.aliyun.com/rockylinux/8.5/AppStream/x86_64/os/
gpgcheck=0[baseos]
name=baseos
baseurl=https://mirrors.aliyun.com/rockylinux/8.5/BaseOS/x86_64/os/
gpgcheck=0
在这里我们也可以将已经下载好的centos8.repo这个包上传到Linux下的/etc/yum.repo.d目录内,就不用了我们手工配置yum 网络源。可以直接使用centos已经配置好的软件仓库。
安装httpd软件
[root@localhost mnt]# yum install httpd -y
查看vim命令属于哪个软件包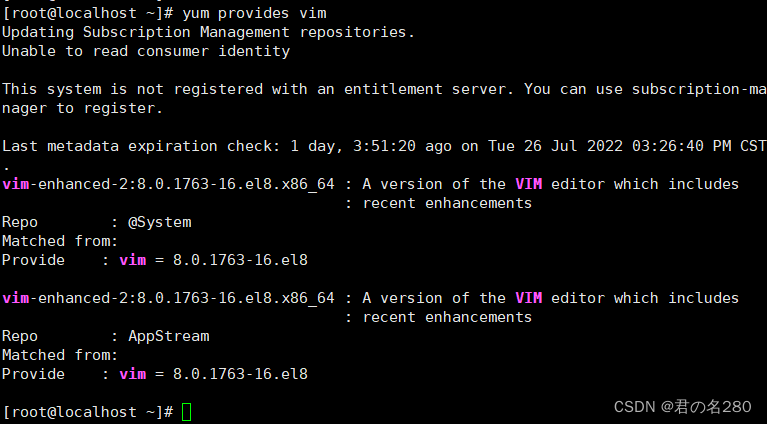
yum卸载httpd
当我们使用yum卸载软件时,我们需要清楚这个软件都依赖于哪些软件,如果依赖的软件包含系统软件的话,我们使用yum卸载时也会把系统软件删掉,有时候会导致我们的系统崩溃,所以对于yum卸载软件,我们需要慎用。
[root@localhost ~]# yum remove httpd -y #在卸载过程中遇到的所有交互都默认回答yes
清理缓存
[root@localhost ~]# yum clean all
重新创建缓存
[root@localhost ~]# yum makecache
安装postgresql模块中的版本13
安装的两种方法:
[root@localhost mnt]# yum install @postgresql:13 -y
[root@localhost mnt]# yum module install postgresql:13 -y
3.源代码安装
要求:安装httpd
#下载三个(一个目标软件,两个依赖软件)源码包,然后上传到Linux端,进行解压
#解压目标软件
[root@localhost software]# tar -xvzf httpd-2.4.54.tar.ga -C /usr/local/software
#解压两个依赖软件
[root@localhost ~]# tar -xzvf "apr-1.6.5.tar.gz" -C /usr/local/software/
[root@localhost ~]# tar -xzvf "apr-util-1.6.1.tar.gz" -C /usr/local/software/
[root@localhost software]# yum install gcc gcc-c++ libgcc -y #安装编译环境
#安装apr-1.6.5
[root@localhost software]# cd apr-1.6.5/
[root@localhost apr-1.6.5]# ./configure --prefix=/usr/local/apr[root@localhost apr-1.6.5]# make
[root@localhost apr-1.6.5]# make install
#安装apr-util-1.6.1
[root@localhost software]# cd apr-util-1.6.1/
[root@localhost apr-util-1.6.1]# ./configure --prefix=/usr/local/apr-until --with-apr=/usr/local/apr
[root@localhost apr-util-1.6.1]# yum install expat-devel -y[root@localhost apr-util-1.6.1]# ./configure --prefix=/usr/local/apr-until --with-apr=/usr/local/apr
[root@localhost apr-util-1.6.1]# make[root@localhost apr-util-1.6.1]# make install
#安装httpd-2.4.54
[root@localhost software]# cd httpd-2.4.54/
[root@localhost httpd-2.4.54]# ./configure --prefix=/usr/local/httpd --with-apr=/usr/local/apr --with-apr-util=/usr/local/apr-until
[root@localhost httpd-2.4.54]# yum install pcre2-devel -y
[root@localhost httpd-2.4.54]# ./configure --prefix=/usr/local/httpd --with-apr=/usr/local/apr --with-apr-util=/usr/local/apr-until
[root@localhost httpd-2.4.54]# make
[root@localhost httpd-2.4.54]# make install
[root@localhost bin]# ./apachectl start
在安装过程中,如果所有依赖软件都安装好,还是安装有问题的话,建议从头开始多试几遍(配置编译环境,编译,安装)。
4.进程管理,查看进程
ps命令查看进程
查看root用户带有终端的进程
[root@localhost ~]# ps -l
F S UID PID PPID C PRI NI ADDR SZ WCHAN TTY TIME CMD
0 S 0 6893 6892 0 80 0 - 6955 - pts/0 00:00:00 bash
0 R 0 37569 6893 0 80 0 - 11370 - pts/0 00:00:00 ps
显示没有终端的进程
[root@localhost ~]# ps -x
PID TTY STAT TIME COMMAND
1 ? Ss 0:03 /usr/lib/systemd/systemd --switched-root --system --deserialize 17
2 ? S 0:00 [kthreadd]
3 ? I< 0:00 [rcu_gp]...
显示所有进程
[root@localhost ~]# ps -e
PID TTY TIME CMD
1 ? 00:00:03 systemd
2 ? 00:00:00 kthreadd
3 ? 00:00:00 rcu_gp
4 ? 00:00:00 rcu_par_gp...
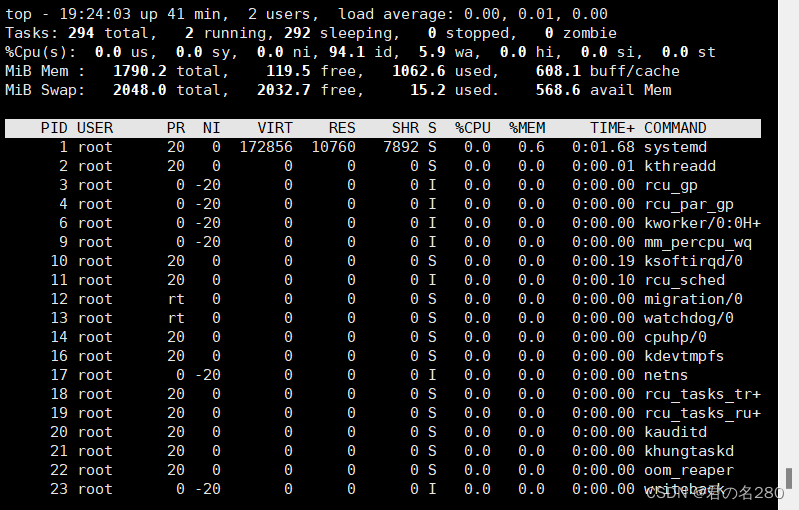
top命令查看进程
-d:后面可以接秒数,就是整个进程界面更新的秒数,默认是5秒
-b:以批次的方式执行top,还有更多的参数可用。通常会搭配数据流重定向来将批处理的结果输出为文件。
-n:与-b搭配,进行几次top的输出结果
-i:不显示闲置或者僵死的进程信息
-c:显示进程的整个命令路径,而不是只显示命令名称
-s:使top命令在安全模式下运行,此时top的交互式指令被取消,避免潜在危险
-p:指定某些个PID来进行查看检测
查看1分钟内占用CPU时间前10的进程(使用top命令)
[root@localhost ~]# top -d60 #设置进程更新的时间是60秒,然后查看进程。top执行过程中使 用T命令,可按照时间/累计时间排序输出


 911
911


 被折叠的 条评论
为什么被折叠?
被折叠的 条评论
为什么被折叠?
 到【灌水乐园】发言


