封装接口 文件夹 需要重新创建一个

然后 在文件夹中定义一些 基本请求数据的封装
//判断当前调试和打包(基本差不多了)
const BASE_URL = process.env.NODE_ENV === 'development' ? '' :'https://192.158.2.160:7890'   //路径是瞎写的  换成自己的

//定义请求头
const header = {
    // 'content-type': 'application/json'
}
// 判断token的类型  是固定的  还是后端的
const token = uni.getStorageSync('token') ?? 15704426824366   //请求头 和后端核对一下
if (token) {
    header = {
        'content-type': 'application/json',
        'Authorization':  token
    }
}

// 暴露  request 方法 使用异步调用
export const request = (option) => {
    return new Promise((resolve, reject) => {
        uni.request({
            url: BASE_URL + option.url,     //路径
            method: option.method || 'GET', //请求方式
            header: header,                 //请求头
            data: option.data,              //数据
            success(res) {                  // 成功的回调
                resolve(res.data)
            },
            fail(err) {                     //失败的回调
                reject(err)
            }
        })
    })
}
引入页面 在页面进行数据的引入
<template>
	<view class="login-content">
		<view class="login-title">
			登录
		</view>
		<view class="iphone">
			<input placeholder="输入手机号" :value="username" v-model="username" />
		</view>

		<view class="password">
			<input placeholder="请输入密码" v-model="password" :password="password" />
		</view>

		<u-radio-group class="rememberMe">
			<u-radio :customStyle="{marginBottom: '8px'}" v-model="rememberMe"></u-radio>
			<view class="">记住我</view>
		</u-radio-group>

		<view class="login-btn" @click="dengLu()">点击登录</view>
	</view>
</template>

<script>
	import {
		request
	} from '@/sever'
	import uradiogroup from '../../uni_modules/uview-plus/index.js'
	import {
		ref
	} from 'vue'
	export default {
		components: {
			uradiogroup,
		},
		setup() {
			const username = ref('test000')
			const password = ref('test000')
			const rememberMe = ref(true)

			async function dengLu() {
				if (this.username == '' || this.password == '') {
					uni.showToast({
						title: '账号或密码不能为空',
						duration: 2000,
						icon: 'error'
					})
					return;
				}
				console.log("要开始登陆了" + this.username + "连接符" + this.password);
				const option = {
					url: '/app/api/v1/auth/login',
					method: 'post',
					data: {
						username: this.username,
						password: this.password,
						captchaAnswer: "",
						captchaUUID: "",
						rememberMe: this.rememberMe,
						tenantId: 0,
					},
				}
				const resData = await request(option)
				console.log(resData, "resData");
				if (resData.code == 200) {

					console.log("请求成功");
					uni.showToast({
						title: "登录成功",
						icon: "success",
						duration: 2000
					});
					//登录成功 跳转到首页
					uni.switchTab({
						url: '../map/map'
					});
				} else { //登入失败
					uni.showToast({
						title: "账号或密码错误",
						icon: "error",
						duration: 2000
					});
				}
			}
			return {
				username,
				password,
				rememberMe,
				dengLu
			}
		}
	}
</script>

<style scoped>
	.login-content {
		padding: 70px 10px 35px;
		text-align: center;
		color: #333333;
	}

	.login-title {
		font-size: 26px;
		font-weight: bold;
		margin-bottom: 31px;
	}

	.login-content input {
		height: 50px;
		background: #F8F8F8;
		border-radius: 25px;
		text-align: left;
		padding: 15px;
		box-sizing: border-box;
		font-size: 15px;
	}

	.iphone,
	.password,
	.test {
		position: relative;
		margin-bottom: 30px;
	}

	.iphone .uni-icons,
	.password .uni-icons {
		position: absolute;
		top: 14px;
		right: 30px;
	}

	.test-btn,
	.password-btn {
		color: #ff8b33;
		font-size: 15px;
		text-align: right;
	}

	.get-test {
		color: #ff8b33;
		font-size: 15px;
		width: 122px;
		height: 50px;
		border: 1px solid #FF8B33;
		border-radius: 25px;
		line-height: 50px;
	}

	.test {
		display: flex;
		justify-content: space-between;
	}

	.login-btn {
		width: 355px;
		height: 45px;
		background: #FF8B33;
		border-radius: 36px;
		color: #fff;
		font-size: 20px;
		text-align: center;
		line-height: 45px;
		position: fixed;
		bottom: 60px;
	}
</style>
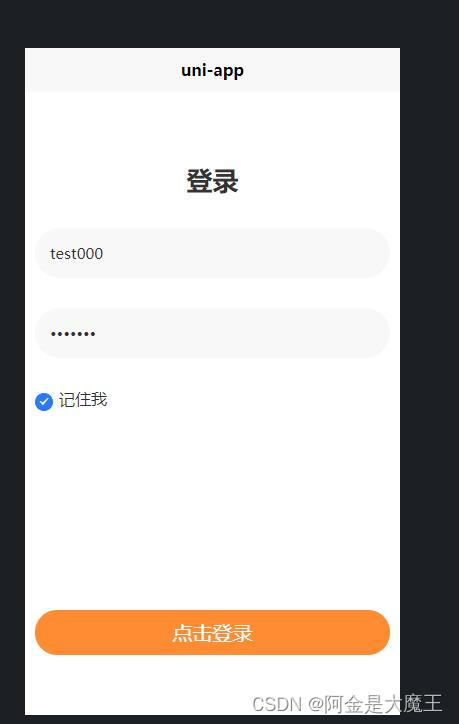
效果展示


 文章展示了如何在Vue项目中封装网络请求接口,包括设置基础URL、请求头以及处理token。此外,还演示了一个登录页面的实现,使用uni-app的uni.request发送登录请求,检查用户名和密码,根据服务器响应进行登录状态提示和页面跳转。


 796
796

 被折叠的 条评论
为什么被折叠?


