


前言
因为学习需要,所以搞了块ESP8266模块来学习物联网组建,数据上云等。这两天随便搞了一下,还是遇到了一些比较麻烦的事情。还在本人还算有耐心,加上运气好,问题基本解决了。所以把踩坑记录(学习日志)发CSDN记一下。
NodeMCU开发板是在某宝随便找家店买来的,十几块钱的东西没怎么想就买了,也是因为自己不常玩就没有这方面门门道道的见识,图1是购置的截图。

NodeMCU是指搭载了ESP8266芯片的开发版,集成了其他的东西可以让我们更方便地使用。ESP8266就是实现核心功能的芯片。
固件烧录
想要使用这个板子,就必须得写入对应的固件,不然就是个白板。从零开始的功能开发,个人还没有那个能力。加上这两天烧录固件的时候遇到了蛮多问题,所以记录一下这部分关键过程和一些踩坑心得。
所使用的烧录软件有两个,图2展示的是NODEMCU FIREWARE PROGRANMER烧录软件的主界面,图3展示的是ESP8266 FLASH DOWNLOAD TOOL的主界面。我因为使用前一个软件不太顺利,所以在乐鑫官网下载了后面这个烧录软件。所烧录的固件文件是nodemcu_float_0.9.6-dev_20150704.bin,后面我会把这些软件都统一整理发出来。关于这两个烧录软件的使用教程,大家可以自行搜索,我对这个东西不太深入了解,所以这里尽可能的提供资料帮助。


ESPlorer测试
使用ESPlorer之前要配置Java环境,我推荐安装JDK 8u111差不多的版本,因为我使用其他版本时遇到闪退了。这种莫名奇妙的问题能避免就避免了。
ESPlorer文件夹的.bat文件打开它,选择对应串口并点击OPEN,当出现如图4所示的内容,说明一切顺利。
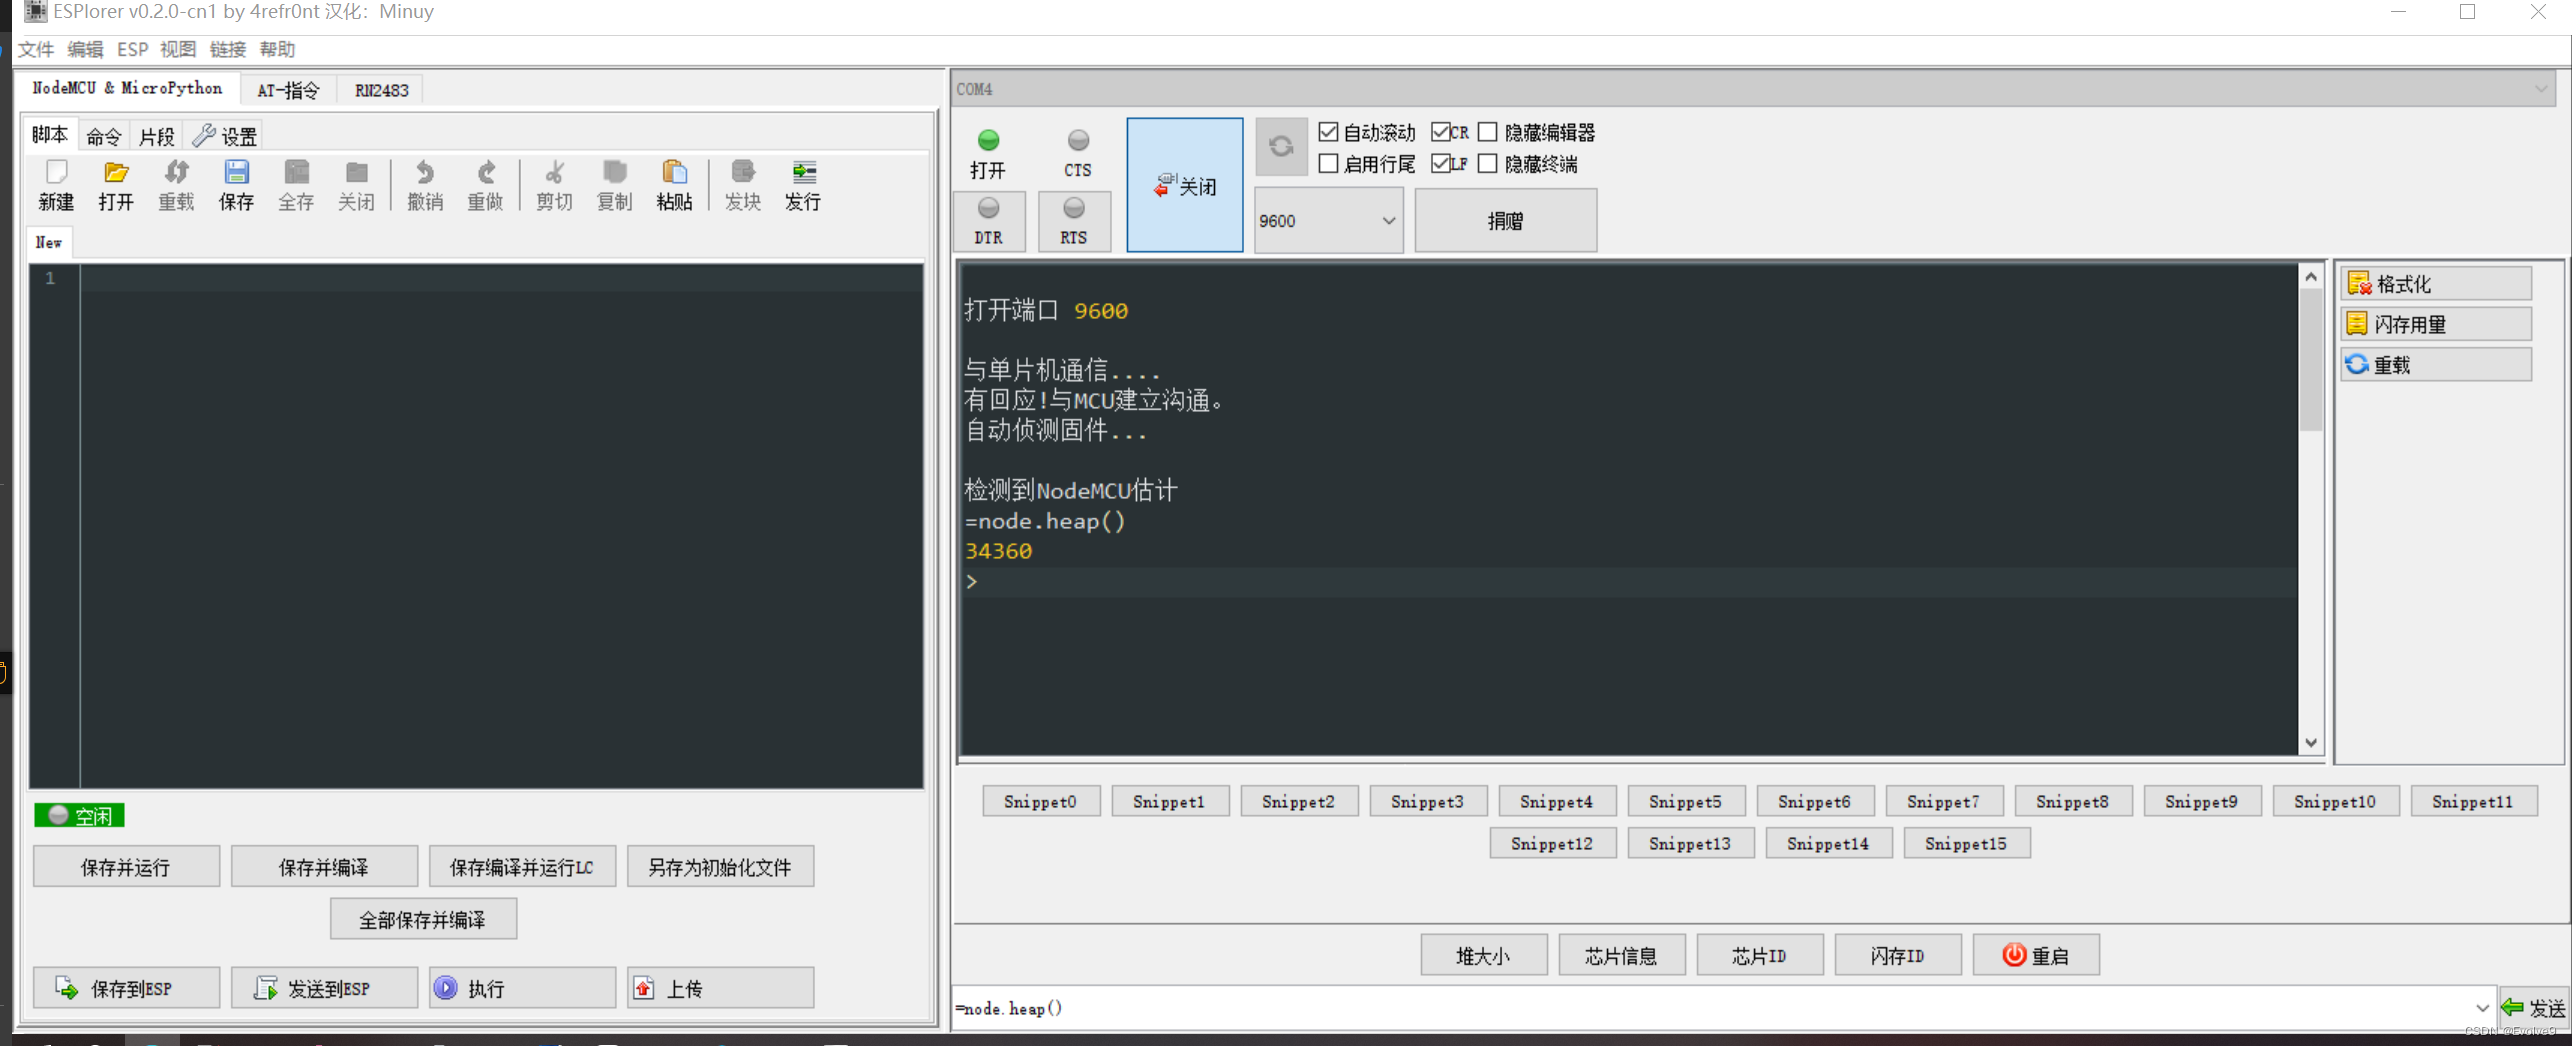
图4中展示的ESPlorer的主界面,左偏黑色区域可以使用lua语言对NodeMCU做一些操作。这里我根据案例点亮了一下NodeMCU上面的灯,程序如下图所示。因为使用教程中指示的pin脚是0,但是实际操作中我用for循环测试出pin=4为低电平时才能点亮NodeMCU的灯。其他的板子我不确定是哪个具体的pin,但你可以取消掉for循环注释,把那个pin脚找出来。
--for pin=0, 4, 1 do
pin = 4
gpio.mode(pin, gpio.OUTPUT)
print(gpio.read(pin),"\n")
gpio.write(pin, gpio.LOW)
print(gpio.read(pin),"\n")
tmr.delay(1000000)
gpio.write(pin, gpio.HIGH)
print(gpio.read(pin),"\n")
print("Above all from pin:",pin,"\n")
--end
如果上述操作都顺利的话
资料及文件
https://download.csdn.net/download/weixin_70618422/89296074
上面的地址是我简单收集的资料文件,方便自己以后再学习和需要的时候下载
后续踩坑补充"not enough memory"-2024年5月12日

继前面成功烧录NodeMCU固件之后,我以为后面就可以使用开发板小试牛刀了。我在网上找了一个教程,作者说把"init.lua"、"httpServer.lua"、"index.html"上传到开发板就行了(我用的ESPlorer)。
init.lua的程序如下所示:
wifi.setmode(wifi.STATIONAP)
cfg={}
cfg.ssid="testWIFI"
--我们的NodeMcu热点
cfg.pwd="yyyyyyyy"
--密码
wifi.ap.config(cfg)
cfg2 =
{
ip="192.168.1.1",
--设置IP
netmask="255.255.255.0",
--子网掩码
gateway="192.168.1.1"
--默认网关
}
wifi.ap.setip(cfg2)
wifi.sta.autoconnect(1)
--自动连接
print("delay1")
tmr.delay(1000)
print("delay 2")

dofile('httpServer.lua')
--执行HttpServer.lua
print("delay 3")

httpServer:use('/config', function(req, res)
    if req.query.ssid ~= nil and req.query.pwd ~= nil then
        print(req.query.ssid ..req.query.pwd)
        config={}
        config.ssid=req.query.ssid
        config.pwd=req.query.pwd
        wifi.sta.config(config)
    end
     res:send('<head><meta charset="UTF-8"><title>配置终端</title></head><h1>您设置的wifi是:'..req.query.ssid..',请等待红灯常亮即连接完成。</h1>')
end)

httpServer:listen(80)
--启动Server
下面继续展示httpServer.lua:
--------------------
-- helper
--------------------
function urlDecode(url)
    return url:gsub('%%(%x%x)', function(x)
        return string.char(tonumber(x, 16))
    end)
end

tmr.delay(1000)

function guessType(filename)
    local types = {
        ['.css'] = 'text/css',
        ['.js'] = 'application/javascript',
        ['.html'] = 'text/html',
        ['.png'] = 'image/png',
        ['.jpg'] = 'image/jpeg'
    }
    for ext, type in pairs(types) do
        if string.sub(filename, -string.len(ext)) == ext
            or string.sub(filename, -string.len(ext .. '.gz')) == ext .. '.gz' then
            return type
        end
    end
    return 'text/plain'
end

tmr.delay(1000)
--------------------
-- Response
--------------------
Res = {
    _skt = nil,
    _type = nil,
    _status = nil,
    _redirectUrl = nil,
}

function Res:new(skt)
    local o = {}
    setmetatable(o, self)
    self.__index = self
    o._skt = skt
    return o
end

function Res:redirect(url, status)
    status = status or 302

    self:status(status)
    self._redirectUrl = url
    self:send(status)
end

function Res:type(type)
    self._type = type
end

function Res:status(status)
    self._status = status
end

function Res:send(body)
    self._status = self._status or 200
    self._type = self._type or 'text/html'

    local buf = 'HTTP/1.1 ' .. self._status .. '\r\n'
        .. 'Content-Type: ' .. self._type .. '\r\n'
        .. 'Content-Length:' .. string.len(body) .. '\r\n'
    if self._redirectUrl ~= nil then
        buf = buf .. 'Location: ' .. self._redirectUrl .. '\r\n'
    end
    buf = buf .. '\r\n' .. body

    local function doSend()
        if buf == '' then
            self:close()
        else
            self._skt:send(string.sub(buf, 1, 512))
            buf = string.sub(buf, 513)
        end
    end
    self._skt:on('sent', doSend)

    doSend()
end

function Res:sendFile(filename)
    if file.exists(filename .. '.gz') then
        filename = filename .. '.gz'
    elseif not file.exists(filename) then
        self:status(404)
        if filename == '404.html' then
            self:send(404)
        else
            self:sendFile('404.html')
        end
        return
    end

    self._status = self._status or 200
    local header = 'HTTP/1.1 ' .. self._status .. '\r\n'

    self._type = self._type or guessType(filename)

    header = header .. 'Content-Type: ' .. self._type .. '\r\n'
    if string.sub(filename, -3) == '.gz' then
        header = header .. 'Content-Encoding: gzip\r\n'
    end
    header = header .. '\r\n'

    print('* Sending ', filename)
    local pos = 0
    local function doSend()
        file.open(filename, 'r')
        if file.seek('set', pos) == nil then
            self:close()
            print('* Finished ', filename)
        else
            local buf = file.read(512)
            pos = pos + 512
            self._skt:send(buf)
        end
        file.close()
    end
    self._skt:on('sent', doSend)

    self._skt:send(header)
end

function Res:close()
    self._skt:on('sent', function() end) -- release closures context
    self._skt:on('receive', function() end)
    self._skt:close()
    self._skt = nil
end

--------------------
-- Middleware
--------------------
function parseHeader(req, res)
    local _, _, method, path, vars = string.find(req.source, '([A-Z]+) (.+)?(.+) HTTP')
    if method == nil then
        _, _, method, path = string.find(req.source, '([A-Z]+) (.+) HTTP')
    end
    local _GET = {}
    if vars ~= nil then
        vars = urlDecode(vars)
        for k, v in string.gmatch(vars, '([^&]+)=([^&]*)&*') do
            _GET[k] = v
        end
    end

    req.method = method
    req.query = _GET
    req.path = path

    return true
end

function staticFile(req, res)
    local filename = ''
    if req.path == '/' then
        filename = 'index.html'
    else
        filename = string.gsub(string.sub(req.path, 2), '/', '_')
    end

    res:sendFile(filename)
end

--------------------
-- HttpServer
--------------------
tmr.delay(1000)

httpServer = {
    _srv = nil,
    _mids = {{
        url = '.*',
        cb = parseHeader
    }, {
        url = '.*',
        cb = staticFile
    }}
}

tmr.delay(1000)

function httpServer:use(url, cb)
    table.insert(self._mids, #self._mids, {
        url = url,
        cb = cb
    })
end

function httpServer:close()
    self._srv:close()
    self._srv = nil
end

function httpServer:listen(port)
    self._srv = net.createServer(net.TCP)
    self._srv:listen(port, function(conn)
        conn:on('receive', function(skt, msg)
            local req = { source = msg, path = '', ip = skt:getpeer() }
            local res = Res:new(skt)

            for i = 1, #self._mids do
                if string.find(req.path, '^' .. self._mids[i].url .. '$')
                    and not self._mids[i].cb(req, res) then
                    break
                end
            end

            collectgarbage()
        end)
    end)
end
然后是html
<head>
    <meta charset="UTF-8">
    <meta name="viewport" content="width=device-width, initial-scale=1">
    <title>配置终端</title>
</head>

<body style="text-align:center;background:#f8fffbb2;">
    <h1>配置页面</h1>
    <form action="/config" method="get">
        <label>WiFi</label>
        <input type="text" name="ssid" />
        <br />
        <label>密码</label>
        <input type="password" name="pwd" />
        <br />
        <input type="submit" value="确认" style="background:#678df9;height:40px;width:60px;border-radius:5px;border:none;outline:none;"/>
    </form>
    <p style="max-width:50vw;margin:auto;">注意:由于NodeMCU内存很小,附近热点过多时,扫描热点会造成内存不足自动重启。请手动输入WIFI信息进行配置。</p>
</body>
<style>
    input{
        margin-bottom:30px;
    }
</style>
</html>
上述文件都上传完毕,我尝试运行init.lua。出现了not enough memory的报错。网上说是IP值获取不到,然后执行后面的程序抛出错误,在程序中添加延时命令等待数据即可。但我试过了没有成功,而且网上关于这个的介绍也比较少,想了很久也没解决。后面准备使用Arduino IDE换条路开发NOdeMCUMCU。当然也欢迎各位大佬指导工作,毕竟我现在入门都不算。
对了还有一点小错误:
如下面的图6所示,其实在ESPlorer和NodeMCU开发过程中,会使用到开发板的RST键,但我不明白一按下RST就出现这种乱码是什么意思,属实是能力之外的事情。而且伴随着乱码的出现,我的开发板串口(COM4)直接丢失了,在电脑上找不到了,然后只能开重启电脑才能解决,这诊断费老劲了...


 被折叠的 条评论
为什么被折叠?
被折叠的 条评论
为什么被折叠?
 到【灌水乐园】发言


