


一、首先准备两台Linux虚拟机当作此次实验的两台服务器
服务器1:server IPV4:192.168.110.136
服务器2:client IPV4: 192.168.110.134
二、准备阶段
[root@server ~]# systemctl disable firewalld #关闭防火墙
[root@server ~]# setenforce 0 #关闭seLiunx
[root@server ~]# getenforce
Permissive
[root@client ~]# systemctl disable firewalld #关闭防火墙
[root@client ~]# setenforce 0 #关闭seLiunx
[root@client ~]# getenforce
Permissive
三、配置
server免密访问client
[root@server ~]# ssh-keygen -t rsa #此处为rsa密钥对
Generating public/private rsa key pair.
Enter file in which to save the key (/root/.ssh/id_rsa):
Created directory '/root/.ssh'.
Enter passphrase (empty for no passphrase):
Enter same passphrase again:
Your identification has been saved in /root/.ssh/id_rsa
Your public key has been saved in /root/.ssh/id_rsa.pub
The key fingerprint is:
SHA256:EtRb4lrkGMtSaa+JoG3bL2AfzUlJPbx114ZZyOmOf04 root@server
The key's randomart image is:
+---[RSA 3072]----+
| .= . B. |
| .* B o . B o |
| =.X B . o . |
| . . *.B . |
| o . *.*S o |
|. = o B. . . |
| o = . . E |
| . + ... |
| o. o. |
+----[SHA256]-----+[root@server ~]# ll /root/.ssh/ #查看密钥匙目录
总用量 8
-rw-------. 1 root root 2590 10月 26 22:40 id_rsa #私钥文件
-rw-r--r--. 1 root root 565 10月 26 22:40 id_rsa.pub #公钥文件
[root@server ~]# ssh-copy-id root@192.168.110.134 #复制该公钥文件到服务端的该目录下
/usr/bin/ssh-copy-id: INFO: Source of key(s) to be installed: "/root/.ssh/id_rsa.pub"
The authenticity of host '192.168.110.134 (192.168.110.134)' can't be established.
ED25519 key fingerprint is SHA256:rFpTMCYeFtLw16vHvNCtD7f+AutcLz68mnrlopUfino.
This key is not known by any other names
Are you sure you want to continue connecting (yes/no/[fingerprint])? yes
/usr/bin/ssh-copy-id: INFO: attempting to log in with the new key(s), to filter out any that are already installed
/usr/bin/ssh-copy-id: INFO: 1 key(s) remain to be installed -- if you are prompted now it is to install the new keys
root@192.168.110.134's password:Number of key(s) added: 1
Now try logging into the machine, with: "ssh 'root@192.168.110.134'"
and check to make sure that only the key(s) you wanted were added.在client端查看文件
[root@client ~]# ll /root/.ssh/
总用量 4
-rw-------. 1 root root 565 10月 26 22:46 authorized_keys[root@server ~]# ssh 192.168.110.134 #使用SSH远程登录client
Register this system with Red Hat Insights: insights-client --register
Create an account or view all your systems at https://red.ht/insights-dashboard
Last login: Thu Oct 26 22:33:54 2023 from 192.168.110.1
[root@client ~]#免密登陆成功!!!


client免密访问server
[root@client ~]# ssh-keygen -t rsa #此处为rsa密钥对
Generating public/private rsa key pair.
Enter file in which to save the key (/root/.ssh/id_rsa):
Enter passphrase (empty for no passphrase):
Enter same passphrase again:
Your identification has been saved in /root/.ssh/id_rsa
Your public key has been saved in /root/.ssh/id_rsa.pub
The key fingerprint is:
SHA256:mmA+3Ih66Ue7yv1TBdvjbcsmmTKeK7U9rBEuW1NWOiU root@client
The key's randomart image is:
+---[RSA 3072]----+
| |
| . |
| +E o |
| . += |
| o So=o |
| =.+ +o+..o |
| .o=.=o=+ = . |
| oo.o.o+++B + |
|.o+oooo+== + |
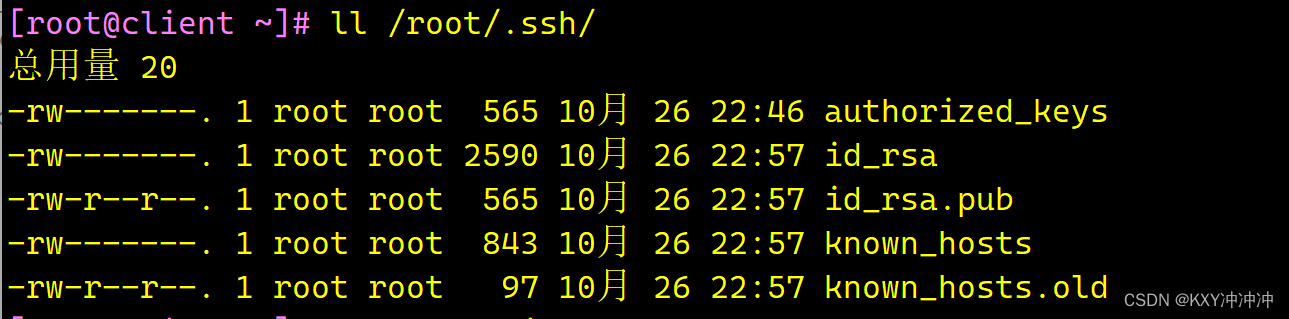
+----[SHA256]-----+[root@client ~]# ll /root/.ssh/ #查看密钥匙目录
总用量 20
-rw-------. 1 root root 565 10月 26 22:46 authorized_keys #server免密访问client生成的密钥
-rw-------. 1 root root 2590 10月 26 22:57 id_rsa #私钥文件
-rw-r--r--. 1 root root 565 10月 26 22:57 id_rsa.pub #公钥文件
-rw-------. 1 root root 843 10月 26 22:57 known_hosts #记录服务端发来的公钥信息
-rw-r--r--. 1 root root 97 10月 26 22:57 known_hosts.old #储之前连接过的 SSH 服务器的公钥
[root@client ~]# ssh-copy-id root@192.168.110.136 #复制该公钥文件到服务端的该目录下
/usr/bin/ssh-copy-id: INFO: Source of key(s) to be installed: "/root/.ssh/id_rsa.pub"
/usr/bin/ssh-copy-id: INFO: attempting to log in with the new key(s), to filter out any that are already installed
/usr/bin/ssh-copy-id: INFO: 1 key(s) remain to be installed -- if you are prompted now it is to install the new keys
root@192.168.110.136's password:Number of key(s) added: 1
Now try logging into the machine, with: "ssh 'root@192.168.110.136'"
and check to make sure that only the key(s) you wanted were added.在server端查看文件
[root@server ~]# ll /root/.ssh/
总用量 20
-rw-------. 1 root root 565 10月 26 23:01 authorized_keys
-rw-------. 1 root root 2590 10月 26 22:40 id_rsa
-rw-r--r--. 1 root root 565 10月 26 22:40 id_rsa.pub
-rw-------. 1 root root 843 10月 26 22:46 known_hosts
-rw-r--r--. 1 root root 97 10月 26 22:46 known_hosts.old[root@client ~]# ssh 192.168.110.136 #使用SSH远程登录server
Activate the web console with: systemctl enable --now cockpit.socketRegister this system with Red Hat Insights: insights-client --register
Create an account or view all your systems at https://red.ht/insights-dashboard
Last login: Thu Oct 26 22:57:34 2023 from 192.168.110.134
[root@server ~]#登陆成功!!!


实验结束实现服务器1server和服务器2client相互免密登录!


 537
537


 被折叠的 条评论
为什么被折叠?
被折叠的 条评论
为什么被折叠?
 到【灌水乐园】发言


