


目录
1.LayUI简介
LayUI(或称为LayUI前端框架)是一个基于JavaScript的UI框架,旨在简化Web界面开发的过程。它由贤心(诚意出品)开发,提供了丰富的CSS组件和JavaScript交互插件,使开发者能够快速构建出美观、灵活的网页界面。
LayUI具有以下特点:
- 简洁易用:LayUI提供了简单明了的API文档和丰富的示例,使开发者能够快速上手使用。
- 响应式设计:LayUI的组件都经过精心设计,能够自动适应不同屏幕大小和设备。
- 模块化开发:LayUI采用了模块化的开发思想,开发者可以按需加载需要的模块,减少资源浪费。
- 多种主题风格:LayUI提供了多种主题风格可供选择,开发者可以根据需要自由切换风格。
- 支持扩展:LayUI还提供了丰富的扩展组件和插件,开发者可以根据需要灵活扩展功能。
总体来说,LayUI是一款功能丰富、易用性高的前端框架,广泛应用于各种Web界面开发中。
1.1LayUI官方文档
LayUI的官方开发文档网站:Layui - 经典开源模块化前端 UI 组件库(官方开发文档)
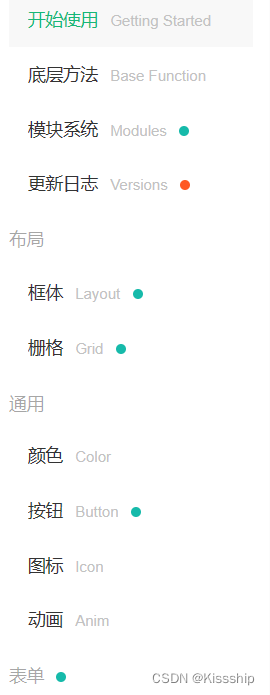
主界面如下:

官方文档里也有上手入门的步骤,下载引用等......
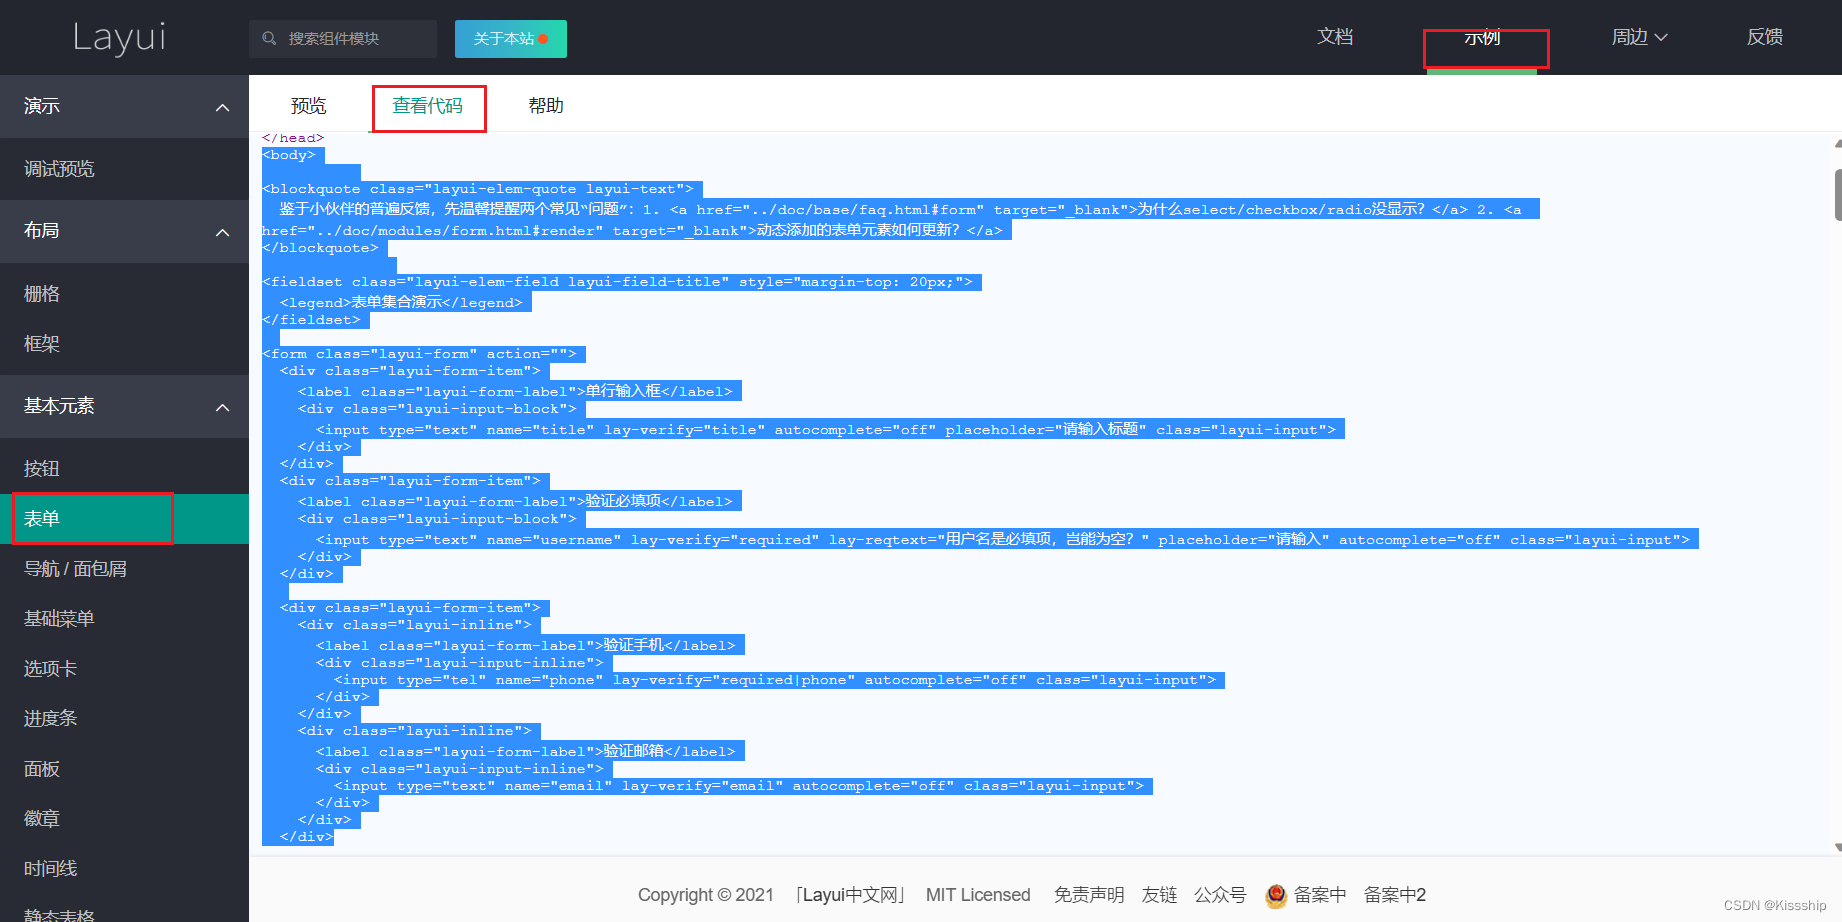
其中还有各种各样的开发所需组件,例如表单,图标,弹幕等。如下:
1.2为什么要用LayUI
使用LayUI的理由有以下几点:
快速搭建界面:LayUI提供了丰富的CSS组件和JavaScript交互插件,使界面开发变得更加简单和高效。你可以通过简单的HTML结构和CSS类名便能实现复杂的页面布局和交互效果,大大节省了开发时间。
简单易学:LayUI的设计理念注重简洁易用,它提供了清晰的API文档和丰富的示例代码,使开发者能够快速上手。即使是对于初学者,也可以迅速掌握主要功能和使用方法。
响应式设计:在移动设备使用越来越普及的今天,响应式设计变得尤为重要。LayUI的组件都经过精心设计,能够自动适应不同屏幕大小和设备,使你的网页在不同的设备上都能有良好的用户体验。
模块化开发:LayUI采用了模块化的开发思想,你可以按需加载需要的模块,减少资源浪费。这种模块化设计使得代码结构清晰,便于维护和扩展。
多种主题风格:LayUI提供了多种主题风格可供选择,你可以根据需要自由切换风格,实现与你的网站或应用的整体风格一致。
社区支持和资源丰富:LayUI拥有活跃的社区论坛,你可以在论坛上获取更多的资源、交流经验和寻求帮助。此外,LayUI凭借其流行度,还有许多社区贡献的插件、模板等可供使用,扩展和定制能力较强。
综上所述,LayUI作为一个功能丰富、易用性高的前端框架,可以帮助开发者快速实现美观、灵活的网页界面,节省开发时间和精力。
1.3LayUI的好处
使用LayUI带来以下好处:
提高开发效率:LayUI提供了丰富的组件和插件,能够快速构建网页界面。通过使用预定义的CSS类名和简单的HTML结构,你可以快速创建出需要的布局和交互效果,节省了开发时间。
简化代码编写:LayUI提供了一致而易于理解的API,使开发者能够以简洁的方式编写代码。你不需要深入了解复杂的CSS和JavaScript原理,只需按照文档提供的指南来使用所需的组件和功能。
响应式设计:LayUI的组件经过优化,能够在不同设备和屏幕尺寸下自适应布局,提供良好的用户体验。你无需为不同的设备编写额外的CSS或JavaScript代码,减少了开发的复杂性。
定制性强:LayUI提供了多种主题风格和可定制选项,你可以根据项目需求或个人喜好进行风格切换或自定义样式。这样能够使你的网页界面与整体风格保持一致,提升用户体验。
社区支持与资源丰富:LayUI拥有庞大的开发者社区,你可以在社区中分享经验、寻求帮助,获取各类插件、模板等资源。社区的活跃度为使用者提供了更多参考和学习的机会。
总的来说,使用LayUI可以加快网页开发速度,降低开发复杂性,提供灵活的定制性,同时也能够得到社区的支持和丰富的资源,帮助开发者更好地实现他们的前端开发需求。
2.LayUI入门
2.1入门实现模板功能
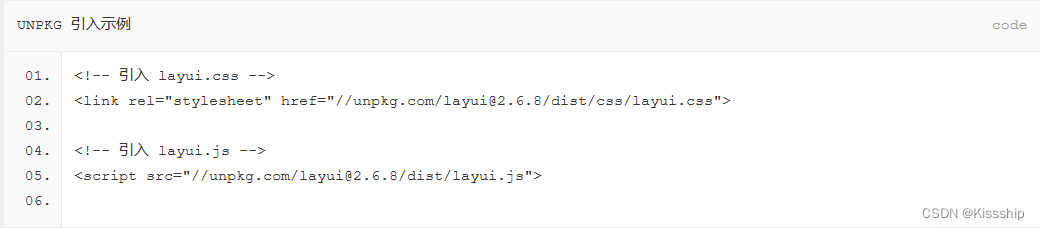
- <!-- 引入 layui.css -->
- <link rel="stylesheet" href="//unpkg.com/layui@2.6.8/dist/css/layui.css">
- <!-- 引入 layui.js -->
- <script src="//unpkg.com/layui@2.6.8/dist/layui.js">
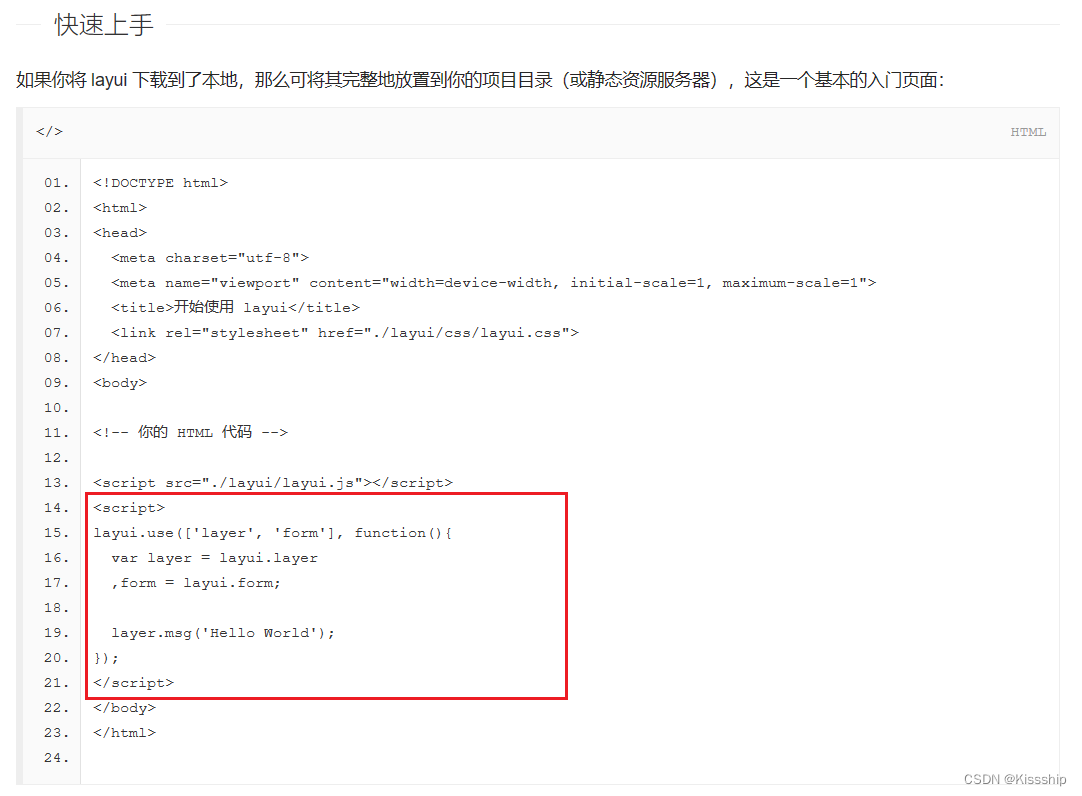
接下来我们做以下准备工作:
我们要用LayUI首先需要引入, 在demo.jsp页面中引入官方css、js路径,如下:
引入之后我们需要对其做出一定的调整,因为引入进来的并不是我们的layUI.css路径名。所以我们需要修改以下路径名。修改后的代码如下:
<!-- 引入 layui.css -->
<link href="${pageContext.request.contextPath }/static/js/layui/css/layui.css" rel="stylesheet">

<!-- 引入 layui.js -->
<script src="${pageContext.request.contextPath }/static/js/layui/layui.js"></script>
然后我们就可以测试是否引入成功了,在官网copy一份测试代码粘贴在demo中:
demo.jsp代码如下:
<%@ page language="java" contentType="text/html; charset=UTF-8"
    pageEncoding="UTF-8"%>
<!DOCTYPE html PUBLIC "-//W3C//DTD HTML 4.01 Transitional//EN" "http://www.w3.org/TR/html4/loose.dtd">
<html>
<head>
<meta http-equiv="Content-Type" content="text/html; charset=UTF-8">
<title>Insert title here</title>
<!-- 引入 layui.css -->
<link href="${pageContext.request.contextPath }/static/js/layui/css/layui.css" rel="stylesheet">

<!-- 引入 layui.js -->
<script src="${pageContext.request.contextPath }/static/js/layui/layui.js"></script>
</head>
<body>
弹屏:<input id="inputId" value="高启强他妹">
<button id="btnId">就你有本事炼狱小镇只拿电击枪</button>
<script>
layui.use(['layer', 'form', 'jquery'], function(){
  var layer = layui.layer
  ,form = layui.form;
  ,$ = layui.jquery;

  $("btnId").click(function(){
	  layer.msg($("#inputId").val());
  });
});
</script>
</body>
</html>
输出效果如下:

2.2JSON
因为LauUI跟easyUI一样,数据交互都用JSON(后续我们需要实现其功能)。所以这里我们适当提一下,也算是当作复习了。
现在给我们一组数据,如下:
{name:"翻斗花园牛爷爷" age:"58"}
{name:"翻斗花园壮壮妈" age:"32"}
{name:"翻斗花园胡图图" age:"10"}
{name:"翻斗花园张小丽" age:"30"}
我们造出这组数据有两种方式, Map集合跟实体类。我们用两种方法分别输出以下四条数据看看,代码如下:
package com.Kissship.demo;

import java.util.ArrayList;
import java.util.HashMap;
import java.util.List;
import java.util.Map;

import com.fasterxml.jackson.databind.ObjectMapper;

/**
 * json数据
 * @author jj
 *
 */
public class Demo1 {
	public static void main(String[] args) throws Exception {
//第一种方式--->Map集合
		ObjectMapper om = new ObjectMapper();
		List<Map> list = new ArrayList<Map>();
		Map<String, Object> map = new HashMap<String, Object>();
		map.put("name", "翻斗花园牛爷爷");
		map.put("age", 58);
//		System.out.println(om.writeValueAsString(map));

		Map<String, Object> map1 = new HashMap<String, Object>();
		map1.put("name", "翻斗花园胡图图");
		map1.put("age", 10);
		list.add(map);
		list.add(map1);
		System.out.println(om.writeValueAsString(list));//输出数组1


		List<User> list1 = new ArrayList<User>();
		User u1 = new User("翻斗花园壮壮妈",32);
		User u2 = new User("翻斗花园张小丽",30);
		list1.add(u1);
		list1.add(u2);
		System.out.println(om.writeValueAsString(list1));//输出数组2
	}
}
//第二张方式--->实体类
class User{
	private String name;
	private int age;
	public String getName() {
		return name;
	}
	public void setName(String name) {
		this.name = name;
	}
	public int getAge() {
		return age;
	}
	public void setAge(int age) {
		this.age = age;
	}
	public User(String name, int age) {
		super();
		this.name = name;
		this.age = age;
	}
	public User() {
		super();
	}
	@Override
	public String toString() {
		return "User [name=" + name + ", age=" + age + "]";
	}

}
效果图如下:
 可以看到两种方法输出的效果跟格式都一样。但是我们需要注意的是:
实体类对应的只有一张表,如果我们需要查询的数据对应多张表时,这时候我们就得用到Map集合。
3.LayUI登录案例
准备:
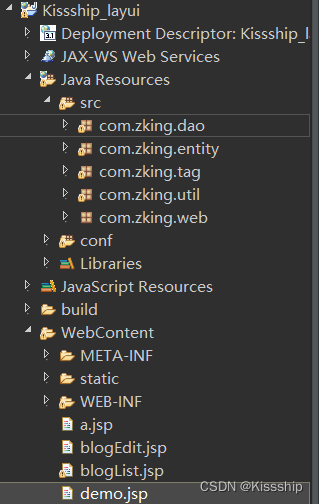
首先我们需要创建一个注册的jsp页面然后在WebContent目录下建立一个header.jsp,因为在企业里面做项目,我们需要反复引入LayUI.css,所以为了避免冗余代码,我们得新建一个公用界面——header.jsp。
然后我们接下来就是搭建页面了。这里我们可以直接去官网copy界面的组成部分(很方便),操作展示如下:
这里因为演示所需(删代码也挺麻烦),博主就用自己找的代码copy上去了,界面代码(不含功能)如下:
<%@ page language="java" contentType="text/html; charset=UTF-8"
    pageEncoding="UTF-8"%>
<%@ include file="common/header.jsp" %>
<!DOCTYPE html>
<html>
<head>
<meta http-equiv="Content-Type" content="text/html; charset=UTF-8">
<title>注册界面</title>
  <link rel="stylesheet" rev="stylesheet" href="${pageContext.request.contextPath }/static/css/iconfont.css" type="text/css" media="all">
        <link rel="stylesheet" rev="stylesheet" href="${pageContext.request.contextPath }/static/css/login.css" type="text/css" media="all">
        <style> body{color:#;}a{color:#;}a:hover{color:#;}.bg-black{background-color:#;}.tx-login-bg{background:url(static/images/bg.jpg) no-repeat 0 0;}</style>
</head>
<body class="tx-login-bg">
        <div class="tx-login-box">
            <div class="login-avatar bg-black"><i class="iconfont icon-wode"></i></div>
				<ul class="tx-form-li row">
					<li class="col-24 col-m-24"><p><input type="text" id="username" placeholder="登录账号" class="tx-input"></p></li>
					<li class="col-24 col-m-24"><p><input type="password" id=	"password" placeholder="登录密码" class="tx-input"></p></li>
					<li class="col-24 col-m-24"><p class="tx-input-full"><button id="login" class="tx-btn tx-btn-big bg-black">登录</button></p></li>
					<li class="col-12 col-m-12"><p><a href="#" class="f-12 f-gray">新用户注册</a></p></li>
					<li class="col-12 col-m-12"><p class="ta-r"><a href="#" class="f-12 f-gray">忘记密码</a></p></li>
				</ul>
            </div>
    </body>
</html>
界面展示: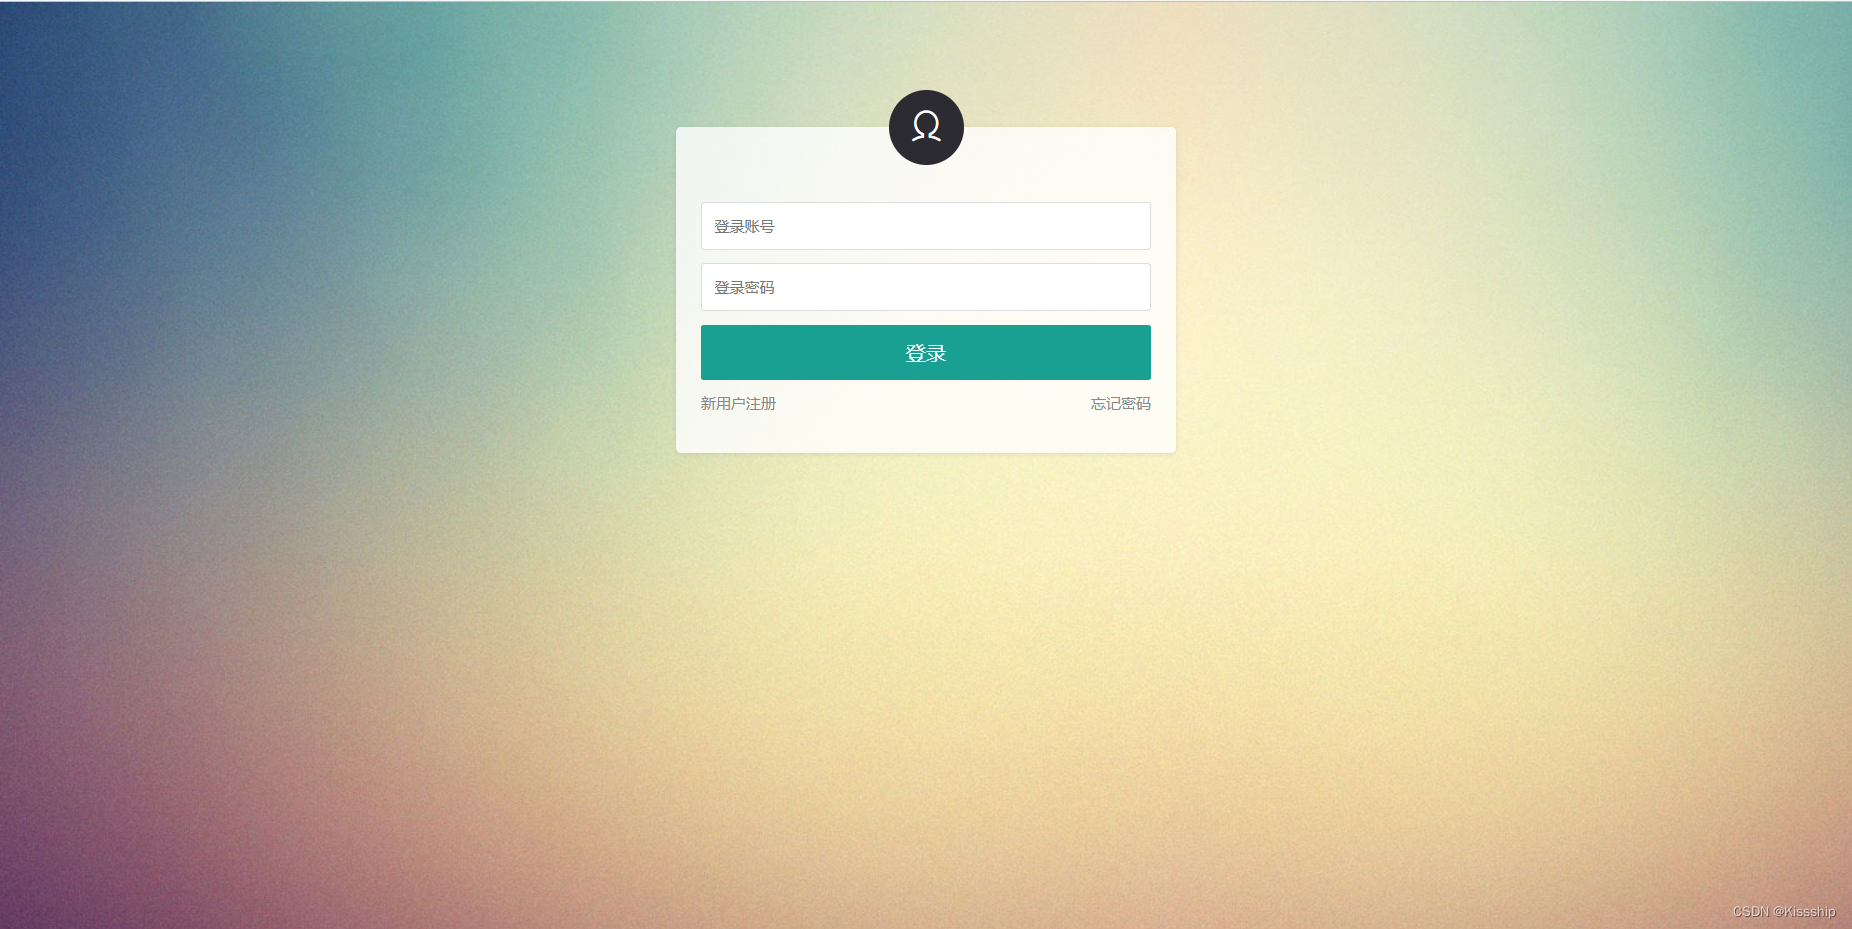 接下来就是功能的实现了(接收参数),功能实现的代码如下:
<%@ page language="java" contentType="text/html; charset=UTF-8"
	pageEncoding="UTF-8"%>
<%@ include file="common/header.jsp"%>
<!DOCTYPE html>
<html>
<head>
<meta http-equiv="Content-Type" content="text/html; charset=UTF-8">
<title>登录界面</title>
<link rel="stylesheet" rev="stylesheet"
	href="${pageContext.request.contextPath }/static/css/iconfont.css"
	type="text/css" media="all">
<link rel="stylesheet" rev="stylesheet"
	href="${pageContext.request.contextPath }/static/css/login.css"
	type="text/css" media="all">
<style>
body {
	color: #;
}

a {
	color: #;
}

a:hover {
	color: #;
}

.bg-black {
	background-color: #;
}

.tx-login-bg {
	background: url(static/images/bg.jpg) no-repeat 0 0;
}
</style>
</head>
<body class="tx-login-bg">
	<div class="tx-login-box">
		<div class="login-avatar bg-black">
			<i class="iconfont icon-wode"></i>
		</div>
		<ul class="tx-form-li row">
			<li class="col-24 col-m-24"><p>
					<input type="text" id="username" placeholder="登录账号"
						class="tx-input">
				</p></li>
			<li class="col-24 col-m-24"><p>
					<input type="password" id="password" placeholder="登录密码"
						class="tx-input">
				</p></li>
			<li class="col-24 col-m-24"><p class="tx-input-full">
					<button id="login" class="tx-btn tx-btn-big bg-black">登录</button>
				</p></li>
			<li class="col-12 col-m-12"><p>
					<a href="#" class="f-12 f-gray">新用户注册</a>
				</p></li>
			<li class="col-12 col-m-12"><p class="ta-r">
					<a href="#" class="f-12 f-gray">忘记密码</a>
				</p></li>
		</ul>
	</div>

	<script>
layui.use(['layer','jquery'], function(){
  var layer = layui.layer
  ,$ = layui.jquery;

  $("login").click(function(){
	  $.ajax({
		  url:'${pageContext.request.contextPath }/user.action?methodName=login}',
		  dataType:'json',
		  data:{
			  loginname:$("#username").val(),
			  pwd:$("#password").val()
		  },
		  method:'post',
		  success:function(data){
			  if(data){
				  layer.alert('登录成功咯',{icon: 6});
			  }else{
				  layer.alert('登录失败咯',{icon: 5});
			  }
		  }
	  });
  });
});
</script>
</body>
</html>
实体类User:
package com.zking.entity;

public class User {
	private long id;
	private String name;
	private String loginName;
	private String pwd;
	private long rid;
	public long getId() {
		return id;
	}
	public void setId(long id) {
		this.id = id;
	}
	public String getName() {
		return name;
	}
	public void setName(String name) {
		this.name = name;
	}
	public String getLoginName() {
		return loginName;
	}
	public void setLoginName(String loginName) {
		this.loginName = loginName;
	}
	public String getPwd() {
		return pwd;
	}
	public void setPwd(String pwd) {
		this.pwd = pwd;
	}
	public long getRid() {
		return rid;
	}
	public void setRid(long rid) {
		this.rid = rid;
	}
	public User(long id, String name, String loginName, String pwd, long rid) {
		super();
		this.id = id;
		this.name = name;
		this.loginName = loginName;
		this.pwd = pwd;
		this.rid = rid;
	}
	public User() {
		super();
	}
	@Override
	public String toString() {
		return "User [id=" + id + ", name=" + name + ", loginName=" + loginName + ", pwd=" + pwd + ", rid=" + rid + "]";
	}

}
Dao(继承UserDao):
package com.zking.dao;

import java.util.List;

import com.zking.entity.User;
import com.zking.util.BaseDao;
import com.zking.util.PageBean;

public class UserDao extends BaseDao<User> {
	public List<User> list(User user, PageBean pageBean) throws Exception {
		String sql = "select * from t_oa_user where 1 = 1";
		return super.executeQuery(sql, User.class, pageBean);
	}
	public User login(User user) throws Exception {
		String sql = "select * from t_oa_user where loginName = '"+user.getLoginName()+"' and pwd = '"+user.getPwd()+"'";
		List<User> lst = super.executeQuery(sql, User.class, null);
		if(lst != null && lst.size() == 1) {
			return lst.get(0);

		}
		return null;
	}
}
head.jsp(公共jsp):
<%@ page language="java" contentType="text/html; charset=UTF-8"
    pageEncoding="UTF-8"%>
<!DOCTYPE html PUBLIC "-//W3C//DTD HTML 4.01 Transitional//EN" "http://www.w3.org/TR/html4/loose.dtd">
<html>
<head>
<meta http-equiv="Content-Type" content="text/html; charset=UTF-8">
<title>Insert title here</title>
<!-- 引入 layui.css -->
<link href="${pageContext.request.contextPath }/static/js/layui/css/layui.css" rel="stylesheet">

<!-- 引入 layui.js -->
<script src="${pageContext.request.contextPath }/static/js/layui/layui.js"></script>
</head>
<body>

</body>
</html>
mvc.xml:
<?xml version="1.0" encoding="UTF-8"?>
<config>
	<action path="/blog" type="com.zking.web.BlogAction">
		<forward name="list" path="/blogList.jsp" redirect="false" />
		<forward name="toList" path="/blog.action?methodName=list"
			redirect="true" />
		<forward name="toEdit" path="/blogEdit.jsp" redirect="false" />
	</action>

	<action path="/user" type="com.zking.web.UserAction">
	</action>

<!-- 	<action path="/meetingInfo" type="com.zking.web.MeetingInfoAction"> -->
<!-- 		<forward name="list" path="/meetingInfoList.jsp" redirect="false" /> -->
<!-- 		<forward name="toList" path="/meetingInfo.action?methodName=list" -->
<!-- 			redirect="true" /> -->
<!-- 		<forward name="toEdit" path="/meetingInfoEdit.jsp" redirect="false" /> -->
<!-- 	</action> -->

<!-- 	<action path="/solrBlog" type="com.test.web.SolrBlogAction"> -->
<!-- 		<forward name="list" path="/solrBlogList.jsp" redirect="false" /> -->
<!-- 		<forward name="toList" path="/solrBlog.action?methodName=list" -->
<!-- 			redirect="true" /> -->
<!-- 		<forward name="toEdit" path="/solrBlogEdit.jsp" redirect="false" /> -->
<!-- 	</action> -->

	<action path="/studentBlog" type="com.test.web.StudentBlogAction">
		<forward name="list" path="/studentBlogList.jsp" redirect="false" />
		<forward name="toList" path="/studentBlog.action?methodName=list" redirect="true" />
		<forward name="toEdit" path="/studentBlogEdit.jsp" redirect="false" />
	</action>

	<action path="/solrBlog" type="com.xiaoli.web.SolrBlogAction">
		<forward name="list" path="/solrBlogList.jsp" redirect="false" />
		<forward name="toList" path="/solrBlog.action?methodName=list" redirect="true" />
		<forward name="toEdit" path="/solrBlogEdit.jsp" redirect="false" />
	</action>


</config>
UserAction:
package com.zking.web;

import javax.servlet.http.HttpServletRequest;
import javax.servlet.http.HttpServletResponse;

import com.zking.dao.UserDao;
import com.zking.entity.User;
import com.zking.framework.ActionSupport;
import com.zking.framework.ModelDriver;
import com.zking.util.ResponseUtil;

public class UserAction extends ActionSupport implements ModelDriver<User> {
	private User user = new User();
	private UserDao userDao = new UserDao();

	public void login(HttpServletRequest req, HttpServletResponse resp) {
		try {
			User u = userDao.login(user);
			ResponseUtil.writeJson(resp, u);
		} catch (Exception e) {
			e.printStackTrace();
		}
	}


	@Override
	public User getModel() {

		return user;
	}

}
ResponseUtil类:
package com.zking.util;

import java.io.PrintWriter;

import javax.servlet.http.HttpServletResponse;

import com.fasterxml.jackson.databind.ObjectMapper;

public class ResponseUtil {

	public static void write(HttpServletResponse response,Object o)throws Exception{
		response.setContentType("text/html;charset=utf-8");
		PrintWriter out=response.getWriter();
		out.println(o.toString());
		out.flush();
		out.close();
	}

	public static void writeJson(HttpServletResponse response,Object o)throws Exception{
		ObjectMapper om = new ObjectMapper();
//		om.writeValueAsString(o)代表了json串
		write(response, om.writeValueAsString(o));
	}
}
最后LayUI之入门篇就到这里,祝大家在敲代码的路上一路通畅!


 3262
3262


 被折叠的 条评论
为什么被折叠?
被折叠的 条评论
为什么被折叠?
 到【灌水乐园】发言


