


目录
VS2022的.NET6.0、.NET7.0框架下默认支持EF7(版本号7.0.13),除非需要没有必要降低版本使用。 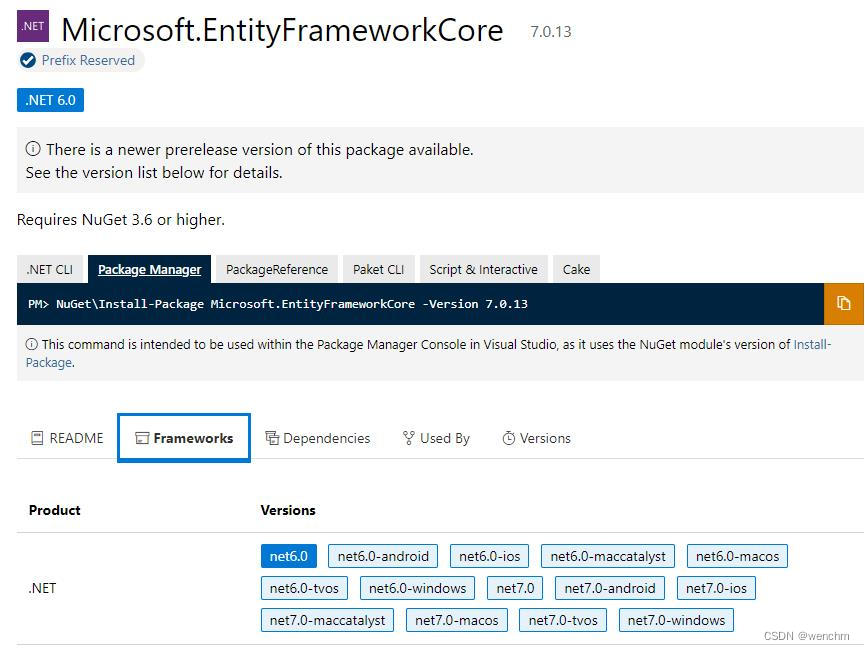
一、新建.NET 6.0控制台应用并建立数据库连接
新建.NET 6.0控制台应用,并连接数据库。
"Server=DESKTOP-3LV13FS;Database=Blogging;Trusted_Connection=True;TrustServerCertificate=true;integrated security=SSPI;" 为避免 (provider: SSL Provider, error: 0 - 证书链是由不受信任的颁发机构颁发的。)增加连接字符串“TrustServerCertificate=true;”。
二、下载并安装EF程序包
因为版本号很新,因此可以通过右侧资源管理器、依赖项、右键、管理NuGet程序包、搜索EF,安装如下程序包:
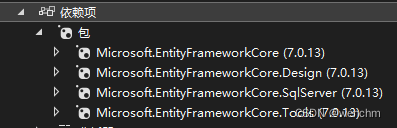
也可以按照前文介绍的方法安装程序包。
三、自动生成EF模型和上下文
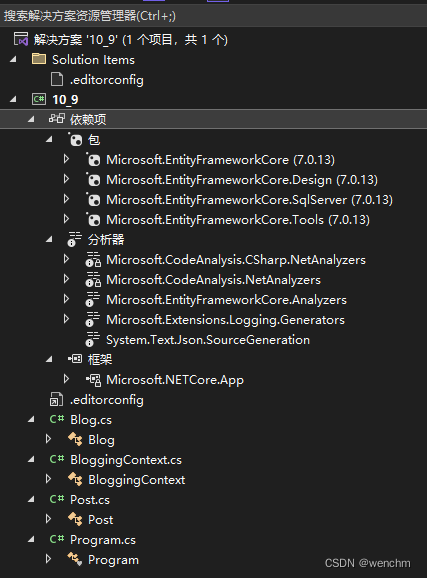
PM> Scaffold-DbContext "Server=DESKTOP-3LV13FS;Database=Blogging;Trusted_Connection=True;TrustServerCertificate=true;integrated security=SSPI;" Microsoft.EntityFrameworkCore.SqlServer右侧资源管理器自动生成与映射到了数据库的Blog.cs类的模型、Post.cs类的模型(数据库有几个列,就自动生成几个类的模型),和BloggingContext.cs数据库上下文。此处有两点需要注意:第一,程序包管理控制台必须没有任何警告,但可以有类似如下内容的建议。第二,EF模型和上下文是自动生成的,倘若右侧的资源管理器里没有自动生成EF模型和上下文,那么这一步之前(含)一定有操作错误的地方,修改过后重试。
PM> Scaffold-DbContext "Server=DESKTOP-3LV13FS;Database=Blogging;Trusted_Connection=True;TrustServerCertificate=true;integrated security=SSPI;" Microsoft.EntityFrameworkCore.SqlServer
Build started...
Build succeeded.
To protect potentially sensitive information in your connection string, you should move it out of source code. You can avoid scaffolding the connection string by using the Name= syntax to read it from configuration - see https://go.microsoft.com/fwlink/?linkid=2131148. For more guidance on storing connection strings, see http://go.microsoft.com/fwlink/?LinkId=723263.
为了保护连接字符串中潜在的敏感信息,您应该将其从源代码中移出。您可以使用 Name= 语法从配置中读取连接字符串,从而避免搭建连接字符串 - 请参阅 https://go.microsoft.com/fwlink/?linkid=2131148。有关存储连接字符串的更多指南,请参阅 http://go.microsoft.com/fwlink/?LinkId=723263。
1.Blog类模型
//Blog类模型
using System;
using System.Collections.Generic;

namespace _10_9;
public partial class Blog
{
    public int BlogId { get; set; }
    public string Url { get; set; } = null!;
    public virtual ICollection<Post> Posts { get; set; } = new List<Post>();
}
2.Post类模型
//Post类模型
using System;
using System.Collections.Generic;

namespace _10_9;
public partial class Post
{
    public int PostId { get; set; }
    public int BlogId { get; set; }
    public string? Content { get; set; }
    public string? Title { get; set; }
    public virtual Blog Blog { get; set; } = null!;
}
3.数据库上下文
//EF实体,数据库上下文
using Microsoft.EntityFrameworkCore;

namespace _10_9;
public partial class BloggingContext : DbContext
{
    public BloggingContext()
    {
    }

    public BloggingContext(DbContextOptions<BloggingContext> options)
        : base(options)
    {
    }

    public virtual DbSet<Blog> Blogs { get; set; }
    public virtual DbSet<Post> Posts { get; set; }

    protected override void OnConfiguring(DbContextOptionsBuilder optionsBuilder)
#warning To protect potentially sensitive information in your connection string, you should move it out of source code. You can avoid scaffolding the connection string by using the Name= syntax to read it from configuration - see https://go.microsoft.com/fwlink/?linkid=2131148. For more guidance on storing connection strings, see http://go.microsoft.com/fwlink/?LinkId=723263.
        => optionsBuilder.UseSqlServer("Server=DESKTOP-3LV13FS;Database=Blogging;Trusted_Connection=True;TrustServerCertificate=true;integrated security=SSPI;");

    protected override void OnModelCreating(ModelBuilder modelBuilder)
    {
        modelBuilder.Entity<Blog>(entity =>
        {
            entity.ToTable("Blog");
        });

        modelBuilder.Entity<Post>(entity =>
        {
            entity.ToTable("Post");
            entity.HasOne(d => d.Blog).WithMany(p => p.Posts).HasForeignKey(d => d.BlogId);
        });
        OnModelCreatingPartial(modelBuilder);
    }
    partial void OnModelCreatingPartial(ModelBuilder modelBuilder);
}
四、设计自己的应用
现在就开始编写属于你的应用吧:通过应用程序,给Blog里增加一个新的网址,并输出到控制台。
// .NET 6.0通过EF7访问已有数据库的应用
using System;
using System.Collections.Generic;
using Microsoft.EntityFrameworkCore;

namespace _10_9
{
    class Program
    {
        static void Main(string[] args)
        {
            using var db = new BloggingContext();
            db.Blogs.Add(new Blog { Url = "http://blogs.msdn.com/adonet" });
            var count = db.SaveChanges();
            Console.WriteLine("{0} records saved to database", count);

            Console.WriteLine();
            Console.WriteLine("All blogs in database:");
            foreach (var _blog in db.Blogs)
            {
                Console.WriteLine(" - {0}", _blog.Url);
            }
        }
    }
}
//运行结果:
/*
1 records saved to database

All blogs in database:
 - http://blogs.msdn.com/dotnet
 - http://blogs.msdn.com/webdev
 - http://blogs.msdn.com/visualstudio
 - http://blogs.msdn.com/adonet
 - http://blogs.msdn.com/adonet
 - http://blogs.msdn.com/adonet

C:\Users\YCZN_MT\Desktop\测试1\10_9\10_9\bin\Debug\net6.0\10_9.exe (进程 25864)已退出,代码为 0。
按任意键关闭此窗口. . .*/


 1427
1427

 被折叠的 条评论
为什么被折叠?
被折叠的 条评论
为什么被折叠?
 到【灌水乐园】发言


