


今天是在第二大学远程实习的第五天,偷偷发个博客记录一下自己的成长哈哈(今天继续学习电子商城)
wxml:
<!--拓展底图效果及置顶效果-->
<view class="flip">
<!-- 底部悬浮效果 触底图-->
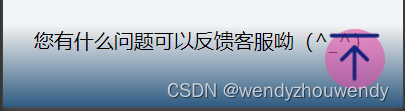
<view class="flipOver">您有什么问题可以反馈客服呦(^_^) </view>
<!--置顶效果-->
<view bindtap="goToURL" class="backToTop">
<image src="/images/top.png" style="width: 49px;height: 49px;" role="img" ></image>
</view>
</view>
wxss:
/*拓展底图效果和置顶*/
.flipOver {
  height: 150rpx;
  display: flex;
  justify-content: center;
  background-image: linear-gradient(to bottom,#eee,#2e5a81);
}
.backToTop {
  position: fixed;
  right: 20rpx;
  bottom: 20rpx;
  font-size: 36rpx;
  font-weight: bolder;
  /* color: #fff; */
  background-image: radial-gradient(#eb4fb799,#da539799);
  padding: 15rpx;
  border-radius: 100rpx;
  display: flex;
  background-clip:content-box
  /* 只包含内容 */
}
效果:
总结:
1.事件绑定:
| 事件类型 | 解释 |
|---|---|
| tap类型 | 即HTML中click:bindtap/bind:tap |
| input类型 | 文本框输入:bindinput/bind:input |
| change类型 | 状态改变时出发:bindchange/bind:change |
| 事件对象event的属性 | 解释 |
|---|---|
| type | 事件类型 |
| target | 出发时间的组件的一些属性值集合 |
| detail | 额外的信息 |
2.bindtap点击事件传参(vue中直接bindtap=“shijianChuancan(2)”;小程序中不能边绑定事件处理函数边传参):
<!--事件传参(变量名为info,参数值为数字2,数字用{{}}语法,不用{{}}就是文本)-->
<button type="primary" bindtap="shijianChuancan" data-info="{{2}}">+2</button>
  /*js中用e.target.dataset.变量名 引用参数2 */
  shijianChuancan(e){
    this.setData({
      count:this.data.count + e.target.dataset.info
    })
  },
3.bindinput文本框输入事件:
<!--bindinput文本框输入事件-->
<input bindinput="inputHandler"/>
 inputHandler(e){
    //e.detail.value是指变化过后文本框最新的值
    console.log(e.detail.value)
  },
电子商城项目到此结束啦,这主要是一个静态的小程序项目,主打一个排列组合,只用到了wxml+wxss,没有用到js,适合新手入门。


 被折叠的 条评论
为什么被折叠?
被折叠的 条评论
为什么被折叠?
 到【灌水乐园】发言


